Sharpening
NOTICE
■When sharpening blades, be sure to balance them. Unbalanced blades will cause excessive vibration which can damage blade spindle bear- ings. Vibration may also cause structural cracks in mower housing.
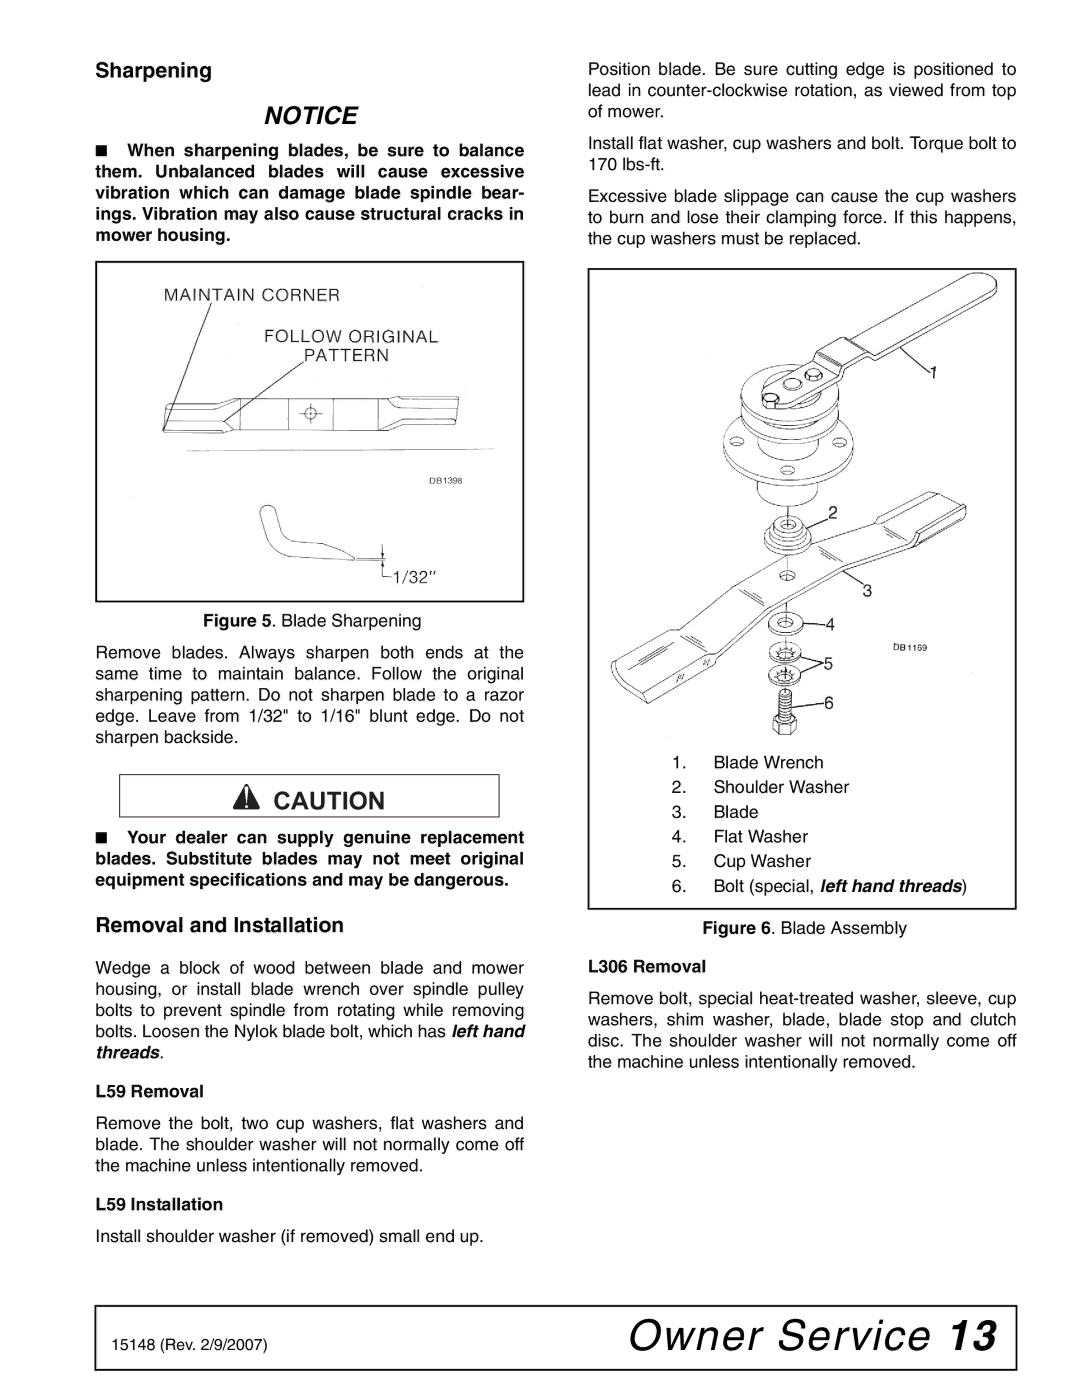
Figure 5. Blade Sharpening
Remove blades. Always sharpen both ends at the same time to maintain balance. Follow the original sharpening pattern. Do not sharpen blade to a razor edge. Leave from 1/32" to 1/16" blunt edge. Do not sharpen backside.
A CAUTION
■Your dealer can supply genuine replacement blades. Substitute blades may not meet original equipment specifications and may be dangerous.
Removal and Installation
Wedge a block of wood between blade and mower housing, or install blade wrench over spindle pulley bolts to prevent spindle from rotating while removing bolts. Loosen the Nylok blade bolt, which has left hand threads.
L59 Removal
Remove the bolt, two cup washers, flat washers and blade. The shoulder washer will not normally come off the machine unless intentionally removed.
L59 Installation
Install shoulder washer (if removed) small end up.
Position blade. Be sure cutting edge is positioned to lead in
Install flat washer, cup washers and bolt. Torque bolt to 170
Excessive blade slippage can cause the cup washers to burn and lose their clamping force. If this happens, the cup washers must be replaced.
1.Blade Wrench
2.Shoulder Washer
3.Blade
4.Flat Washer
5.Cup Washer
6.Bolt (special, left hand threads)
Figure 6. Blade Assembly
L306 Removal
Remove bolt, special
15148 (Rev. 2/9/2007) | Owner Service 13 |
|
|
