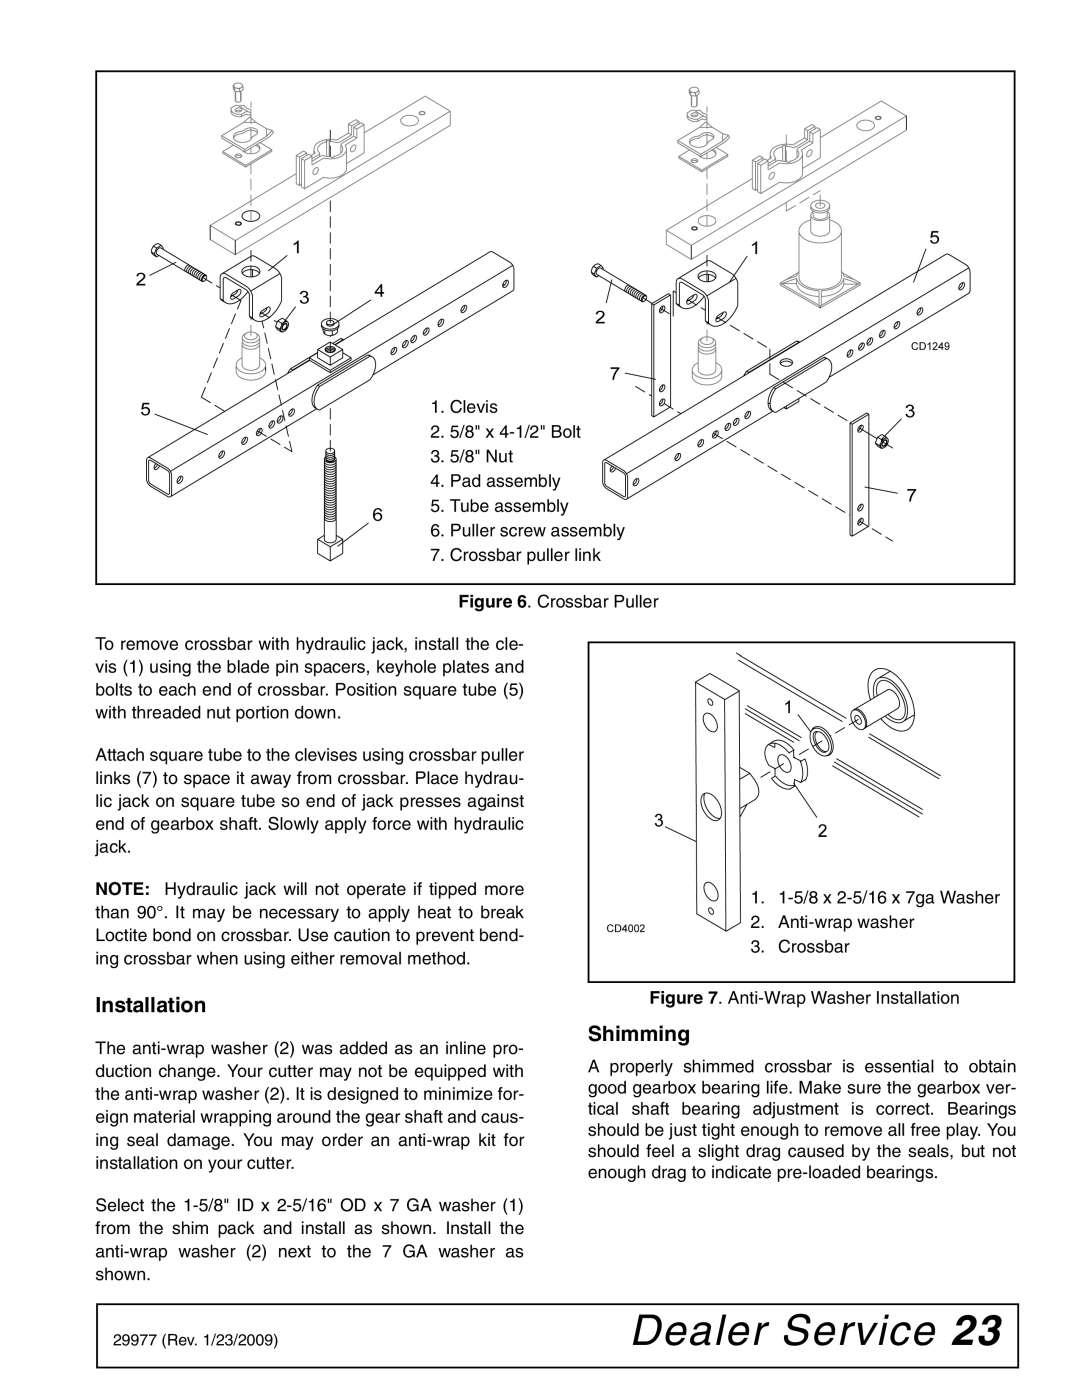
1.Clevis
2.5/8" x
3.5/8" Nut
4.Pad assembly
5.Tube assembly
6.Puller screw assembly
7.Crossbar puller link
Figure 6. Crossbar Puller
To remove crossbar with hydraulic jack, install the cle- vis (1) using the blade pin spacers, keyhole plates and bolts to each end of crossbar. Position square tube (5) with threaded nut portion down.
Attach square tube to the clevises using crossbar puller links (7) to space it away from crossbar. Place hydrau- lic jack on square tube so end of jack presses against end of gearbox shaft. Slowly apply force with hydraulic jack.
NOTE: Hydraulic jack will not operate if tipped more than 90°. It may be necessary to apply heat to break Loctite bond on crossbar. Use caution to prevent bend- ing crossbar when using either removal method.
Installation
The
Select the
1.
2.
3.Crossbar
Figure 7. Anti-Wrap Washer Installation
Shimming
A properly shimmed crossbar is essential to obtain good gearbox bearing life. Make sure the gearbox ver- tical shaft bearing adjustment is correct. Bearings should be just tight enough to remove all free play. You should feel a slight drag caused by the seals, but not enough drag to indicate
29977 (Rev. 1/23/2009) | Dealer Service 23 |
|
|