4.When you are certain you have correctly determined the proper shim pack, remove crossbar and apply blue Loctite retaining compound to vertical shaft. When fit between shaft and crossbar is tight, use Loctite sparingly. When fit is loose, completely coat the shaft.
NOTE: Do not apply Loctite to vertical shaft when installing a clamp type crossbar.
Figure 12
5.Install crossbar on vertical shaft and push keys into keyway with screwdriver. Do not drive key in with a hammer, as this could loosen vertical shaft bearings. Clean crossbar bolt threads and apply a few drops of red Loctite.
Install 1/4" thick washer and shim pack, selected in step three, on bolt. Install bolt into vertical shaft and torque to 300
With crossbar installed, recheck gearbox bearings for excessive drag or presence of free play. If either excessive drag or any free play is detected, repeat step three.
Figure 13
6.When installing a
Install crossbar block lock over bolt head. Place a socket over bolt and drive in lock until it is com- pletely flat.
NOTE: If
NOTICE
■Attach welder ground directly to crossbar. Fail- ure to do so can ruin gearbox bearings.
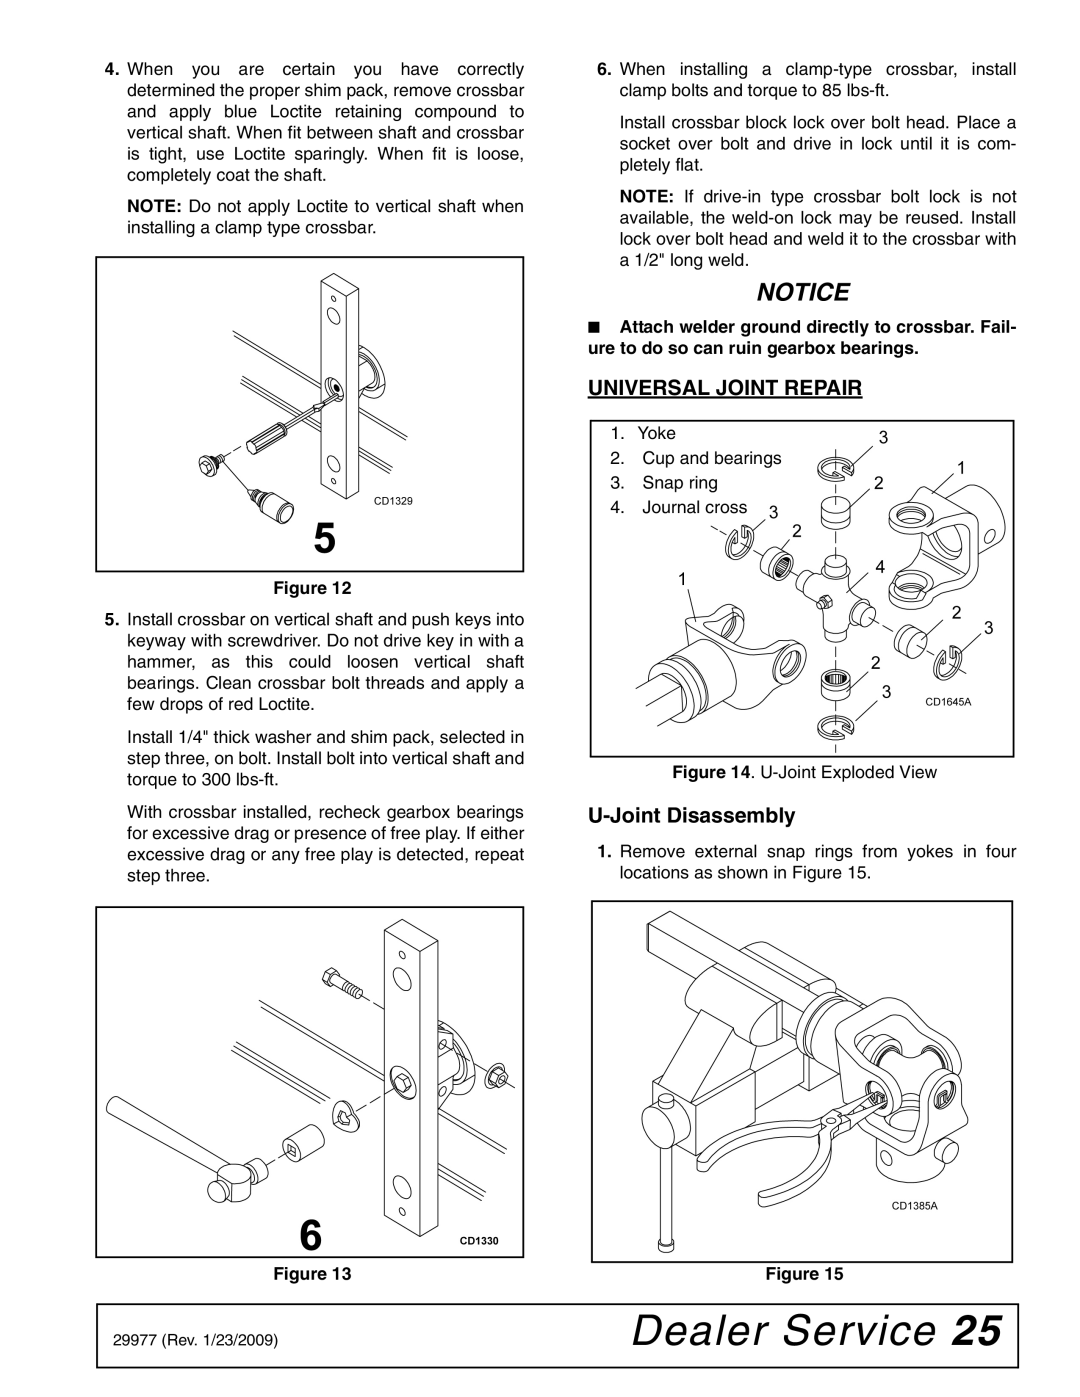
UNIVERSAL JOINT REPAIR
1.Yoke
2.Cup and bearings
3.Snap ring
4.Journal cross
Figure 14. U-Joint Exploded View
U-Joint Disassembly
1.Remove external snap rings from yokes in four locations as shown in Figure 15.
Figure 15
29977 (Rev. 1/23/2009) | Dealer Service 25 |
|
|