NOTICE
■Incorrectly shimmed crossbars can cause costly damage to bearings and gearboxes. Follow these steps to obtain a properly shimmed crossbar.
Figure 8
1.Using emery cloth (220 or finer), remove surface rust, Loctite and foreign material from gearbox vertical shaft and hole in crossbar.
Figure 9
2.Apply Locquic® primer to gearbox vertical shaft and hole in crossbar. Wipe off with clean cloth and reapply. This reduces Loctite curing time. Do not reapply blue Loctite until all solvent smell has gone.
NOTE: Omit step 2 when installing a
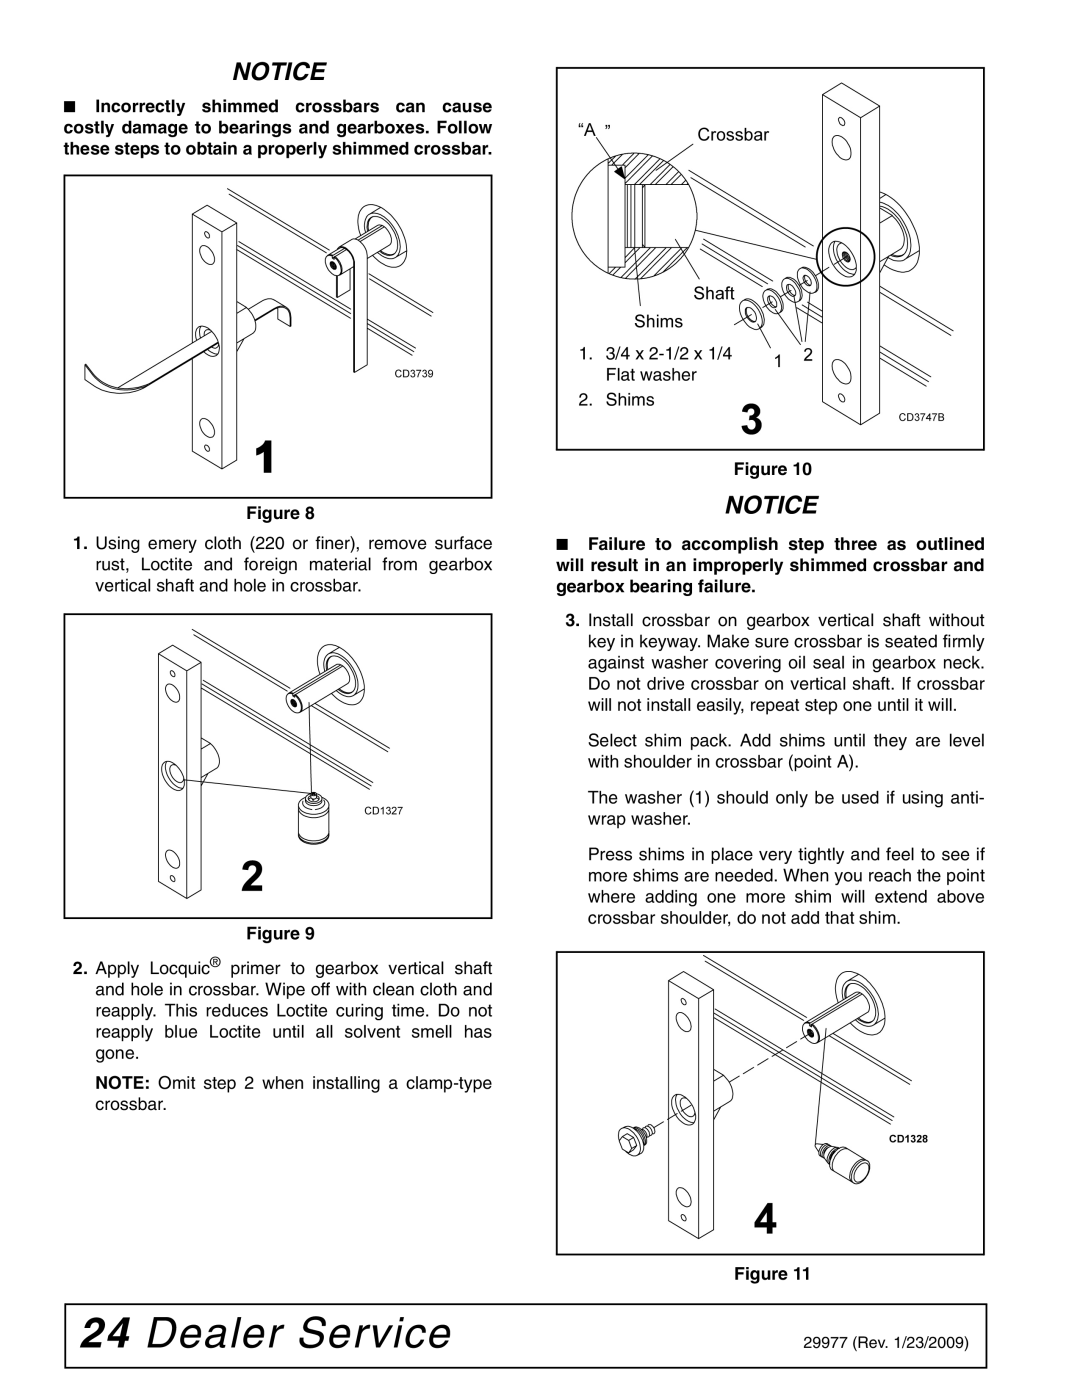
1.3/4 x
2.Shims
Figure 10
NOTICE
■Failure to accomplish step three as outlined will result in an improperly shimmed crossbar and gearbox bearing failure.
3.Install crossbar on gearbox vertical shaft without key in keyway. Make sure crossbar is seated firmly against washer covering oil seal in gearbox neck. Do not drive crossbar on vertical shaft. If crossbar will not install easily, repeat step one until it will.
Select shim pack. Add shims until they are level with shoulder in crossbar (point A).
The washer (1) should only be used if using anti- wrap washer.
Press shims in place very tightly and feel to see if more shims are needed. When you reach the point where adding one more shim will extend above crossbar shoulder, do not add that shim.
Figure 11
24 Dealer Service | 29977 (Rev. 1/23/2009) |
|
|