ASSEMBLY
DEALER SET-UP INSTRUCTIONS
Assembly of this cutter is the responsibility of the Woods dealer. It should be delivered to the owner com- pletely assembled, lubricated, and adjusted for normal cutting conditions.
The cutter is shipped partially assembled. Assembly will be easier if aligned and loosely assembled before tightening hardware. Recommended torque values for hardware are located in the Bolt Torque Chart on page 54.
Full chain shielding must be installed when operating in populated areas or other areas where thrown objects could injure people or damage property.
•If this machine is not equipped with full chain shielding, operation must be stopped when any- one comes within 300 feet (92 m).
•This shielding is designed to reduce the risk of thrown objects. The mower deck and protec- tive devices cannot prevent all objects from escaping the blade enclosure in every mowing condition. It is possible for objects to ricochet and escape, traveling as much as 300 feet (92 m).
Make sure
Operate tractor PTO at 540 RPM (1000 RPM on Q Series cutters). Do not exceed.
![]() CAUTION
CAUTION
Always wear relatively tight and belted clothing to avoid getting caught in moving parts. Wear sturdy,
Drive Shaft Installation
Cut Drive Shields
NOTE: The driveline shielding must be cut to dimen- sions given before installing of front drives.
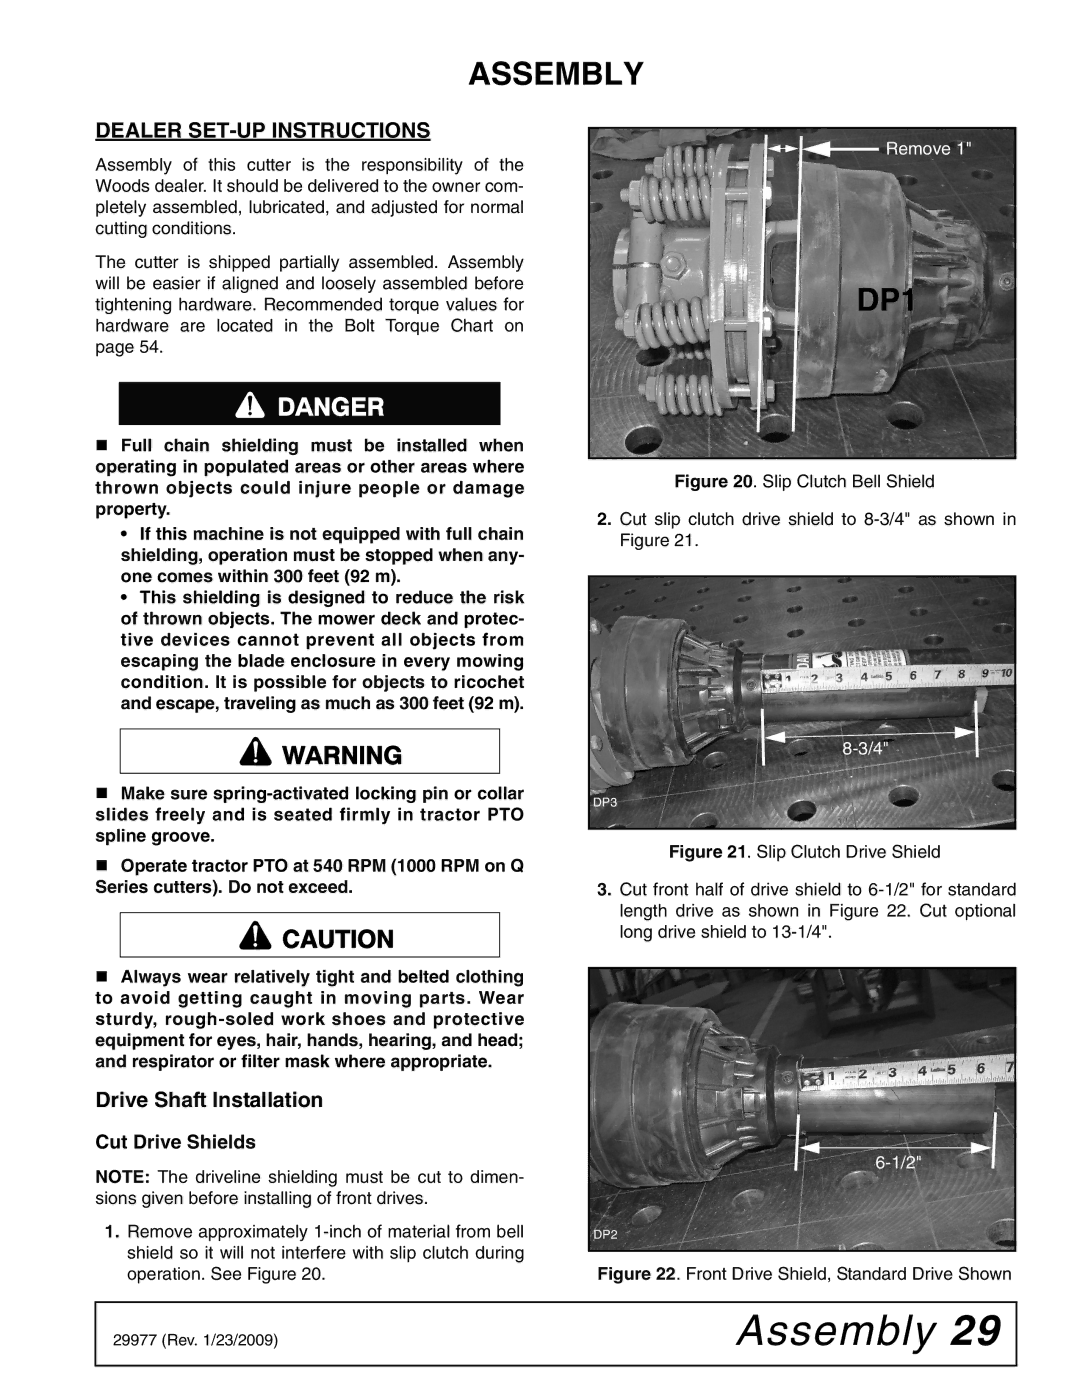
1.Remove approximately
![]()
![]()
![]() Remove 1"
Remove 1"
DP1
Figure 20. Slip Clutch Bell Shield
2.Cut slip clutch drive shield to 8-3/4" as shown in Figure 21.
DP3
Figure 21. Slip Clutch Drive Shield
3.Cut front half of drive shield to 6-1/2" for standard length drive as shown in Figure 22. Cut optional long drive shield to 13-1/4".
DP2
Figure 22. Front Drive Shield, Standard Drive Shown
29977 (Rev. 1/23/2009) | Assembly 29 |
|
|