D. Miter Gauge
In order to make straight, predictable miter cuts, the miter gauge must be properly adjusted. There are 3 adjustable stops built into the miter gauge (two at 45° and one at 90°) that are engaged by pushing in the stop pin. These stops make it easier to make changes in the miter gauge angle.
To adjust the miter gauge stops:
Step 1 - Insert the miter gauge into its slot and adjust the blade angle to 90°. Pull out the miter gauge stop pin.
Step 2 - Place an accurate square against the miter gauge bar and the face of the miter gauge.
.
Step 3 - If there is a gap between the miter gauge bar and the square, loosen the miter gauge lock knob and move the face of the miter gauge into the square until the gap is eliminated. Re- tighten the lock knob.
Step 4 - Push in the miter gauge stop pin.
Step 5 - Loosen the jam nut on the stop bolt.
Step 6 - Adjust the 90° miter gauge stop bolt so it rests against the pin.
Step 7 -
Repeat steps
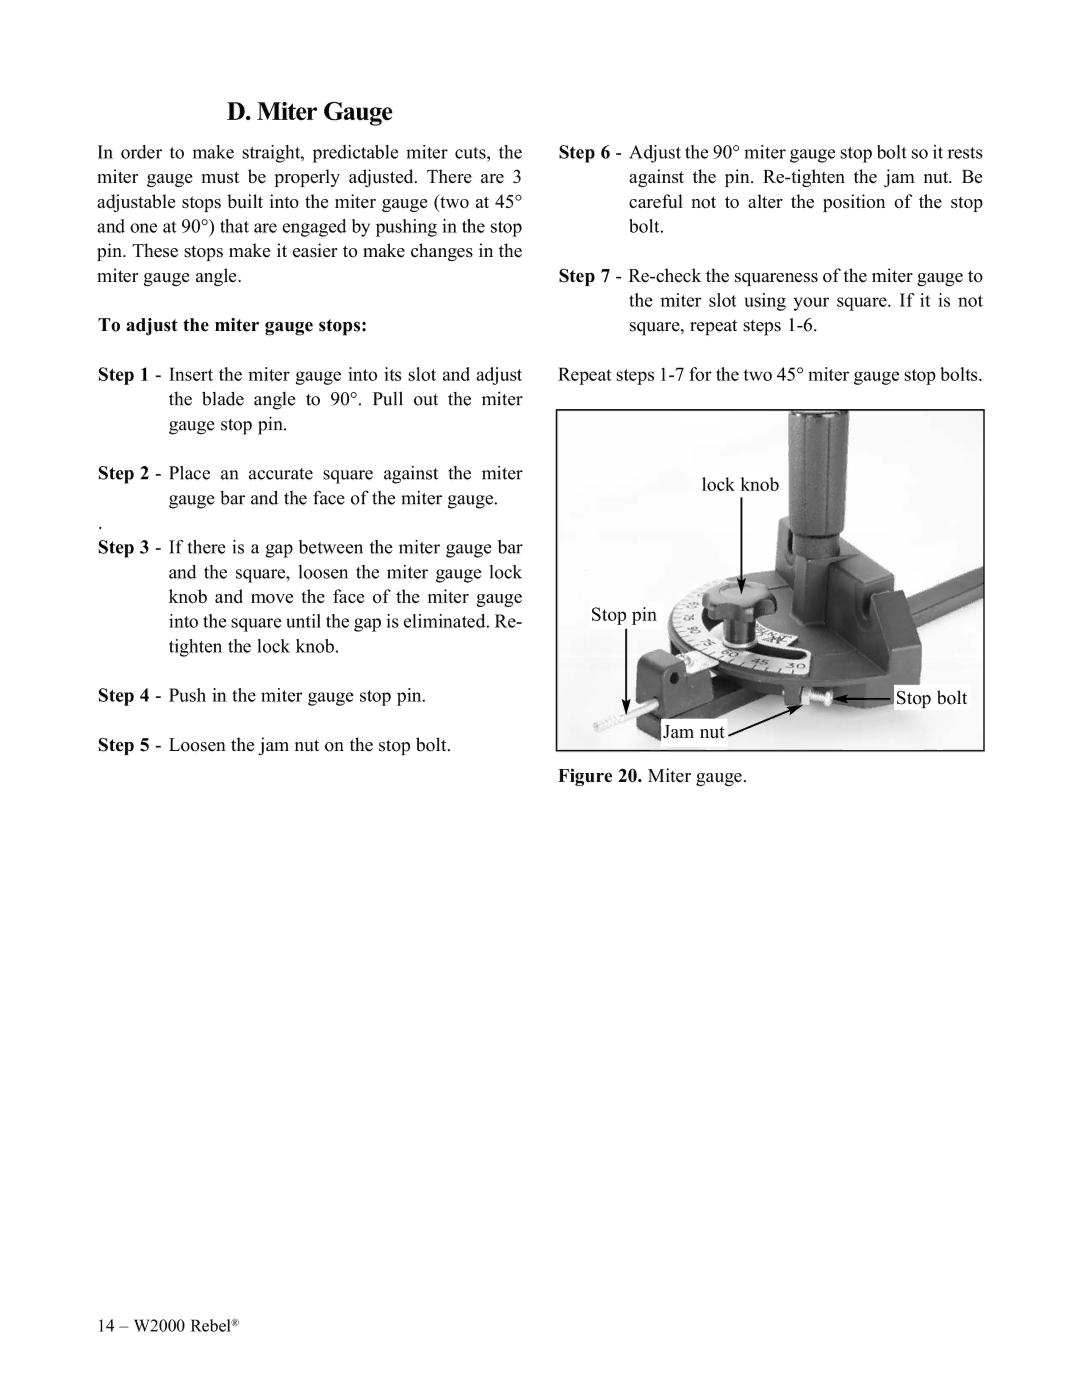
lock knob
Stop pin
![]() Stop bolt
Stop bolt
Jam nut![]()
Figure 20. Miter gauge.
14 – W2000 Rebel®