RS2321X8 Serial Router | Page 3 |
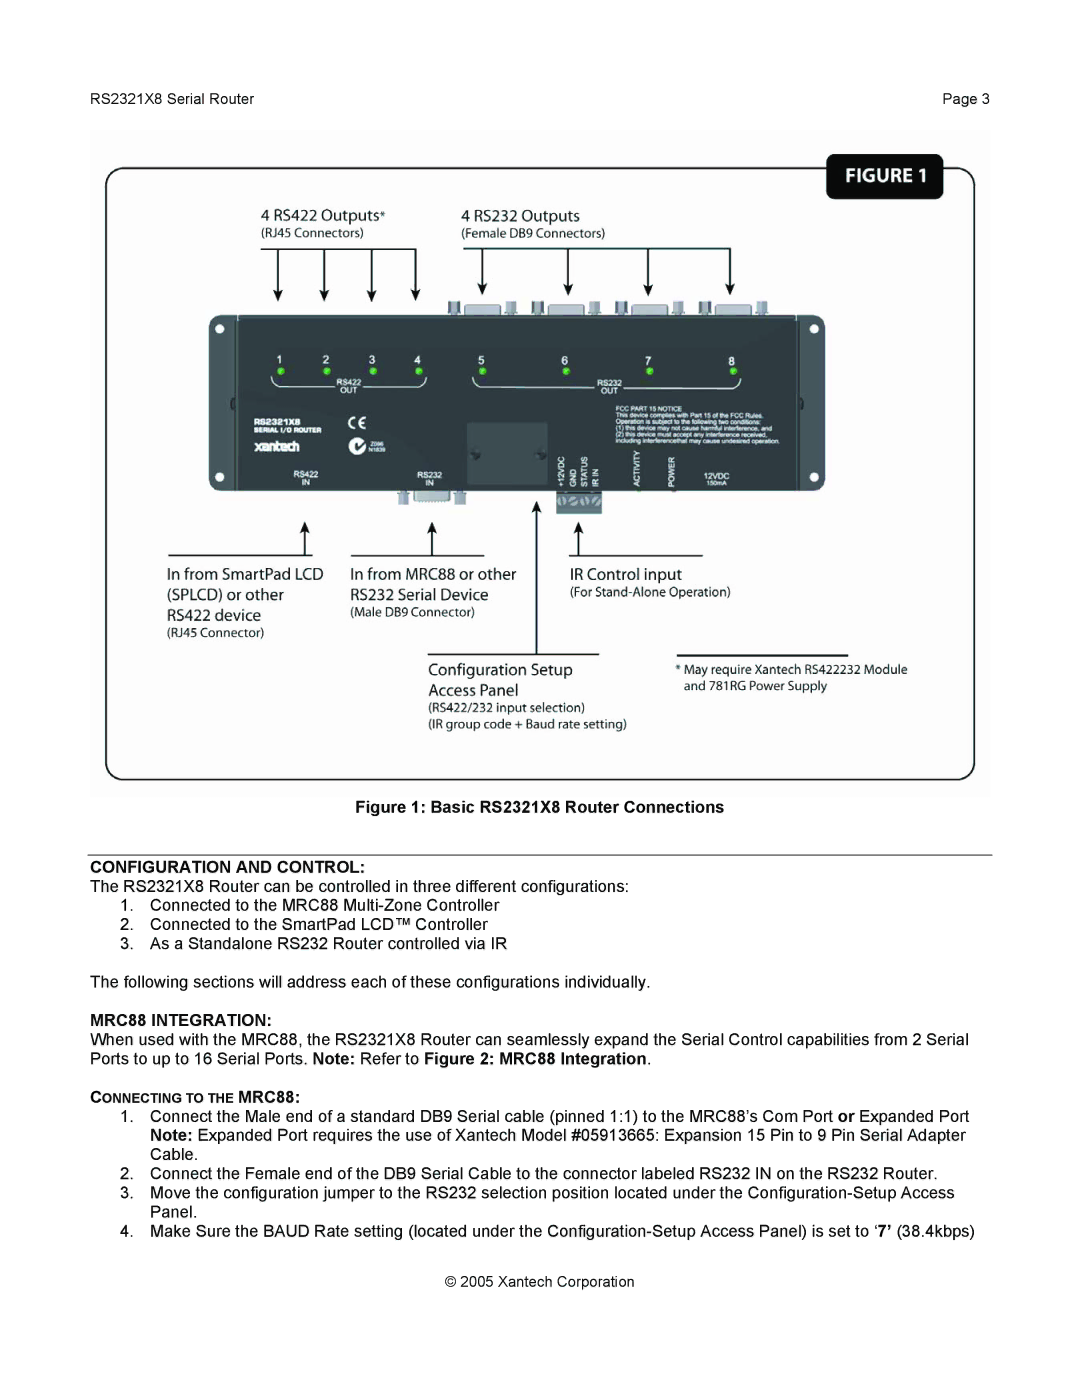
Figure 1: Basic RS2321X8 Router Connections
CONFIGURATION AND CONTROL:
The RS2321X8 Router can be controlled in three different configurations:
1.Connected to the MRC88
2.Connected to the SmartPad LCD™ Controller
3.As a Standalone RS232 Router controlled via IR
The following sections will address each of these configurations individually.
MRC88 INTEGRATION:
When used with the MRC88, the RS2321X8 Router can seamlessly expand the Serial Control capabilities from 2 Serial Ports to up to 16 Serial Ports. Note: Refer to Figure 2: MRC88 Integration.
CONNECTING TO THE MRC88:
1.Connect the Male end of a standard DB9 Serial cable (pinned 1:1) to the MRC88’s Com Port or Expanded Port Note: Expanded Port requires the use of Xantech Model #05913665: Expansion 15 Pin to 9 Pin Serial Adapter Cable.
2.Connect the Female end of the DB9 Serial Cable to the connector labeled RS232 IN on the RS232 Router.
3.Move the configuration jumper to the RS232 selection position located under the
4.Make Sure the BAUD Rate setting (located under the
© 2005 Xantech Corporation