Menu items
◆ Setup
Location | Designate the location of the main unit. |
|
|
|
| ||||
| Choices: [Front/Table] [Front/Ceiling] [Rear/Table] [Rear/Ceiling] (☞ page 50) | ||||||||
|
|
|
|
|
|
|
|
| |
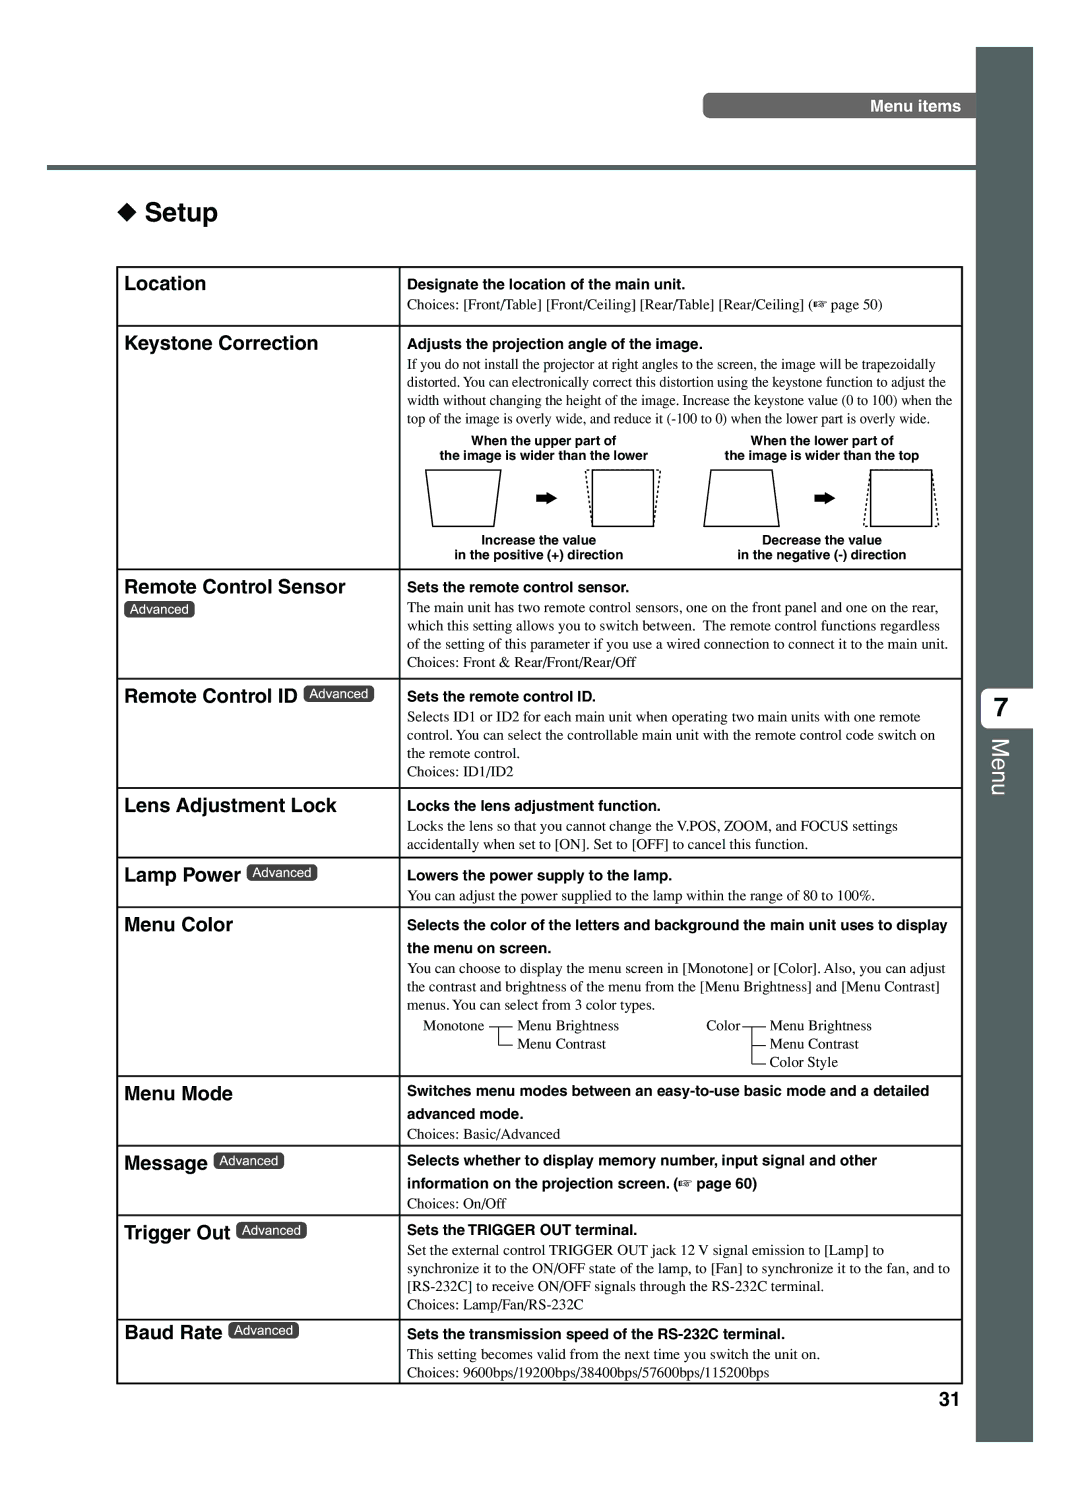
Keystone Correction | Adjusts the projection angle of the image. |
|
|
|
| ||||
| If you do not install the projector at right angles to the screen, the image will be trapezoidally | ||||||||
| distorted. You can electronically correct this distortion using the keystone function to adjust the | ||||||||
| width without changing the height of the image. Increase the keystone value (0 to 100) when the | ||||||||
| top of the image is overly wide, and reduce it | ||||||||
| When the upper part of |
| When the lower part of | ||||||
| the image is wider than the lower | the image is wider than the top | |||||||
| Increase the value |
|
| Decrease the value | |||||
| in the positive (+) direction | in the negative | |||||||
|
|
|
|
|
|
|
|
| |
Remote Control Sensor | Sets the remote control sensor. |
|
|
|
| ||||
| The main unit has two remote control sensors, one on the front panel and one on the rear, | ||||||||
| which this setting allows you to switch between. The remote control functions regardless | ||||||||
| of the setting of this parameter if you use a wired connection to connect it to the main unit. | ||||||||
| Choices: Front & Rear/Front/Rear/Off |
|
|
|
| ||||
|
|
|
|
|
|
|
|
| |
Remote Control ID | Sets the remote control ID. |
|
|
|
| ||||
| Selects ID1 or ID2 for each main unit when operating two main units with one remote | ||||||||
| control. You can select the controllable main unit with the remote control code switch on | ||||||||
| the remote control. |
|
|
|
| ||||
| Choices: ID1/ID2 |
|
|
|
|
| |||
|
|
|
|
|
|
|
|
| |
Lens Adjustment Lock | Locks the lens adjustment function. |
|
|
|
| ||||
| Locks the lens so that you cannot change the V.POS, ZOOM, and FOCUS settings | ||||||||
| accidentally when set to [ON]. Set to [OFF] to cancel this function. | ||||||||
|
|
|
|
|
|
|
|
| |
Lamp Power | Lowers the power supply to the lamp. |
|
|
|
| ||||
| You can adjust the power supplied to the lamp within the range of 80 to 100%. | ||||||||
|
|
|
|
|
|
| |||
Menu Color | Selects the color of the letters and background the main unit uses to display | ||||||||
| the menu on screen. |
|
|
|
| ||||
| You can choose to display the menu screen in [Monotone] or [Color]. Also, you can adjust | ||||||||
| the contrast and brightness of the menu from the [Menu Brightness] and [Menu Contrast] | ||||||||
| menus. You can select from 3 color types. |
|
|
|
| ||||
| Monotone |
|
|
| Menu Brightness | Color |
|
| Menu Brightness |
|
|
|
|
|
| ||||
|
|
|
|
| Menu Contrast |
|
|
| Menu Contrast |
|
|
|
|
|
|
|
| ||
|
|
|
|
|
|
|
|
| Color Style |
|
|
|
|
|
|
|
|
| |
|
|
|
|
|
|
| |||
Menu Mode | Switches menu modes between an | ||||||||
| advanced mode. |
|
|
|
| ||||
| Choices: Basic/Advanced |
|
|
|
| ||||
|
|
|
|
|
|
| |||
Message | Selects whether to display memory number, input signal and other | ||||||||
| information on the projection screen. (☞ page 60) | ||||||||
| Choices: On/Off |
|
|
|
|
| |||
|
|
|
|
|
|
|
|
| |
Trigger Out | Sets the TRIGGER OUT terminal. |
|
|
|
| ||||
| Set the external control TRIGGER OUT jack 12 V signal emission to [Lamp] to | ||||||||
| synchronize it to the ON/OFF state of the lamp, to [Fan] to synchronize it to the fan, and to | ||||||||
| |||||||||
| Choices: |
|
|
|
| ||||
|
|
|
|
|
|
| |||
Baud Rate | Sets the transmission speed of the | ||||||||
| This setting becomes valid from the next time you switch the unit on. | ||||||||
| Choices: 9600bps/19200bps/38400bps/57600bps/115200bps | ||||||||
|
|
|
|
|
|
|
|
|
|
7
Menu
31