Eiki LC-XB42 Installation Connecting the AC Power Cord, Note, Projector side AC outlet side

Page 15

Installation

Connecting the AC Power Cord

This projector uses nominal input voltages of 100-120 V or 200–240 V AC and it automatically selects the correct input voltage. It is designed to work with single-phase power systems having a grounded neutral conductor. To reduce the risk of electrical shock, do not plug into any other type of power system.

If you are not sure of the type of power being supplied, consult your authorized dealer or service station.

Connect the projector with all peripheral equipment before turning the projector on.

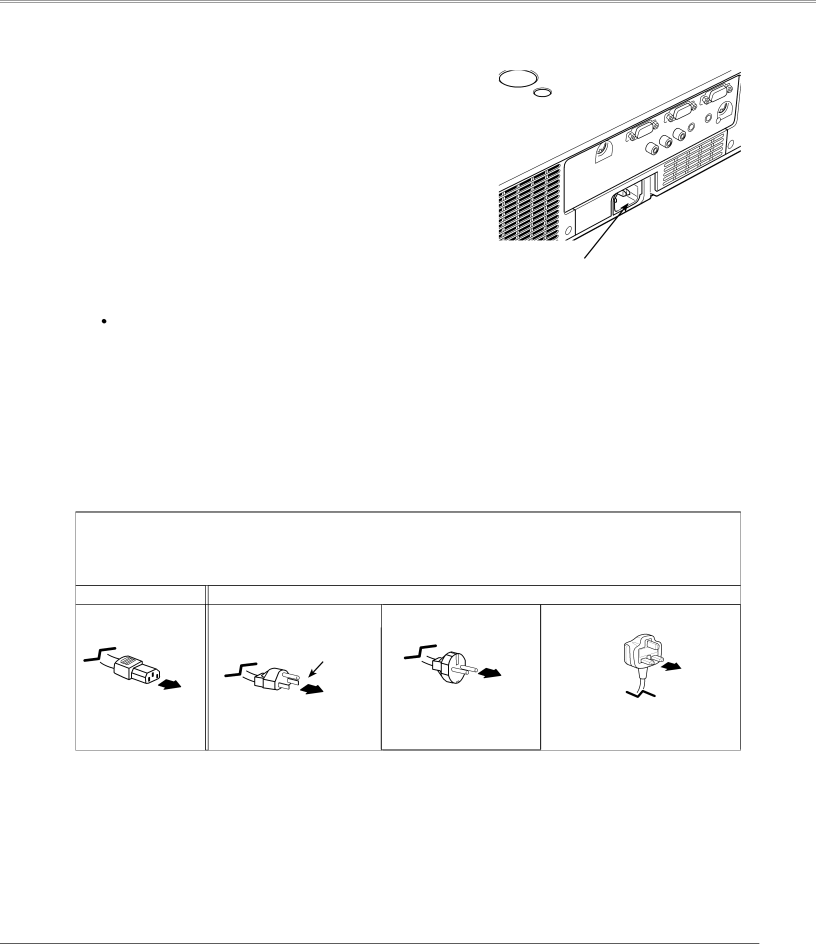
Connect the AC power cord (supplied) to the projector.

CAUTION

The AC outlet must be near this equipment and must be easily accessible.

Note:

Unplug the AC power cord when the projector is not in use. When this projector is connected to an outlet with the AC power cord, it is in Stand-by mode and consumes a little electric power.

NOTE ON THE POWER CORD

AC power cord must meet requirement of the country where you use the projector.

Confirm the AC plug type with the chart below and proper AC power cord must be used.

If supplied AC power cord does not match your AC outlet, contact your sales dealer.

Projector side

AC outlet side


For the U..S..A.. and Canada

For Continental Europe

For the U..K..


Ground


To power cord


connector on your

To the AC outlet.

To the AC outlet.

To the AC outlet.

projector.

(120 V AC)

(200 - 240 V AC)

(200 - 240 V AC)

15

Image 15
Contents Model LC-XB42 Features and Design Table of Contents To the Owner Safety PrecautionSafety Instructions Moving the Projector Safety Instructions Air CirculationBottom Front Downward Upward Usual Positioning PrecautionsCompliance AC Power Cord RequirementAC Power Cord for the United States and Canada AC Power Cord for the United KingdomBottom Part Names and FunctionsPart Names and Functions Rear Terminal⑧ Power indicator ① Lamp Replace indicator⑤ Point Volume +/- buttons ⑦ Warning indicator⑤ Point Volume + / buttons Part Names and Functions Remote ControlAdjustable Feet Remote Control Operating RangePositioning the Projector InstallationFor Continental Europe For the U..K Installation Connecting the AC Power CordNote Projector side AC outlet sideCables used for connection Installation Connecting to a ComputerInstallation Connecting to Video Equipment Installation Connecting to Component Video Equipment Enter a PIN code What is PIN code?Basic Operation Turning On the ProjectorBasic Operation Turning Off the Projector On-Screen Menu Basic Operation How to Operate the On-Screen MenuRemote Control Top ControlBasic Operation Menu Bar For computer sourceFor video source Basic Operation Zoom and Focus Adjustment Auto Setup FunctionKeystone Correction Basic Operation Sound Adjustment Direct OperationMenu Operation Basic Operation Remote Control Operation Image button Timer buttonBasic Operation No Show buttonInput Source Selection Computer InputComputer Input Computer System Selection Selecting Computer System ManuallyPC System Menu Computer Input Auto PC Adjustment To store adjustment parametersAuto PC Adj Computer Input Manual PC Adjustment To clear adjusted data parameters To store adjusted dataComputer Input Computer Input Image Mode Selection Computer Input Image Adjustment Wide Screen Size AdjustmentNormal TrueDigital zoom For zooming in and out the imagesCustom Digital zoom +Input Source Selection Video, S-video Video InputRGB Scart Note Component Video Input Video System SelectionVideo or S-Video AV System Menu Video or S-VideoVideo Input Image Mode Selection CinemaImage1-4 Video Input Image Adjustment ColorTint Video Input Noise reductionProgressive Video Input Screen Size Adjustment Auto setup SettingSetting Setting Menu LanguageKeystoneKeystone Blue backDisplay Capture Logo Logo and Logo PIN code lock settingsLogo select Capture Logo selectChange the Logo PIN code lock setting Enter a Logo PIN codeChange the Logo PIN code Input search Ceiling RearCeiling RearOn start Power managementTo change the code for the projector To change the code for the remote controlKey lock Key lockPIN code lock Security Key lock and PIN code lockEnter a PIN code Change the PIN code lock settingChange the PIN code lock setting Change the PIN codeLamp counter Fan Fan Control SettingFan Fan controlFilter counter Factory defaultFactory default Filter counterProjector is shut down and the Warning Maintenance and CleaningIndicator is blinking red Indicator lights redResetting the Filter Counter Maintenance and Cleaning Cleaning the FiltersMaintenance and Cleaning Slide Shutter Cleaning the Projection LensCleaning the Projector Cabinet Maintenance and Cleaning Lamp Replacement Reset the lamp counterService Parts No 333 Maintenance and Cleaning Resetting the Lamp Counter Lamp Handling PrecautionsAppendix TroubleshootingAppendix PIN code dialog box appears Remote Control doesIndicator blinks or lights Image is distorted or runs offAppendix Sound Computer InputMenu Tree Video Input SettingIndicators Appendix Indicators and Projector ConditionON-SCREEN Resolution Appendix Compatible Computer SpecificationsAppendix Technical Specifications SCART-VGA Cable AccessoriesOptional Parts COMPONENT-VGA CableTerminal Analog RGB Mini D-sub 15 pin Appendix Configurations of TerminalsDimensions Service Port Connector Terminal Mini DIN 8-PINAppendix PIN Code Number Memo PIN Code Lock NoLogo PIN Code Lock No Eastern Europe Deutschland & ÖsterreichChina Canada