Installation
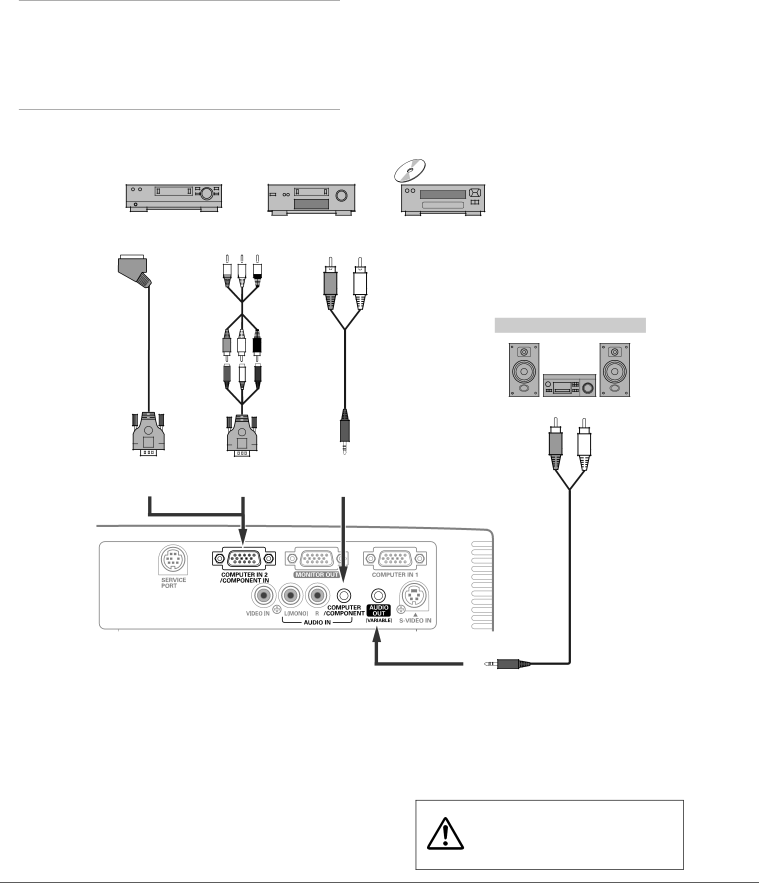
Connecting to Component Video Equipment
Cables used for connection
•Audio Cables
•
•Component Cable
•
(Cables are not supplied with the projector.)
RGB Scart | Component Video Output |
|
|
| |||||||
(Y, Pb/Cb, Pr/Cr) | Audio Output | ||||||||||
|
|
|
|
|
|
|
|
|
|
|
|
|
|
|
|
|
|
|
|
|
|
|
|
|
|
|
|
|
|
|
|
|
|
|
|
Component cable
Component- |
VGA cable |
External Audio Equipment
Audio cable (stereo)
Audio Input
COMPUTER IN 2/COMPONENT IN | COMPUTER |
/COMPONENT | |
| AUDIO IN |
| Audio cable |
| (stereo) |
| AUDIO OUT |
| (stereo) |
Notes:
•When the AUDIO OUT is
•See page 68 for ordering optional cables.
Unplug the power cords of both the projector and external equipment from the AC outlet before connecting cables..
18