Oki BMG7012, BMG7011 manual Appendix a Troubleshooting

Page 69

BMG7011 and BMG7012 User’s Guide Rev. 1.8

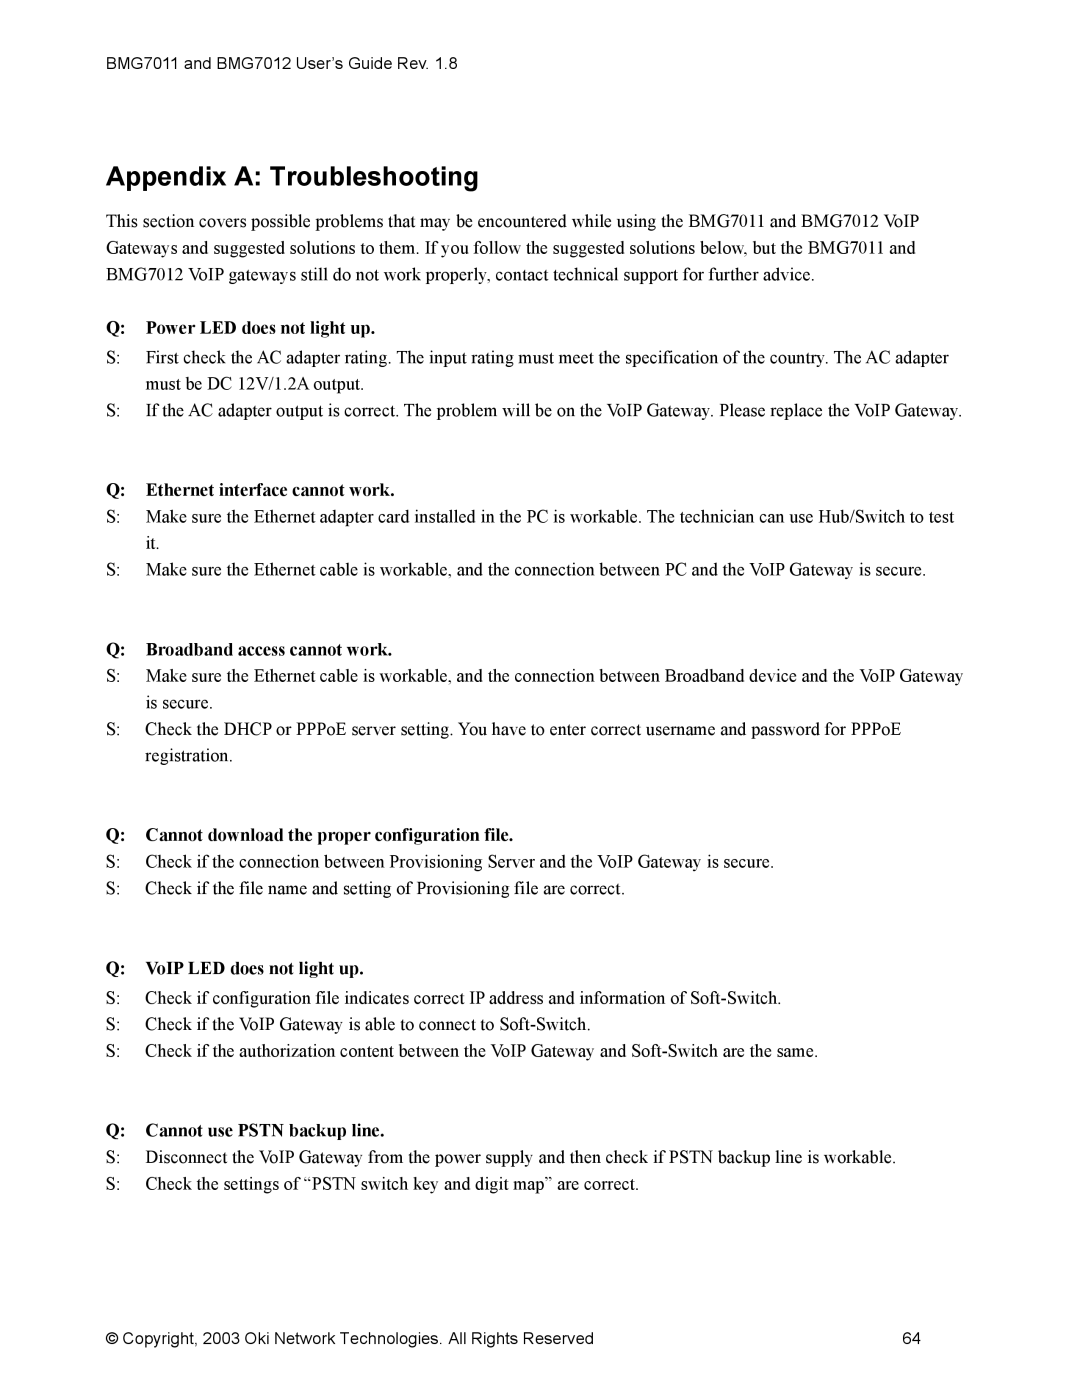
Appendix A: Troubleshooting

This section covers possible problems that may be encountered while using the BMG7011 and BMG7012 VoIP Gateways and suggested solutions to them. If you follow the suggested solutions below, but the BMG7011 and BMG7012 VoIP gateways still do not work properly, contact technical support for further advice.

Q:Power LED does not light up.

S:First check the AC adapter rating. The input rating must meet the specification of the country. The AC adapter must be DC 12V/1.2A output.

S:If the AC adapter output is correct. The problem will be on the VoIP Gateway. Please replace the VoIP Gateway.

Q:Ethernet interface cannot work.

S:Make sure the Ethernet adapter card installed in the PC is workable. The technician can use Hub/Switch to test it.

S:Make sure the Ethernet cable is workable, and the connection between PC and the VoIP Gateway is secure.

Q:Broadband access cannot work.

S:Make sure the Ethernet cable is workable, and the connection between Broadband device and the VoIP Gateway is secure.

S:Check the DHCP or PPPoE server setting. You have to enter correct username and password for PPPoE registration.

Q:Cannot download the proper configuration file.

S:Check if the connection between Provisioning Server and the VoIP Gateway is secure.

S:Check if the file name and setting of Provisioning file are correct.

Q:VoIP LED does not light up.

S:Check if configuration file indicates correct IP address and information of Soft-Switch.

S:Check if the VoIP Gateway is able to connect to Soft-Switch.

S:Check if the authorization content between the VoIP Gateway and Soft-Switch are the same.

Q:Cannot use PSTN backup line.

S:Disconnect the VoIP Gateway from the power supply and then check if PSTN backup line is workable.

S:Check the settings of “PSTN switch key and digit map” are correct.

© Copyright, 2003 Oki Network Technologies. All Rights Reserved

64

Image 69
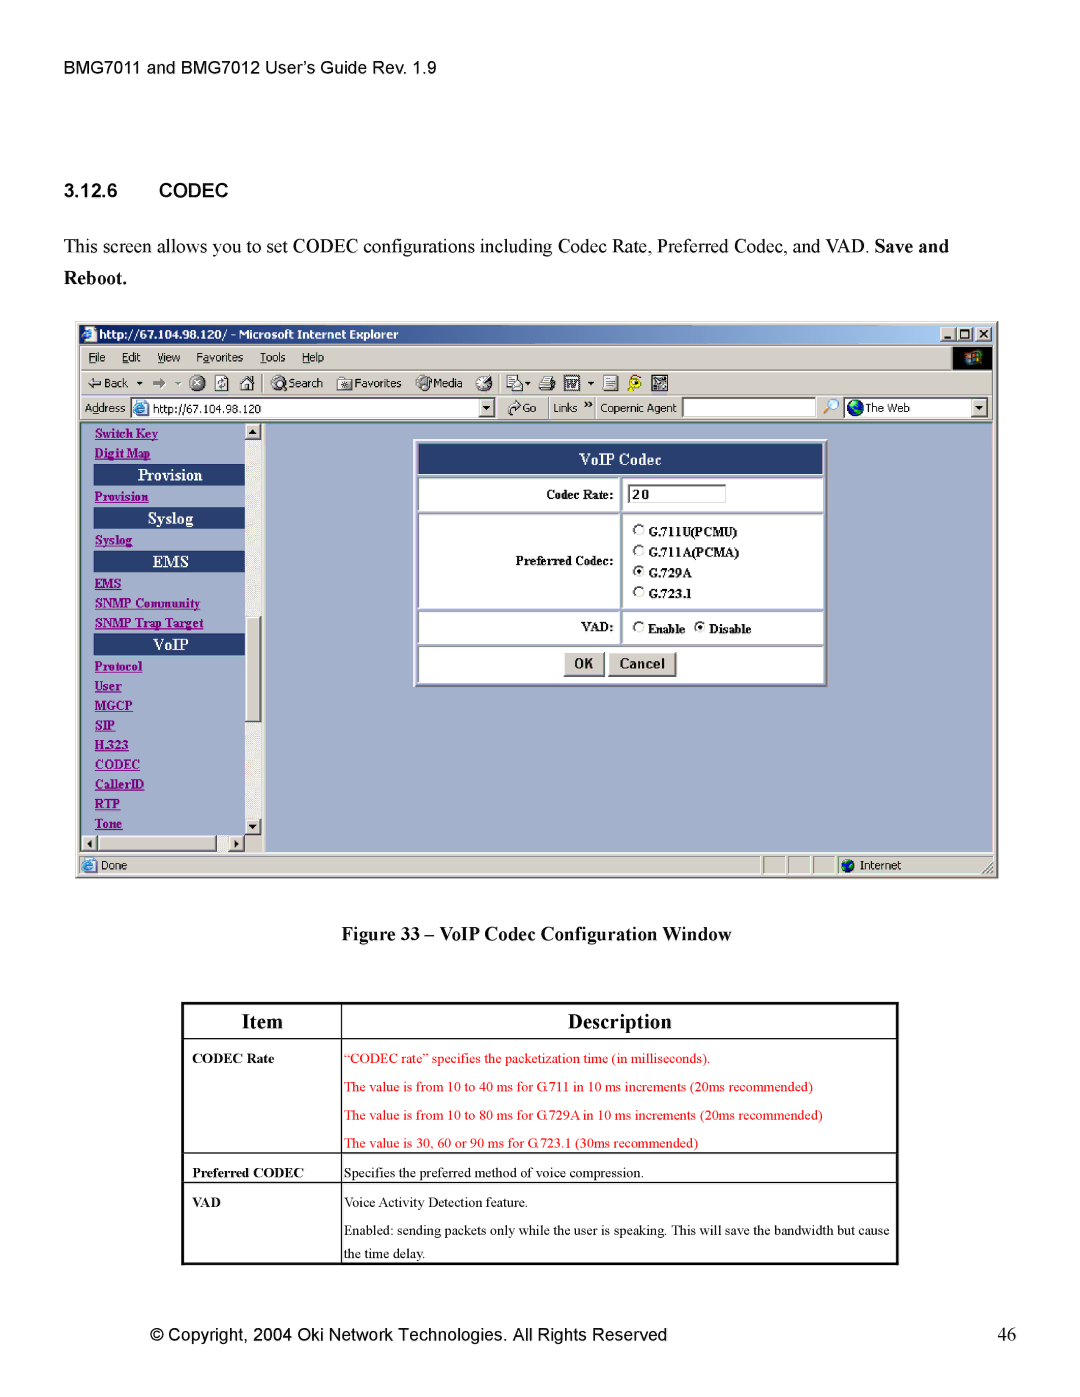
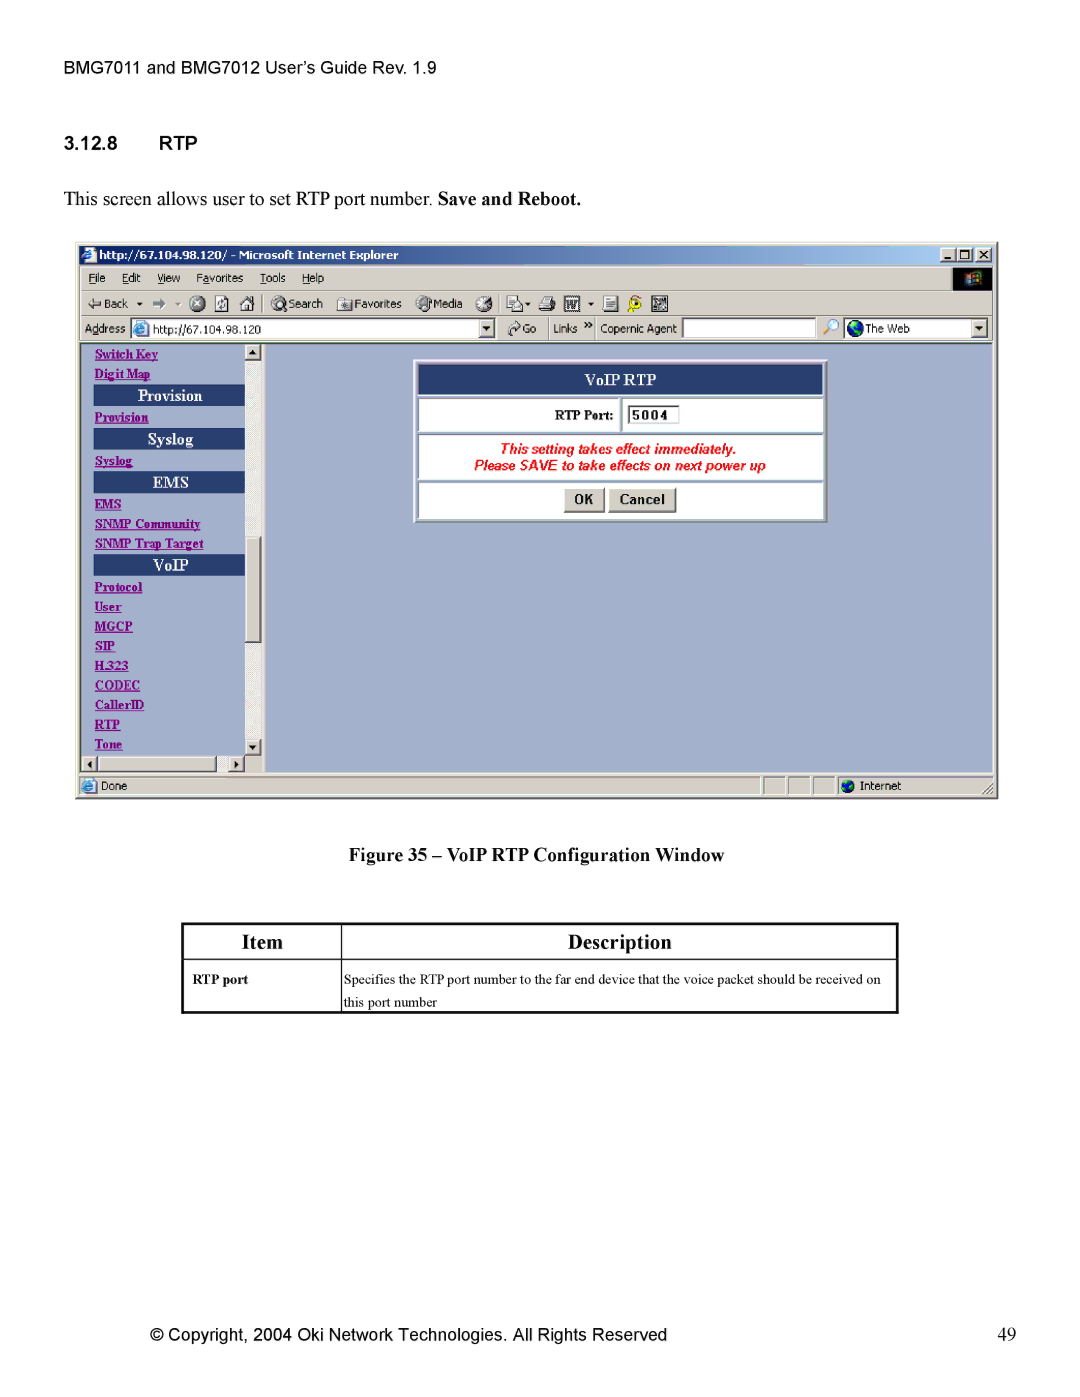
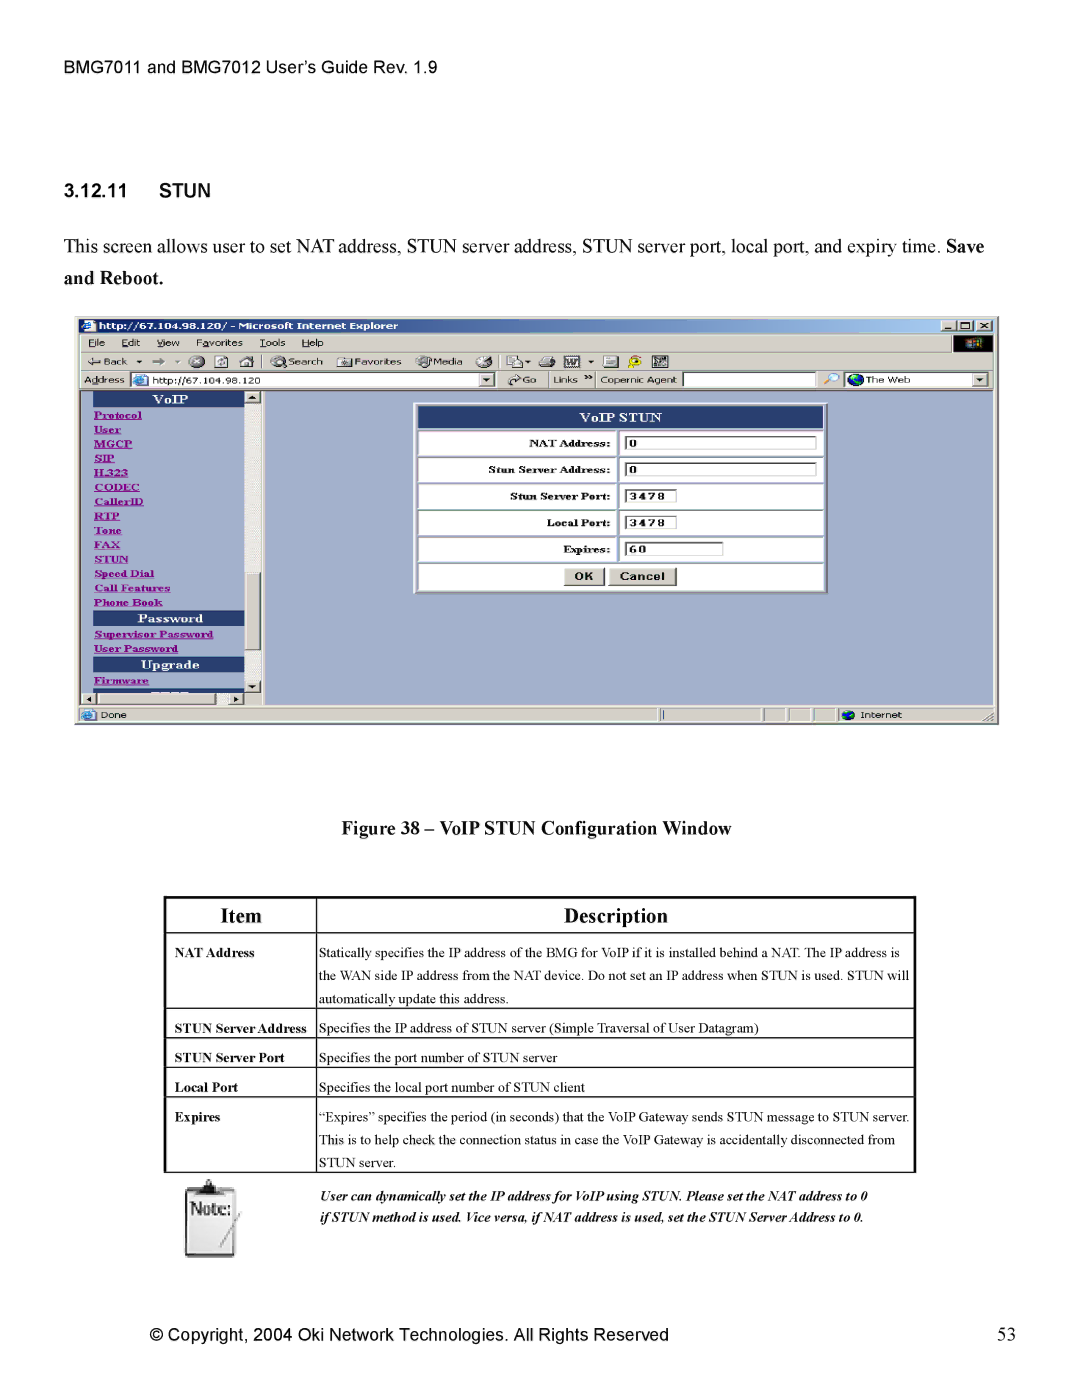
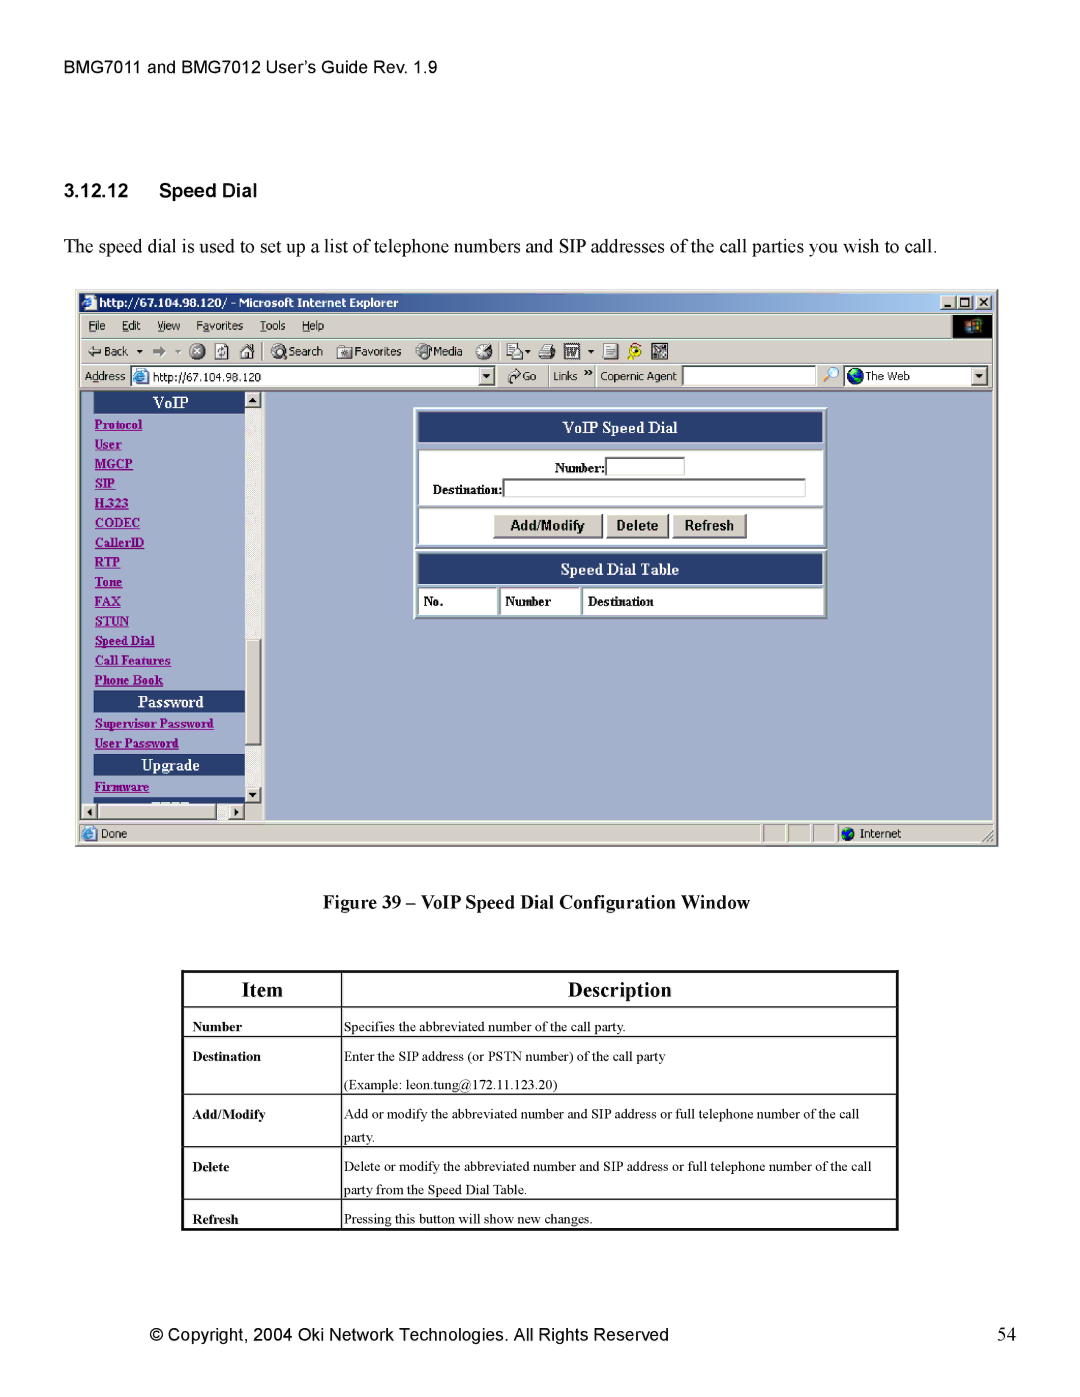
Contents Broadband Media Gateway Document Revision History Copyrights Notice Contents 11.1 Package Contents FeaturesSystem Requirements Integrated Routing Features Front View LEDs Hardware InstallationLine Rear View PortsConfiguring TCP/IP Protocol for Your PC Initial Installation Procedures for Adsl and Cable NetworksConfiguring via Web Browser Configuring the BMG7011 and BMG7012 VoIP gatewaysSetting your BMG to communicate through PPPoE Supervisor ModeBMG7011 and BMG7012 User’s Guide Rev Setting your BMG to communicate through Dhcp Select Dhcp within the WAN Configuration setup screen Setting your BMG to communicate through a Static IP address Example DSL installation Installation Overview For Adsl and Cable NetworksPHONE1 & PHONE2 Web Interface Screen Descriptions System Status StatusPort Status Window Port StatusDNS Dhcpc StatusPPPoE Status Window Description PPPoE StatusDescription PPPoE ConfigurationDhcp Configuration Dhcp Server ConfigurationWAN IP WAN ConfigurationRemote Provisioning DescriptionDevice Mode Configuration Window Device Mode1 NTP NTPPort Forwarding Napt ConfigurationIP Filtering IP Filter Configuration Window3 DMZ DMZ Configuration WindowQoS QoS ConfigurationDscp Configuration VLan Configuration Mac Cloning Window Mac CloningSwitch Key Pstn ConfigurationLength Digit MapGroup Provision ConfigurationSyslog Configuration Window Syslog Configuration11.1 EMS EMS ConfigurationSnmp Community Snmp Community Configuration WindowSnmp Trap Target Snmp Trap Configuration WindowProtocol VoIP ConfigurationUser DescriptionRstp Mgcp12.4 SIP VoIP SIP Configuration WindowSIP Domain 12.5 H.323 Specifies the password for secured registrationDtmf Codec DescriptionBMG7011 and BMG7012 User’s Guide Rev VoIP Caller ID Configuration Window RTP port 12.8 RTPBusy Tone ToneCall Waiting Tone 12.10 FAX VoIP Fax Configuration WindowNAT Address StunAdd/Modify Speed DialPort Configure port 1 or port 2 For BMG7012 Only Call Hold Call FeaturesPhone book Supervisor Password Password ConfigurationUser Password Window User PasswordFirmware Upgrade ConfigurationConfiguration Upgrade Window ConfigurationSave Save ConfigurationLoad Default Settings Window Load Default SettingsReboot Window RebootAppendix a Troubleshooting Appendix B Specifications