Portable Dryer Troubleshooting | Grain Sensor |
Procedure for Locating, Testing and Replacing a Defective Grain Temperature Sensor
Symptoms of a bad sensor may include:
·Temperature readings that are not consistent with the ambient outside temperature or with any known verified grain temperatures entering the dryer.
·Grain temp open or grain temp short on Network dryers
·Display readings of 255° or
Grain Thermistor Sensor
Troubleshooting:
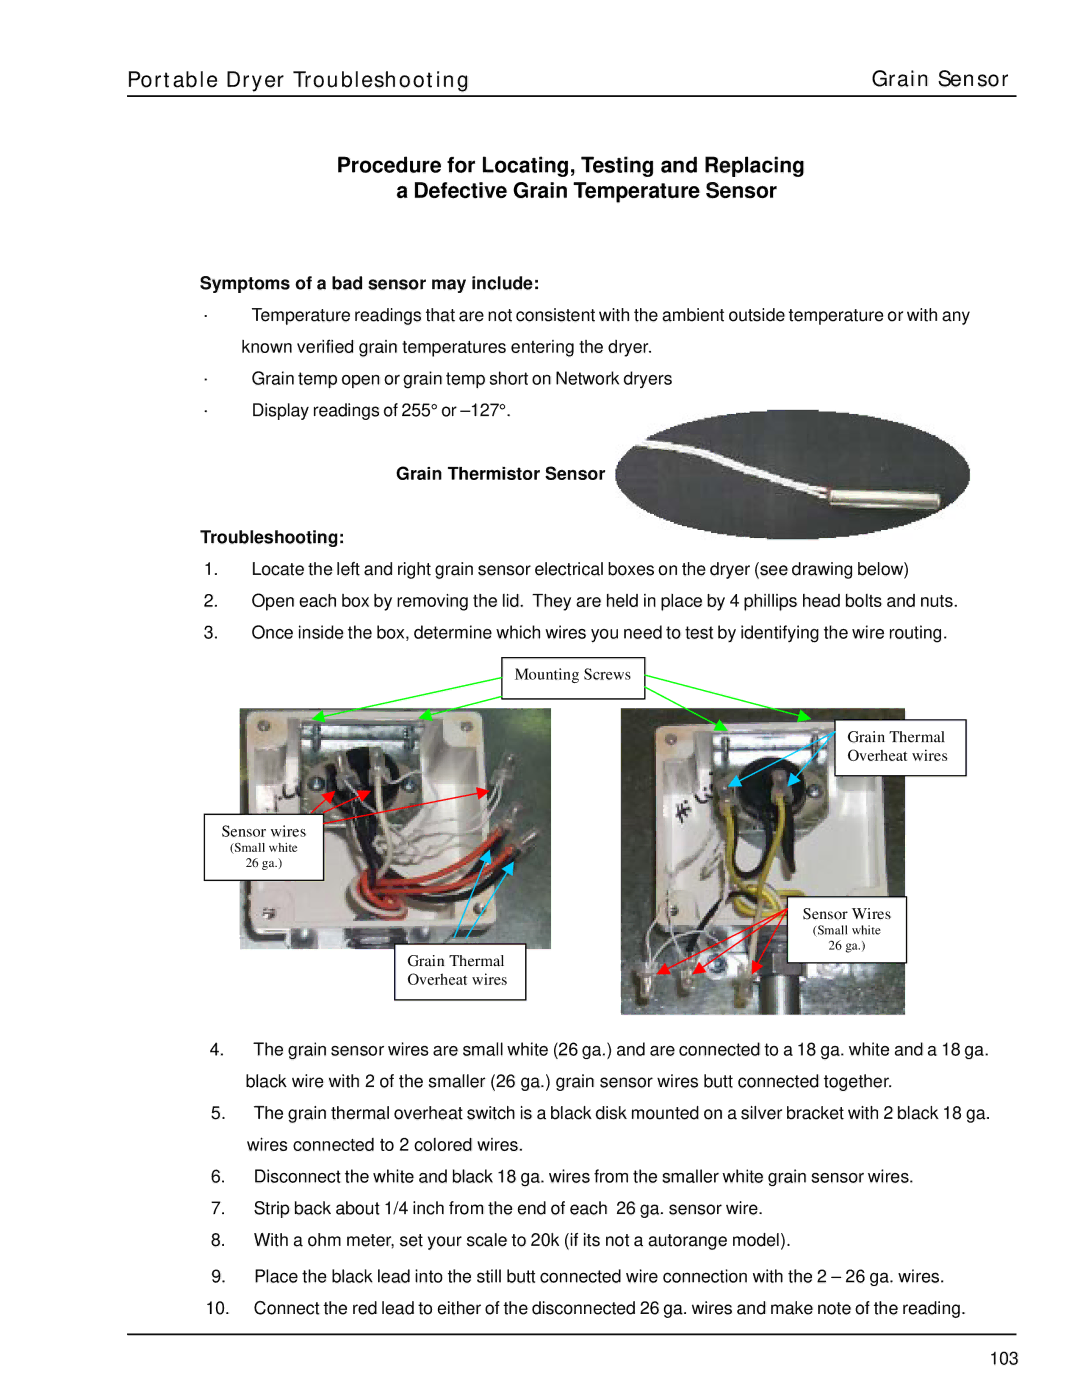
1.Locate the left and right grain sensor electrical boxes on the dryer (see drawing below)
2.Open each box by removing the lid. They are held in place by 4 phillips head bolts and nuts.
3.Once inside the box, determine which wires you need to test by identifying the wire routing.
Mounting Screws
Sensor wires
(Small white
26 ga.)
Grain Thermal
Overheat wires
Grain Thermal
Overheat wires
Sensor Wires
(Small white
26 ga.)
4.The grain sensor wires are small white (26 ga.) and are connected to a 18 ga. white and a 18 ga. black wire with 2 of the smaller (26 ga.) grain sensor wires butt connected together.
5.The grain thermal overheat switch is a black disk mounted on a silver bracket with 2 black 18 ga. wires connected to 2 colored wires.
6.Disconnect the white and black 18 ga. wires from the smaller white grain sensor wires.
7.Strip back about 1/4 inch from the end of each 26 ga. sensor wire.
8.With a ohm meter, set your scale to 20k (if its not a autorange model).
9.Place the black lead into the still butt connected wire connection with the 2 – 26 ga. wires.
10.Connect the red lead to either of the disconnected 26 ga. wires and make note of the reading.
