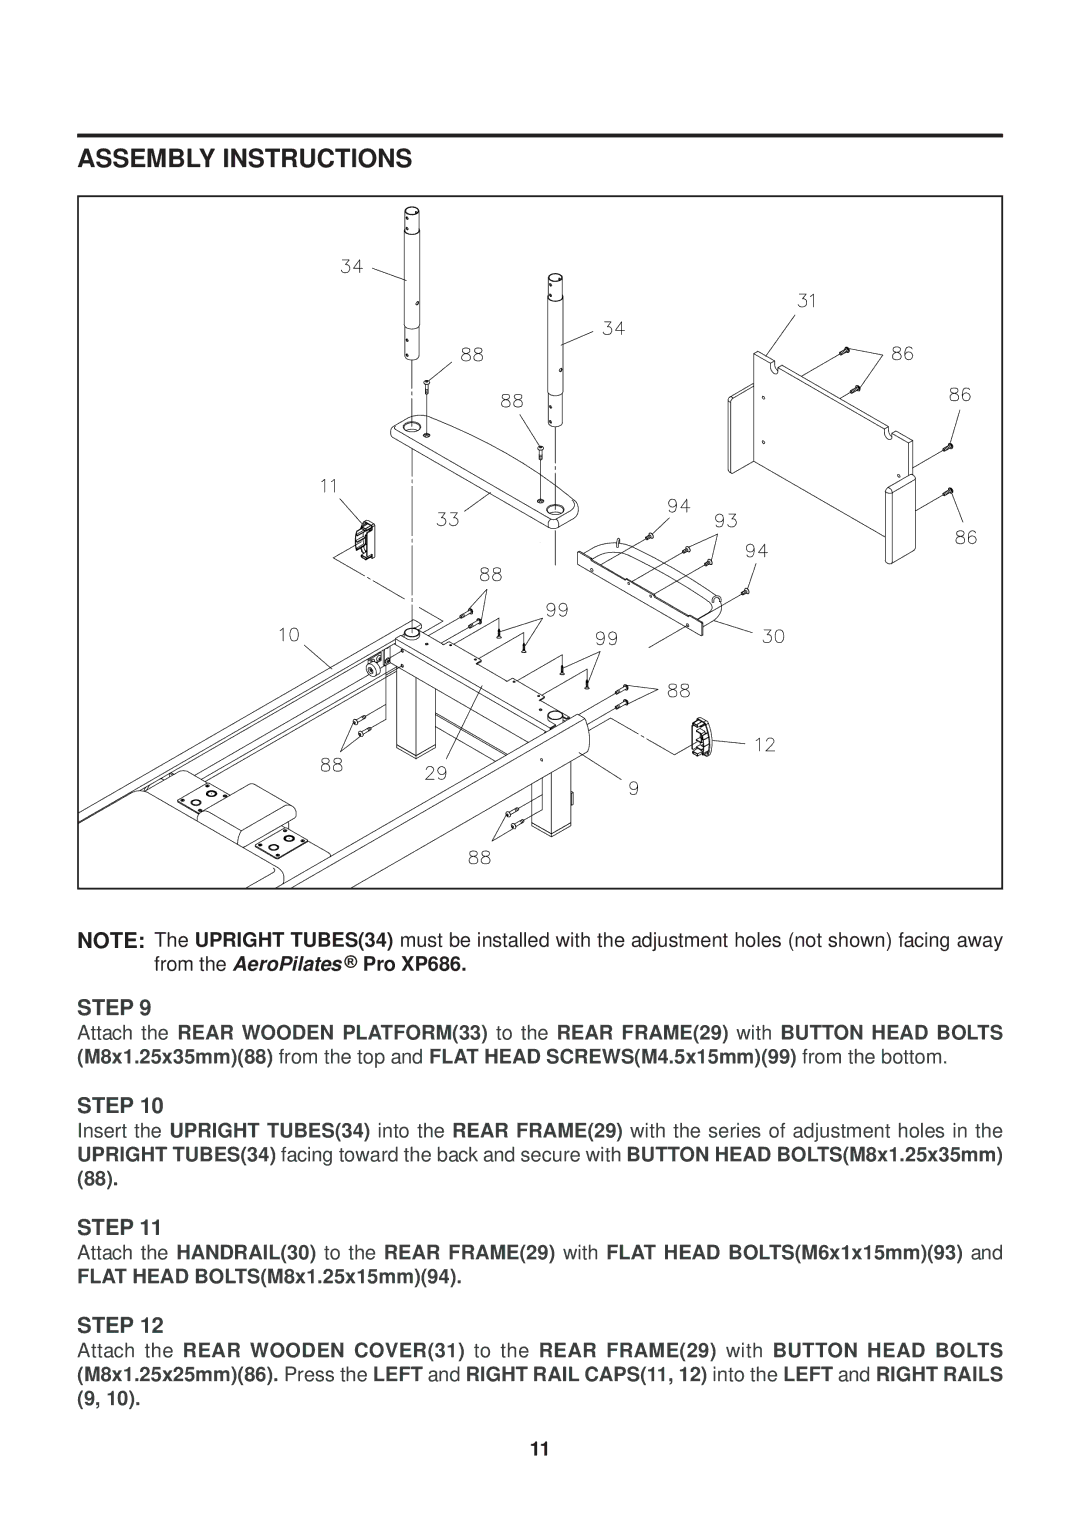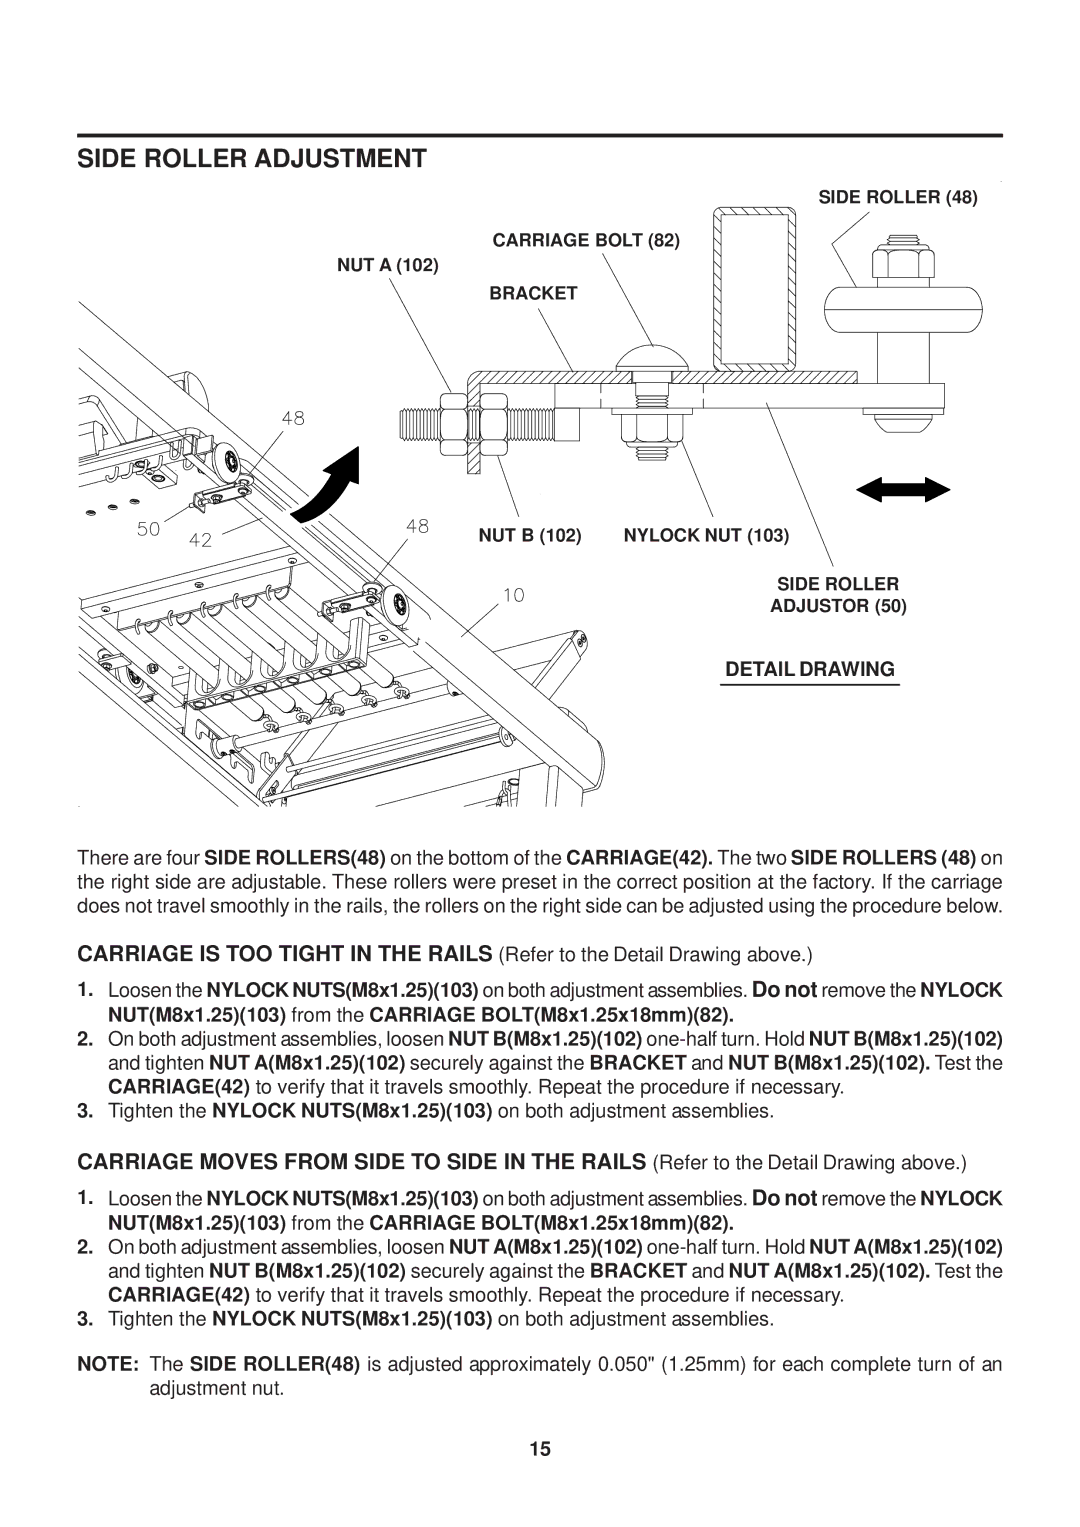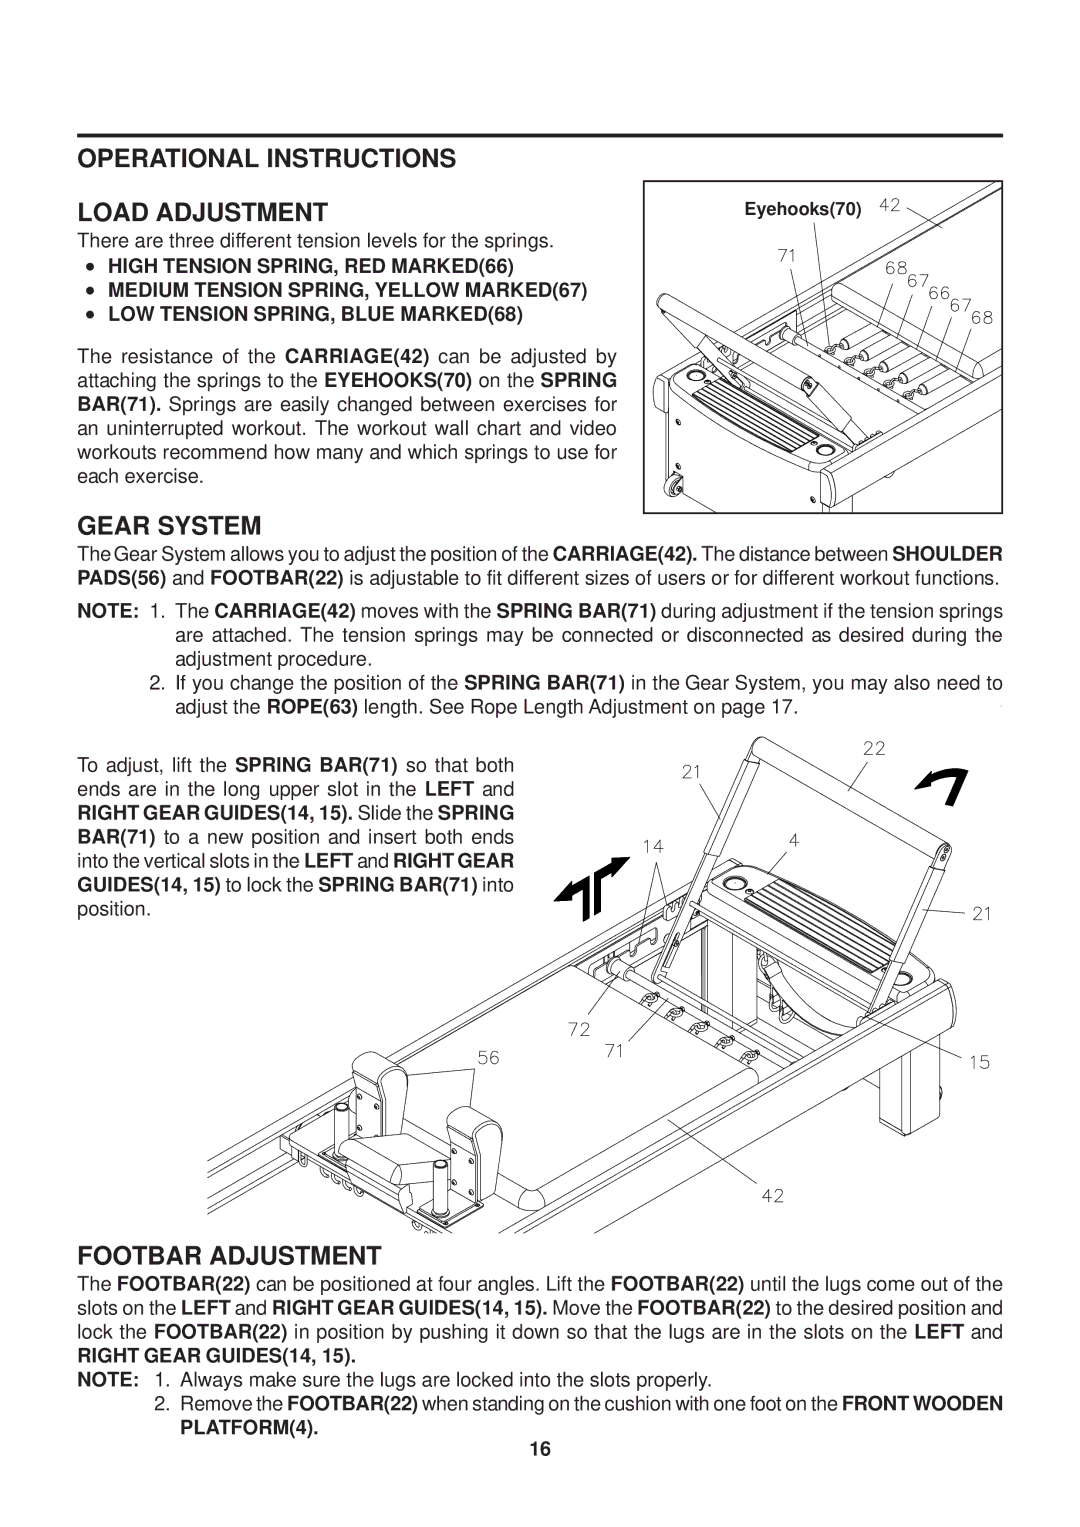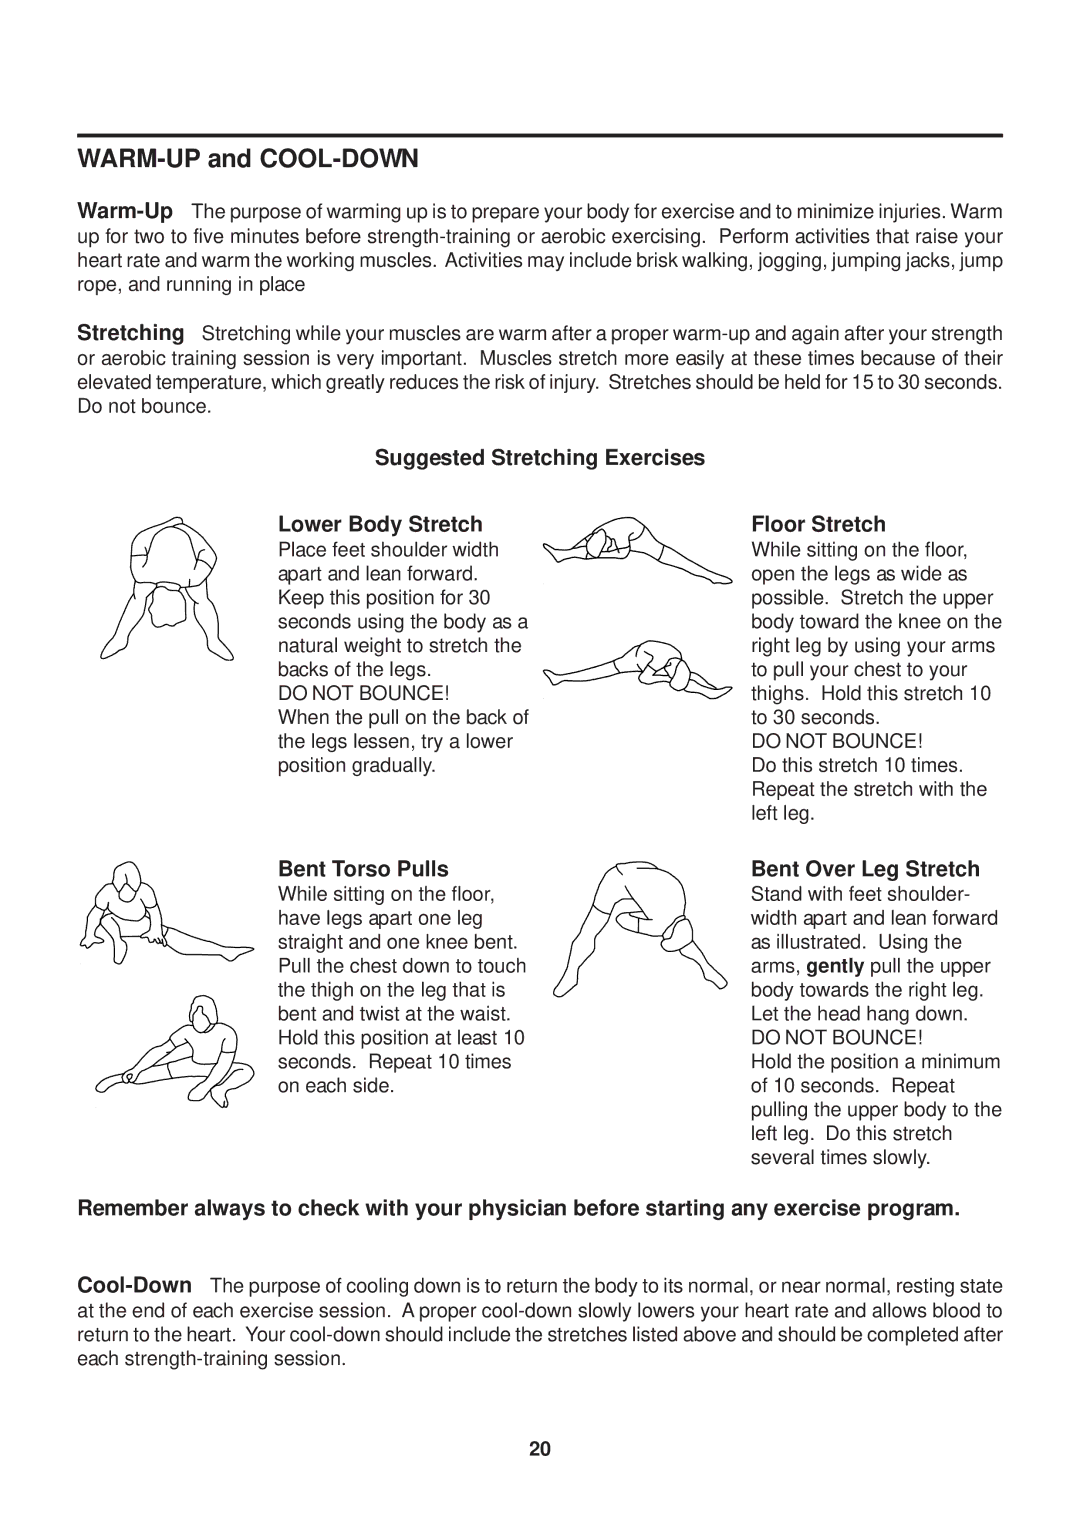
ASSEMBLY INSTRUCTIONS
2 ![]()
![]() 3
3 ![]()
![]()
![]()
4
1
5
2
6
Tie a knot large enough
to stop by ring B.
Ring A
Ring B
Bottom View
STEP 17
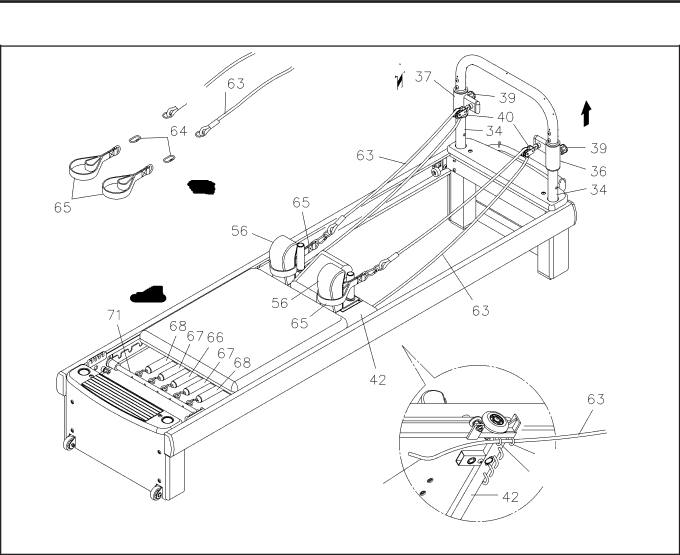
Assemble the ROPES(63) and adjust the length by following these steps:
1.Hook the TENSION SPRINGS(66, 67, 68) to the SPRING BAR(71). Adjust the Gear System to move the SPRING BAR(71) and CARRIAGE(42) to the
2.Adjust the LEFT and RIGHT PULLEY SLIDERS(36, 37) to the highest position on the UPRIGHT TUBES (34). Refer to page 17 for details of Pulley Slider Adjustment.
3.Attach the HAND STRAPS(65) to the looped ends of the ROPES(63) with LINKS(64).
4.Loop the HAND STRAPS(65) over the SHOULDER PADS(56) to hold the ropes in place.
5.Thread the other ends of the ROPES(63) through the PULLEY SETS(40).
6.Refer to the bottom view inset in the illustration. Thread the ends of each rope through ring A and ring B on the underside of the CARRIAGE(42) and tie a knot in the end of each ROPE(63) large enough so the ROPE(63) won't pull back through ring B.
NOTE: 1. For different workout functions, you will need to change the position of the SPRING BAR(71) in the Gear System, or the position of the PULLY SLIDERS(36, 37), you may also need to adjust the ROPE(63) length. See Rope Length Adjustment on page 17.
2.If the ROPE(63) is still too long for your workout even when hung on the most distant hook, untie the knot and shorten the ROPE(63) by pulling more ROPE(63) through ring B.
13
