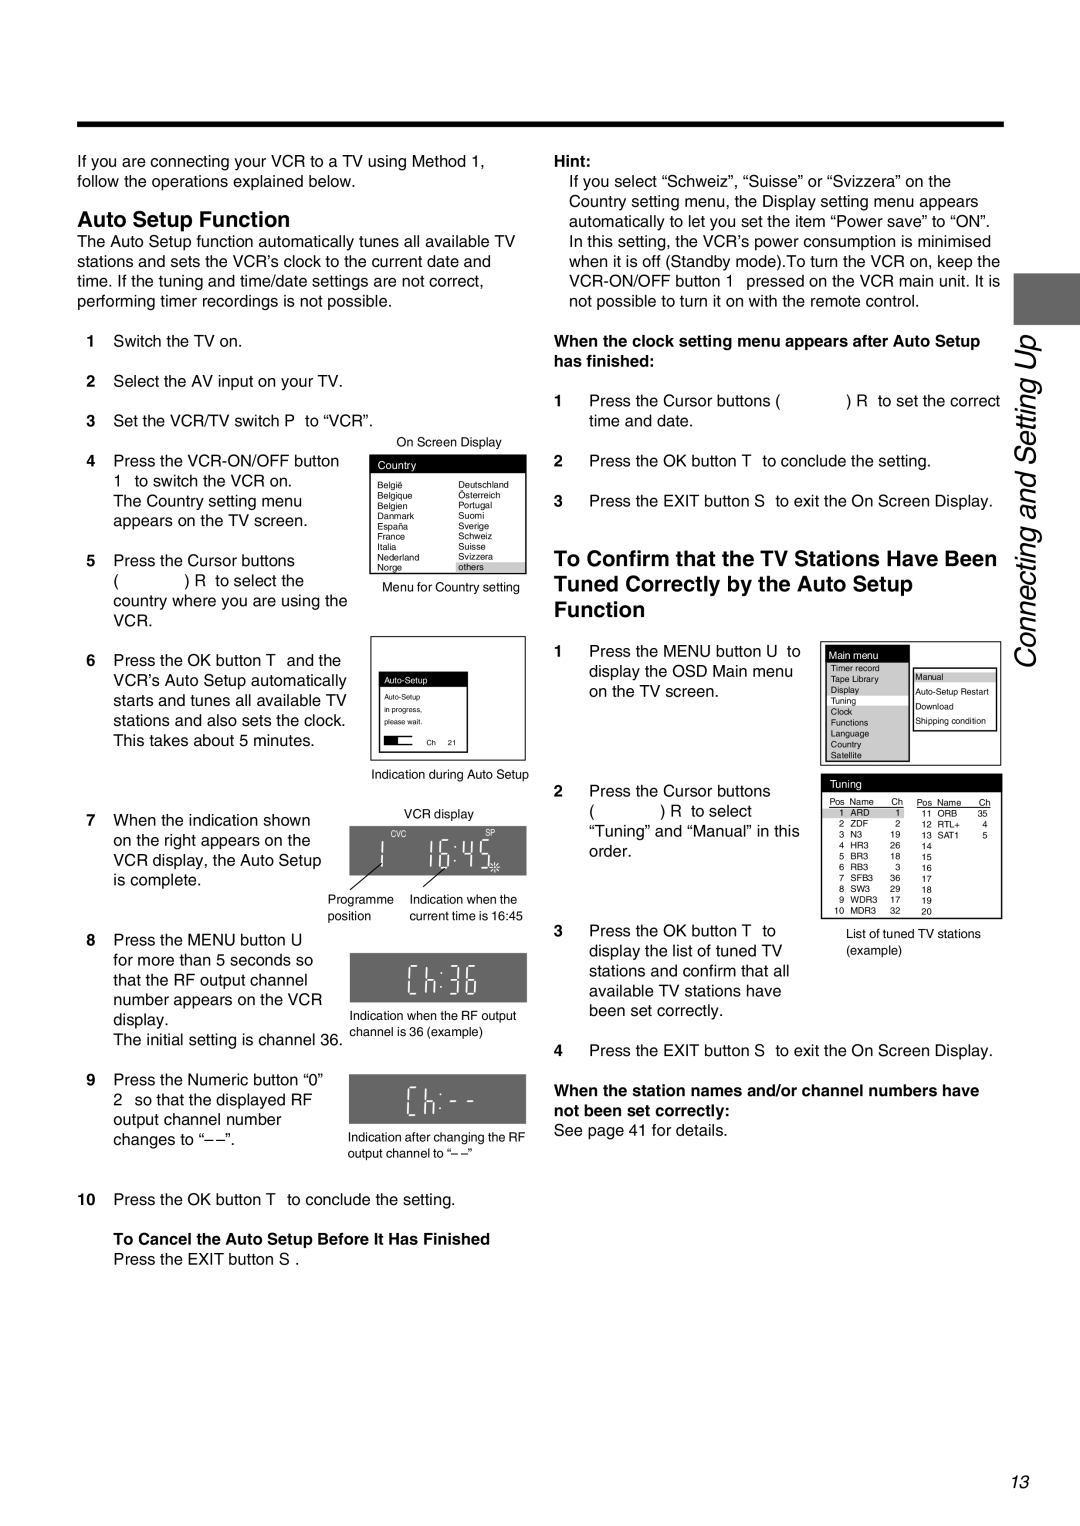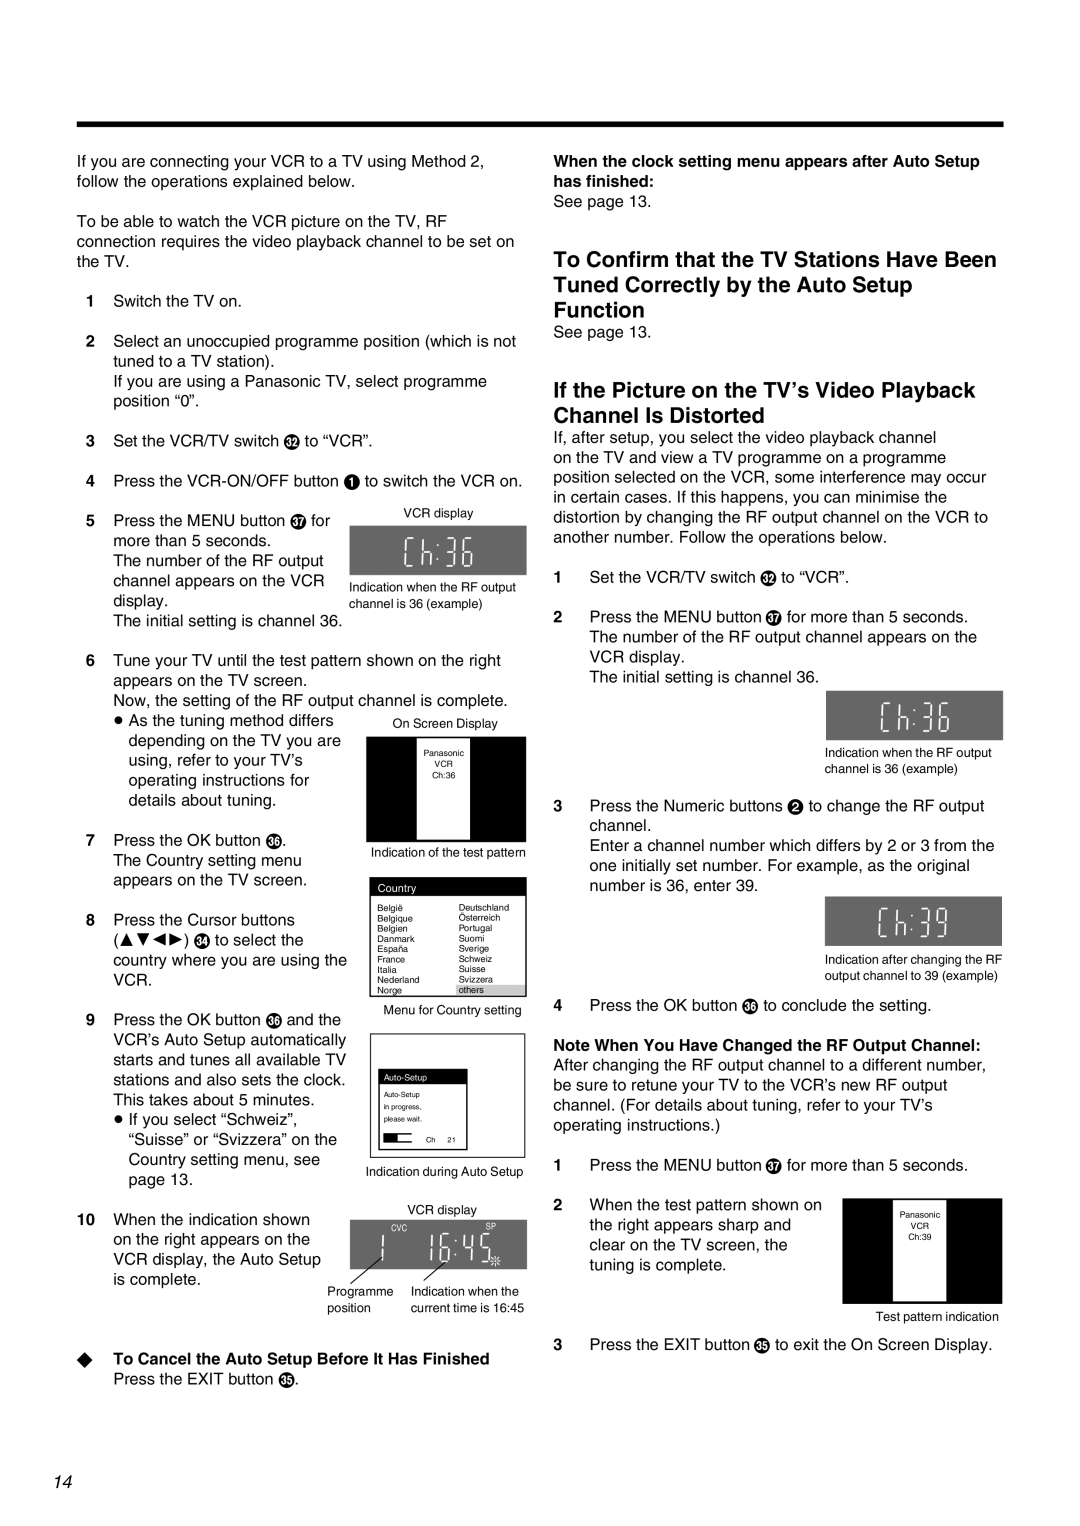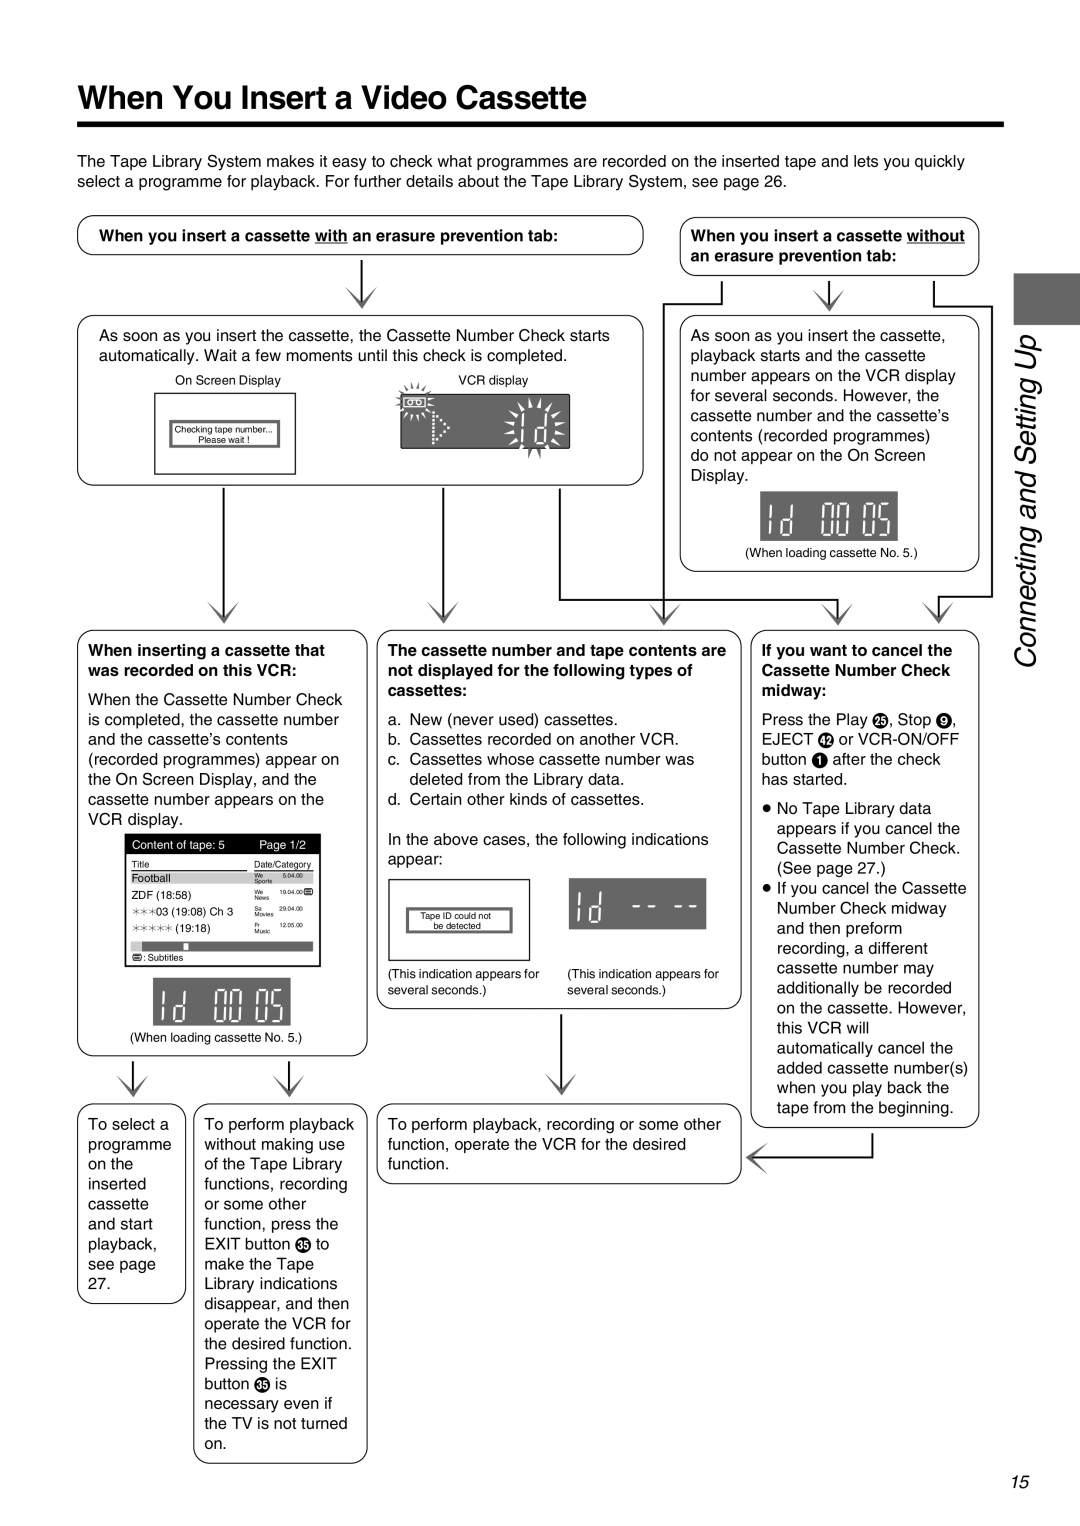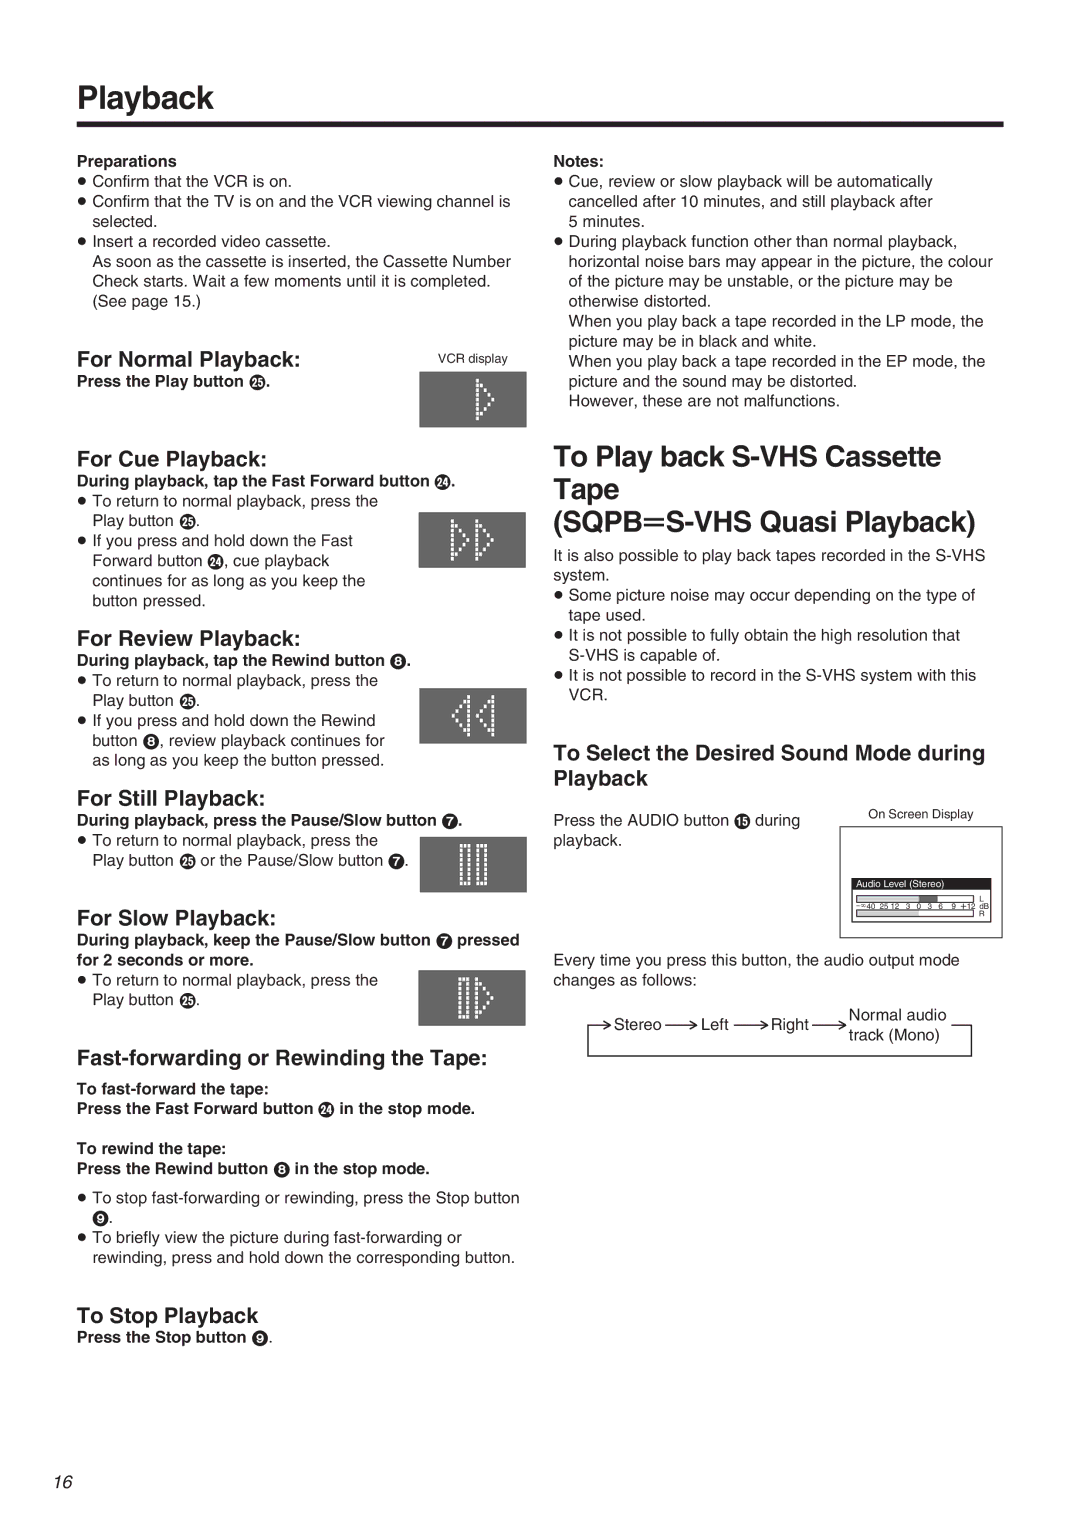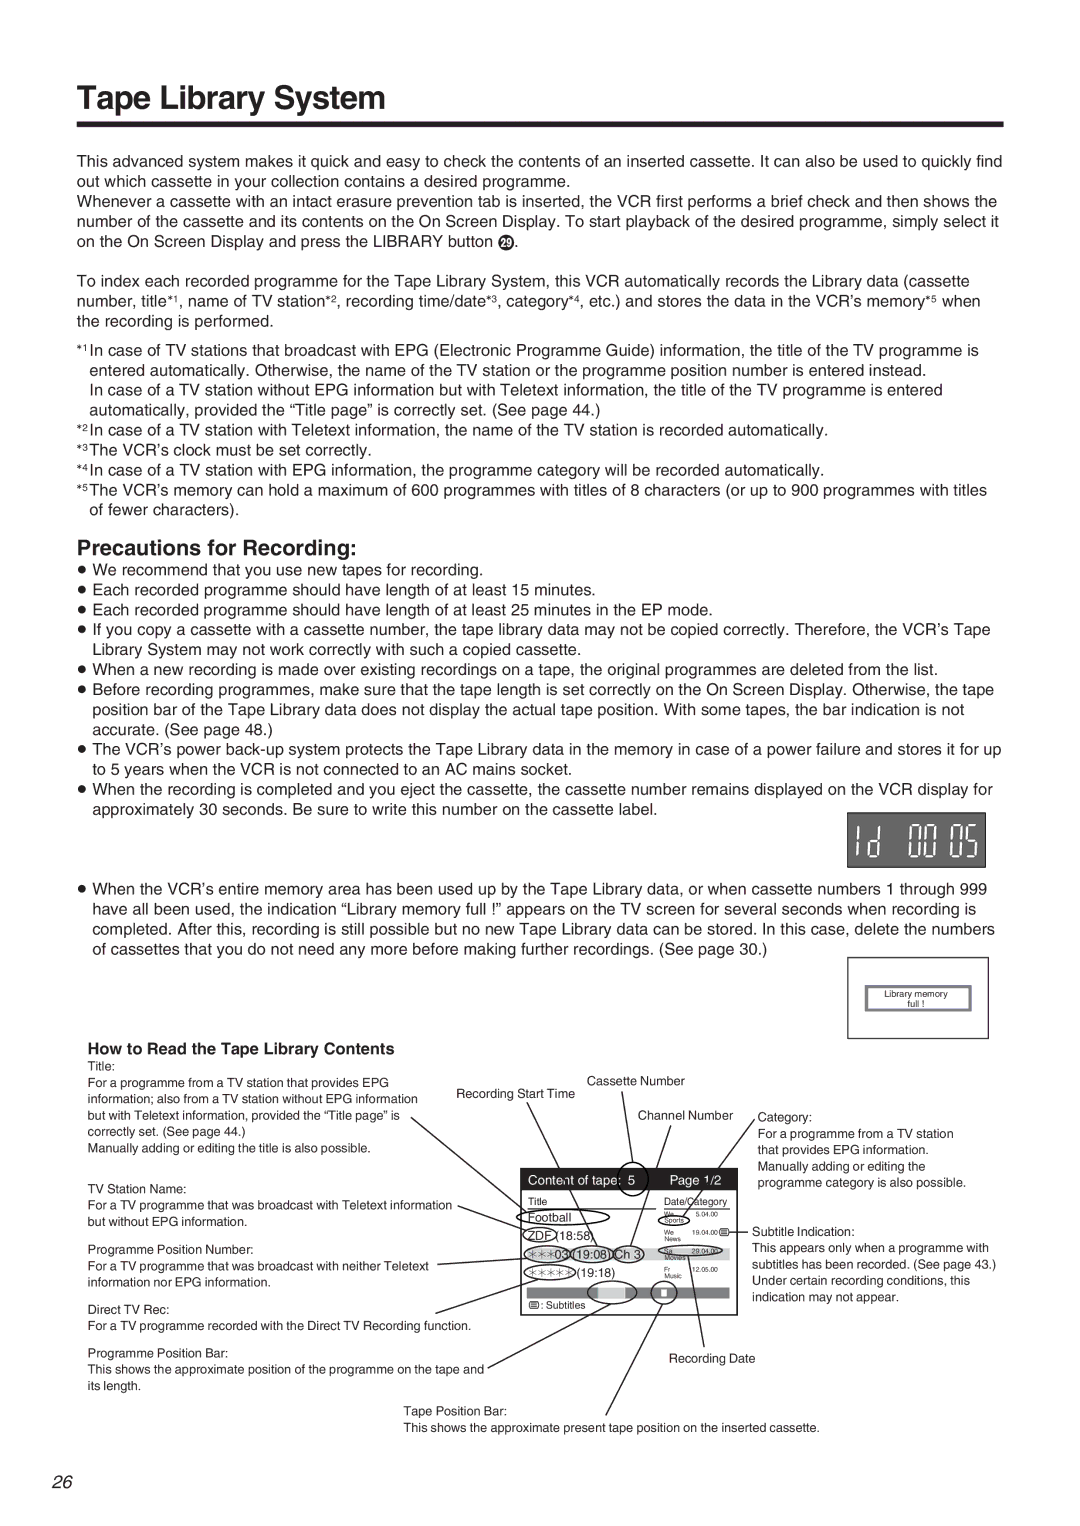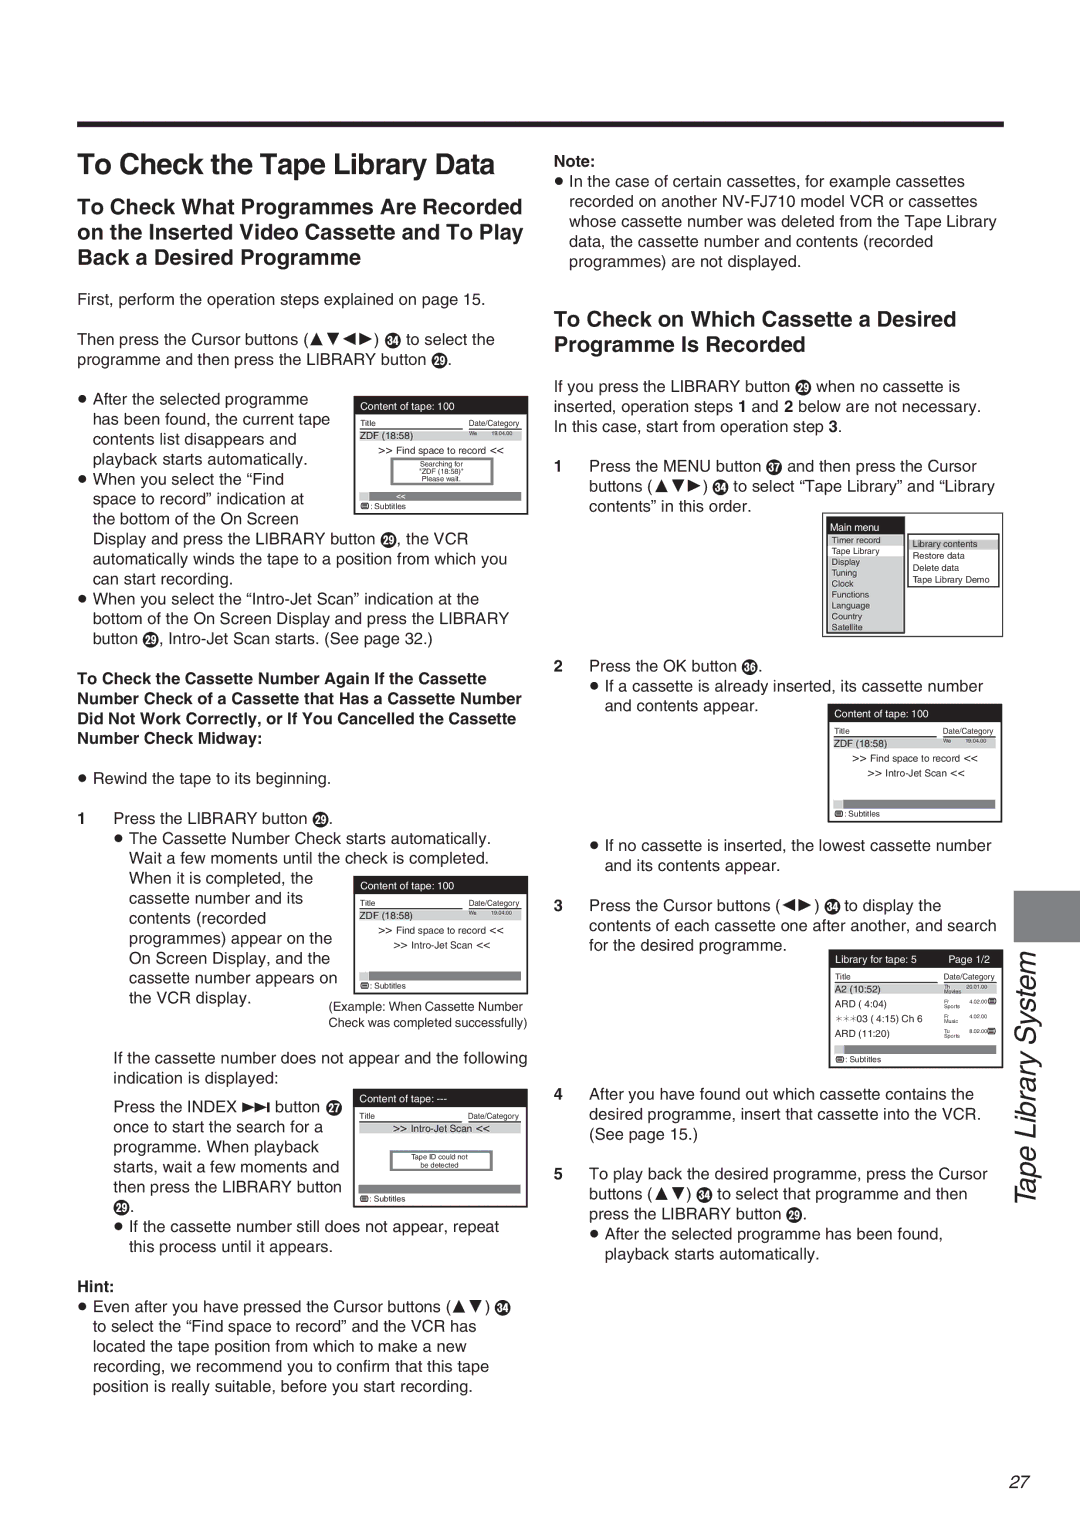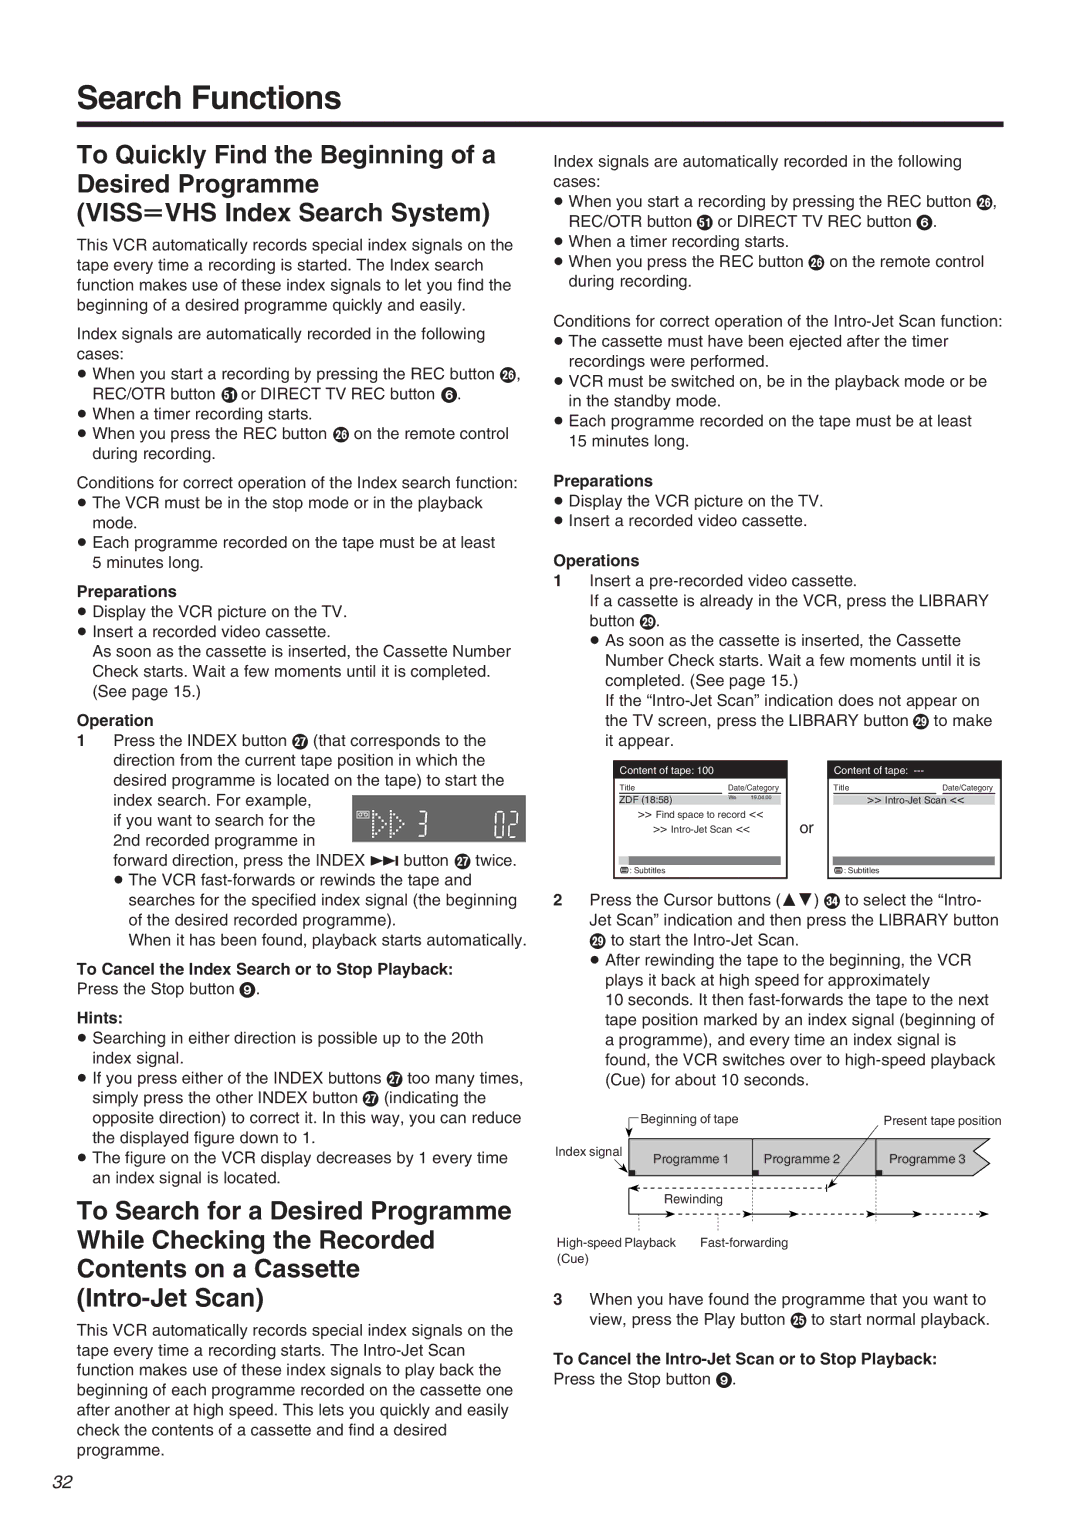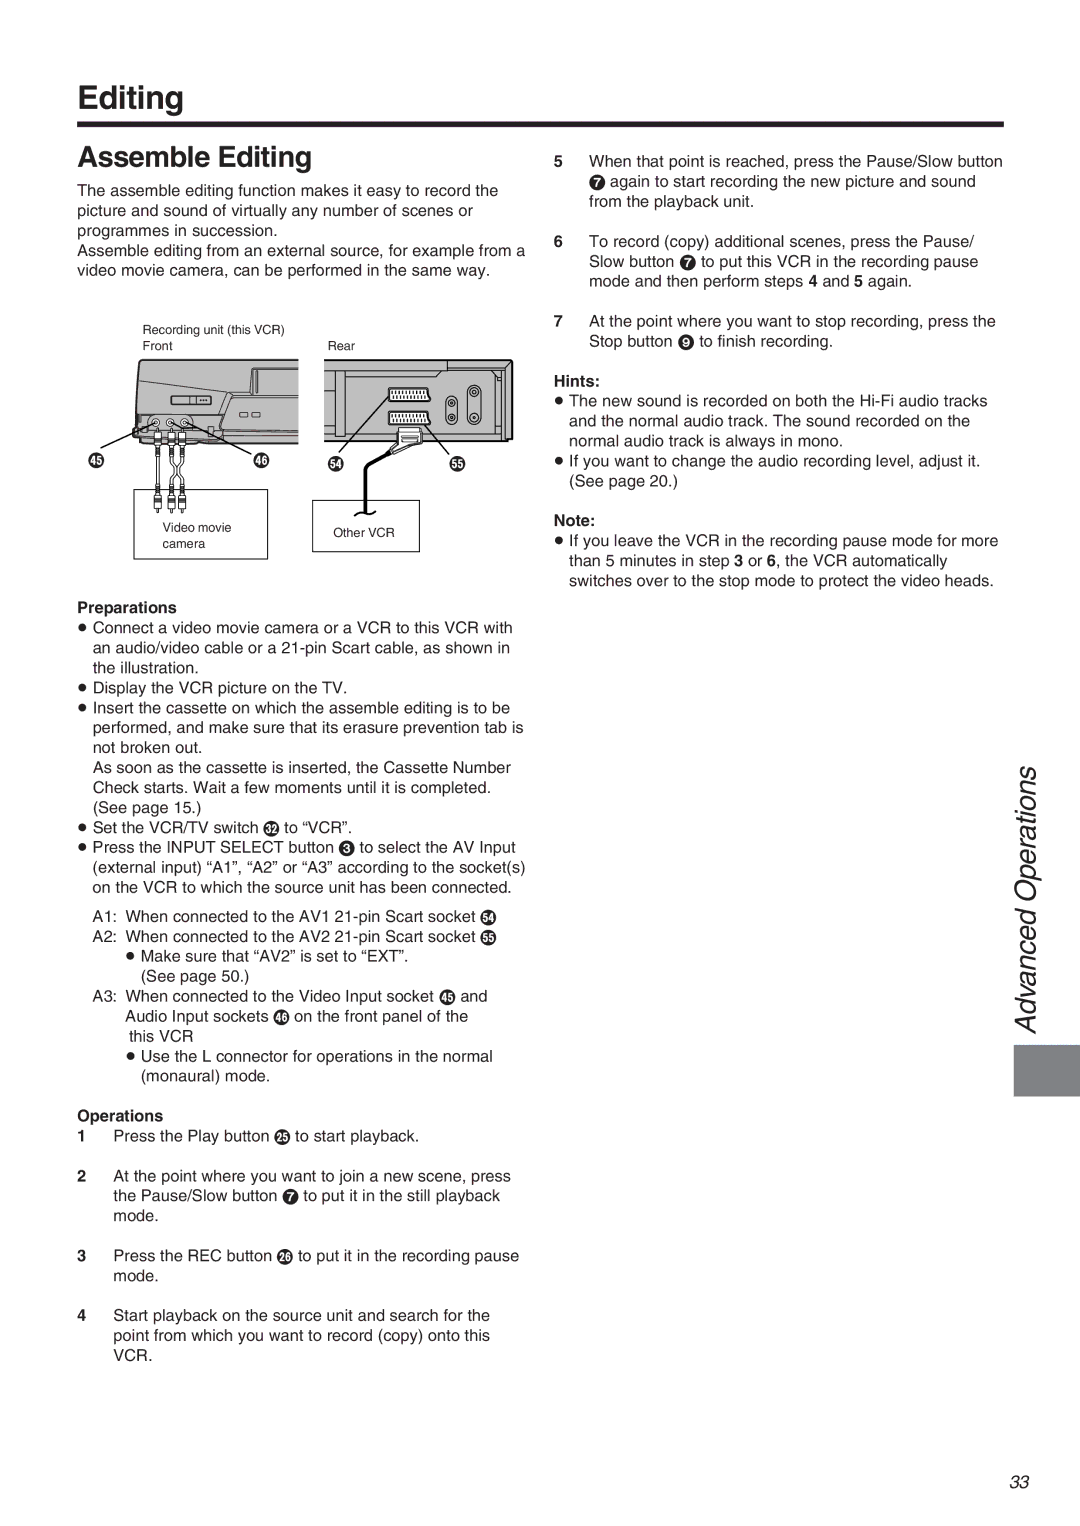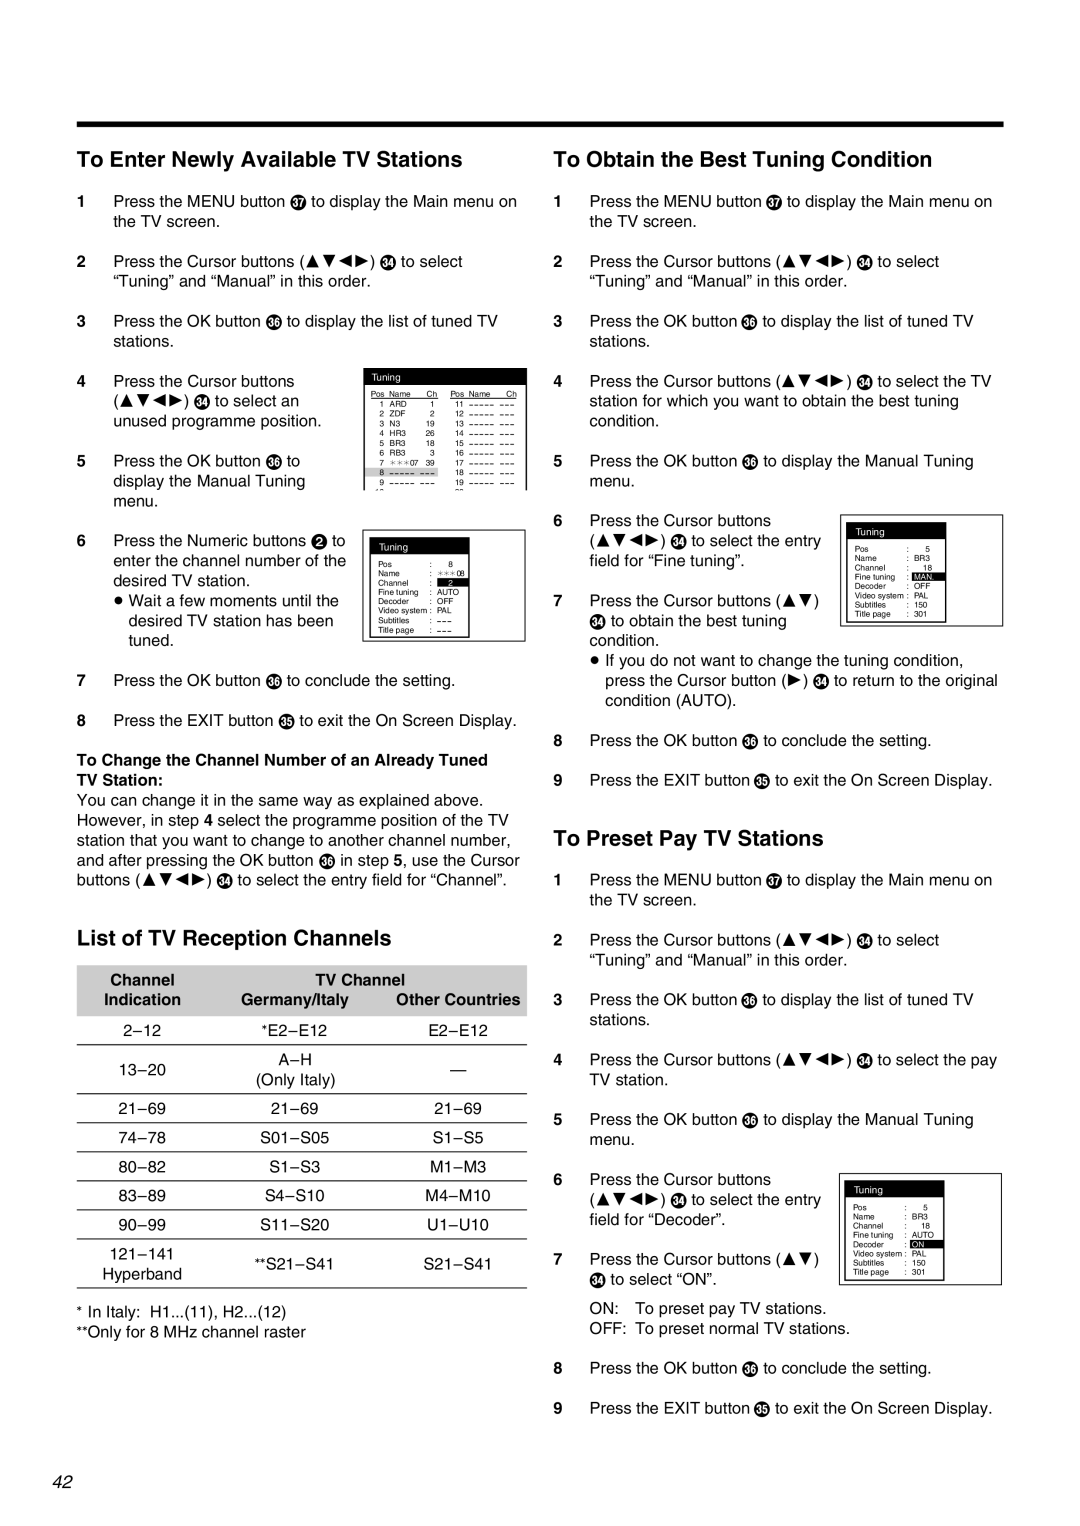
Panasonic NV-FJ710 Series operating instructions To Manually Adjust the Audio Recording Level

Page 20

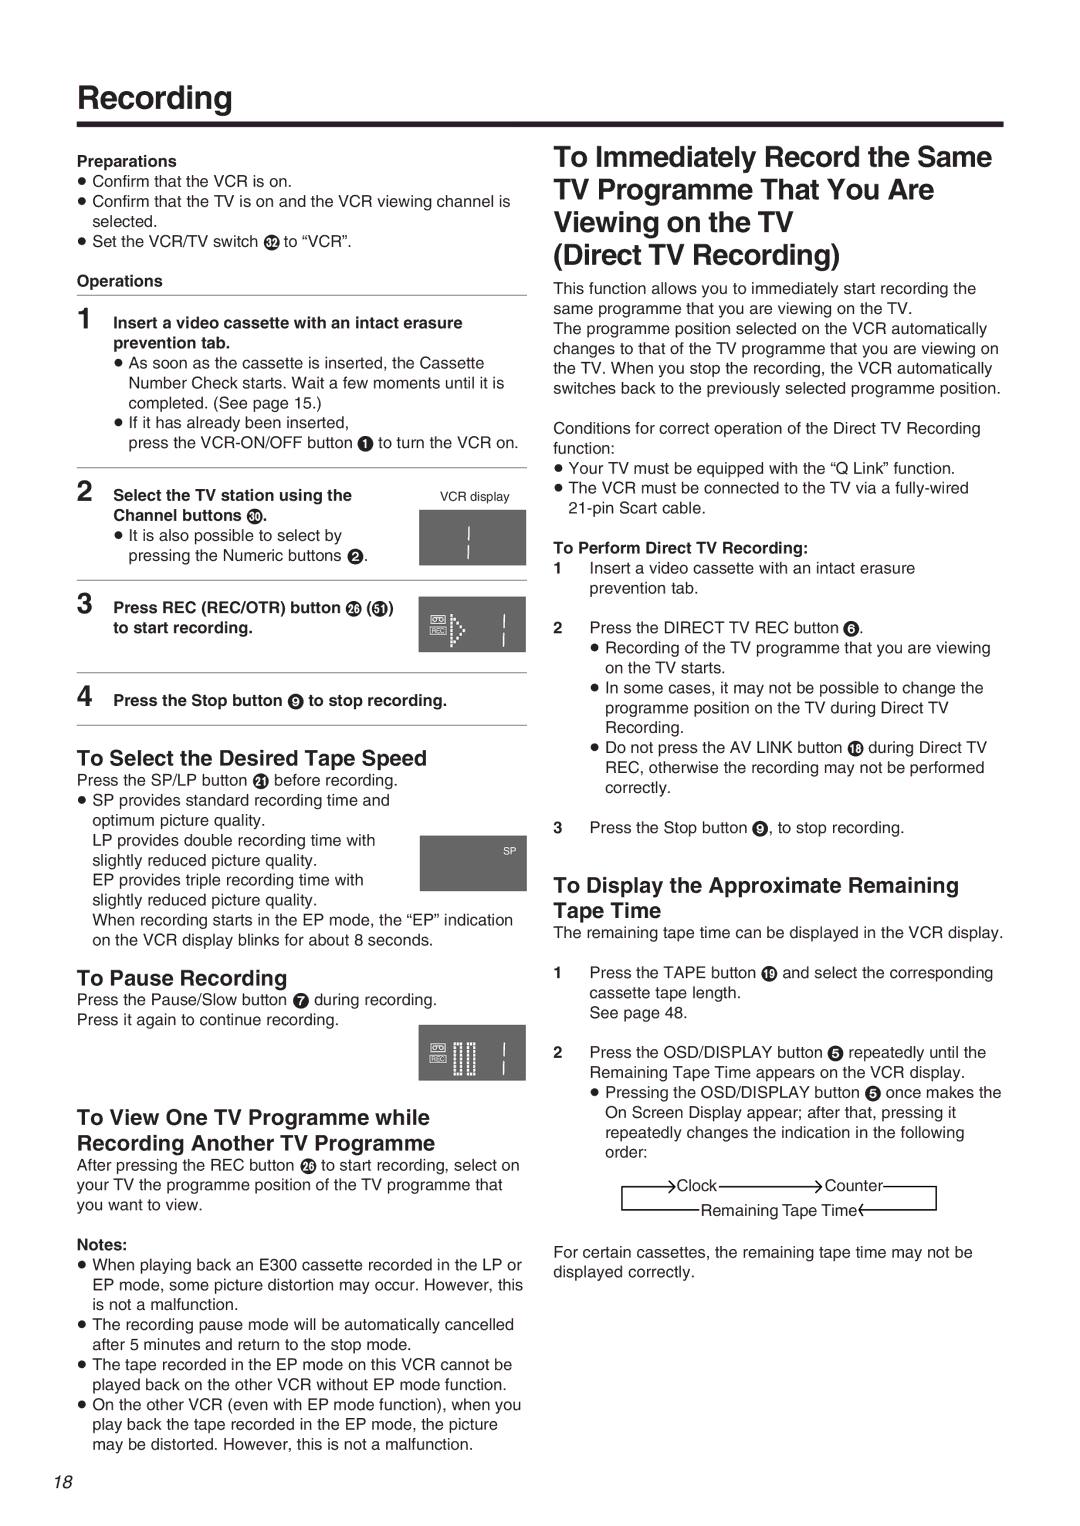
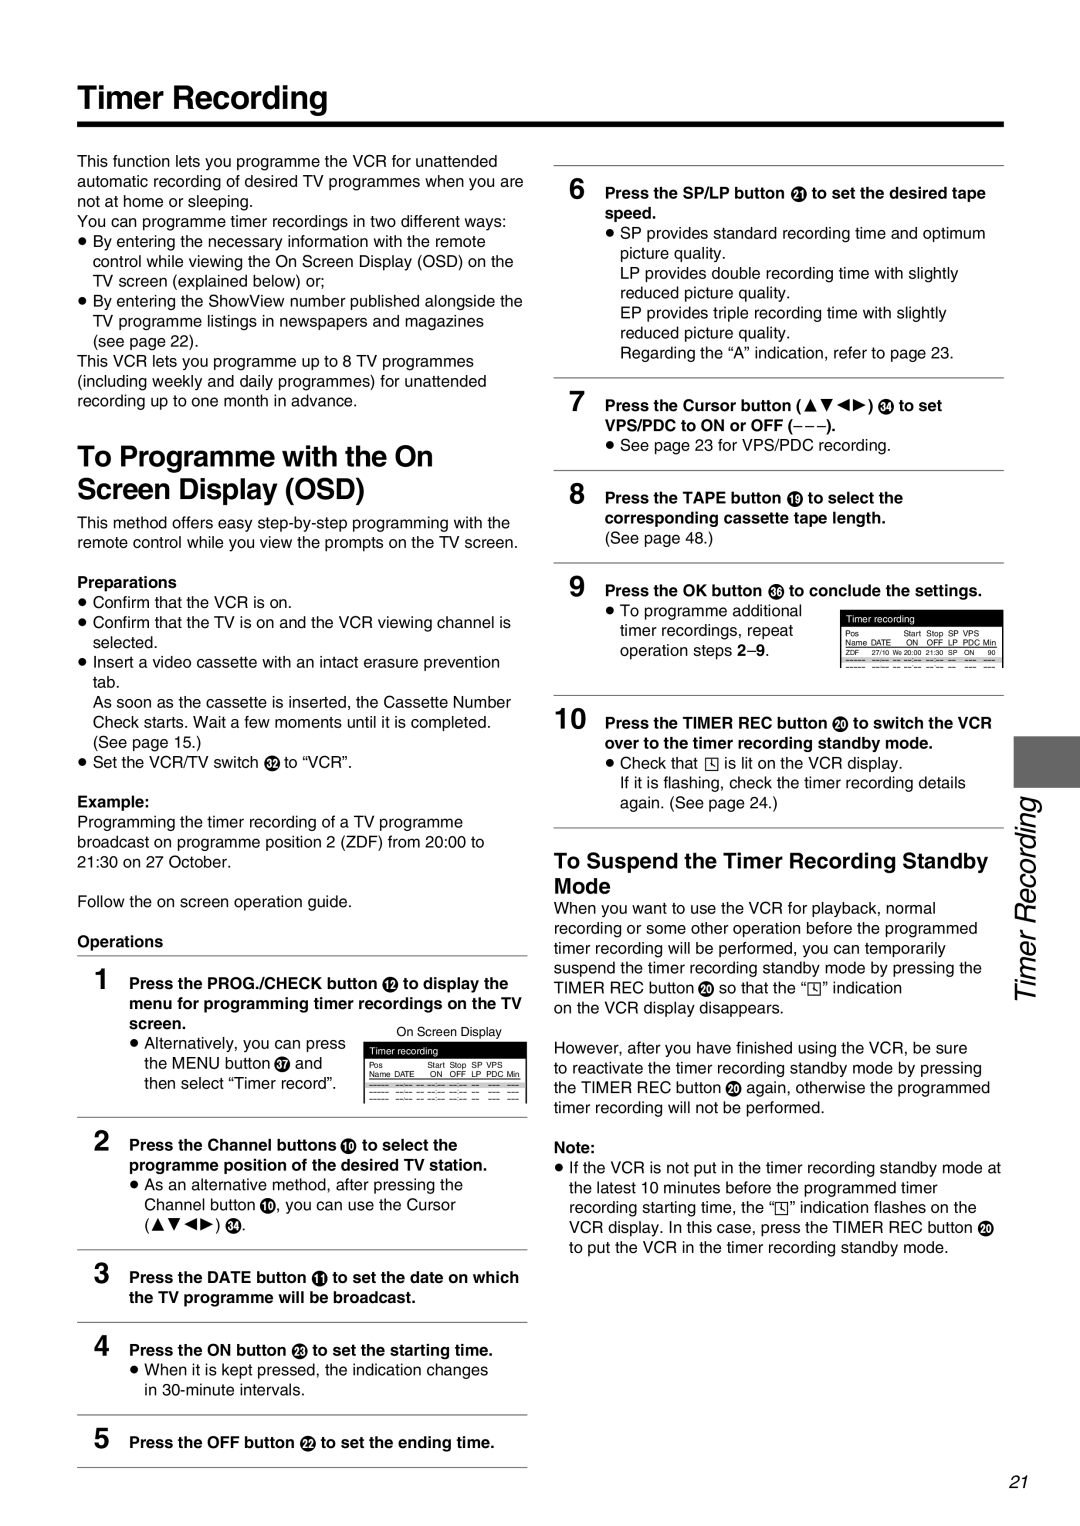
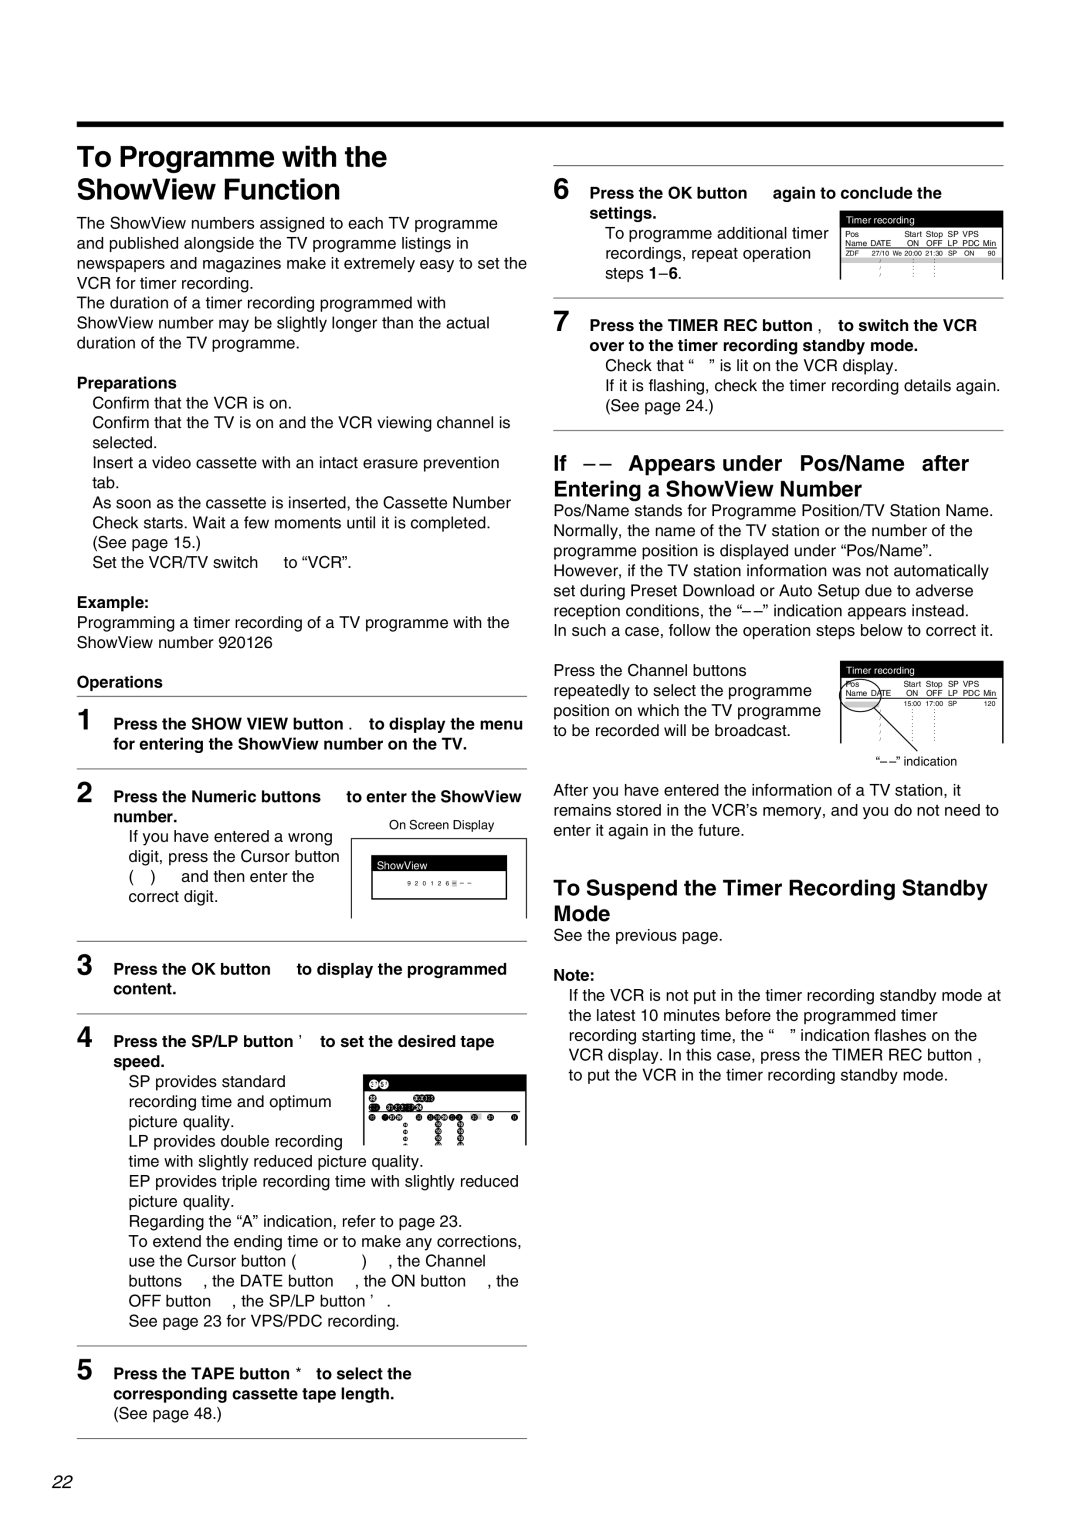
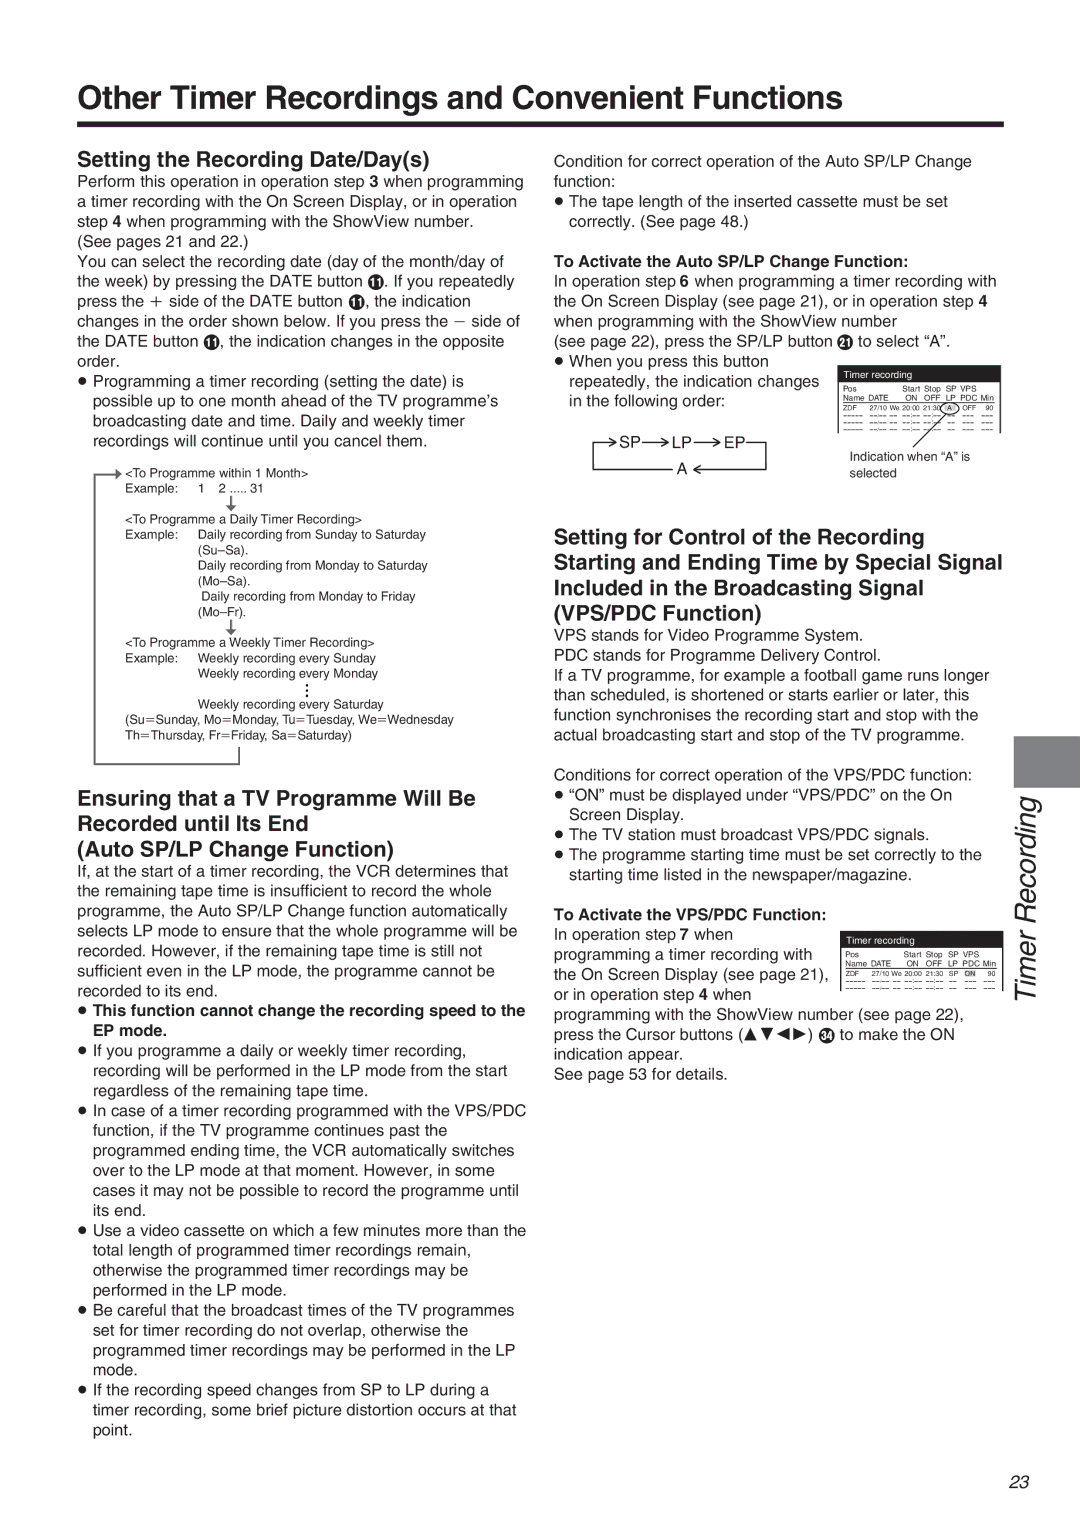
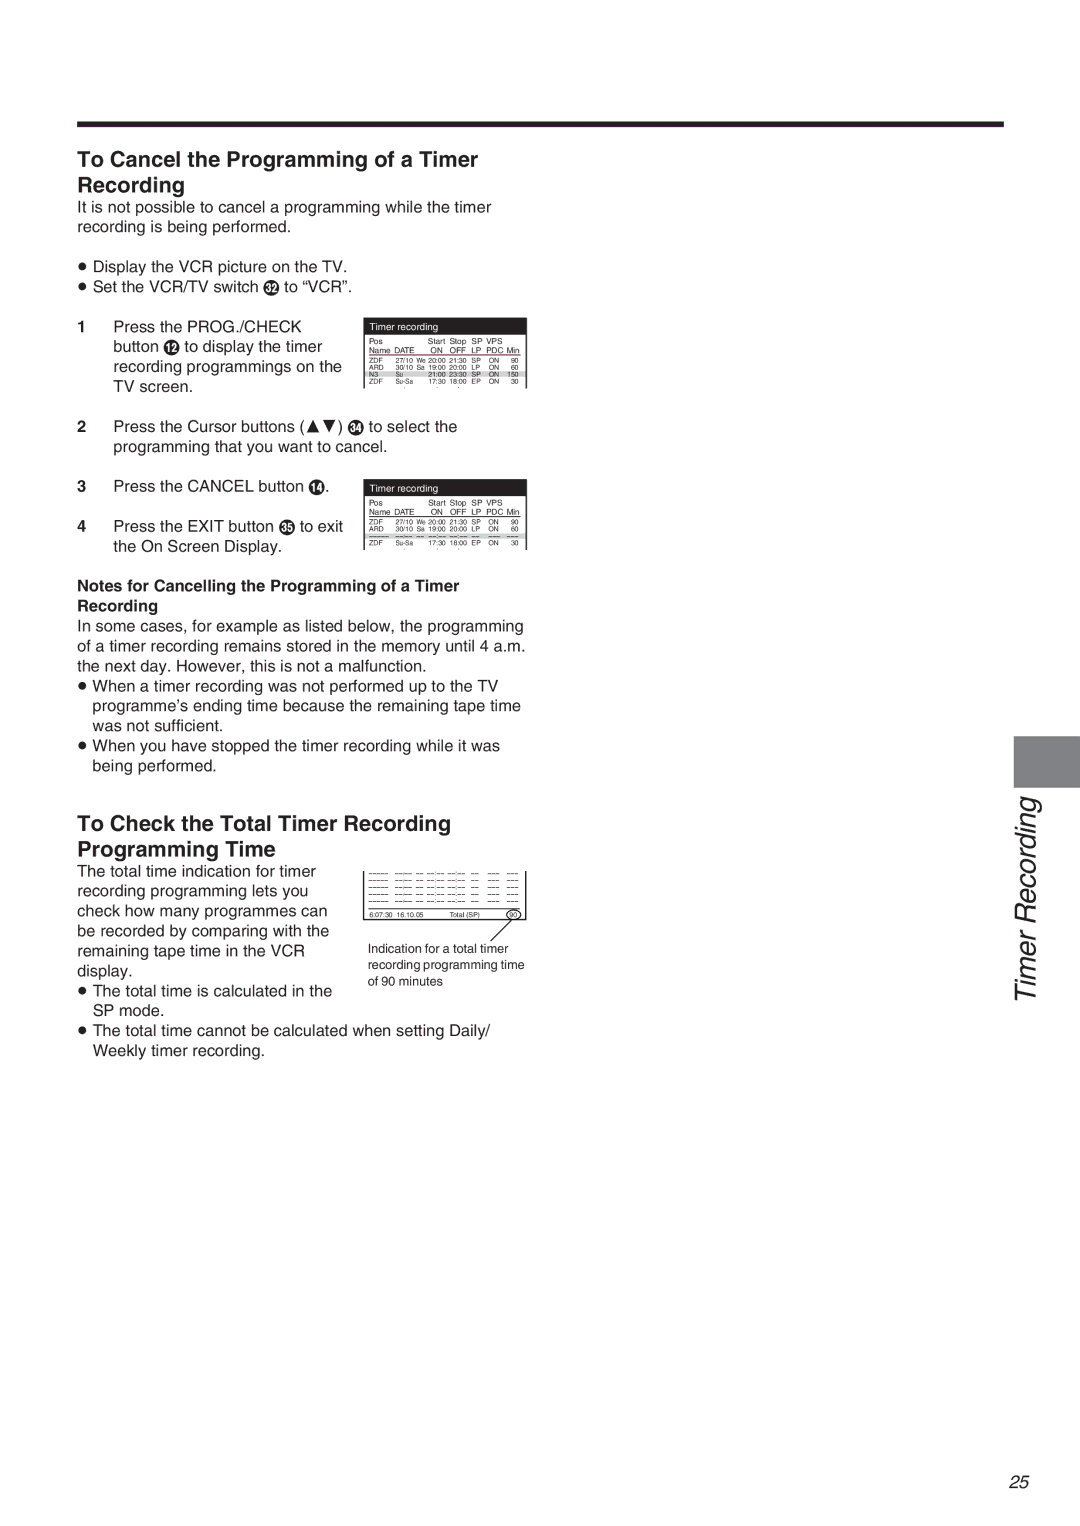
To Manually Adjust the Audio Recording Level

This VCR adjusts the recording level automatically to prevent sound distortion due to excessive peaks.

However, if you want to manually adjust the audio recording level, perform the operation steps below before you start the actual recording. We recommend you to adjust the level so that it peaks at approximately i4 dB on the recording level indicator.

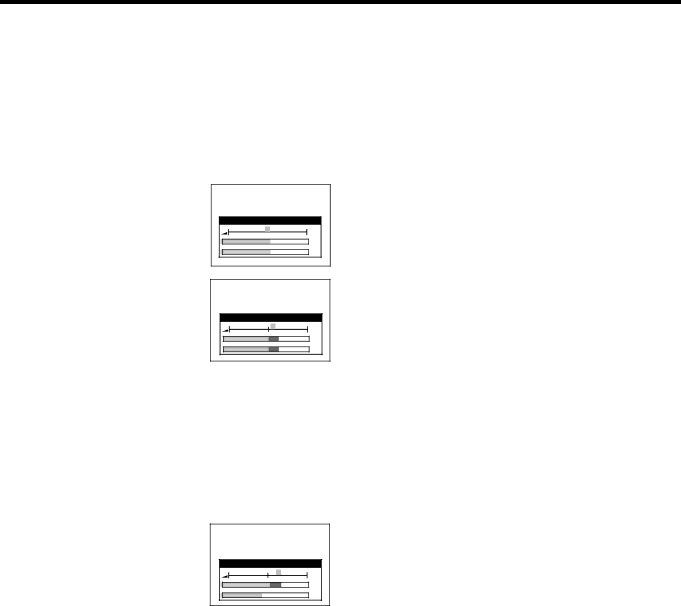
1Before recording, press the AUDIO button ?.

On Screen Display

Audio Rec Level (Stereo)


L


0


R


0

40 25 12


L

3

0

3

6

9 r12 dB


R

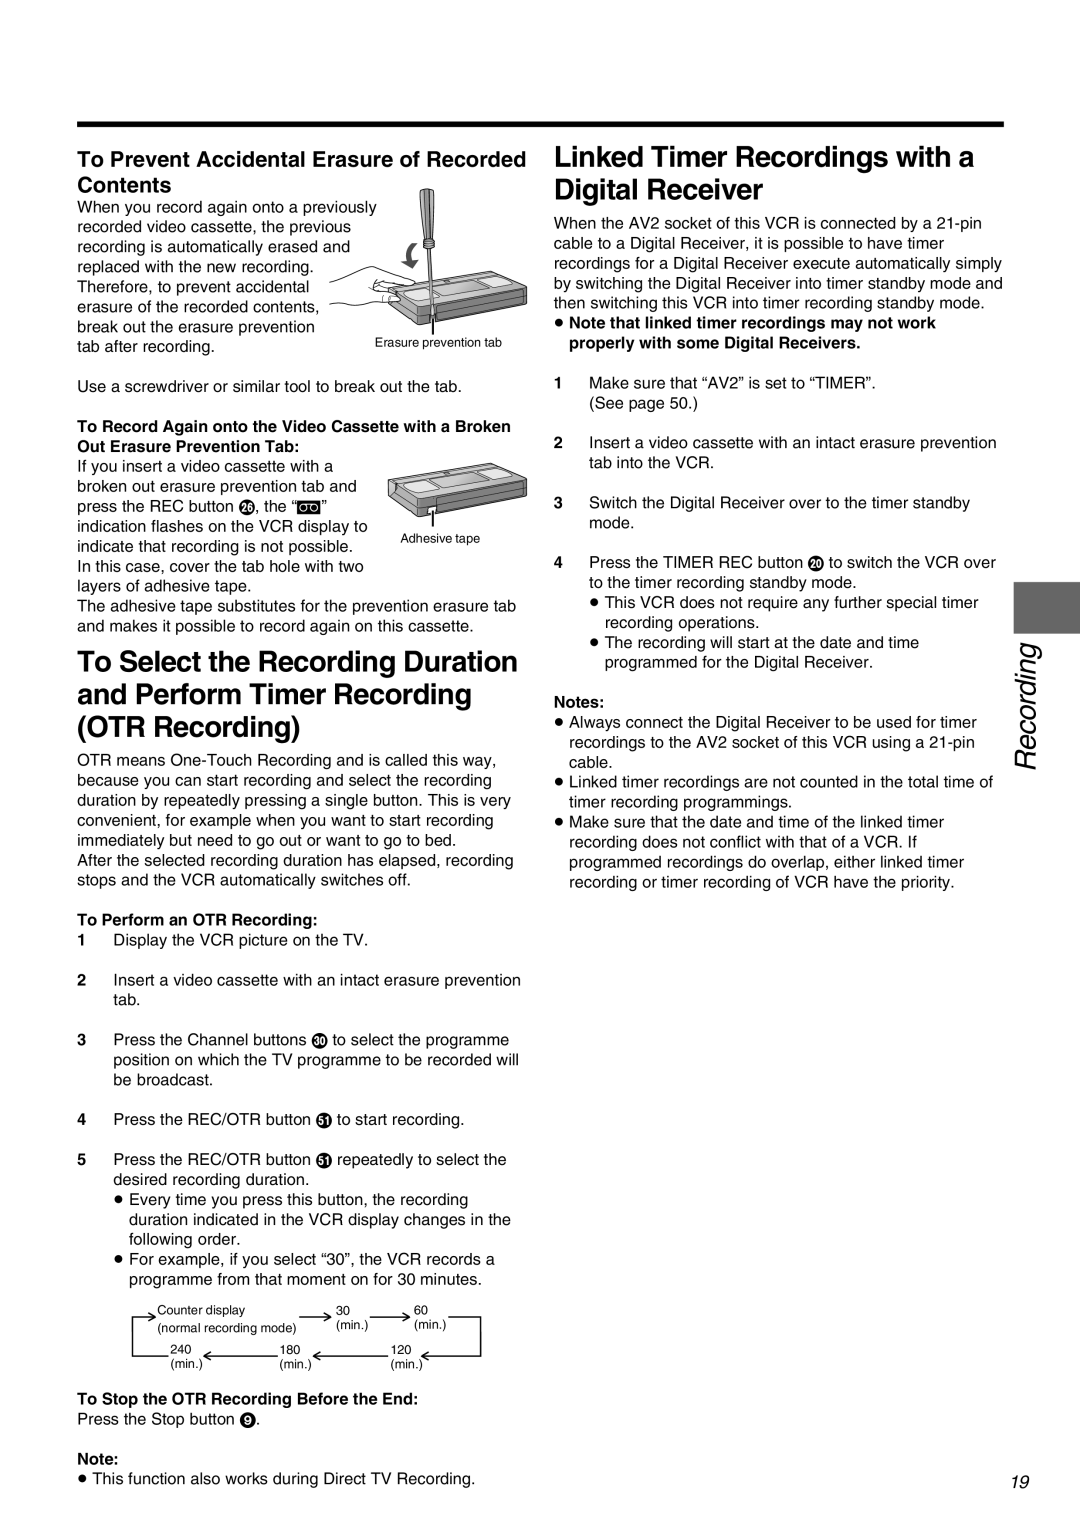
2-aTo adjust the left (L) and right

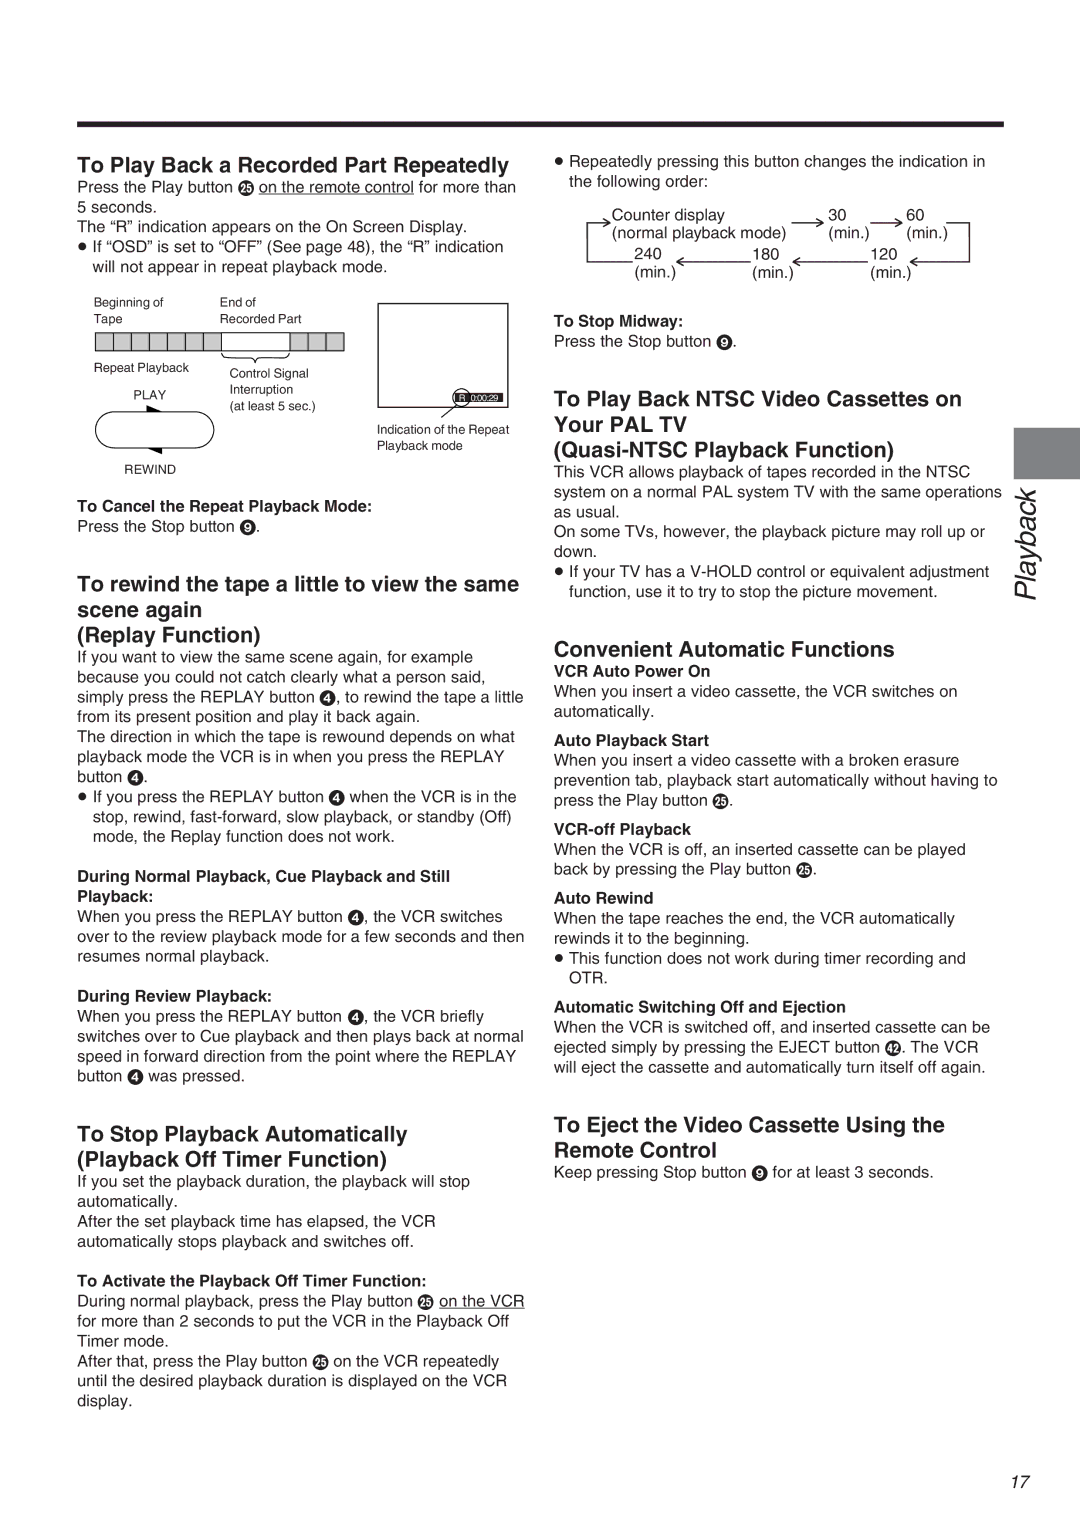
(R)channels simultaneously: Press the Cursor buttons (21) R to adjust the audio recording level.

Audio Rec Level (Stereo)


L

r 2


R

r 2

40 25 12 3 0


L

3

6 9 r12 dB


R

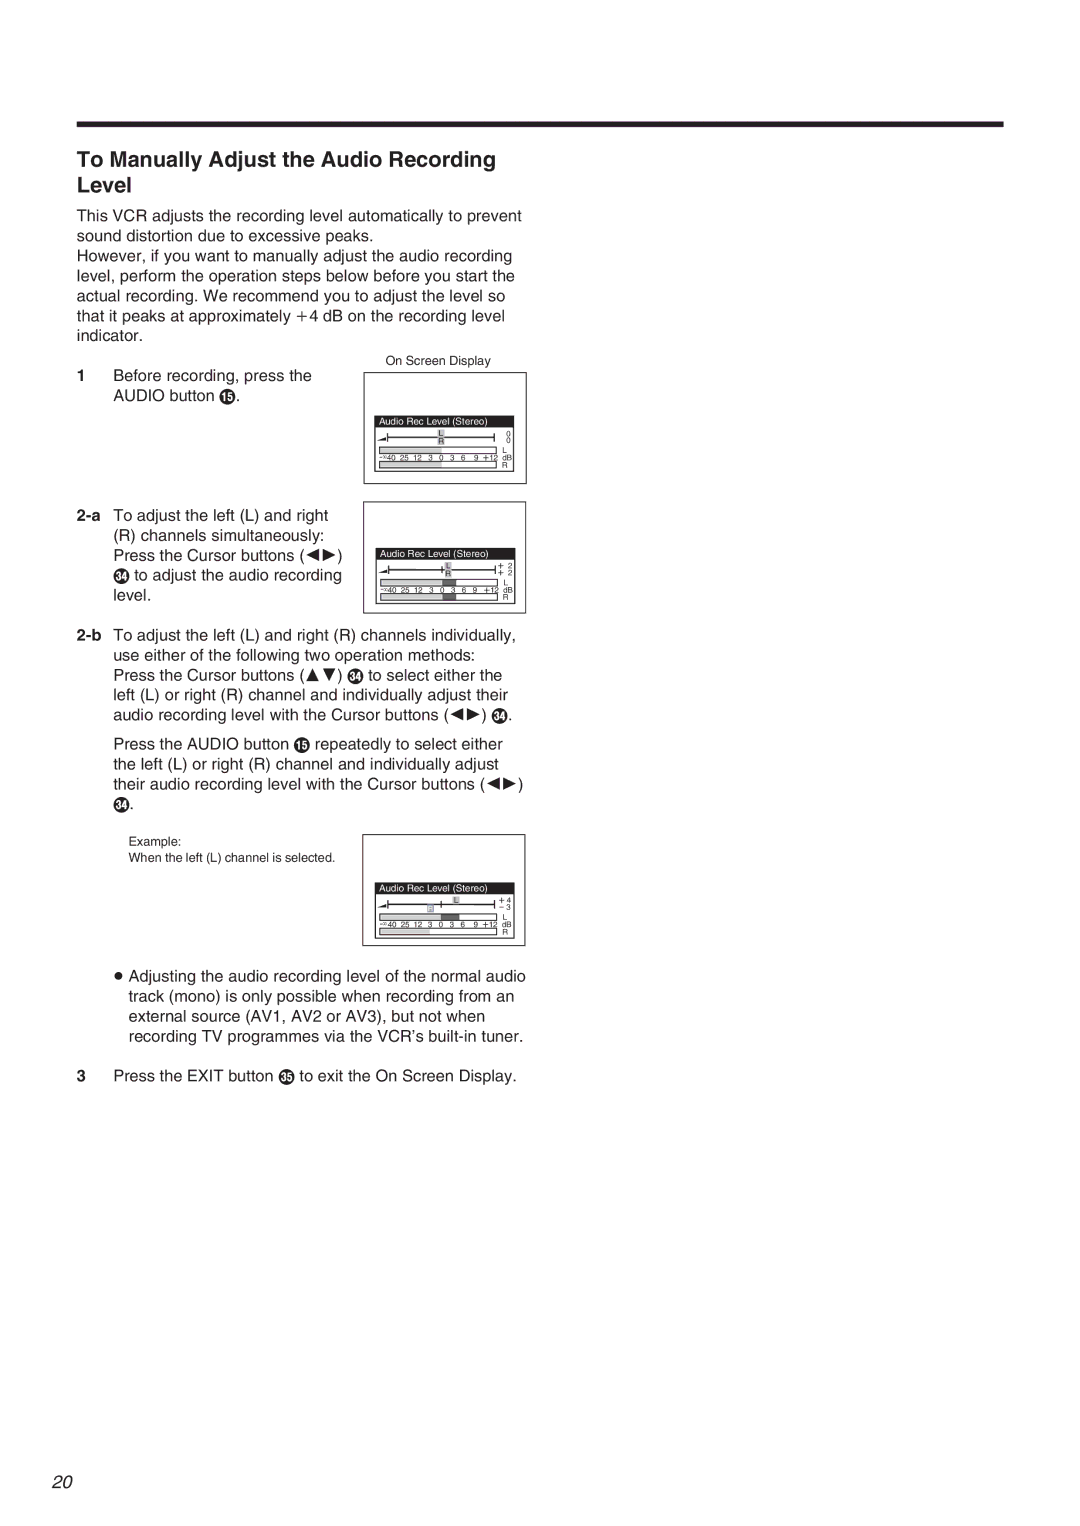
2-bTo adjust the left (L) and right (R) channels individually, use either of the following two operation methods: Press the Cursor buttons (34) R to select either the left (L) or right (R) channel and individually adjust their audio recording level with the Cursor buttons (21) R.

Press the AUDIO button ? repeatedly to select either the left (L) or right (R) channel and individually adjust their audio recording level with the Cursor buttons (21) R.

Example:

When the left (L) channel is selected.

Audio Rec Level (Stereo)


L

r 4


R


s 3

40 25 12


L

3

0

3

6

9 r12 dB


R

Adjusting the audio recording level of the normal audio track (mono) is only possible when recording from an external source (AV1, AV2 or AV3), but not when recording TV programmes via the VCR’s built-in tuner.

3Press the EXIT button S to exit the On Screen Display.

20
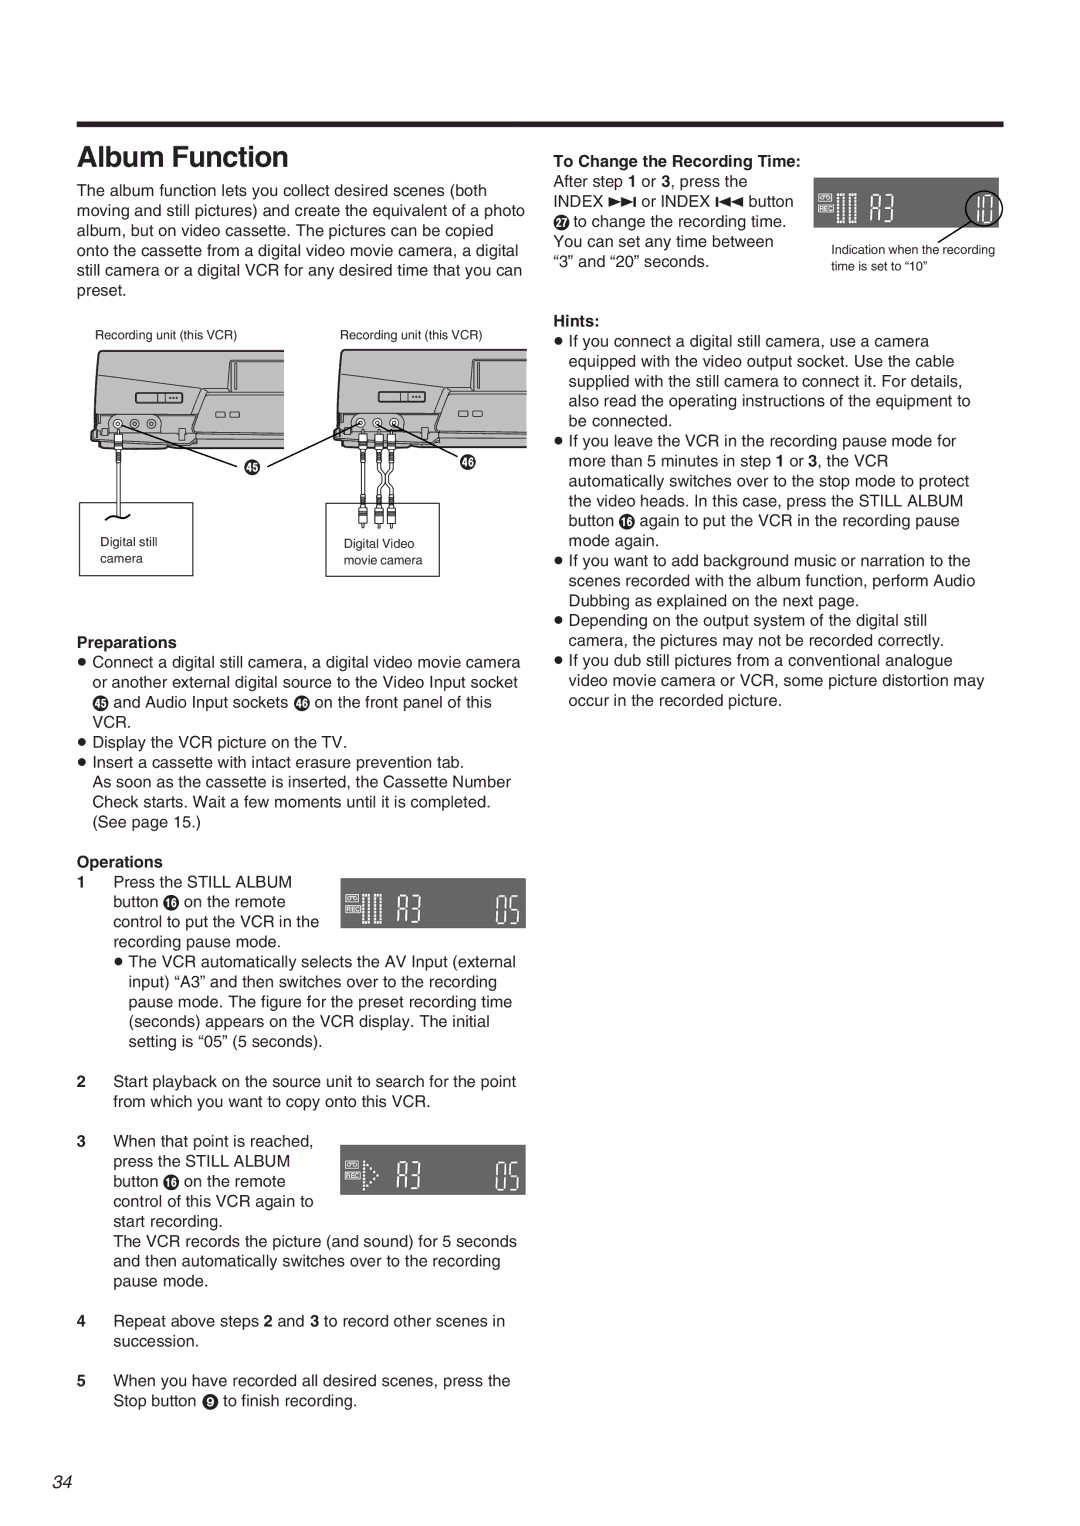
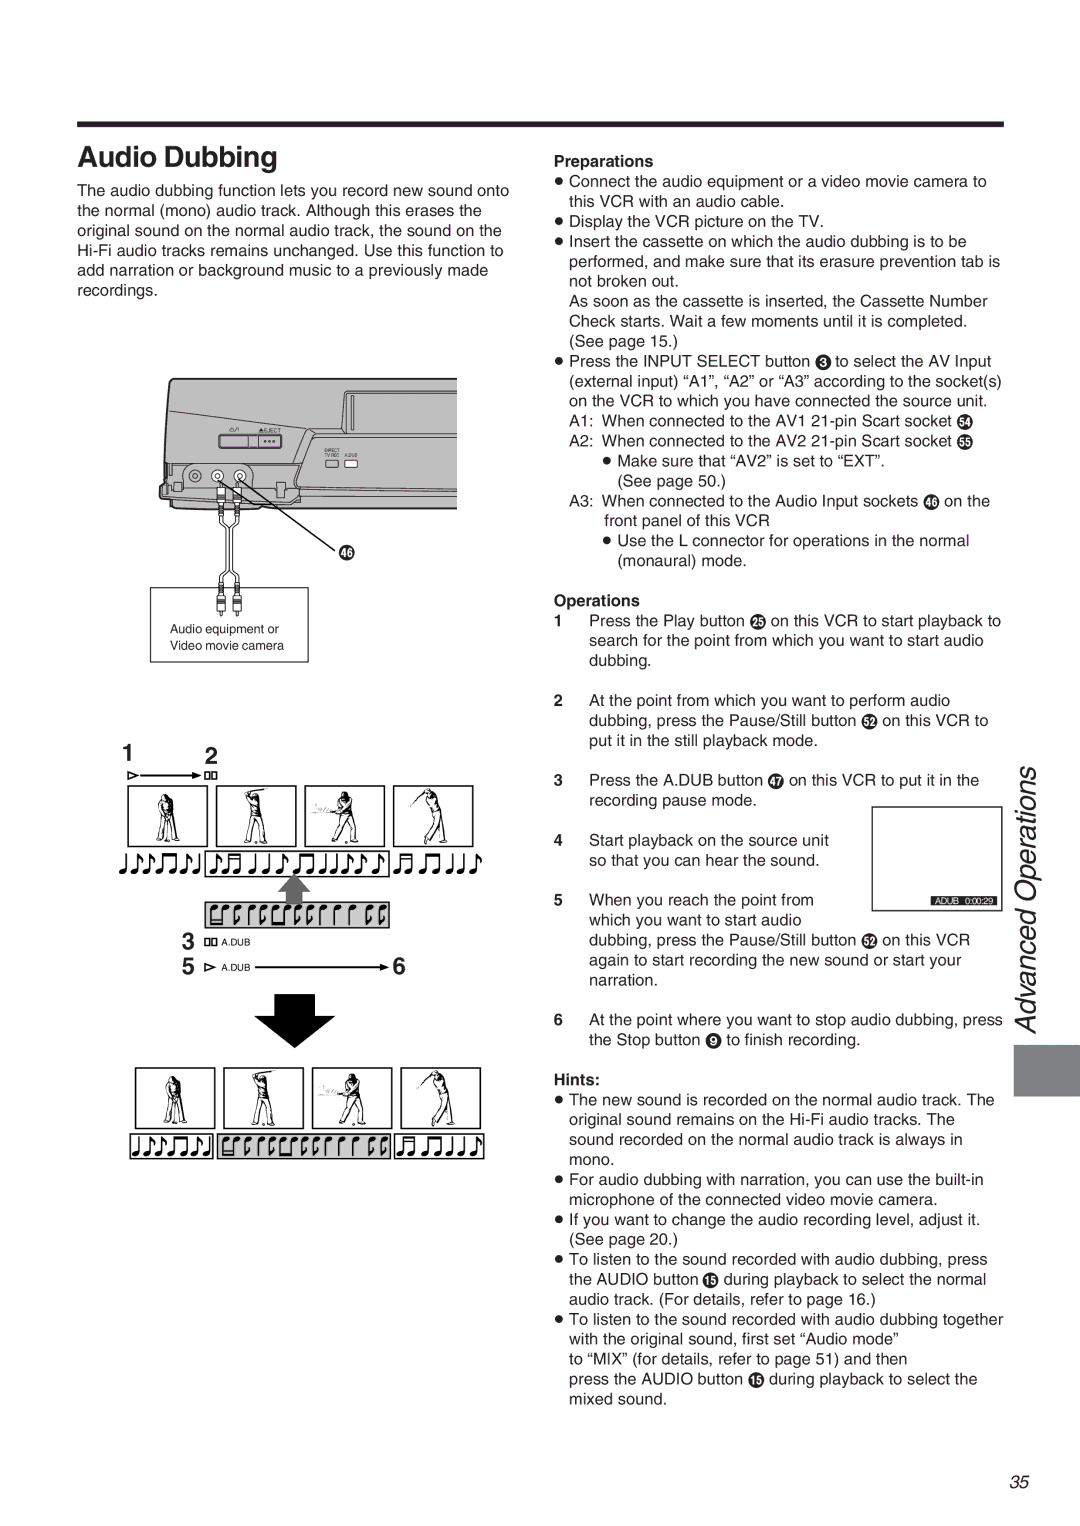
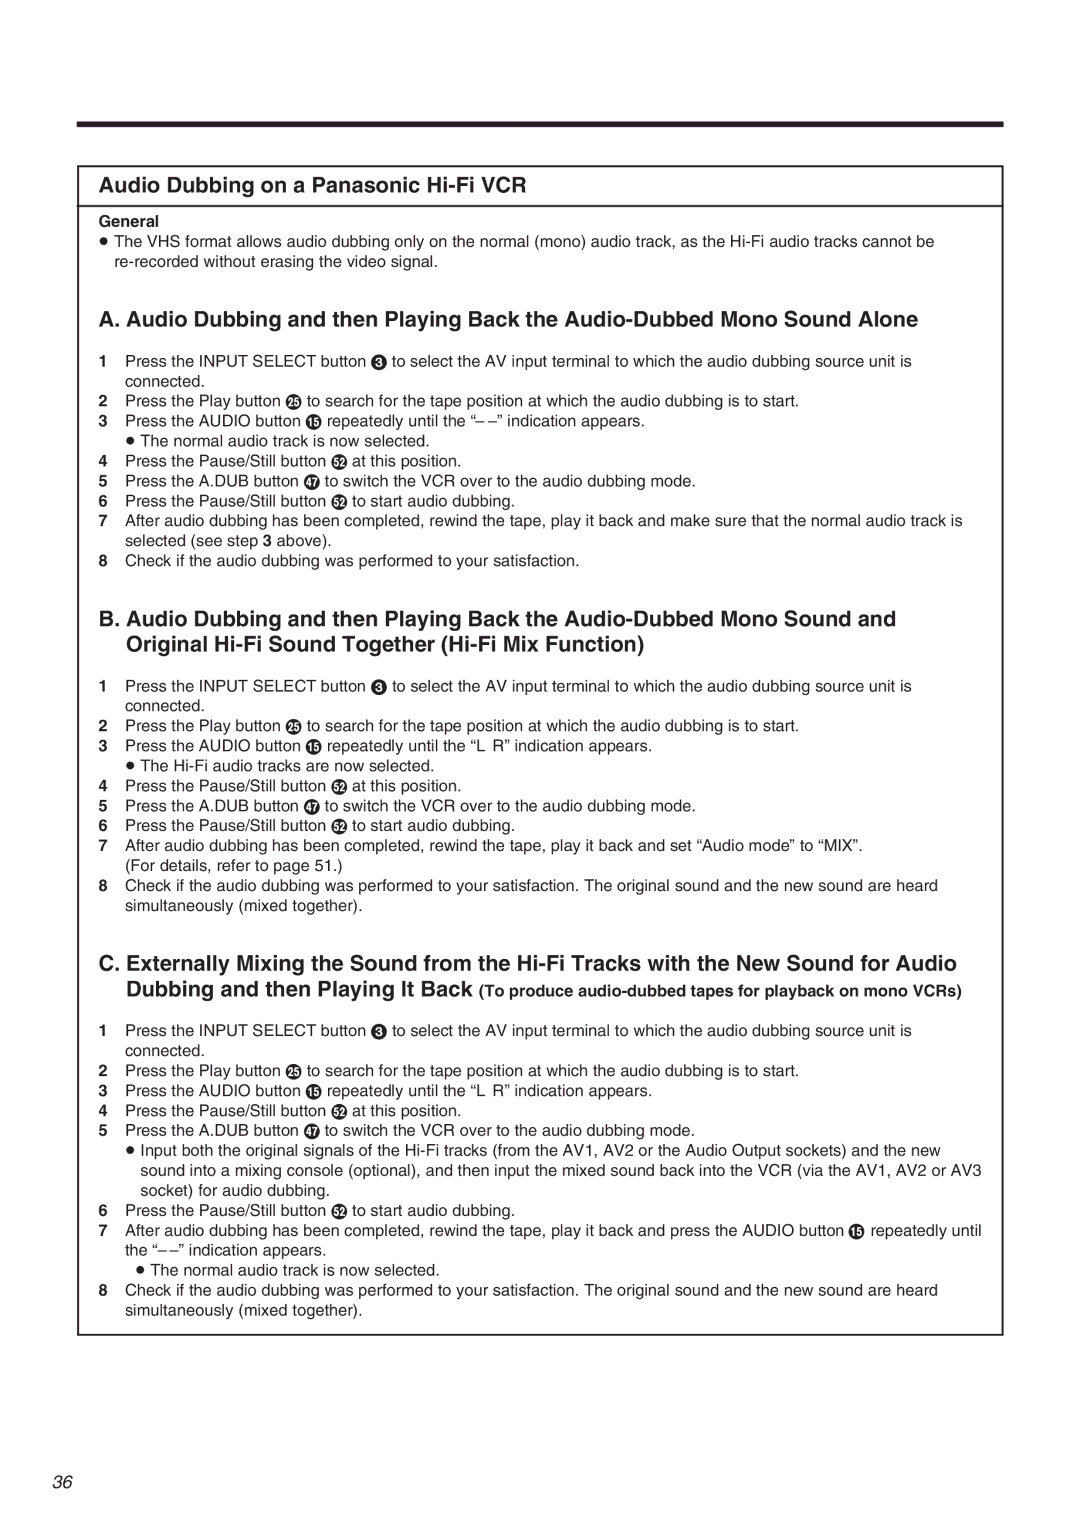
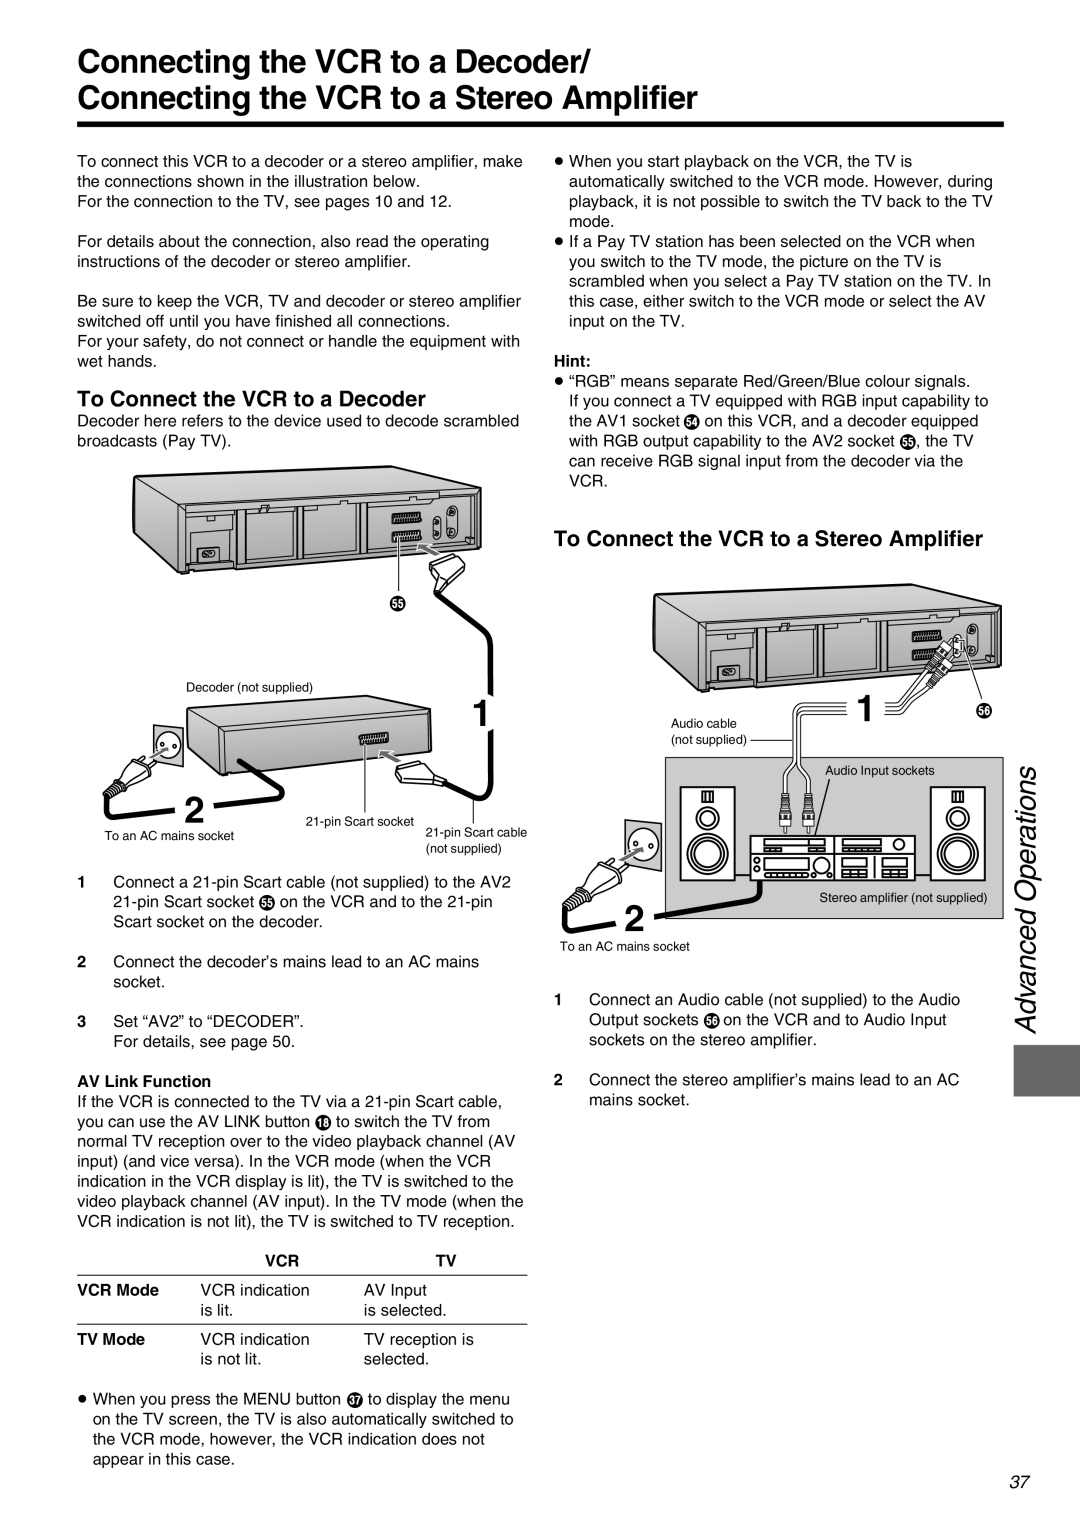
Image 20
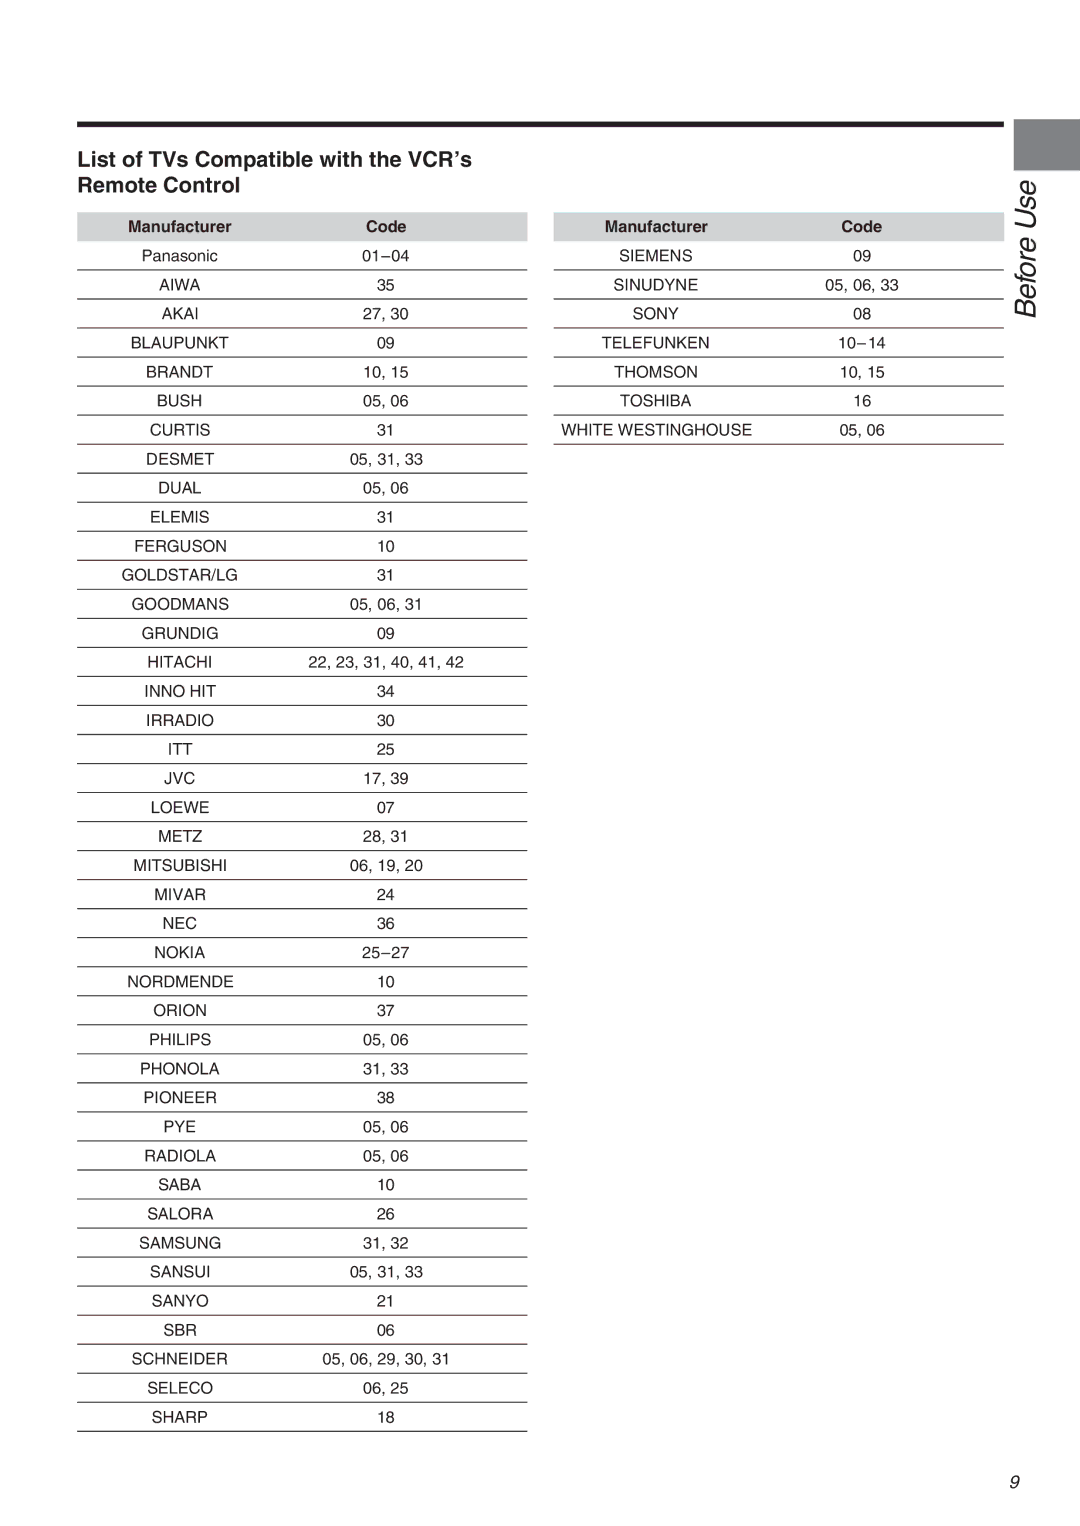
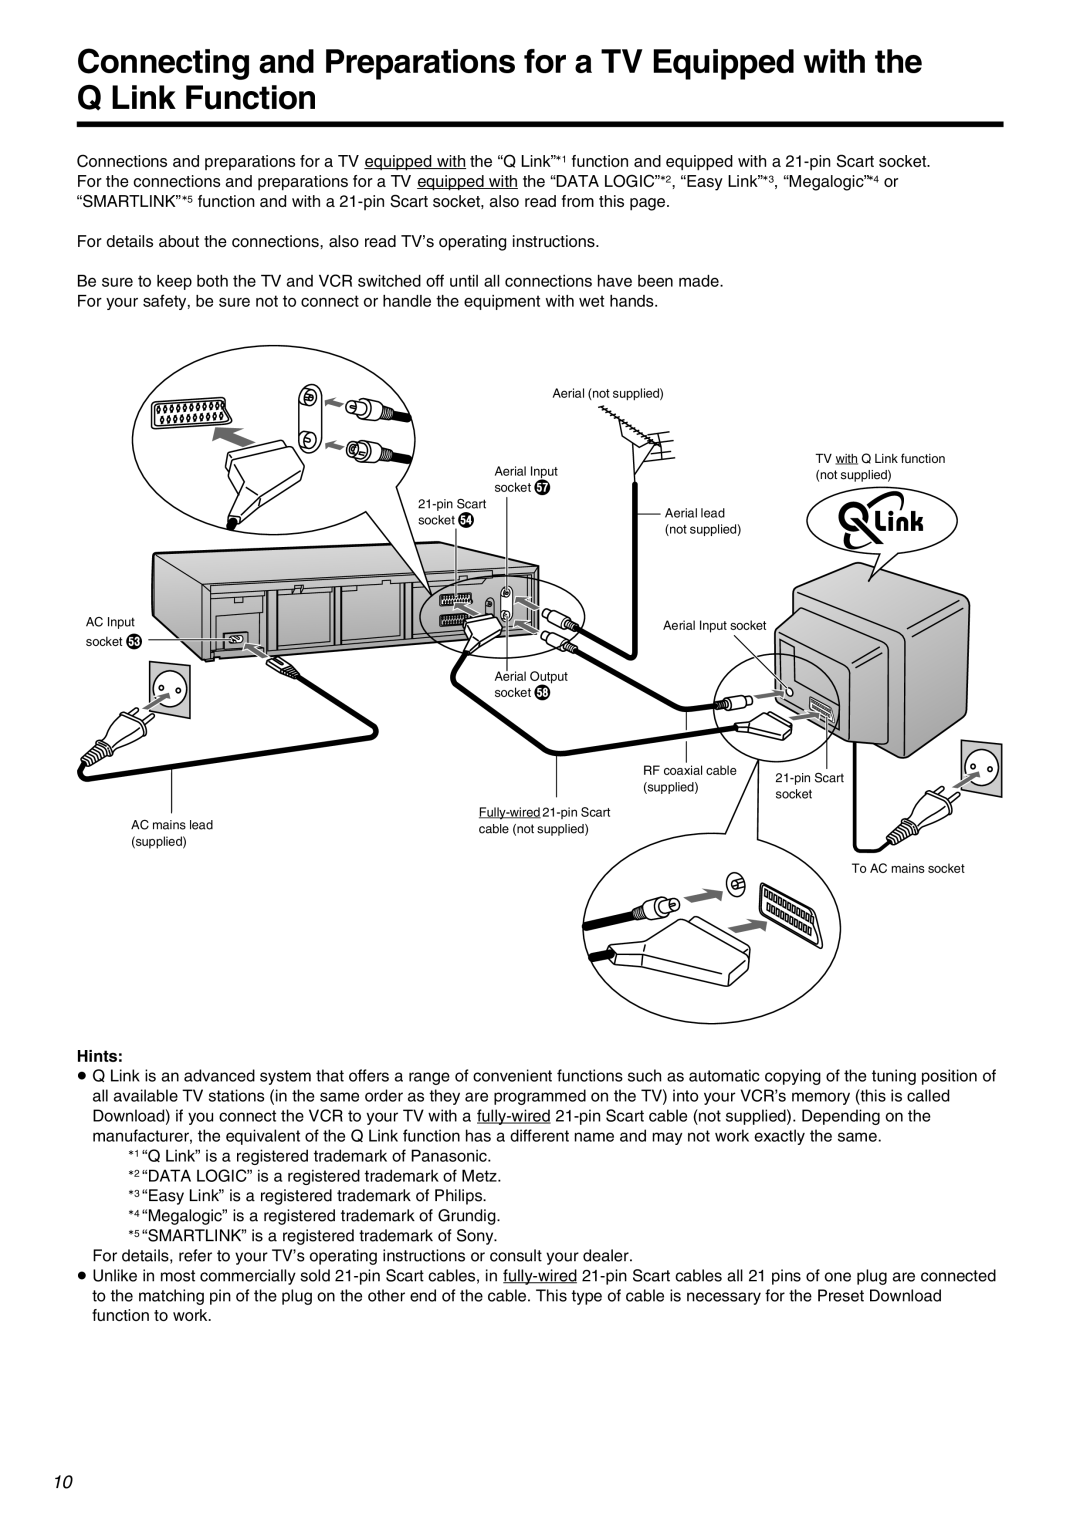
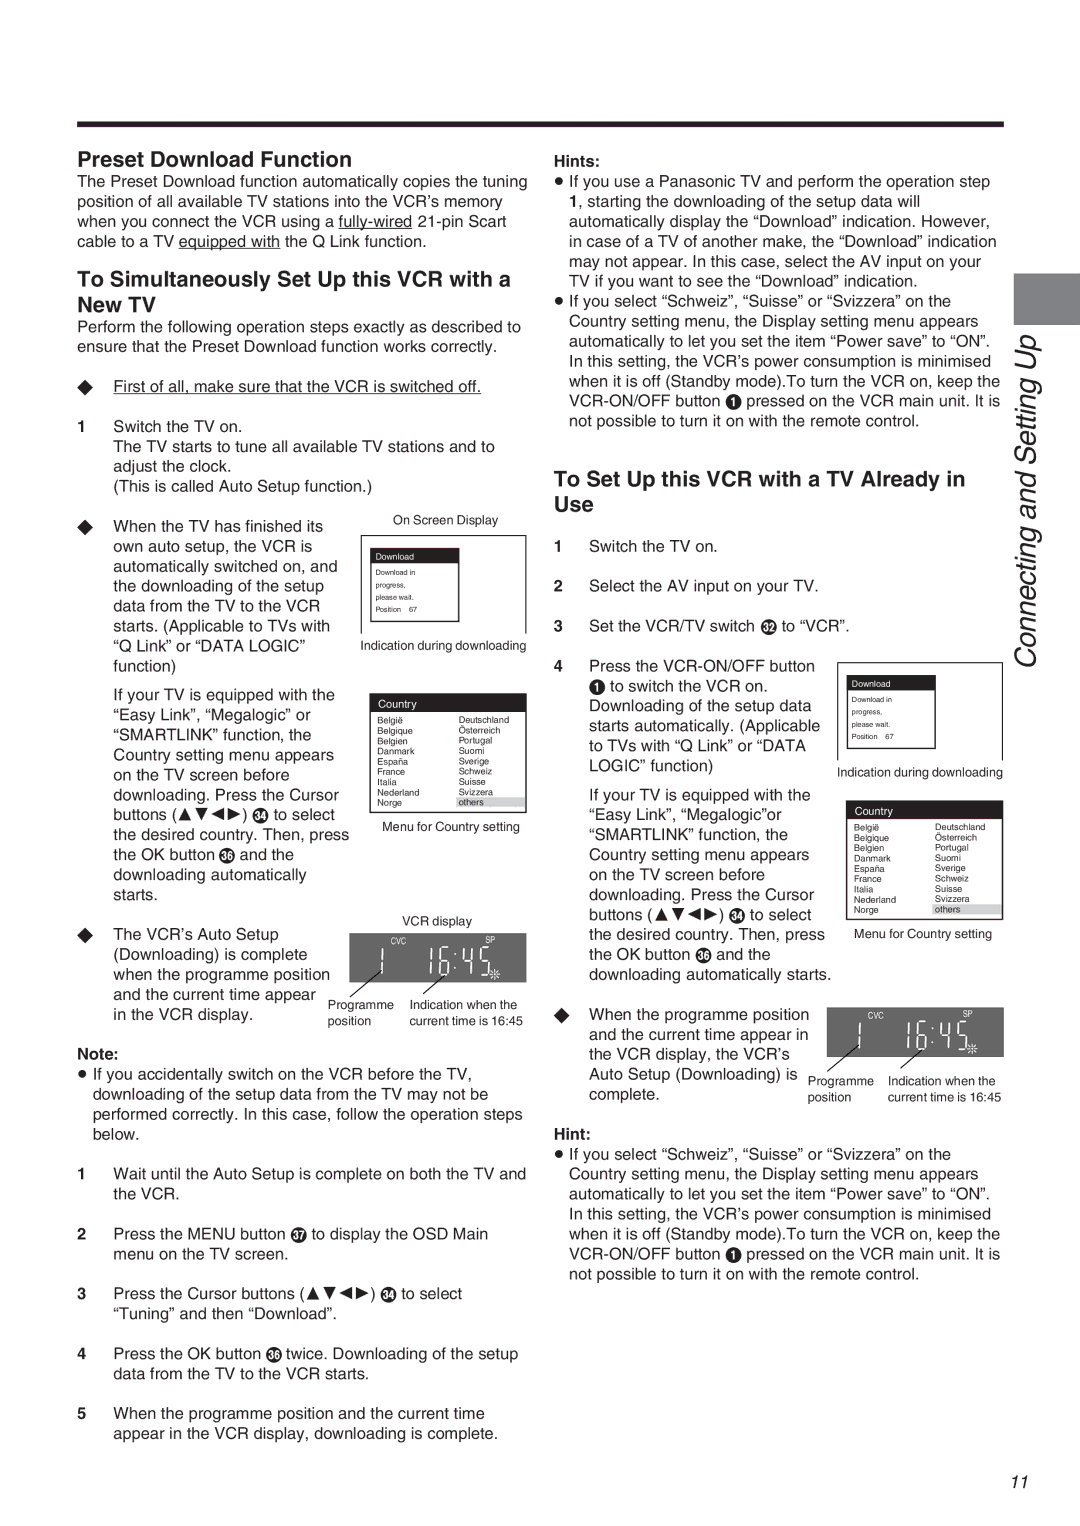
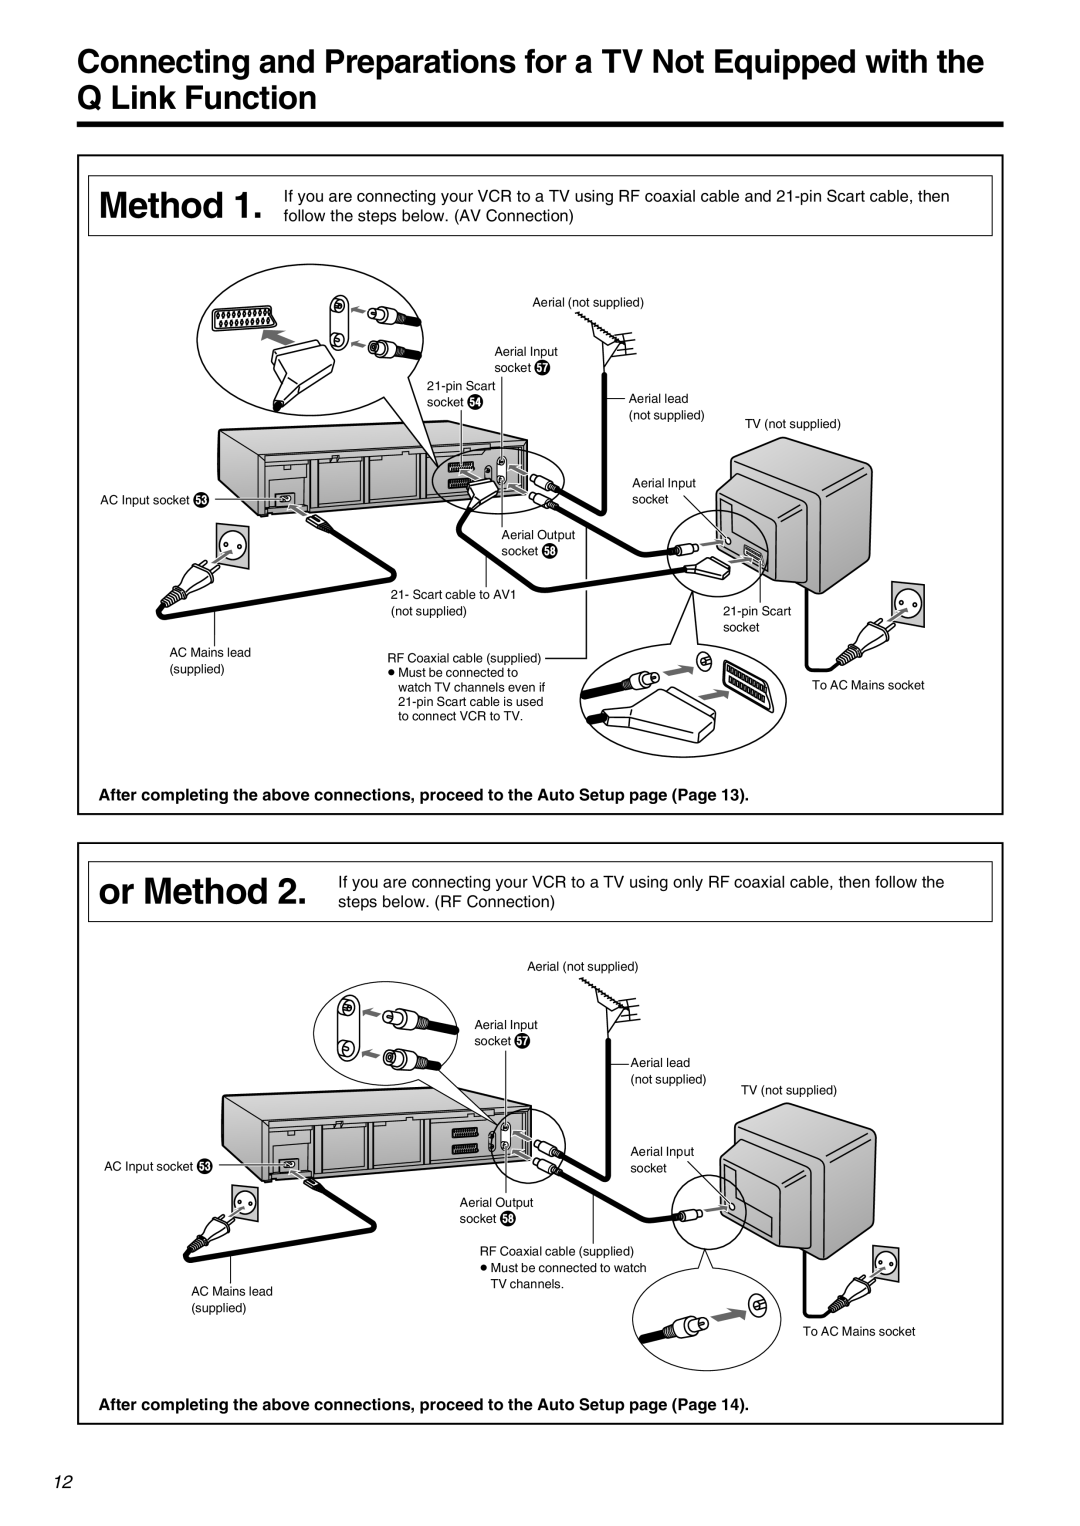
Contents NV-FJ710 Series Contents Dear CustomerControls and Components H ijTo Cancel the Child Lock Function VCR OperationNumeric buttons To Activate the Child Lock FunctionBefore Checking the Accessories/Preparing the Remote ControlUse Avoid sudden changes in temperature Keep the VCR away from high temperaturesCleaning the VCR Avoid humidity and dustRemarks Before UseDo not Remove Outer Cover Setting the Remote Control to Operate Your TV TV OperationList of TVs Compatible with the VCR’s Remote Control Manufacturer CodeHints Setting ConnectingOr Method To Confirm that the TV Stations Have Been Auto Setup FunctionTuned Correctly by the Auto Setup Function ≥ If you select Schweiz When You Insert a Video Cassette Setting UpWhen inserting a cassette that was recorded on this VCR If you want to cancel the Cassette Number Check midwayPlayback To Play back S-VHS Cassette Tape SQPBuS-VHS Quasi PlaybackTo Play Back a Recorded Part Repeatedly Convenient Automatic FunctionsRecording To Select the Desired Tape SpeedTo Pause Recording To Display the Approximate Remaining Tape TimeRecording Linked Timer Recordings with a Digital ReceiverTo Prevent Accidental Erasure of Recorded Contents To Manually Adjust the Audio Recording Level Timer Recording To Suspend the Timer Recording StandbyTo Programme with the On Screen Display OSD ModeTo Programme with ShowView Function To Suspend the Timer Recording Standby ModePress the OK button T again to conclude Settings Other Timer Recordings and Convenient Functions TimerSetting the Recording Date/Days To Activate the Auto SP/LP Change FunctionTo Change a Timer Recording Programming Programming a Timer Recording of a Satellite ProgrammeTo Check the Contents of Timer Recording Programmings To Check the Total Timer Recording Programming Time Timer RecordingTo Cancel the Programming of a Timer Recording Tape Library System Precautions for RecordingHow to Read the Tape Library Contents To Check on Which Cassette a Desired Programme Is Recorded To Check the Tape Library DataTape Desired programme title To Manually Enter or Editing a Title or Category Tape Library SystemPress the OK button T again if you are sure that you To Restore Deleted Tape Library Data To Demonstrate the Tape Library SystemTo Cancel the Index Search or to Stop Playback To Cancel the Intro-Jet Scan or to Stop PlaybackSearch Functions OperationAdvanced Operations EditingAssemble Editing Album Function To Change the Recording TimeAudio Dubbing Audio Dubbing on a Panasonic Hi-Fi VCR GeneralVCR Mode TV ModeTo Connect the VCR to a Decoder To Connect the VCR to a Stereo AmplifierHow to install the satellite receiver Preparation To Prepare the Satellite Receiver Standby Typ Action YesTo select SAT 9 Enter To select SAT 19 EnterVarious Settings To Enter or Change the Name of a TV StationTo Preset Pay TV Stations List of TV Reception ChannelsTo Change the Channel Number of an Already Tuned TV Station Channel TV Channel Indication Germany/Italy Other CountriesTo Change the Type of Video System Colour TV system To Change the Subtitle Teletext Page Number SubtitlesTo Change the Title Teletext Page Number Title Various Settings To Restart the Download To Activate the Automatic Time Correction Function Setting the VCR’s ClockTo Manually Adjust the Clock Other Convenient Functions Various Settings Settings for the Main Menu Item DisplayPress the Menu button U to display the Main menu on Settings for the Main Menu Item Functions To Set the Playback Picture Sharpness Sharper or SofterTo Set the Remote Control Mode To Set the Audio Mode to Be Used During PlaybackLanguage Setting Country SettingNicam Broadcasting System NV-FJ710EC/ECM/ECY Series GlossaryVPS Video Programme System/ PDC Programme Delivery Control Pin Scart Socket Link FunctionCrystal View Control CVC Before Requesting Service √ On Screen Display Messages√ The VCR Does Not Work Correctly √ Playback Does Not Work Properly√ The Remote Control Does Not Work Correctly √ Recording Is Not Possible or Does Not Work Properly√ The Satellite Receiver Cannot Be Controlled Correctly √ The Tape Library System Does Not Work CorrectlyAdjusting the Playback Picture If the Still Picture Scrolls Up or Down V-Lock AdjustmentPrecautions To Return to Auto TrackingSpecifications