Trixter X-Bike manual Rear Bolts, Side Covers, Side Cover Bolts, Bottom Cover, Bottom cover bolts

Page 25

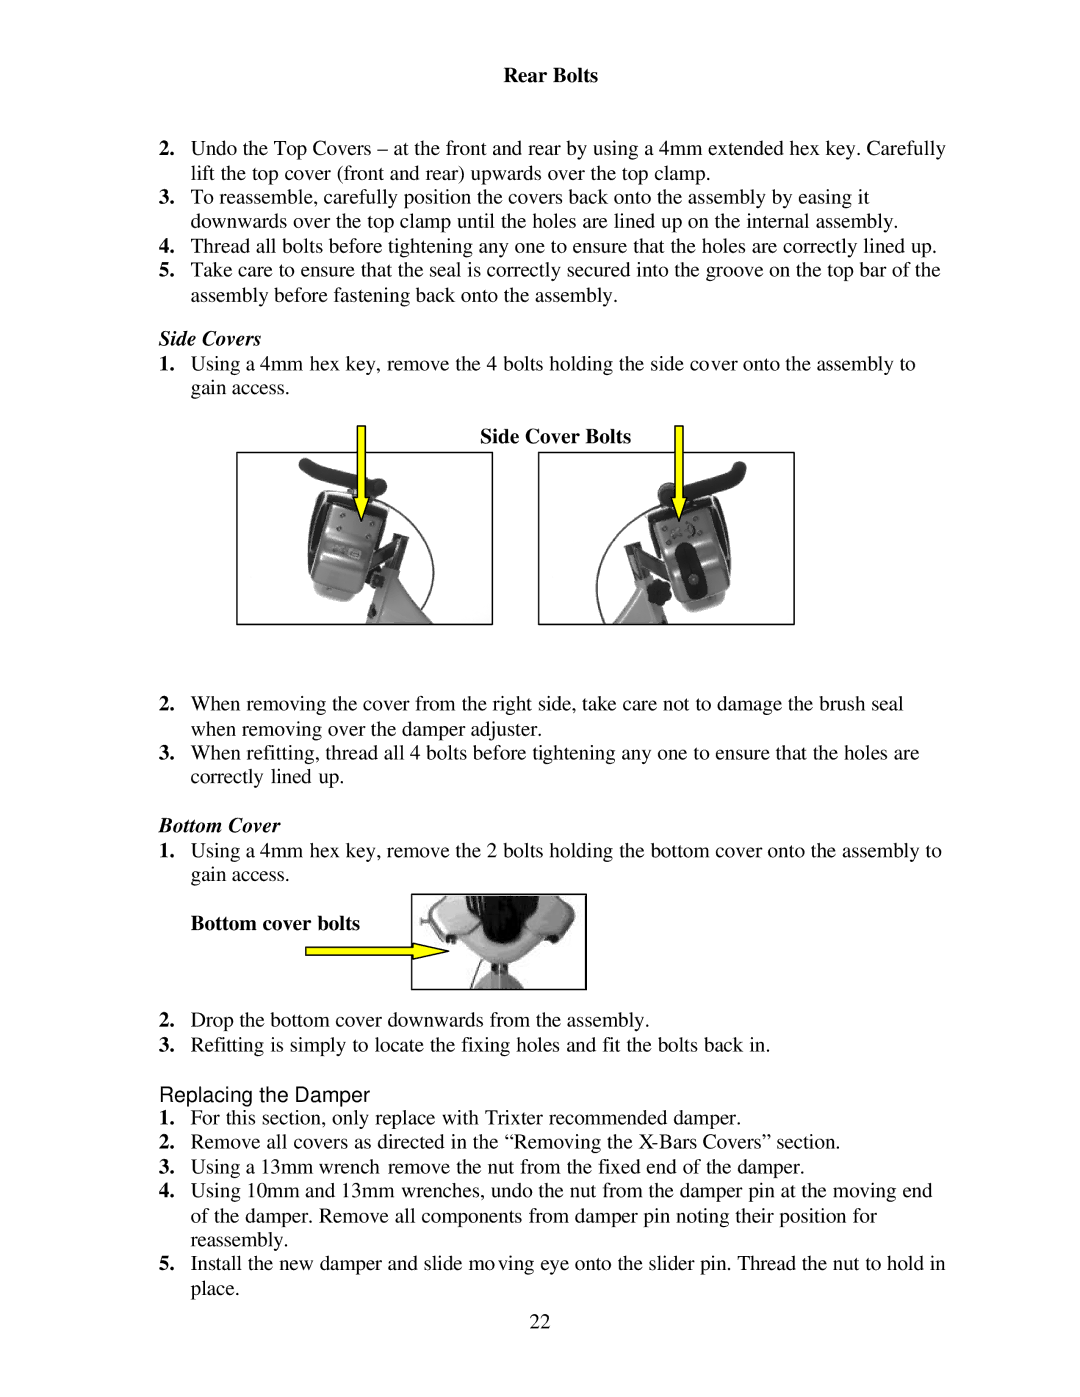
Rear Bolts

2.Undo the Top Covers – at the front and rear by using a 4mm extended hex key. Carefully lift the top cover (front and rear) upwards over the top clamp.

3.To reassemble, carefully position the covers back onto the assembly by easing it downwards over the top clamp until the holes are lined up on the internal assembly.

4.Thread all bolts before tightening any one to ensure that the holes are correctly lined up.

5.Take care to ensure that the seal is correctly secured into the groove on the top bar of the assembly before fastening back onto the assembly.

Side Covers

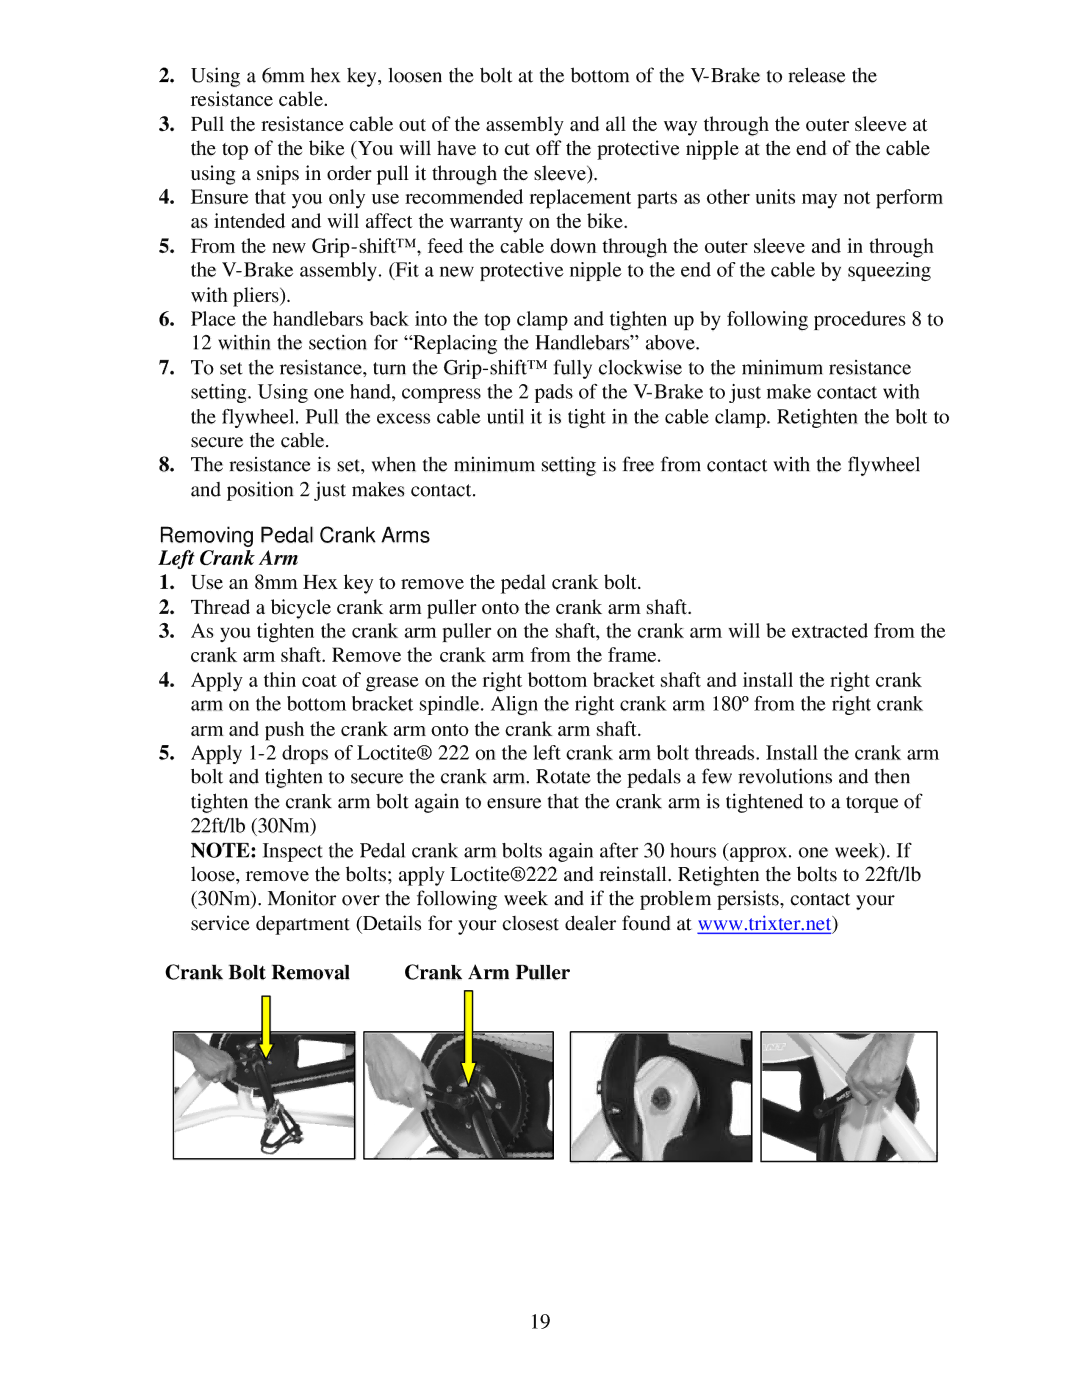
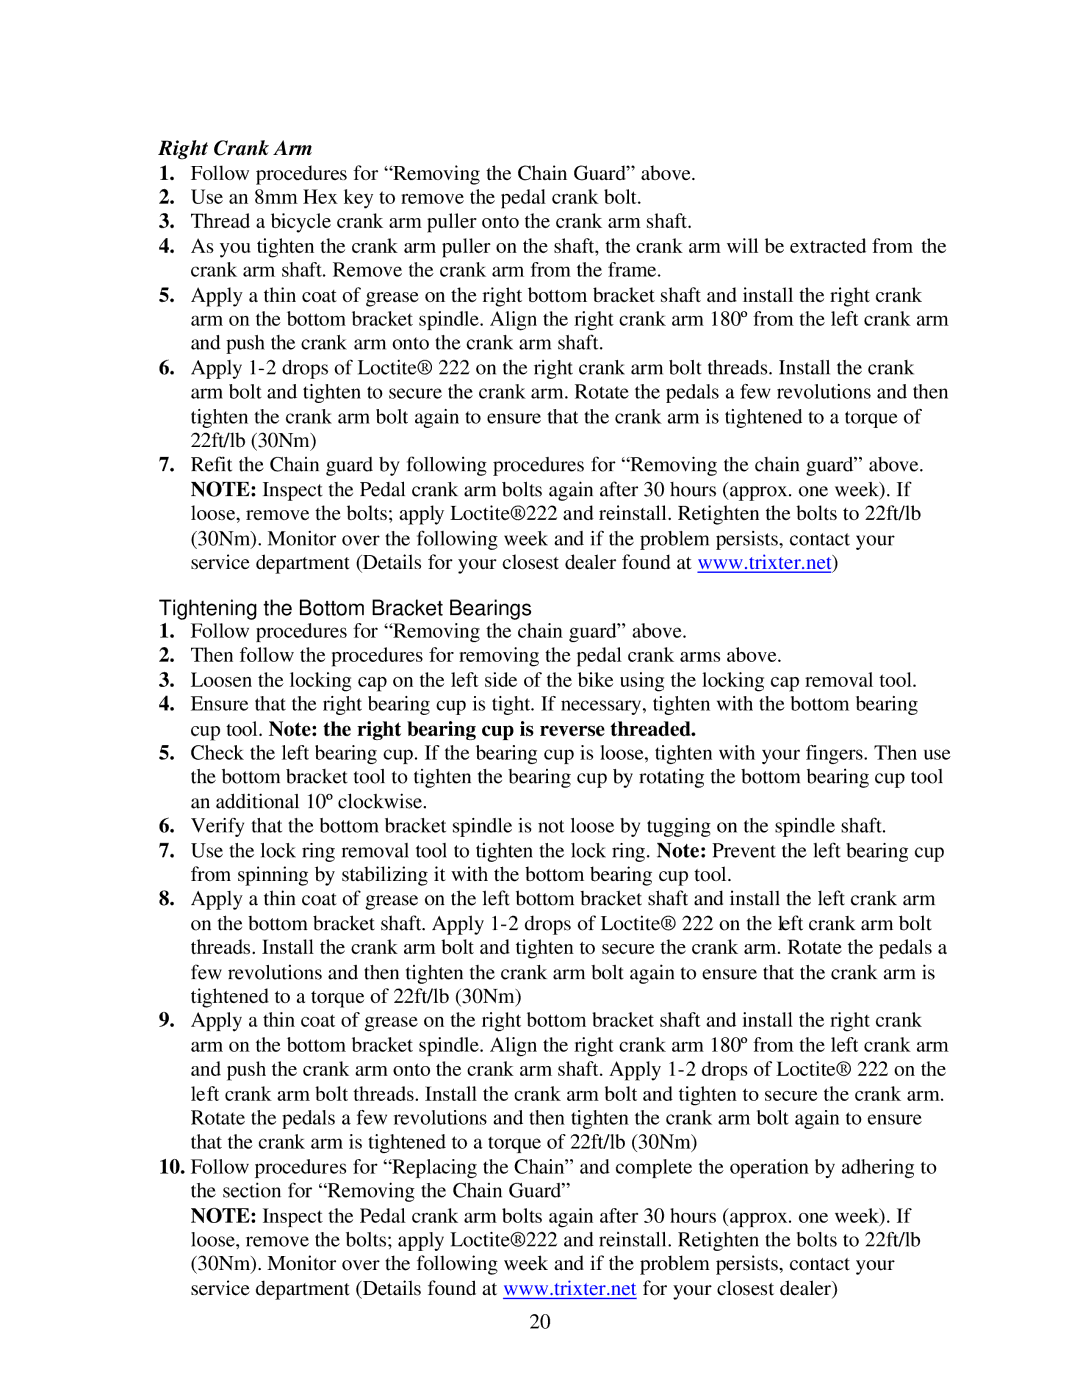
1.Using a 4mm hex key, remove the 4 bolts holding the side cover onto the assembly to gain access.

Side Cover Bolts

2.When removing the cover from the right side, take care not to damage the brush seal when removing over the damper adjuster.

3.When refitting, thread all 4 bolts before tightening any one to ensure that the holes are correctly lined up.

Bottom Cover

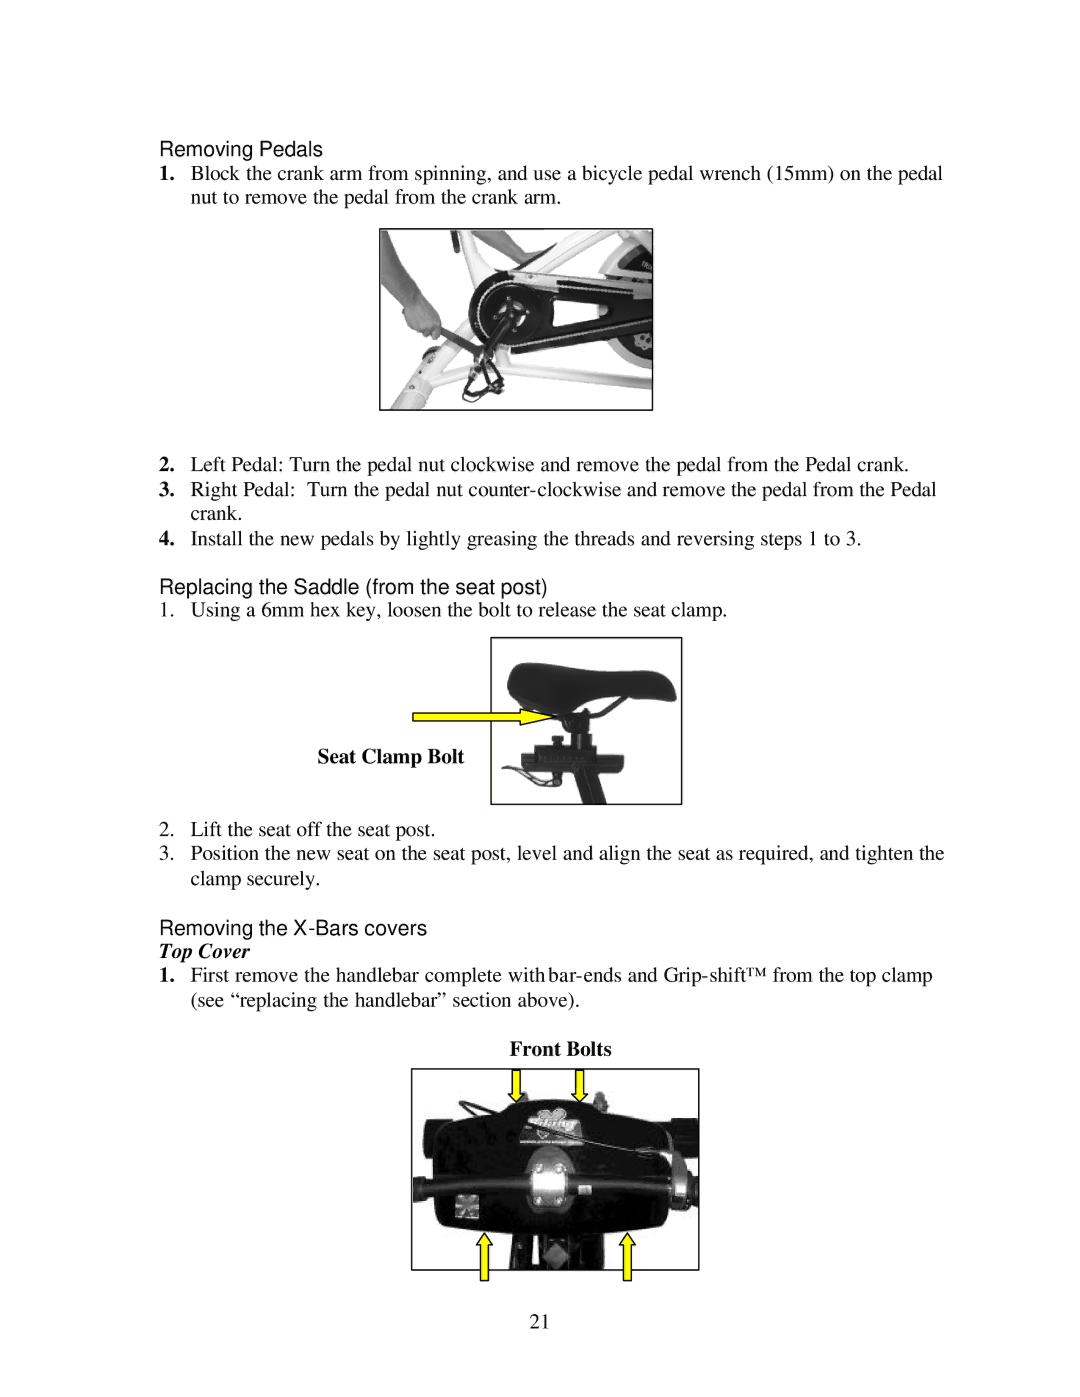
1.Using a 4mm hex key, remove the 2 bolts holding the bottom cover onto the assembly to gain access.

Bottom cover bolts

2.Drop the bottom cover downwards from the assembly.

3.Refitting is simply to locate the fixing holes and fit the bolts back in.

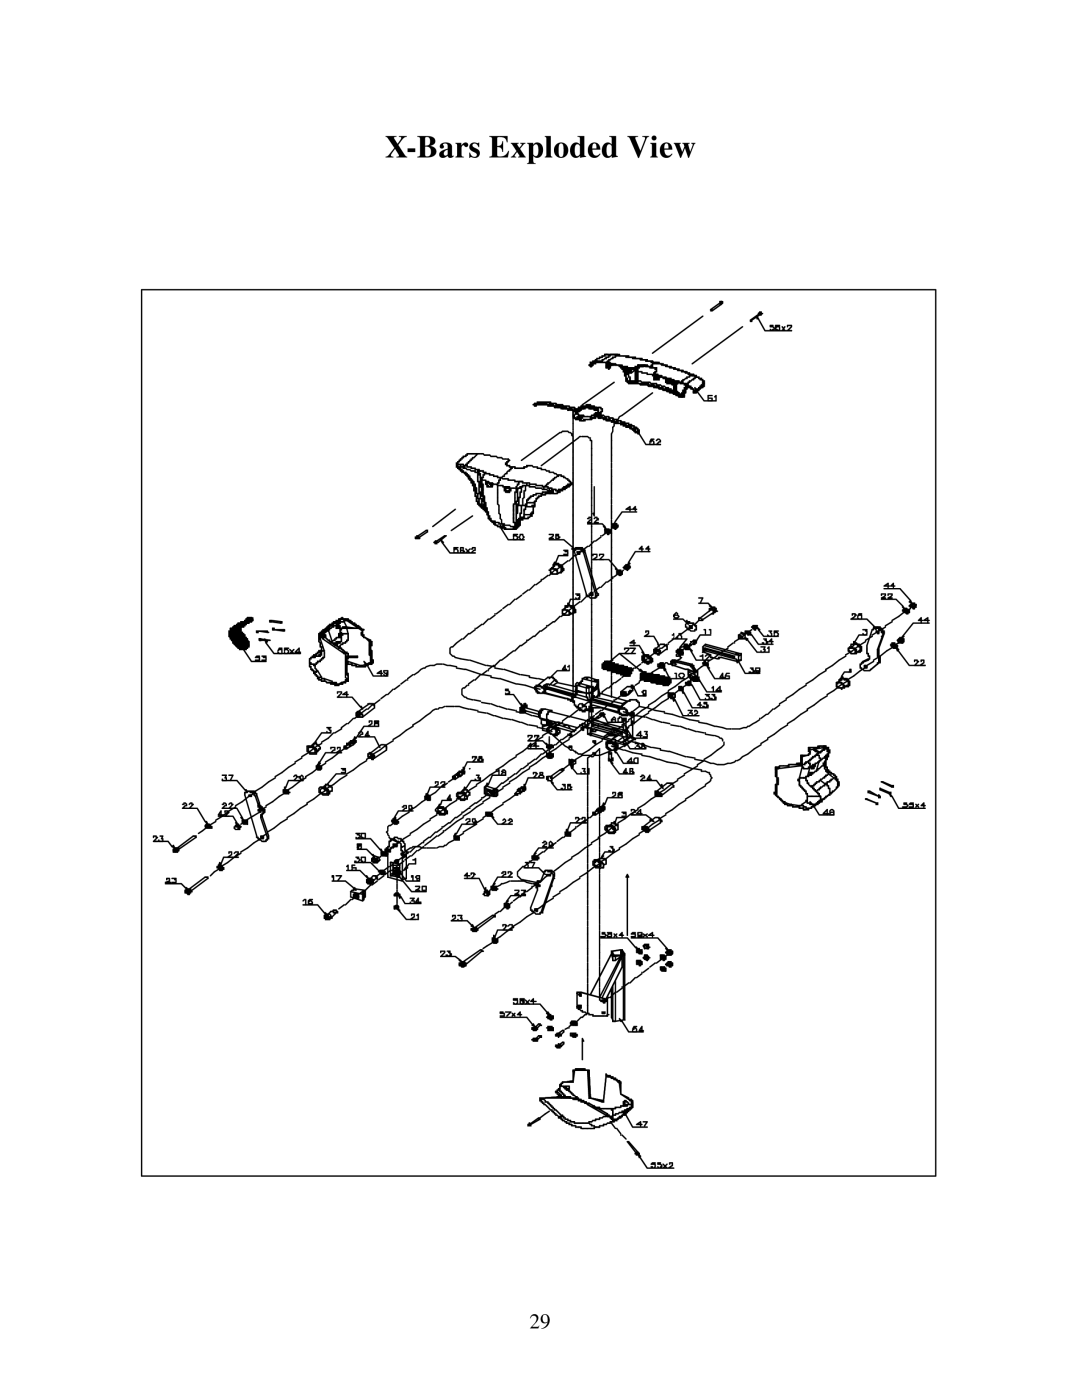
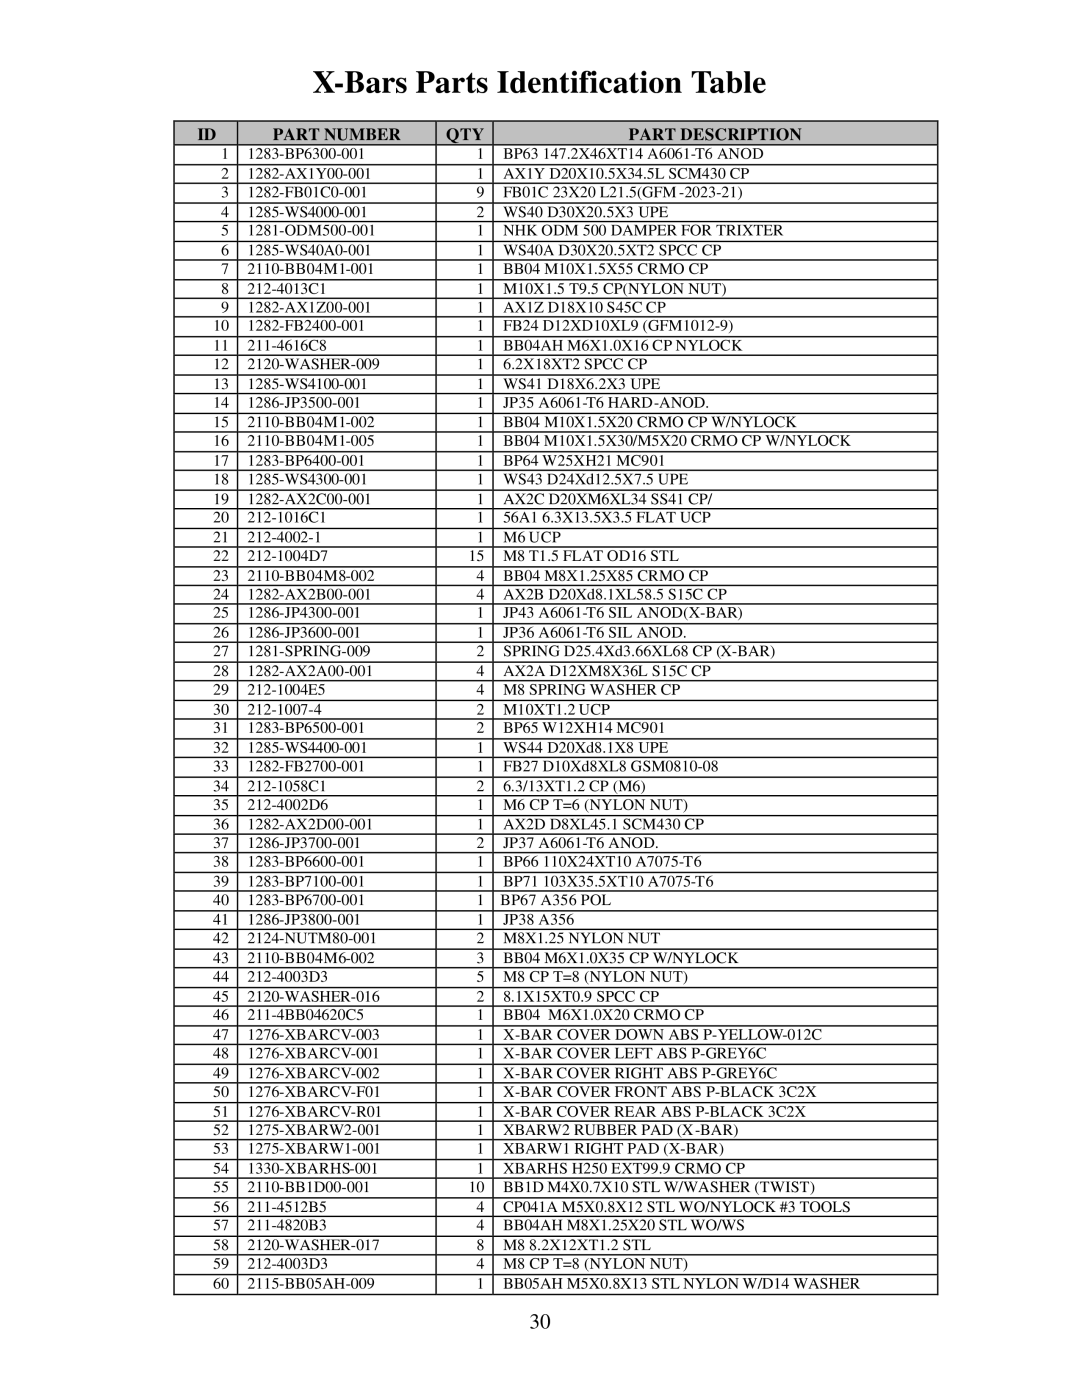
Replacing the Damper

1.For this section, only replace with Trixter recommended damper.

2.Remove all covers as directed in the “Removing the X-Bars Covers” section.

3.Using a 13mm wrench remove the nut from the fixed end of the damper.

4.Using 10mm and 13mm wrenches, undo the nut from the damper pin at the moving end of the damper. Remove all components from damper pin noting their position for reassembly.

5.Install the new damper and slide mo ving eye onto the slider pin. Thread the nut to hold in place.

22
Image 25
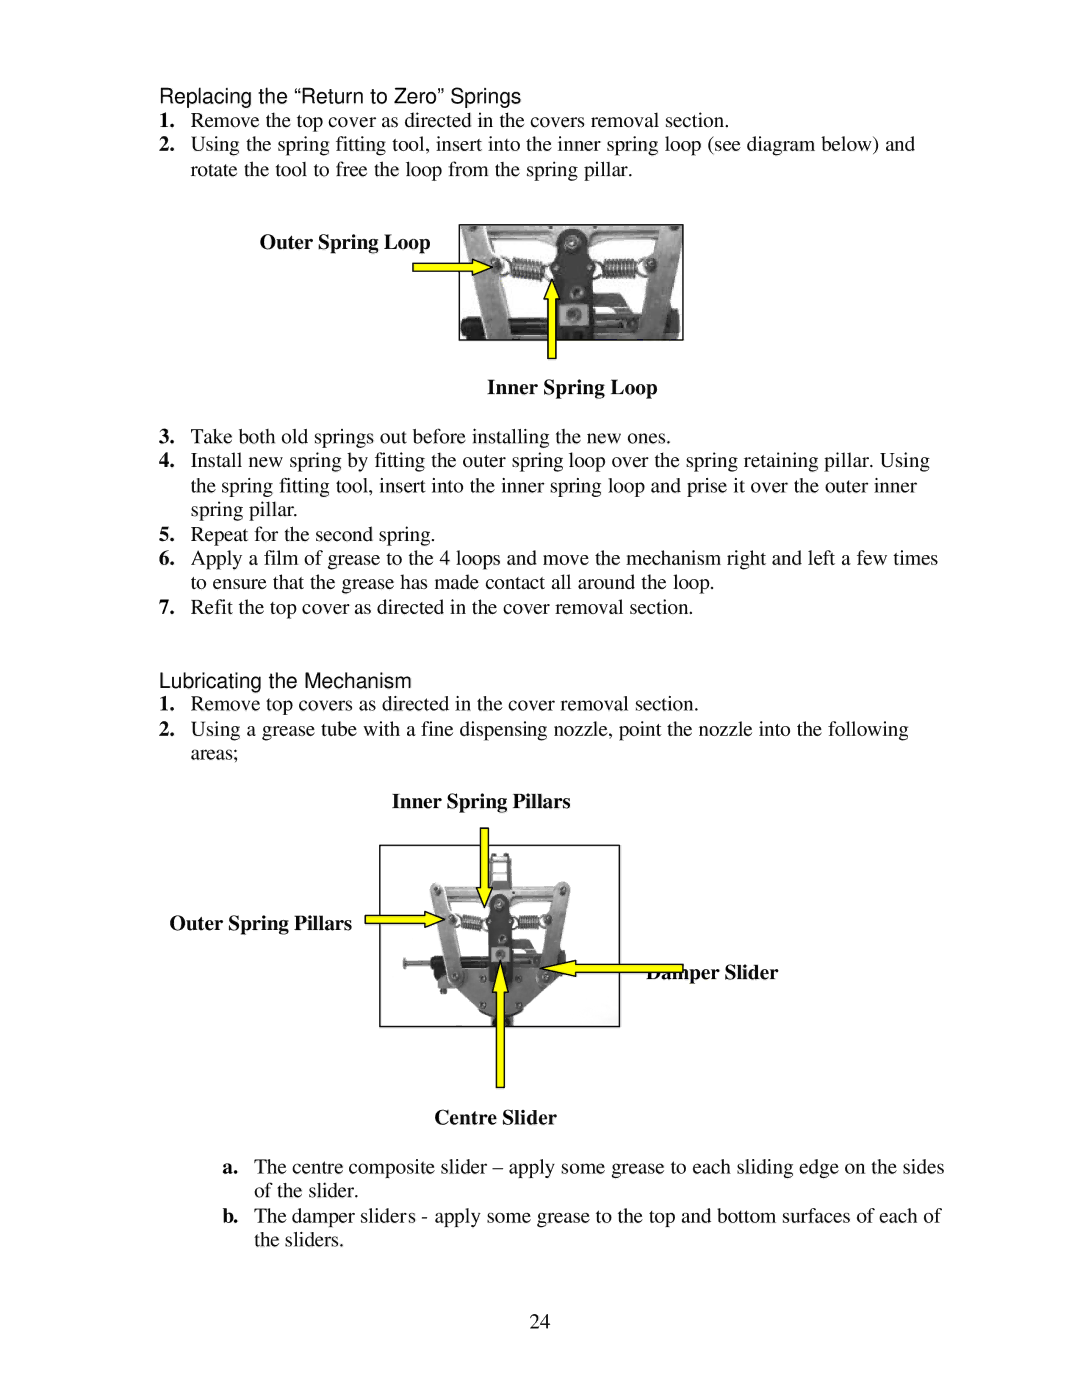
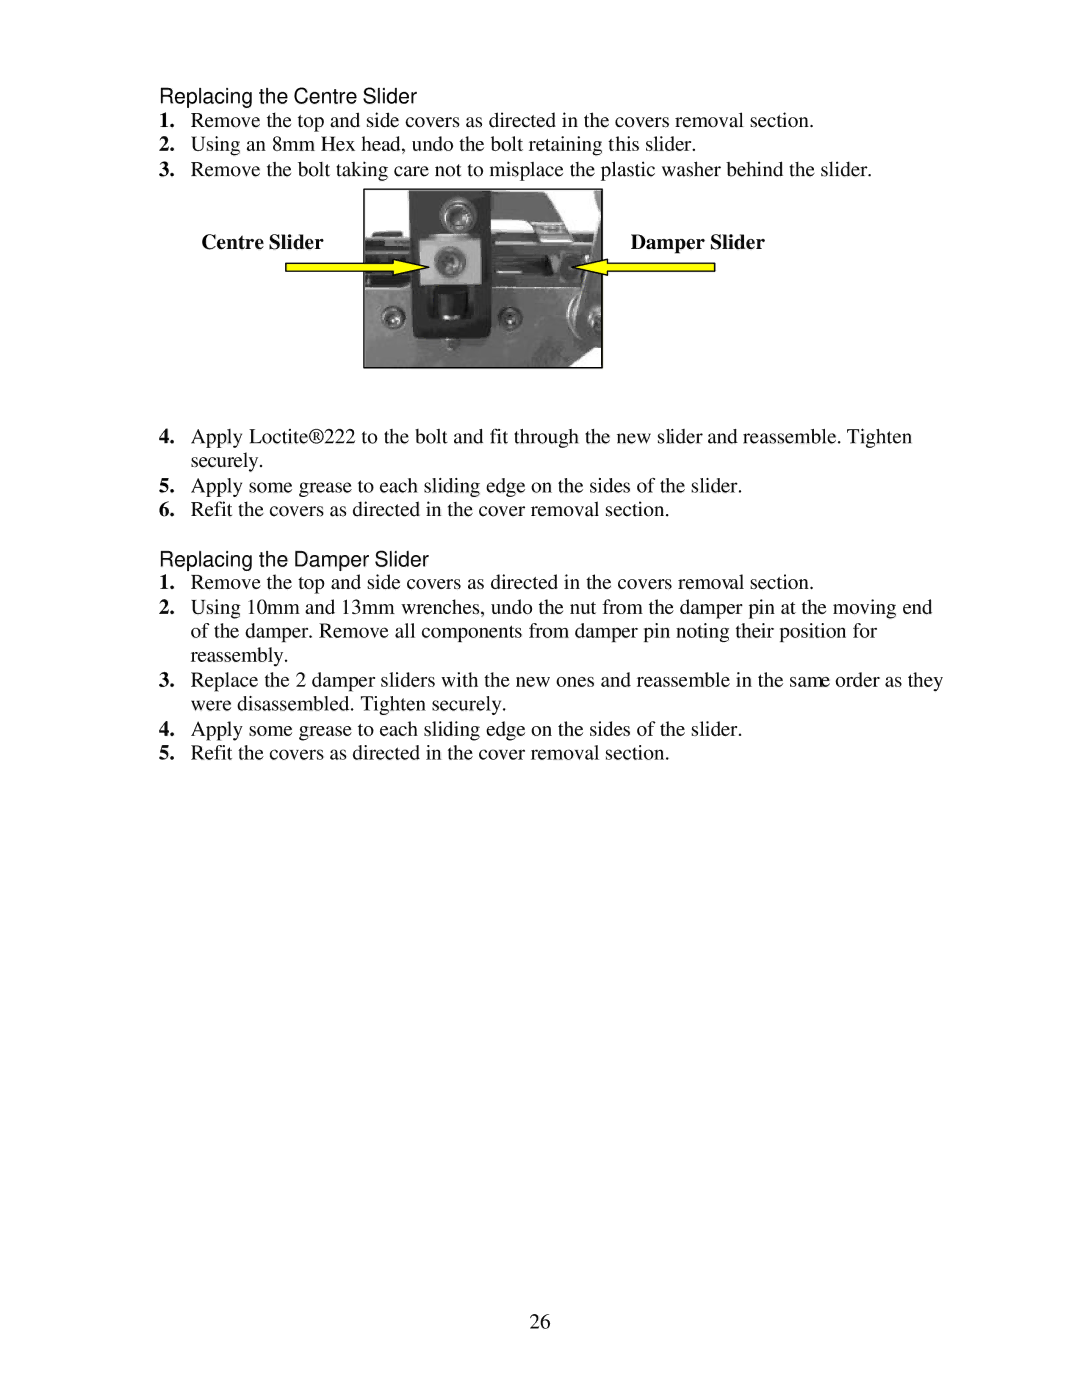
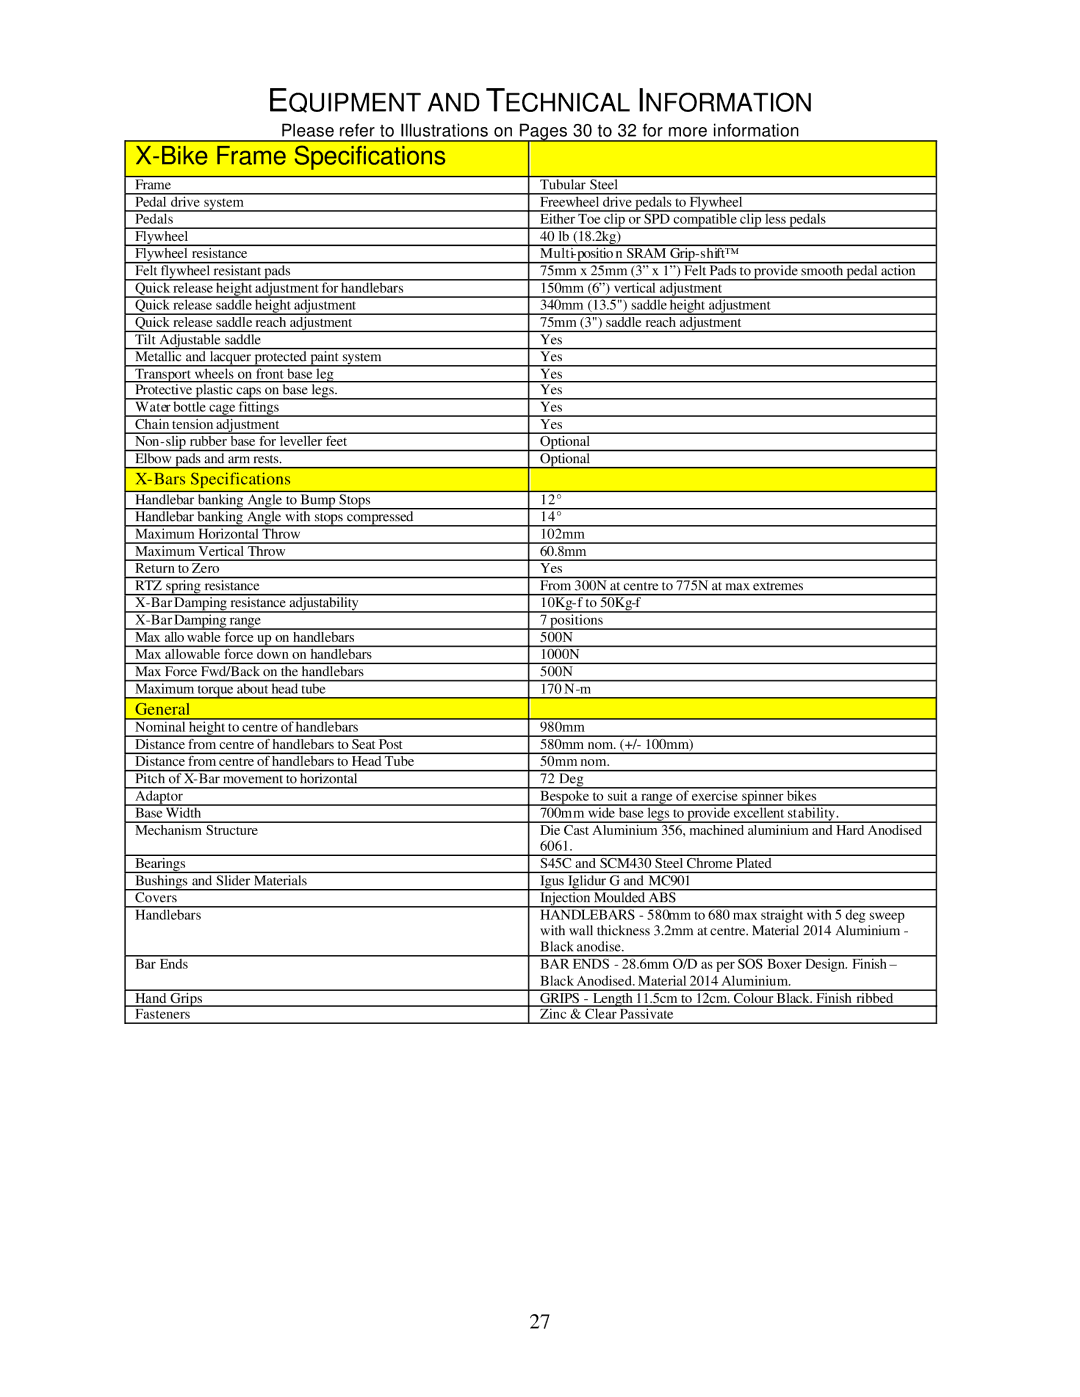
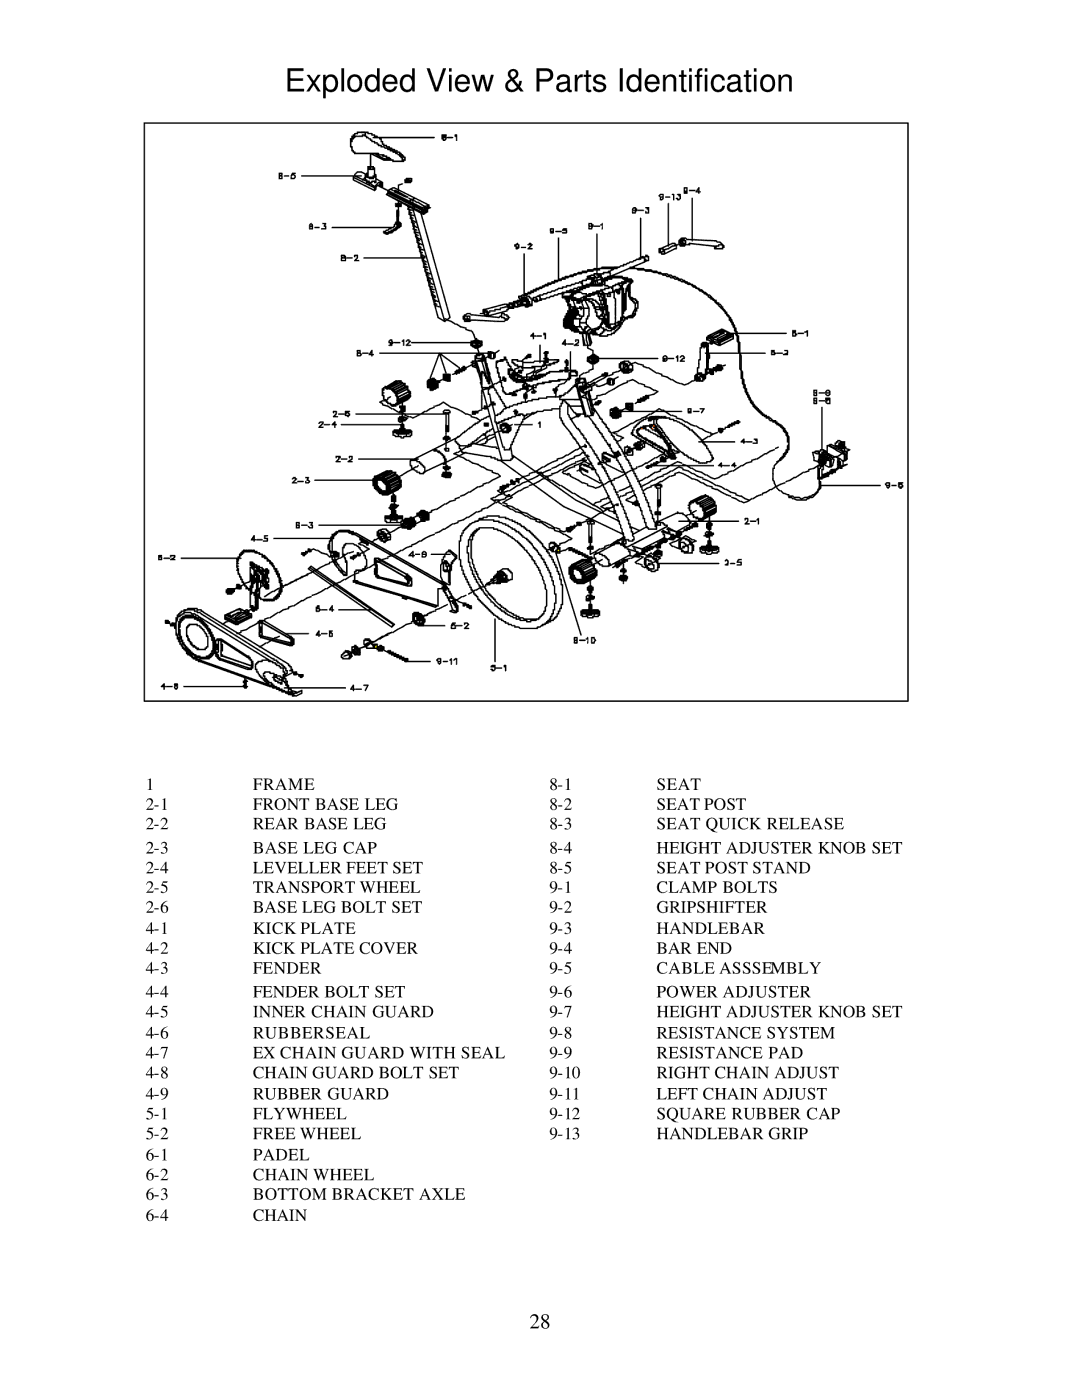
Contents Page Page Table of Contents Safety Information Page Introduction Dimensions of the X-BikeBike Indoor Performance Bike Biking Indoor Cycling ProgramsSetting UP the X-BIKEIndoor Performance Cycle Installation & AdjustmentRemove the bike and components from the shipping carton Assembling the Bike Seat Fore/Aft Adjust Lever Seat Height Adjuster KnobLeveller Foot Handlebar and Bar Ends Height Adjuster Knob Seat Adjustment Adjusting the BikeAdjusting the Flywheel Resistance Handlebar Bar Height Adjustment Minor Cable AdjusterPedal Strap Adjustment General Exercise Guidelines Using Your X-BIKEINDOOR Performance BikePedalling Pumping the X-BarsYour First Workout Mounting and DismountingBasic Instructions Pedalling ResistanceHelpful Hints Maintenance InstructionsFront of Bike Frame Serial Number Tool ListDaily Preventative MaintenanceWeekly Monthly Axle Position Markings Chain Adjusting BoltsChain Tensioning BarsHandlebar System Damper PerformanceBarsHandlebar System ‘Return to Zero’ Performance Height AdjustmentPage Replacing the Resistance Pads Parts Removal and ReplacementCable Release Bolt Removing the Chain GuardsInner Guard BoltRemoving the Flywheel Replacing the ChainReplacing the Grip-shift Replacing the Handlebars Left Crank Arm Removing Pedal Crank Arms Crank Bolt Removal Crank Arm Puller Tightening the Bottom Bracket Bearings Right Crank ArmTop Cover Seat Clamp BoltFront Bolts Side Covers Rear BoltsSide Cover Bolts Bottom CoverPage Outer Spring Loop Inner Spring Loop Replacing the Return to Zero SpringsLubricating the Mechanism Page Centre Slider Damper Slider Replacing the Centre SliderReplacing the Damper Slider Equipment and Technical Information Bike Frame SpecificationsExploded View & Parts Identification Bars Exploded View Bars Parts Identification Table Structure Maximum User Weight Capacity 300 lbsBike Indoor Performance Bike Bars Handlebar SystemPerformance AdjustabilityStyle & Comfort SafetyProtection Easily accessible chain tensioning points Service and MaintenanceAdditional Features & Options Mobility & StorageThank YOU for Purchasing AN X-BIKEINDOOR Performance Bike Bike Indoor Performance Bike Warranty CardLimited Remedy Limited WarrantyWarranty Registration Card Thank YOU Index