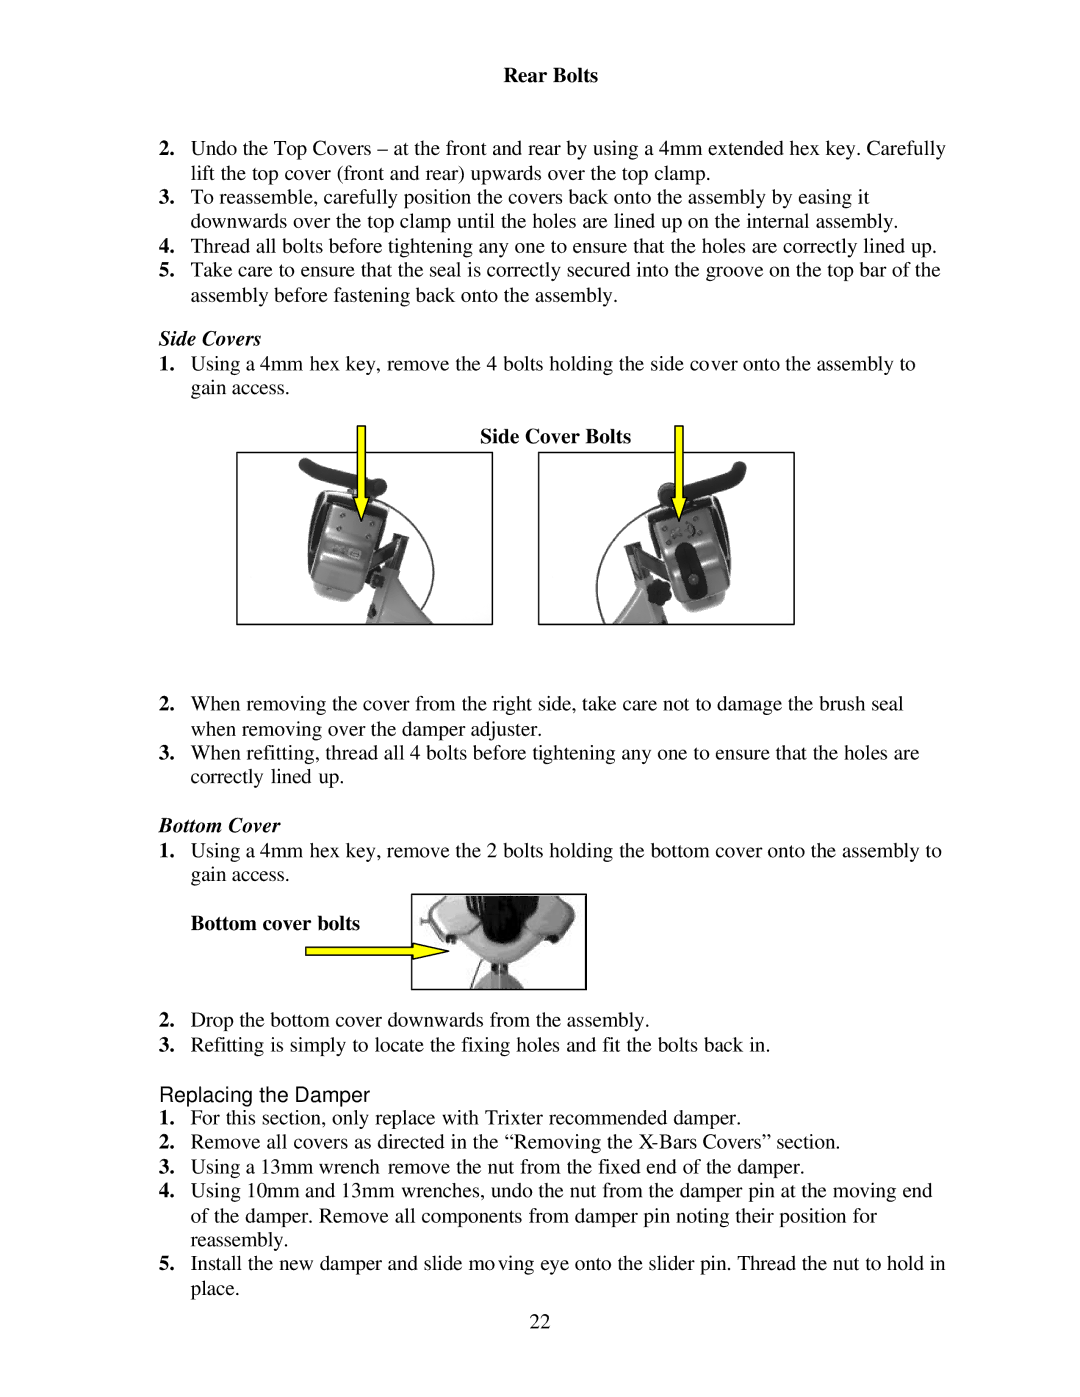
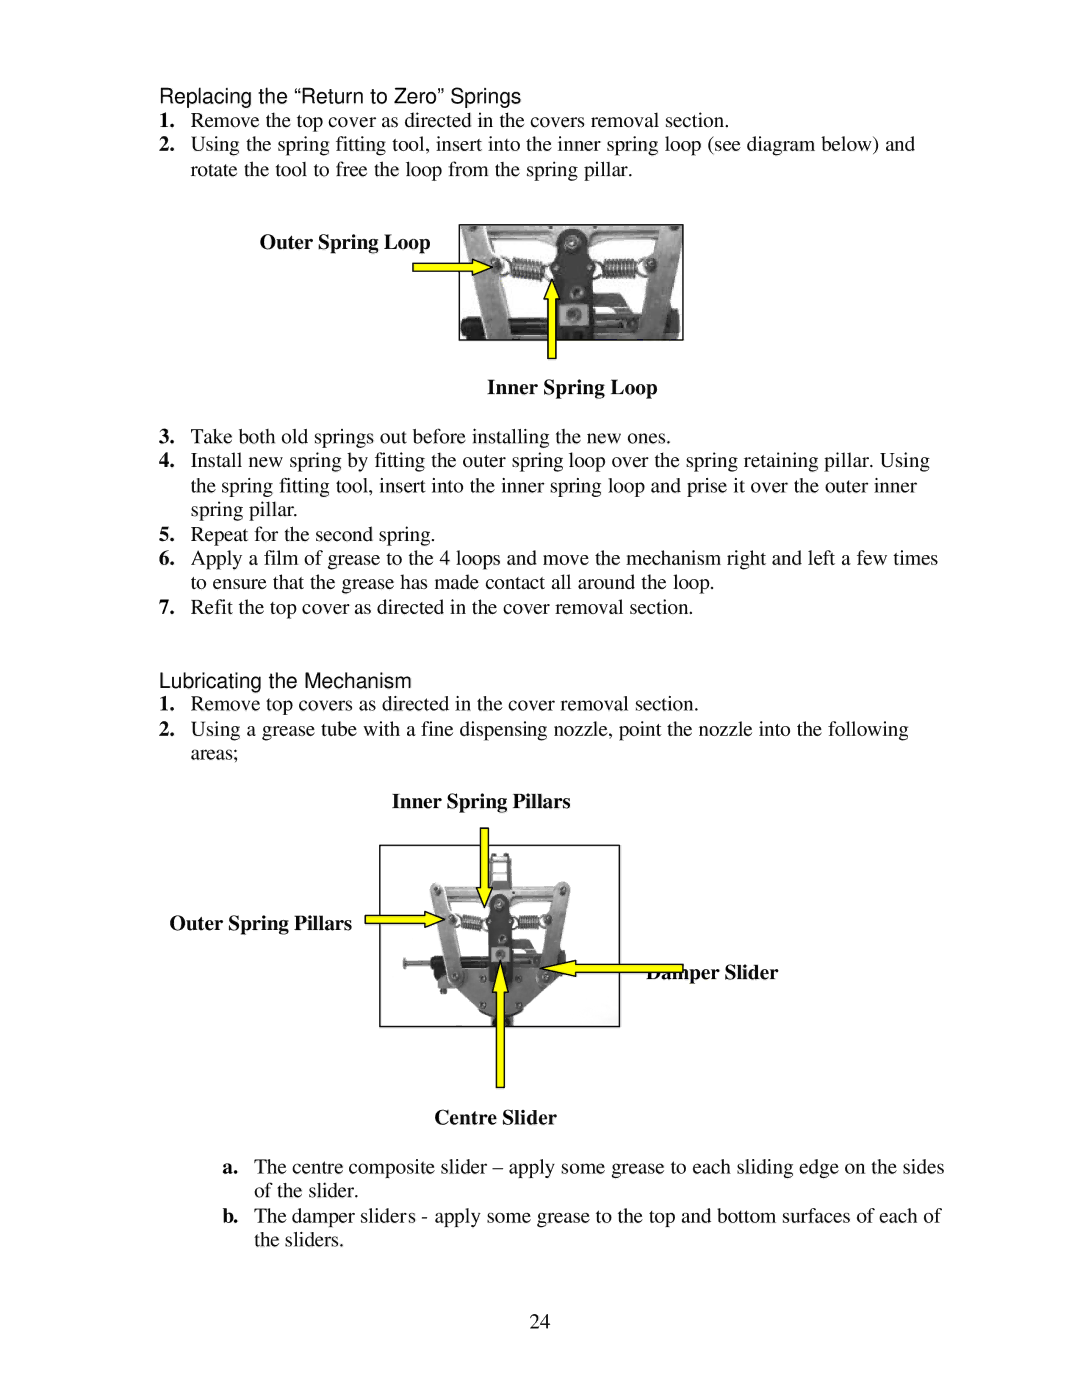
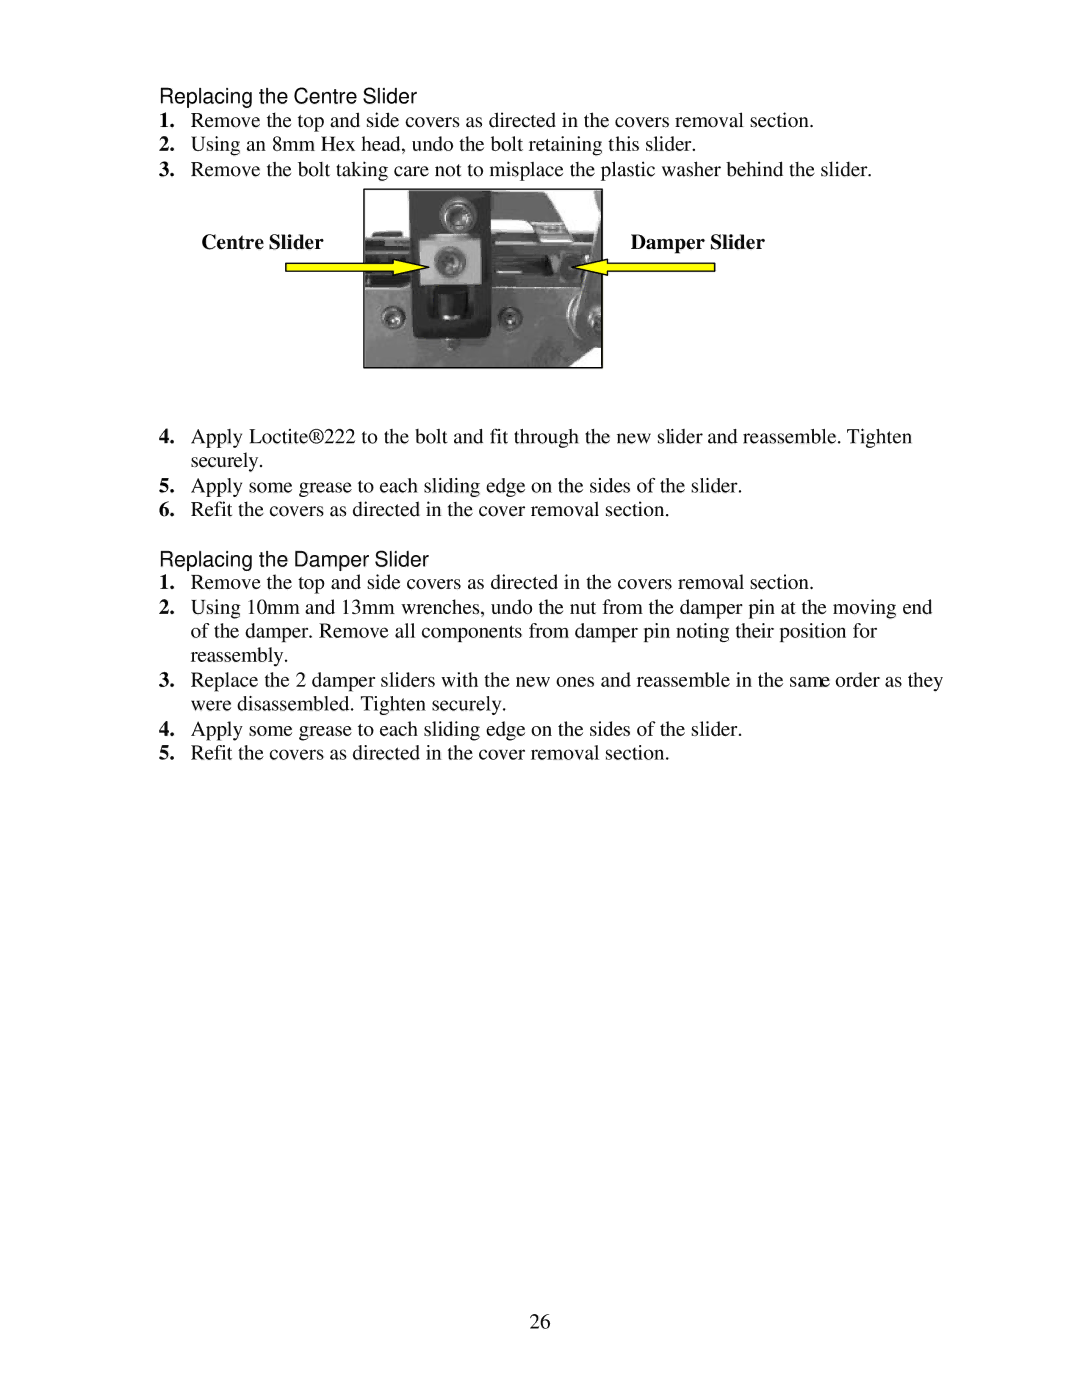
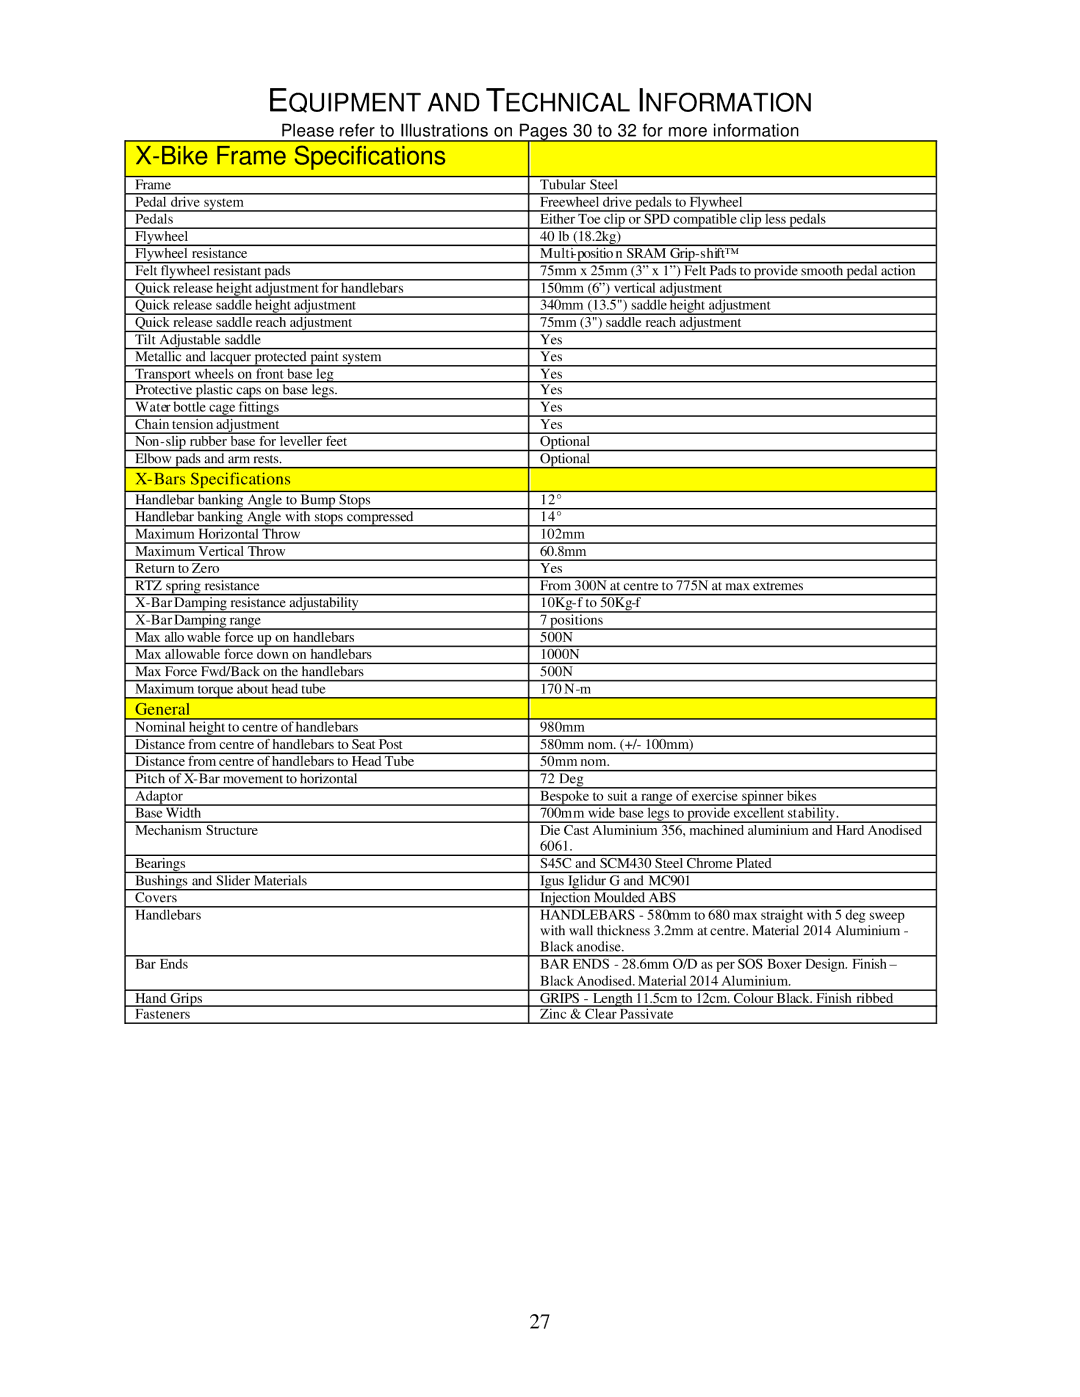
Trixter X-Bike Parts Removal and Replacement, Replacing the Resistance Pads, Cable Release Bolt

Page 19

PARTS – REMOVAL AND REPLACEMENT

WARNING:

It is vitally important to keep the X-Bike™ Indoor Cycle properly maintained but if you are unsure about any of the procedures for the removal or replacement of parts, you are recommended to contact your authorised dealer.

NOTE: When carrying out any service or maintenance procedures, it is vital to ensure that ALL hardware has been fully tightened and the assembly is returned to its original assembly state prior to allowing the X-Bike™ Indoor Cycle to be used. If in doubt, contact your authorised dealer.

Replacing the Resistance Pads

1.If the pad thickness is reduced to less than 4mm, they need to be replaced.

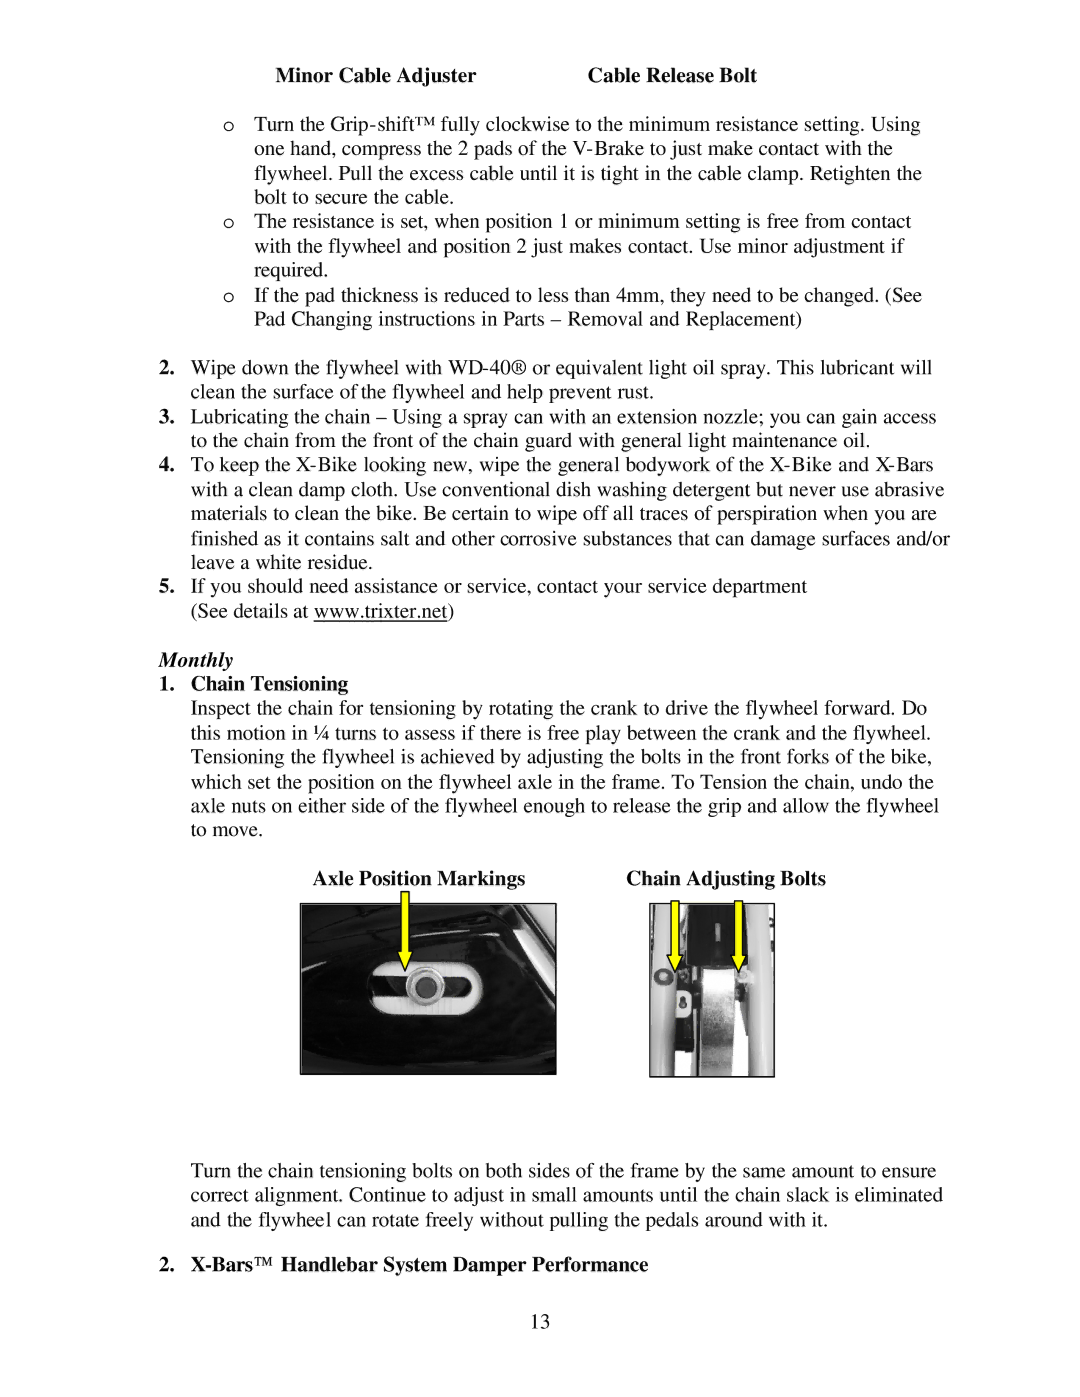
2.Using a 6mm hex key, loosen the bolt clamping the resistance cable to release the V- brake mechanism.

Cable Release Bolt

3.Remove the screw at the back of the pad housing to release. Drop the pad out of the assembly.

4.Fit new pad into the V-Brake assembly on both sides. Refit the screws complete with the spring and washers. Tighten to within 2 full turns from the end.

5.Turn the Grip-shift™ fully clockwise to the minimum resistance setting. Using one hand, compress the 2 pads of the V-Brake to just make contact with the flywheel. Pull the excess cable until it is tight in the cable clamp. Retighten the bolt to secure the cable.

6.The resistance is set, when the minimum setting is free from contact with the flywheel and position 2 just makes contact.

Removing the Chain Guards

Outer Guard

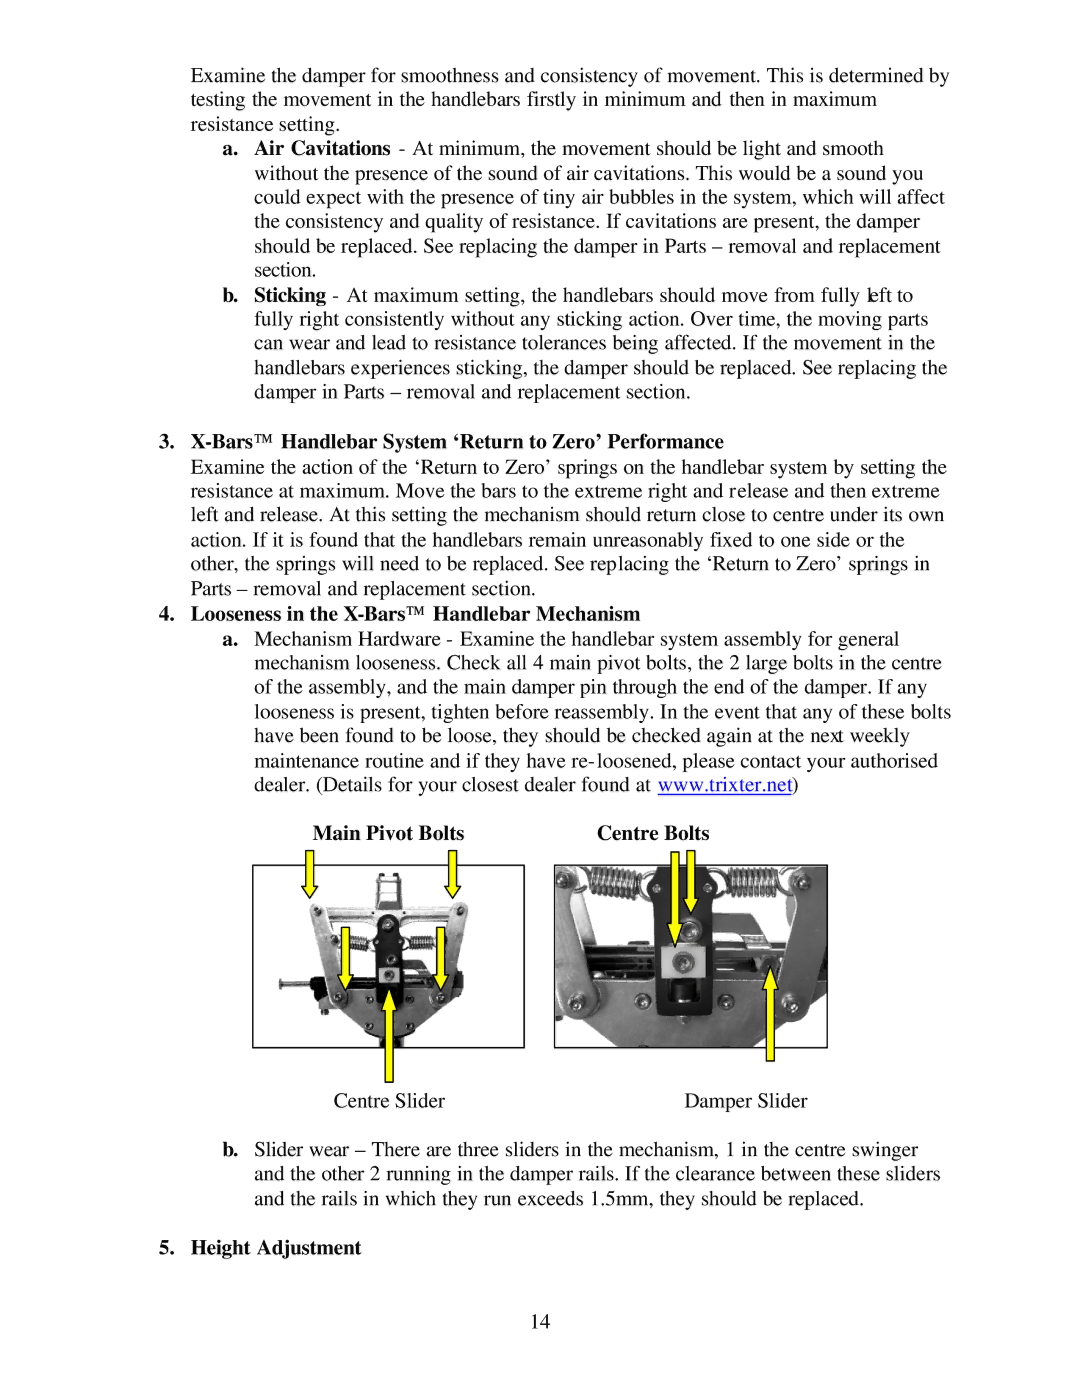
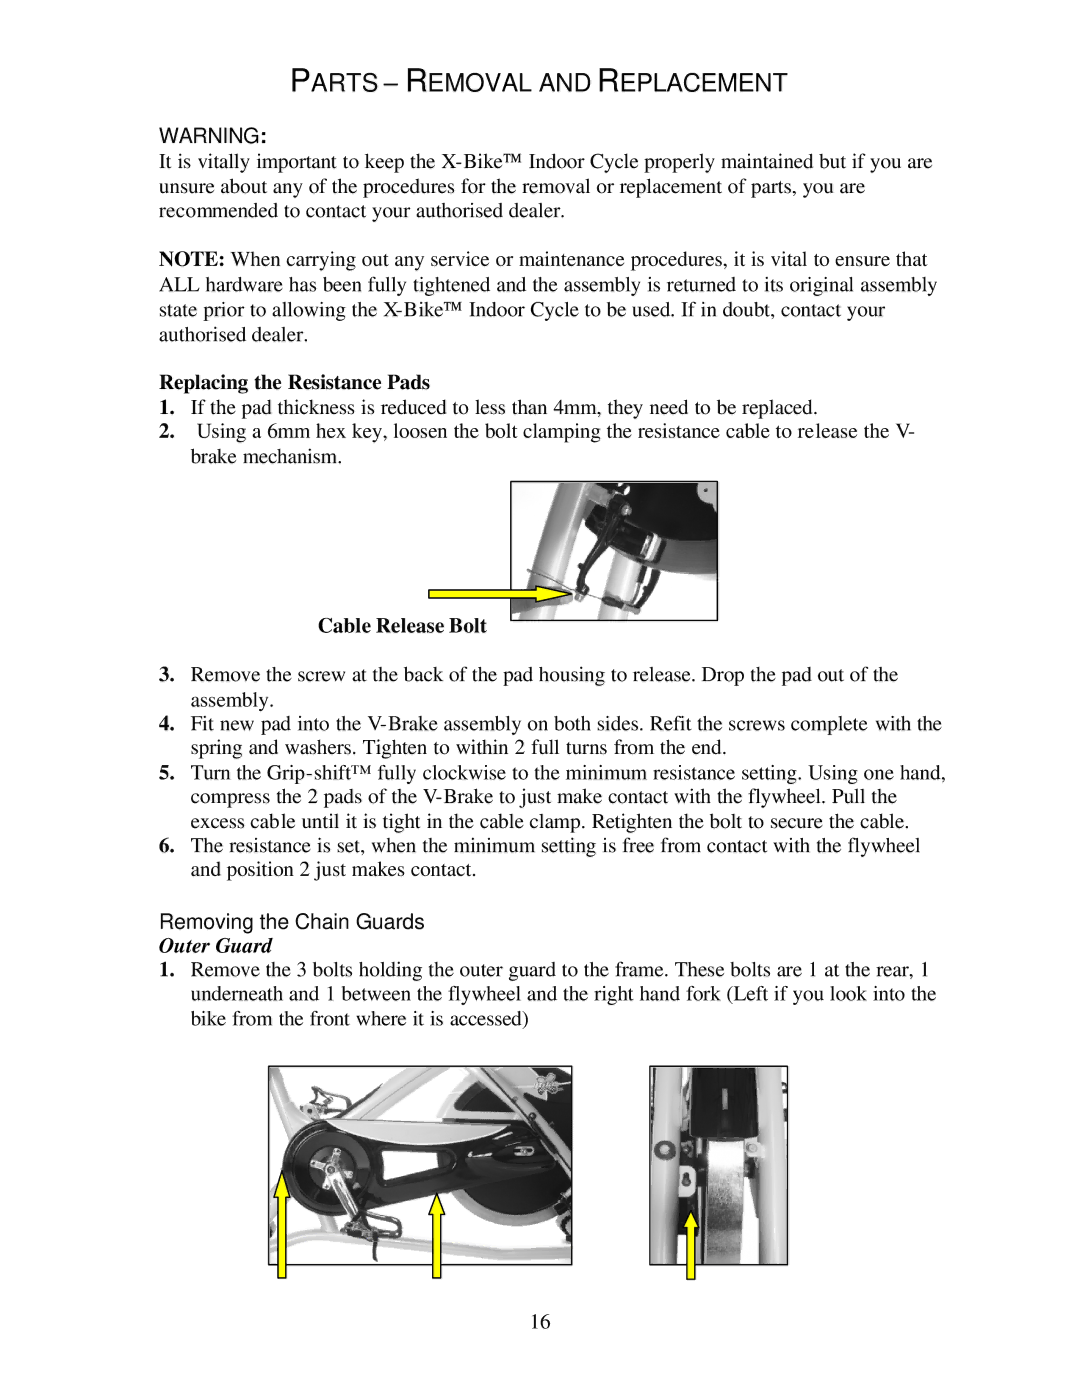
1.Remove the 3 bolts holding the outer guard to the frame. These bolts are 1 at the rear, 1 underneath and 1 between the flywheel and the right hand fork (Left if you look into the bike from the front where it is accessed)

16
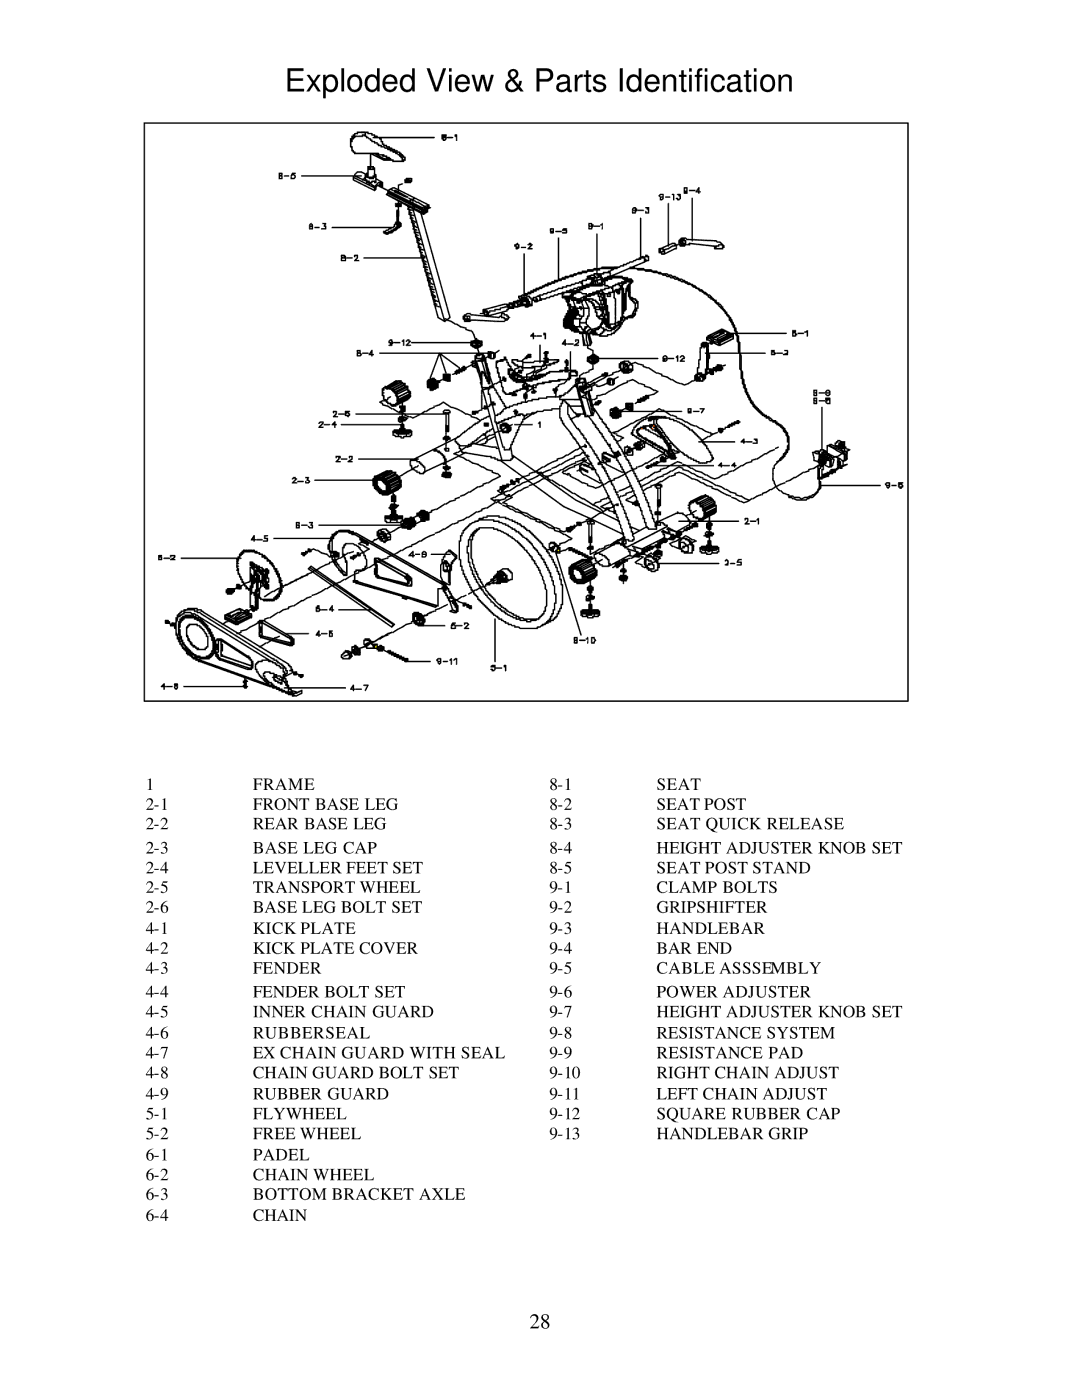
Image 19
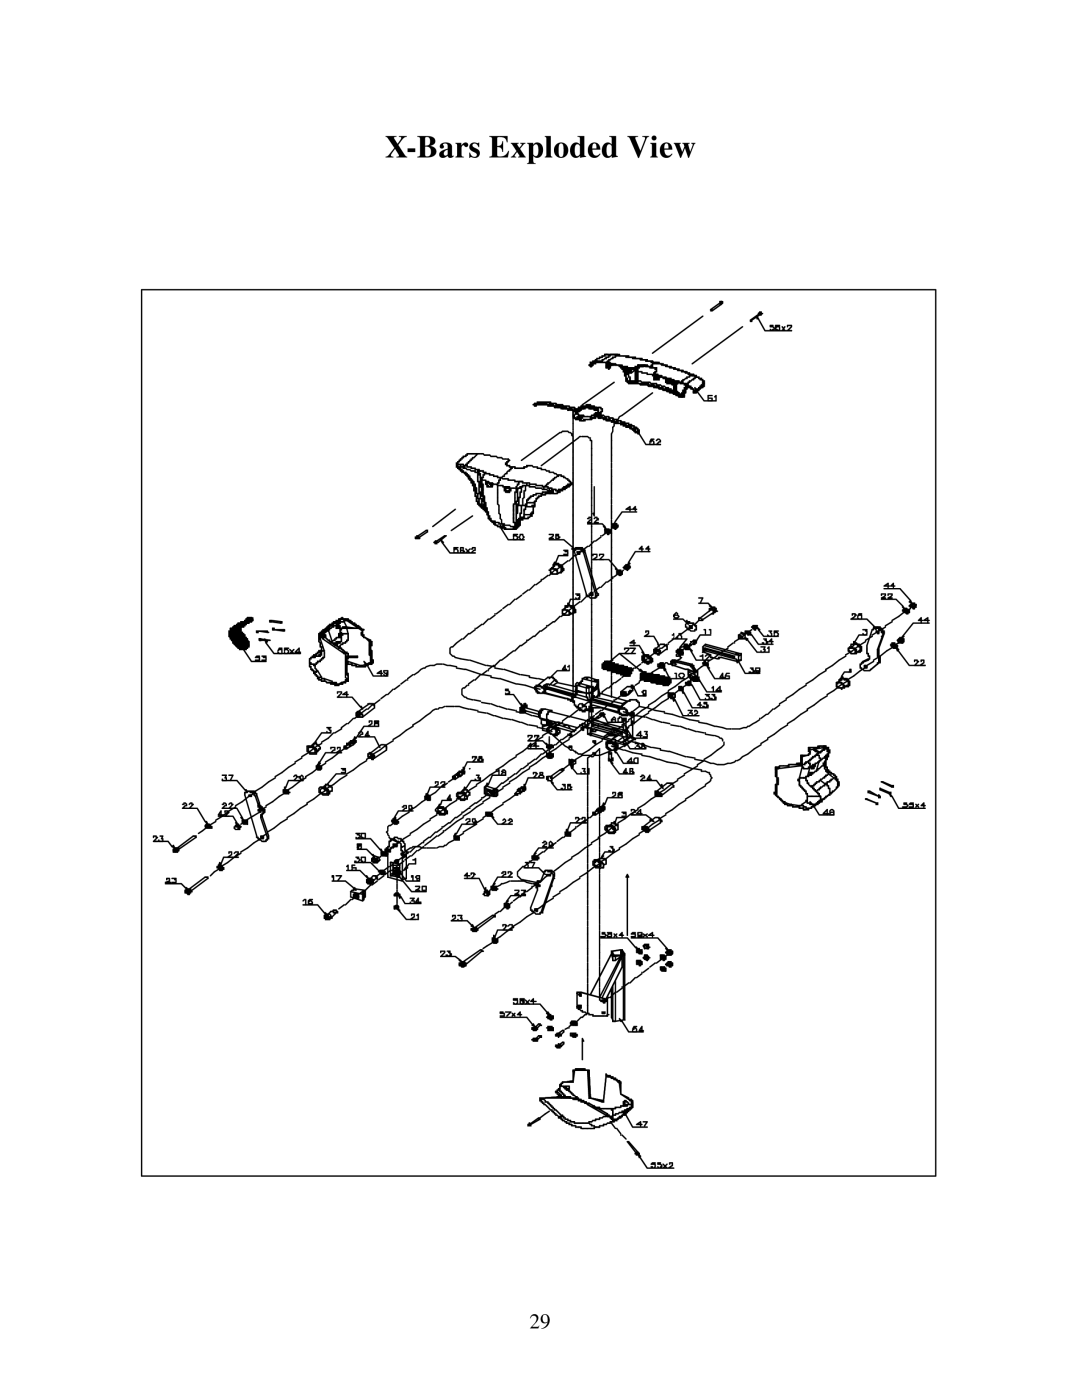
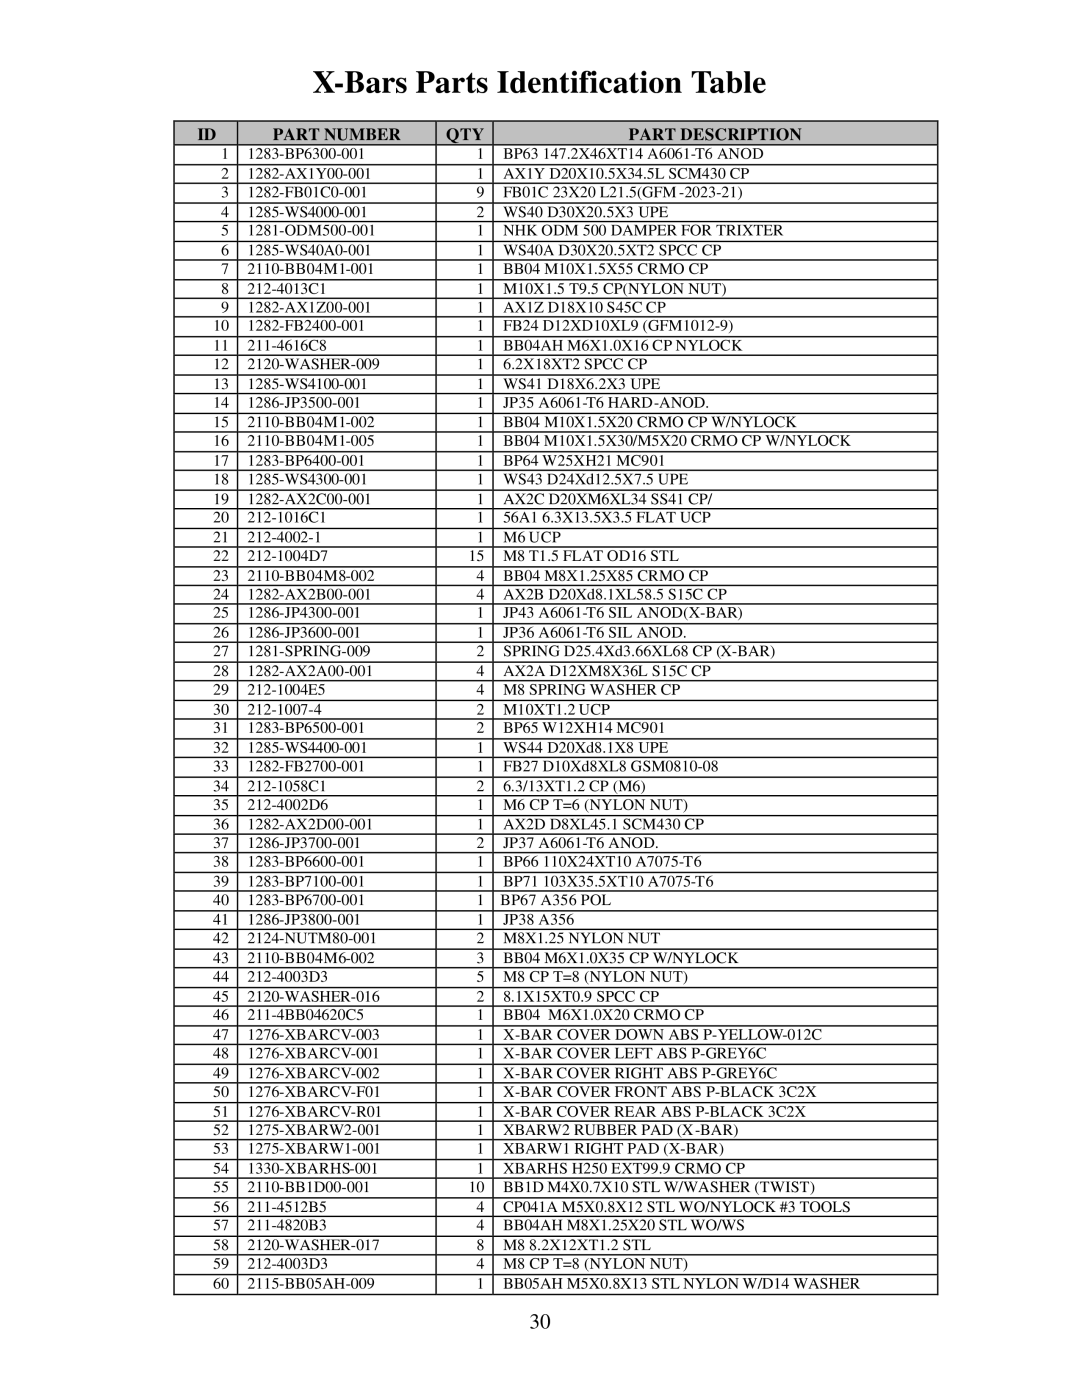
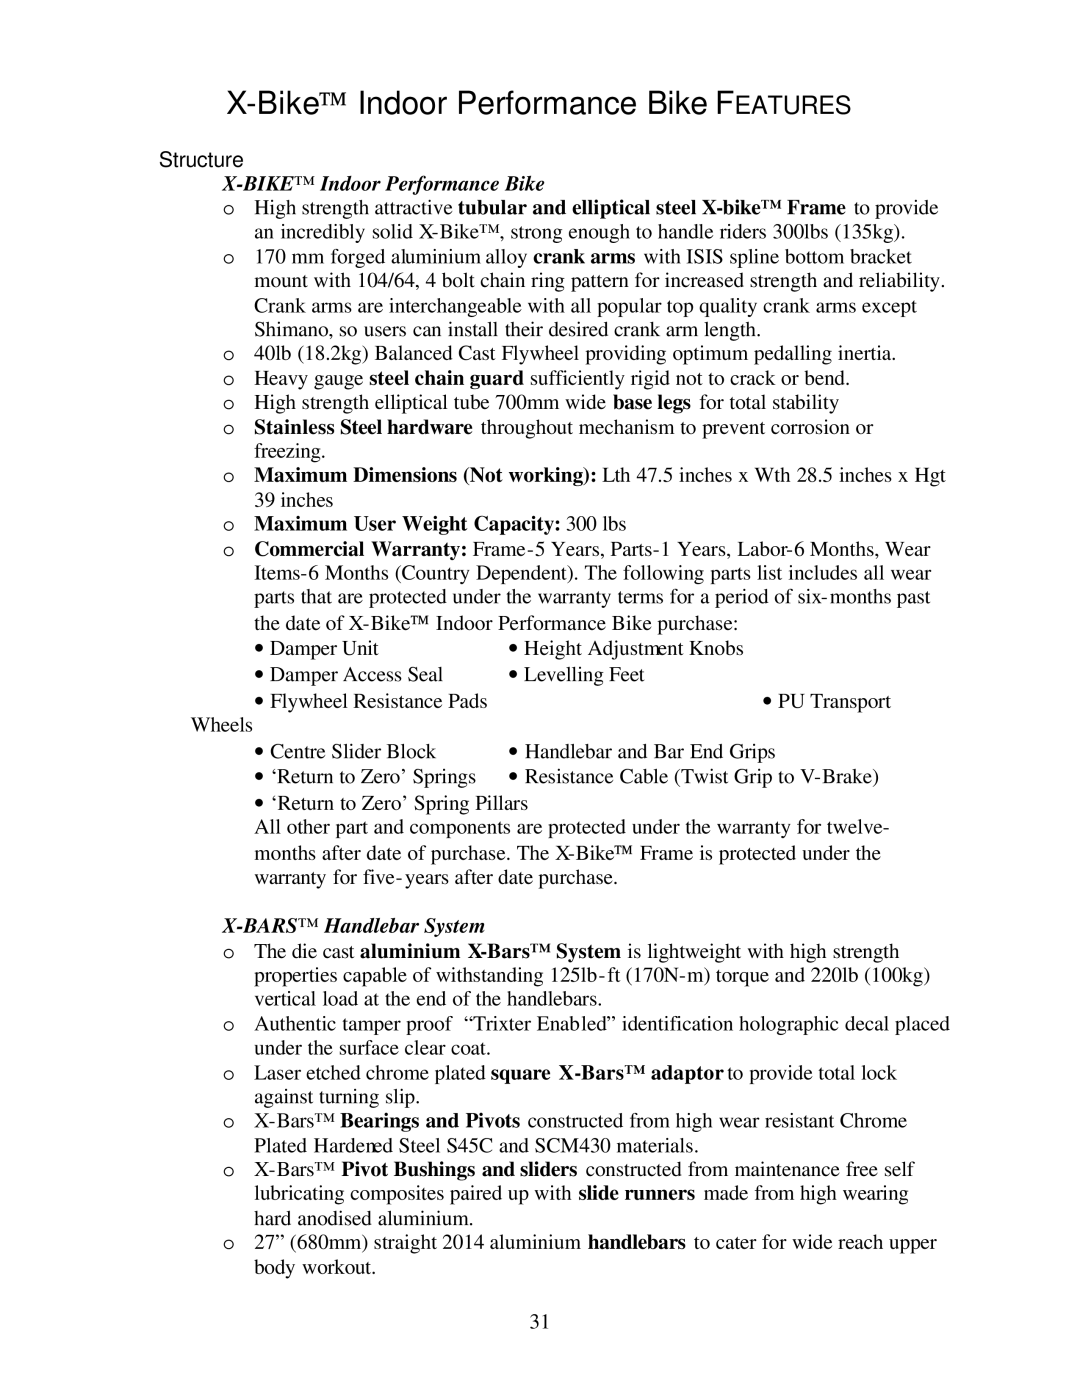
Contents Page Page Table of Contents Safety Information Page Biking Indoor Cycling Programs Dimensions of the X-BikeIntroduction Bike Indoor Performance BikeSetting UP the X-BIKEIndoor Performance Cycle Installation & AdjustmentRemove the bike and components from the shipping carton Assembling the Bike Seat Fore/Aft Adjust Lever Seat Height Adjuster KnobLeveller Foot Handlebar and Bar Ends Height Adjuster Knob Seat Adjustment Adjusting the BikeAdjusting the Flywheel Resistance Handlebar Bar Height Adjustment Minor Cable AdjusterPedal Strap Adjustment Pumping the X-Bars Using Your X-BIKEINDOOR Performance BikeGeneral Exercise Guidelines PedallingPedalling Resistance Mounting and DismountingYour First Workout Basic InstructionsTool List Maintenance InstructionsHelpful Hints Front of Bike Frame Serial NumberDaily Preventative MaintenanceWeekly BarsHandlebar System Damper Performance Axle Position Markings Chain Adjusting BoltsMonthly Chain TensioningBarsHandlebar System ‘Return to Zero’ Performance Height AdjustmentPage Removing the Chain Guards Parts Removal and ReplacementReplacing the Resistance Pads Cable Release BoltReplacing the Chain BoltInner Guard Removing the FlywheelReplacing the Grip-shift Replacing the HandlebarsLeft Crank Arm Removing Pedal Crank ArmsCrank Bolt Removal Crank Arm Puller Tightening the Bottom Bracket Bearings Right Crank ArmTop Cover Seat Clamp BoltFront Bolts Bottom Cover Rear BoltsSide Covers Side Cover BoltsPage Outer Spring Loop Inner Spring Loop Replacing the Return to Zero SpringsLubricating the Mechanism Page Centre Slider Damper Slider Replacing the Centre SliderReplacing the Damper Slider Equipment and Technical Information Bike Frame SpecificationsExploded View & Parts Identification Bars Exploded View Bars Parts Identification Table Bars Handlebar System Maximum User Weight Capacity 300 lbsStructure Bike Indoor Performance BikePerformance AdjustabilityStyle & Comfort SafetyProtection Mobility & Storage Service and MaintenanceEasily accessible chain tensioning points Additional Features & OptionsThank YOU for Purchasing AN X-BIKEINDOOR Performance Bike Bike Indoor Performance Bike Warranty CardLimited Remedy Limited WarrantyWarranty Registration Card Thank YOU Index