2.1.Installing the Balance
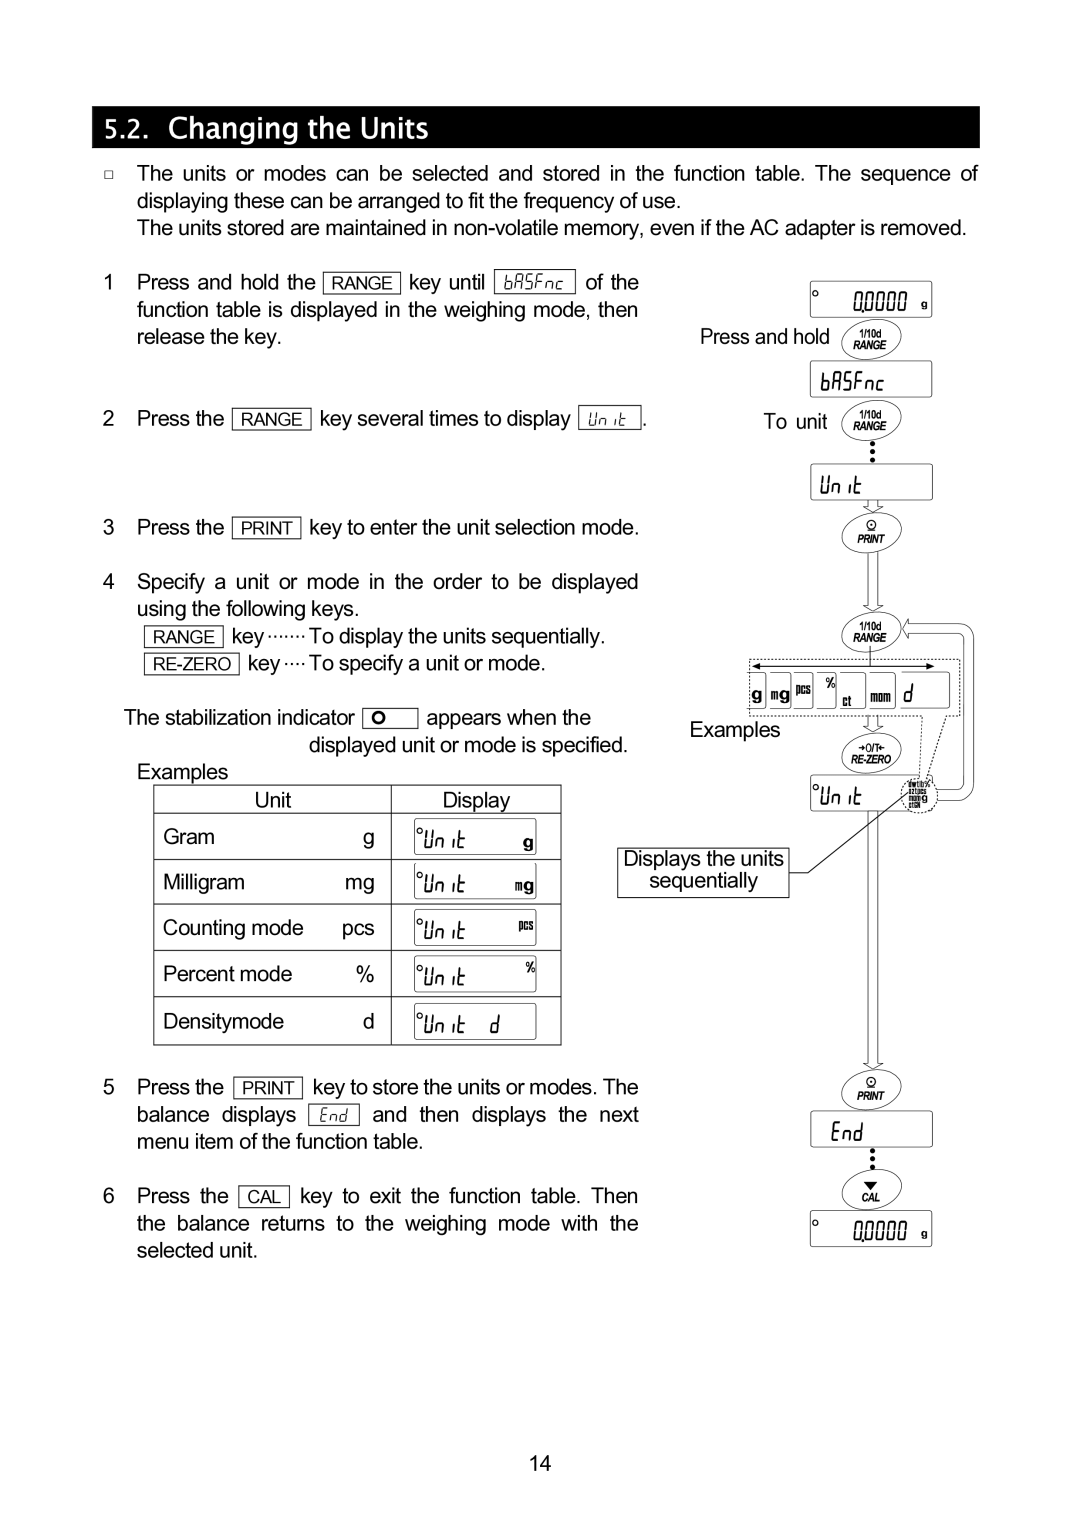
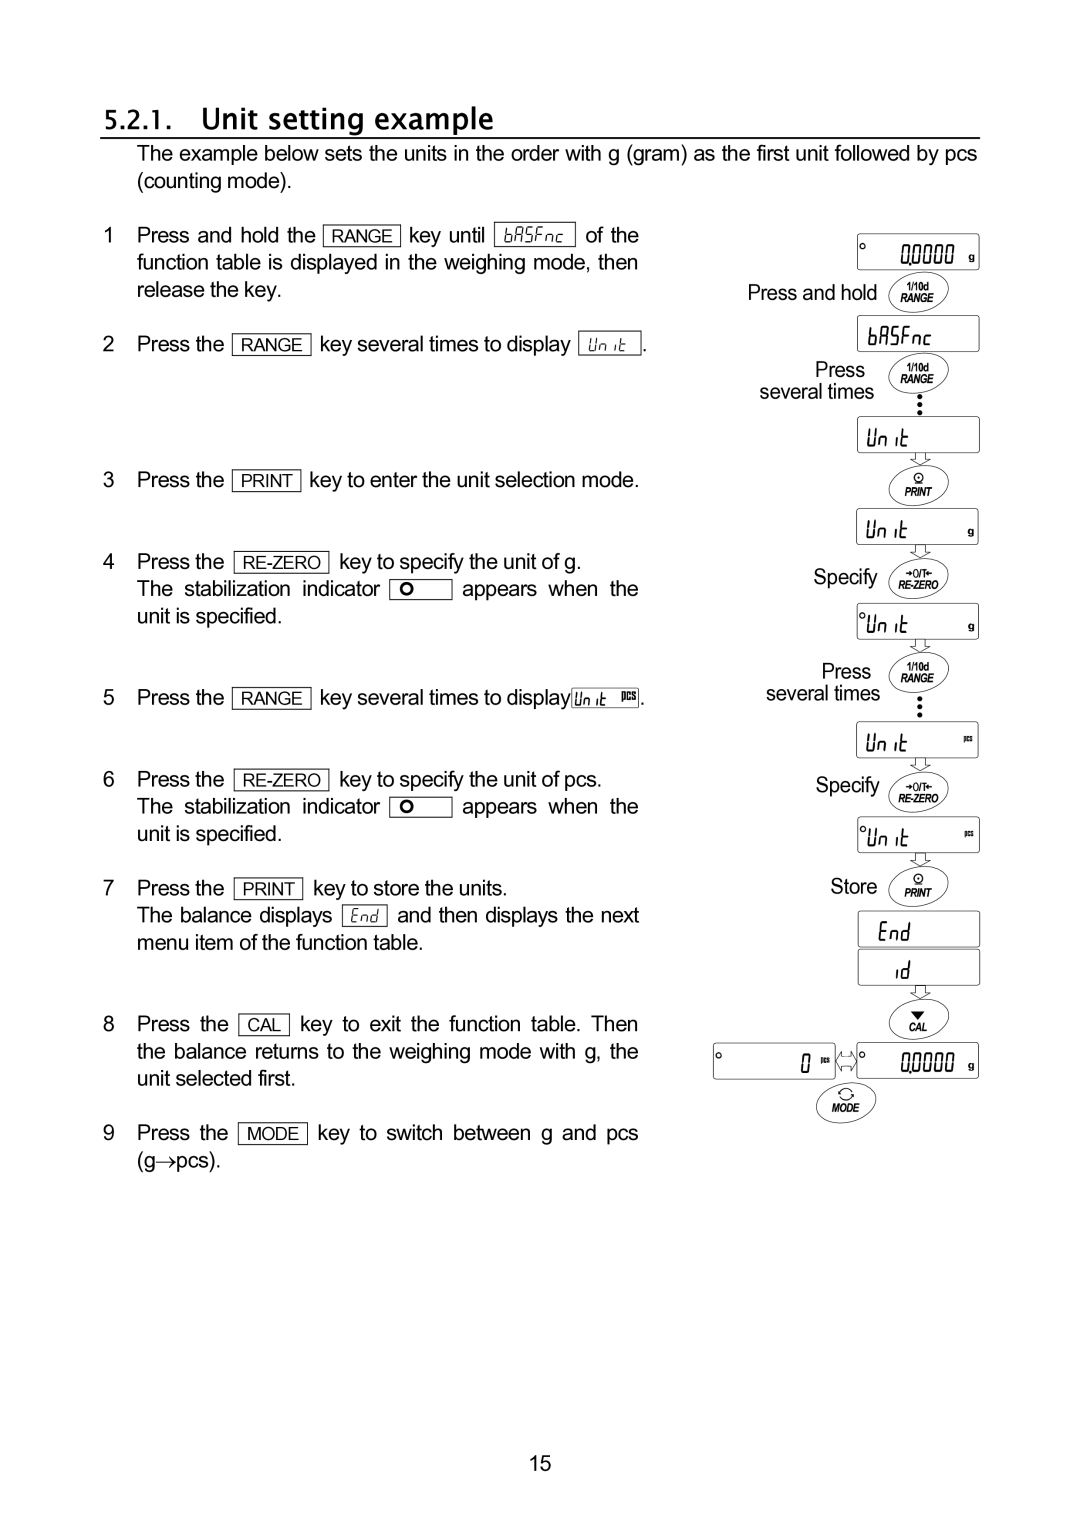
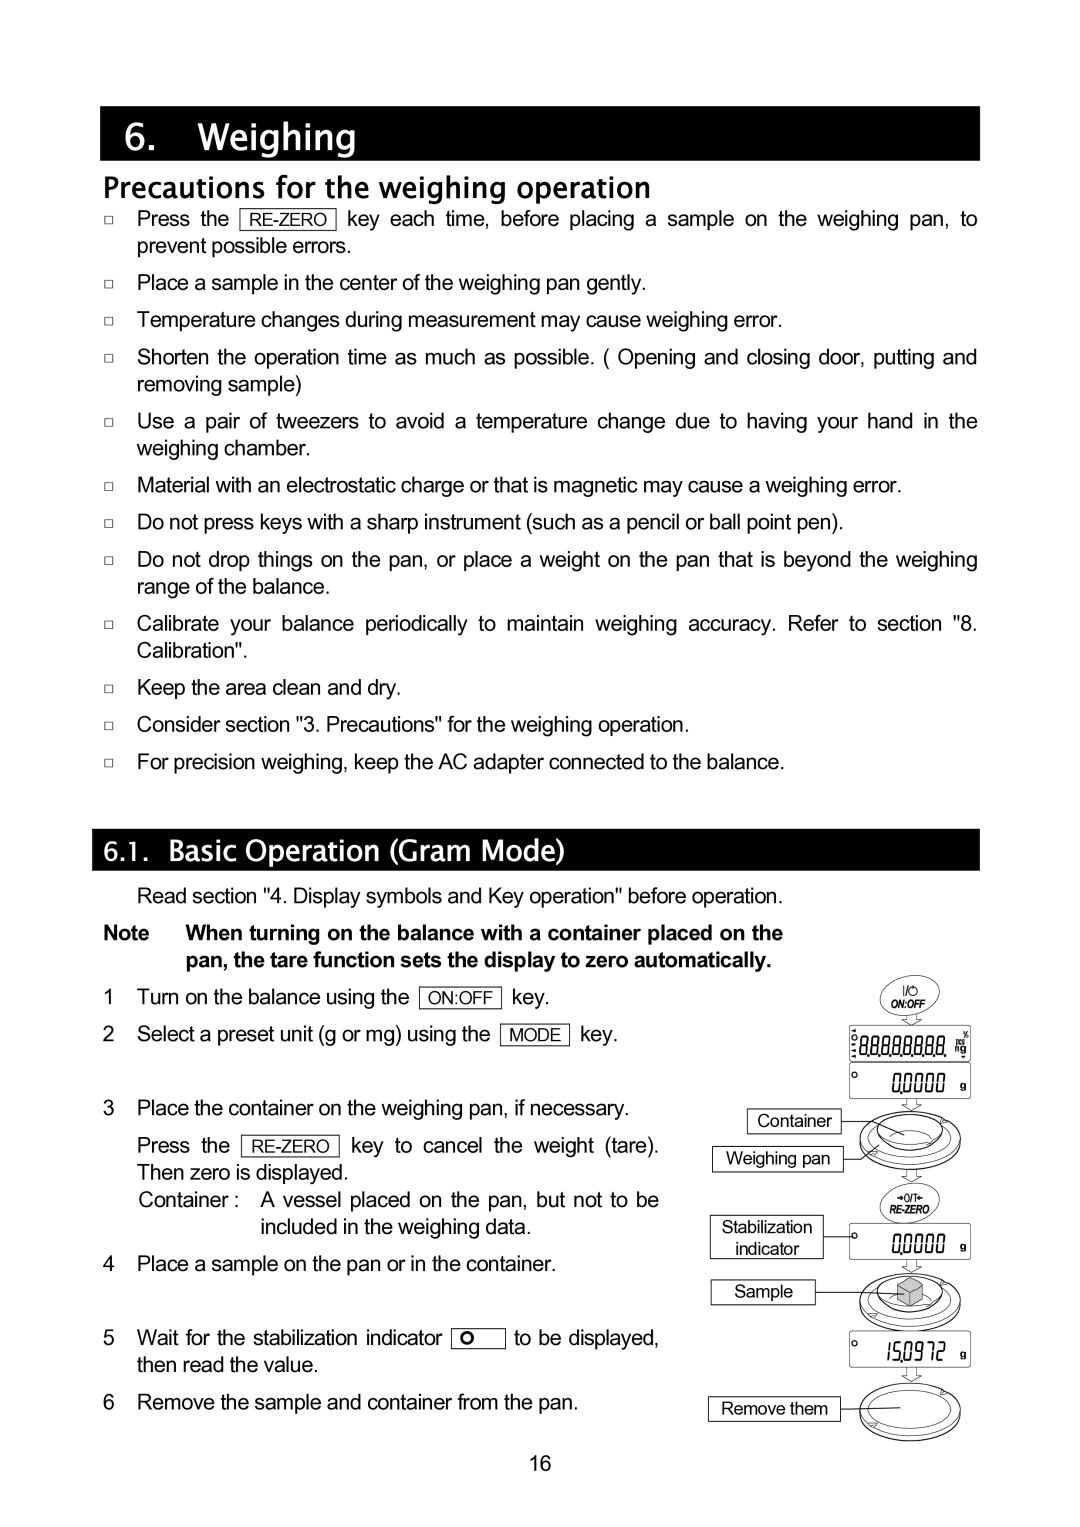
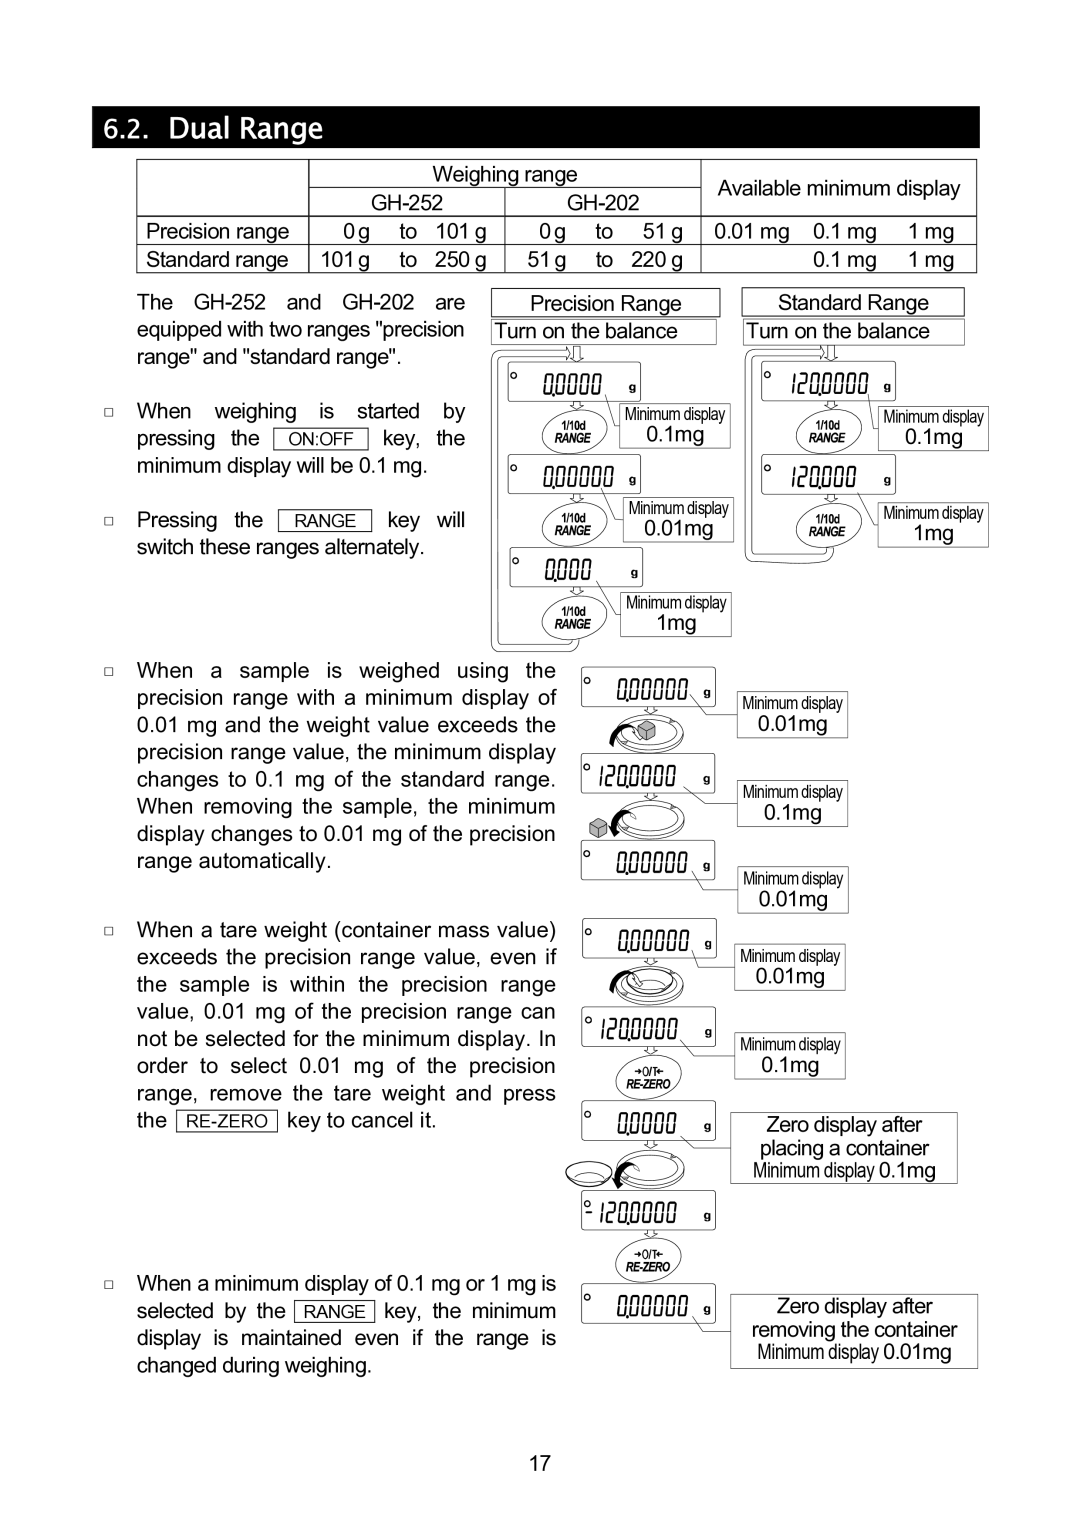
Install the balance as follows:
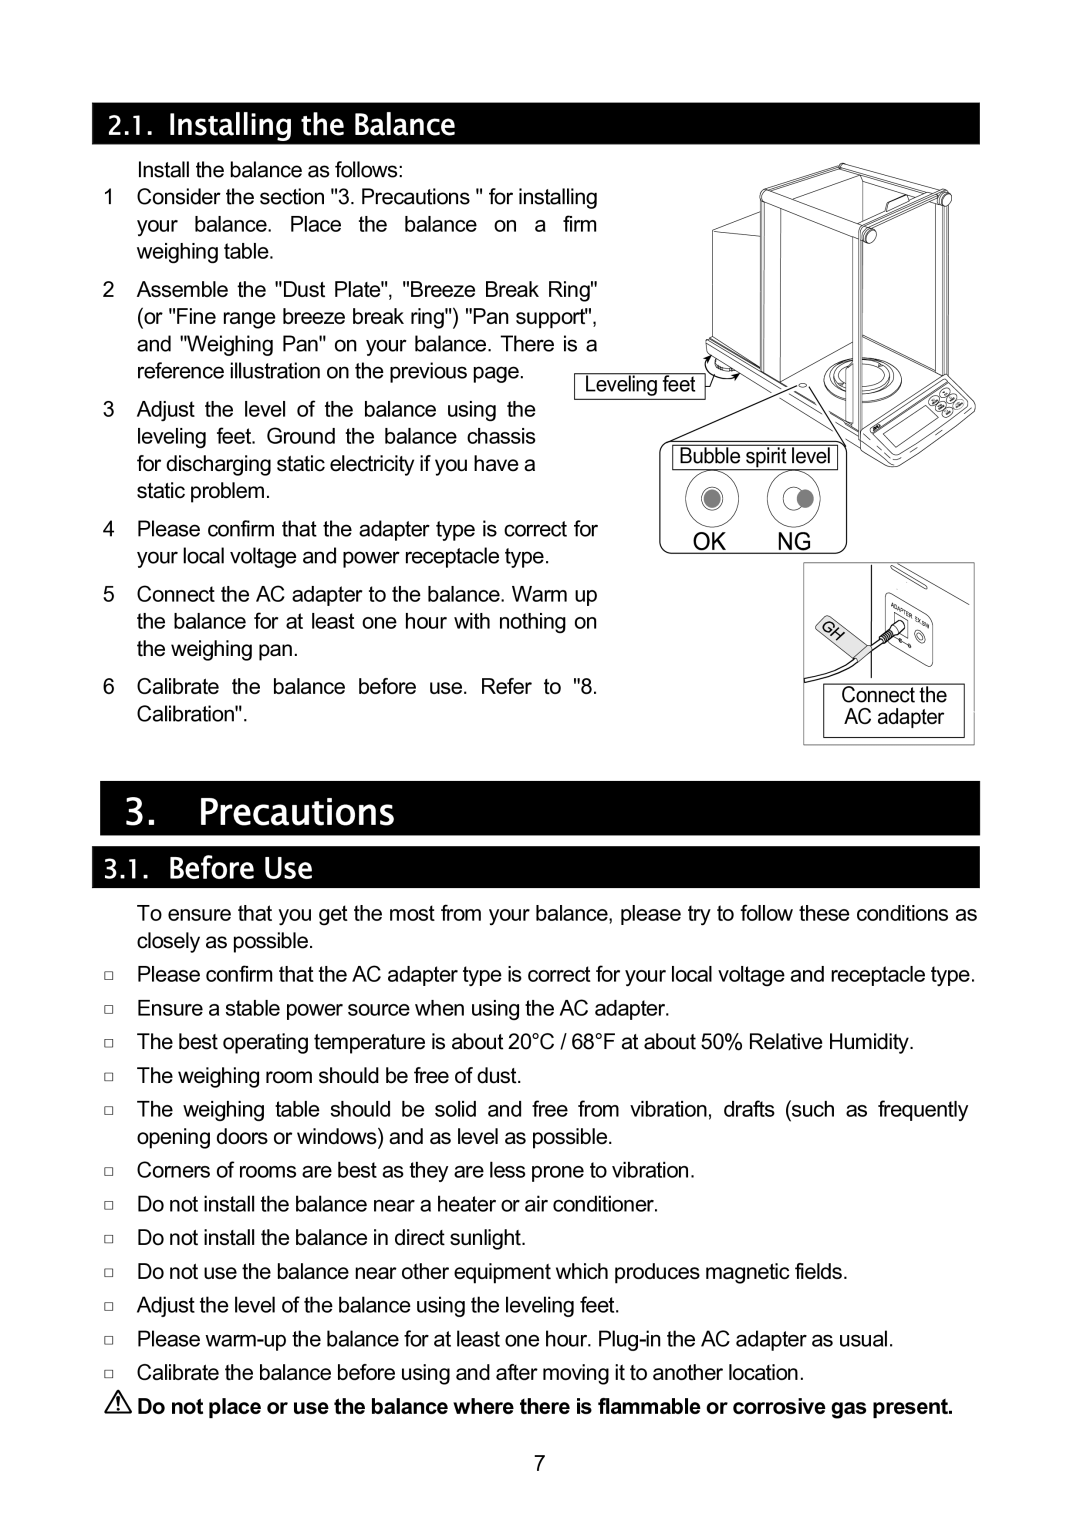
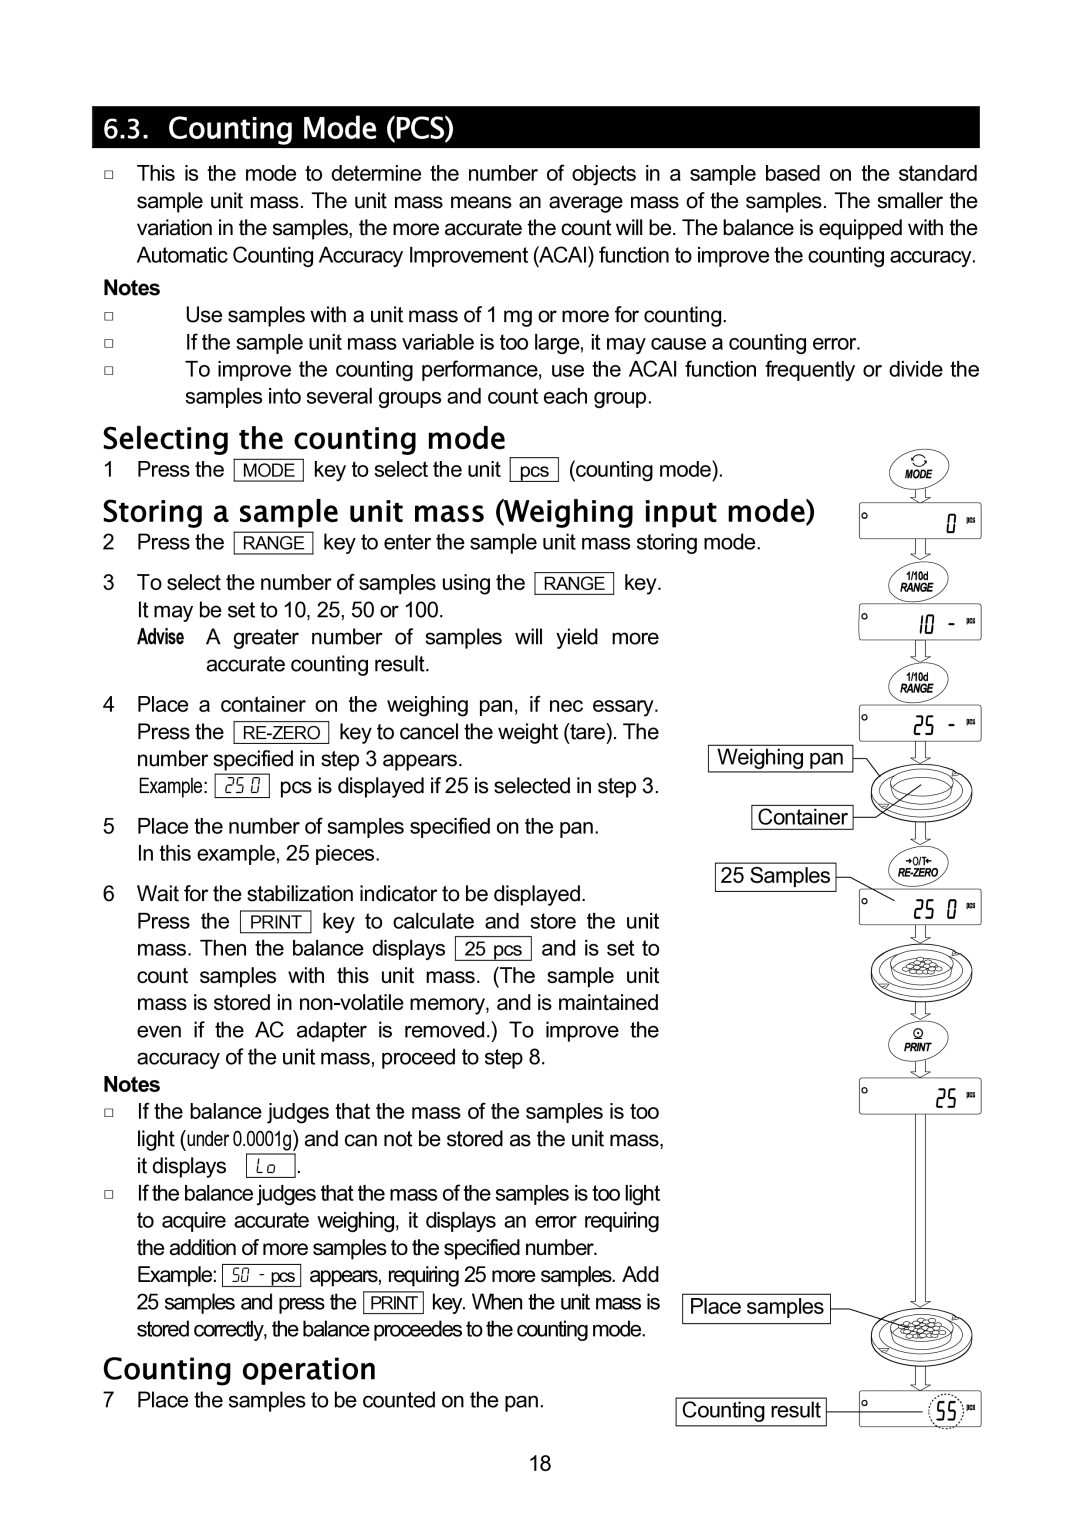
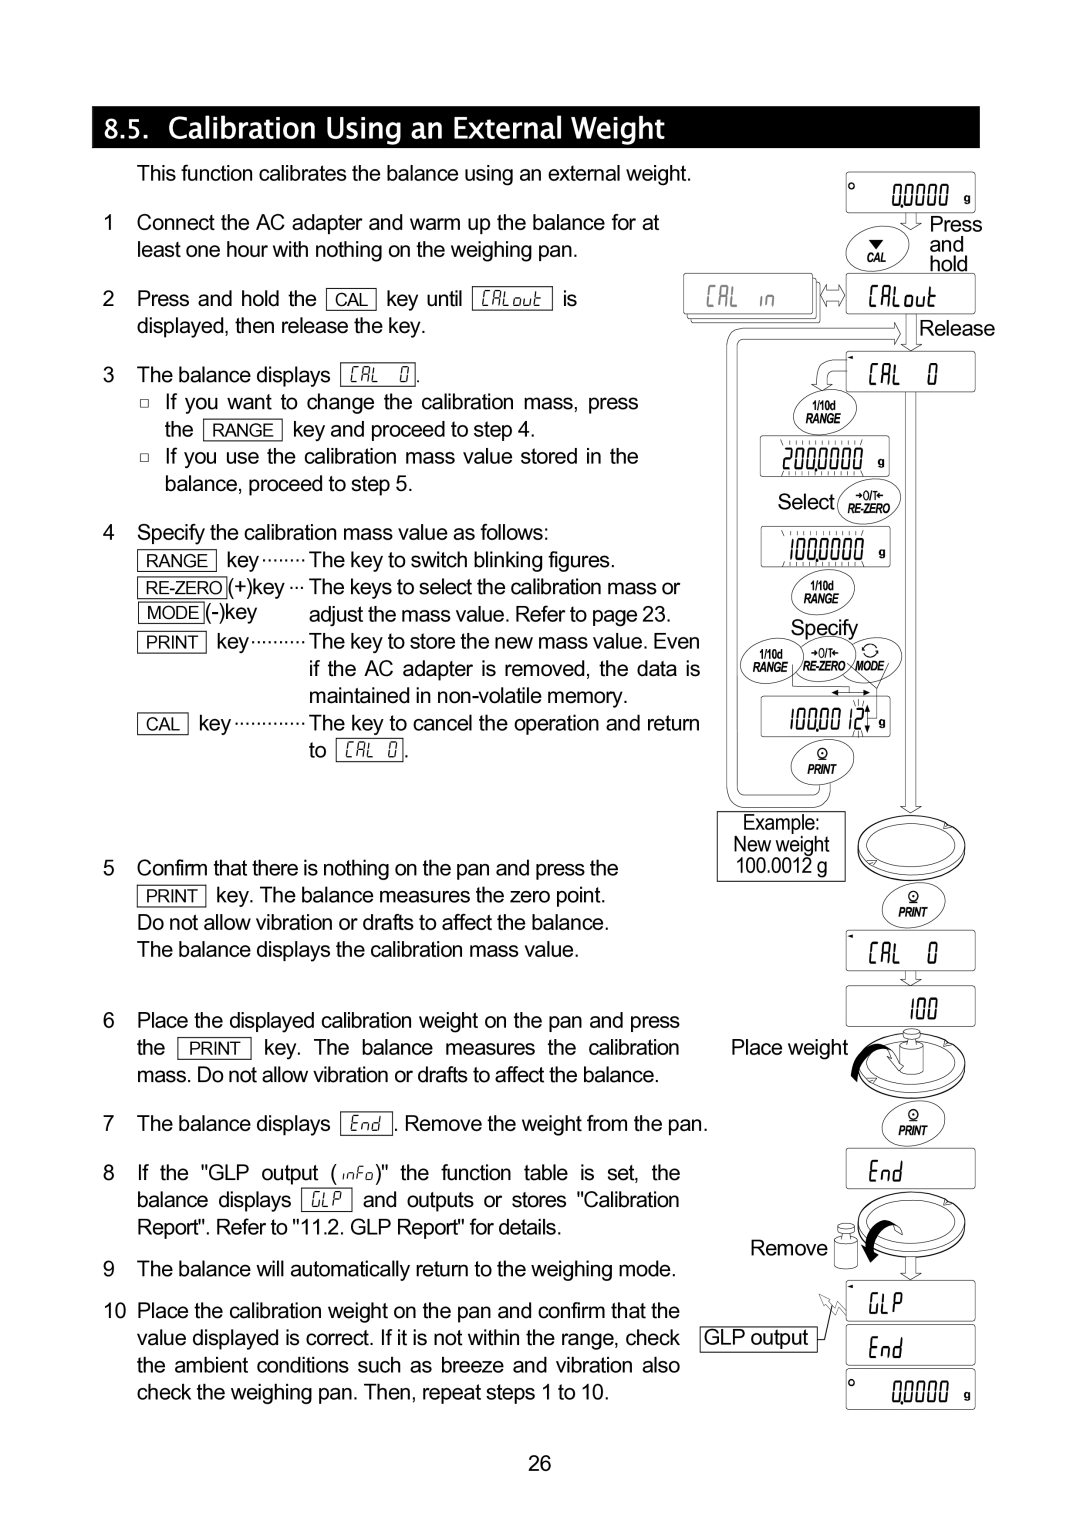
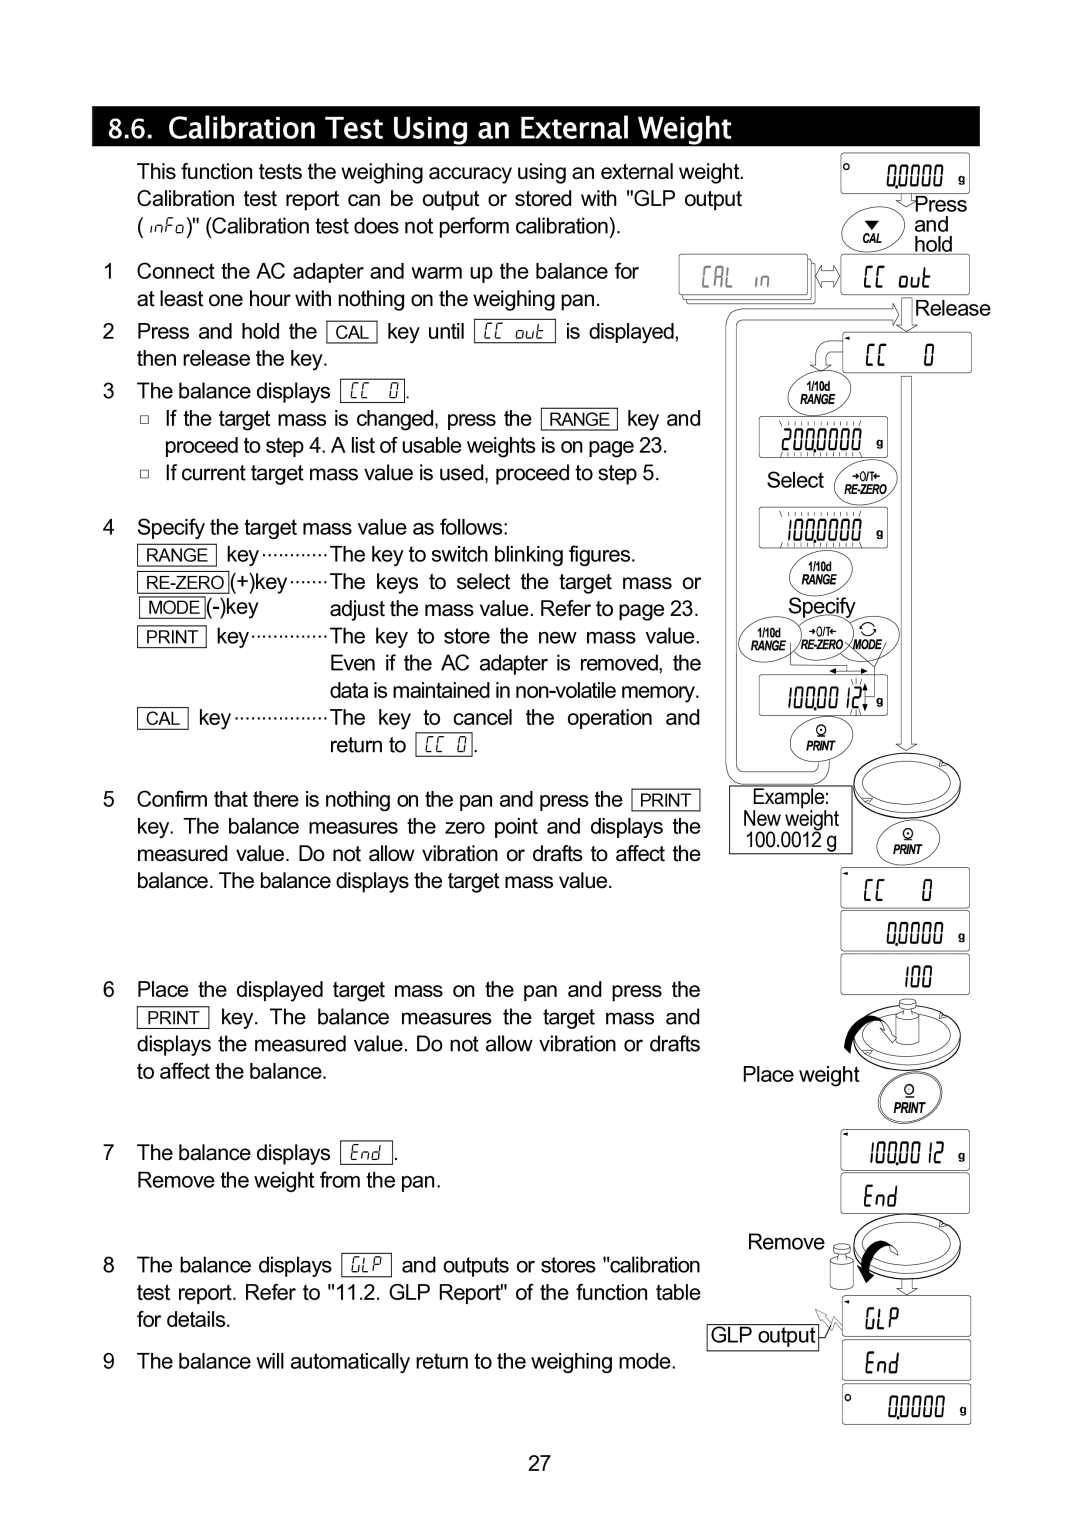
1Consider the section "3. Precautions " for installing your balance. Place the balance on a firm weighing table.
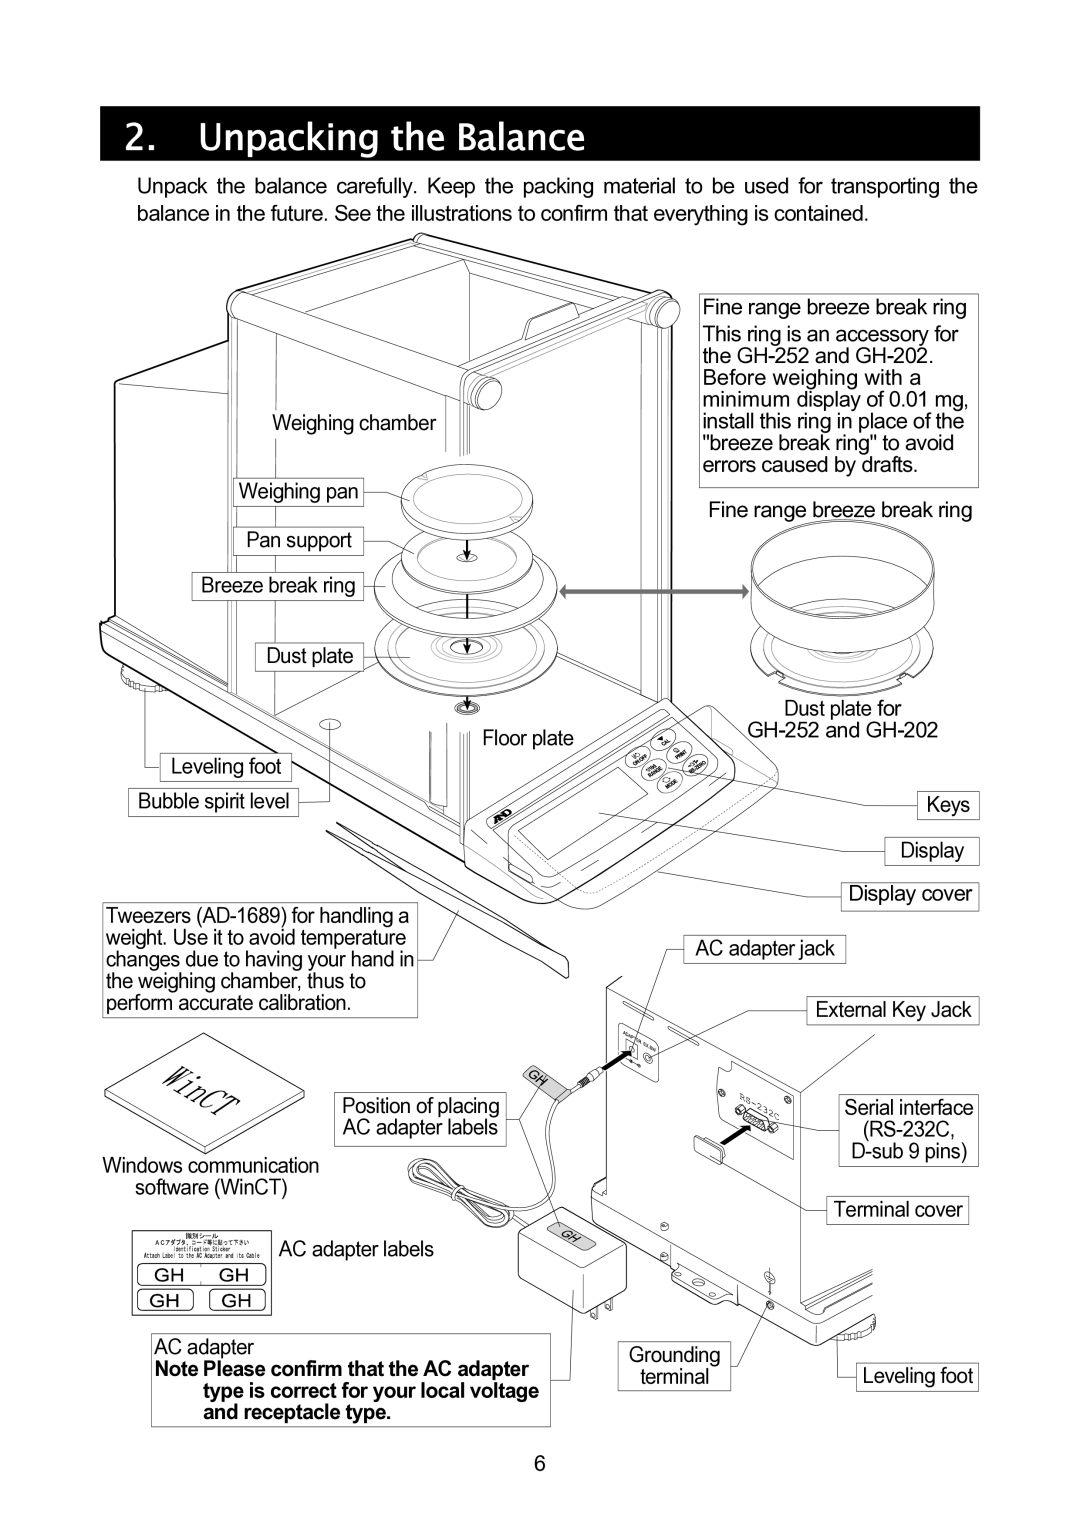
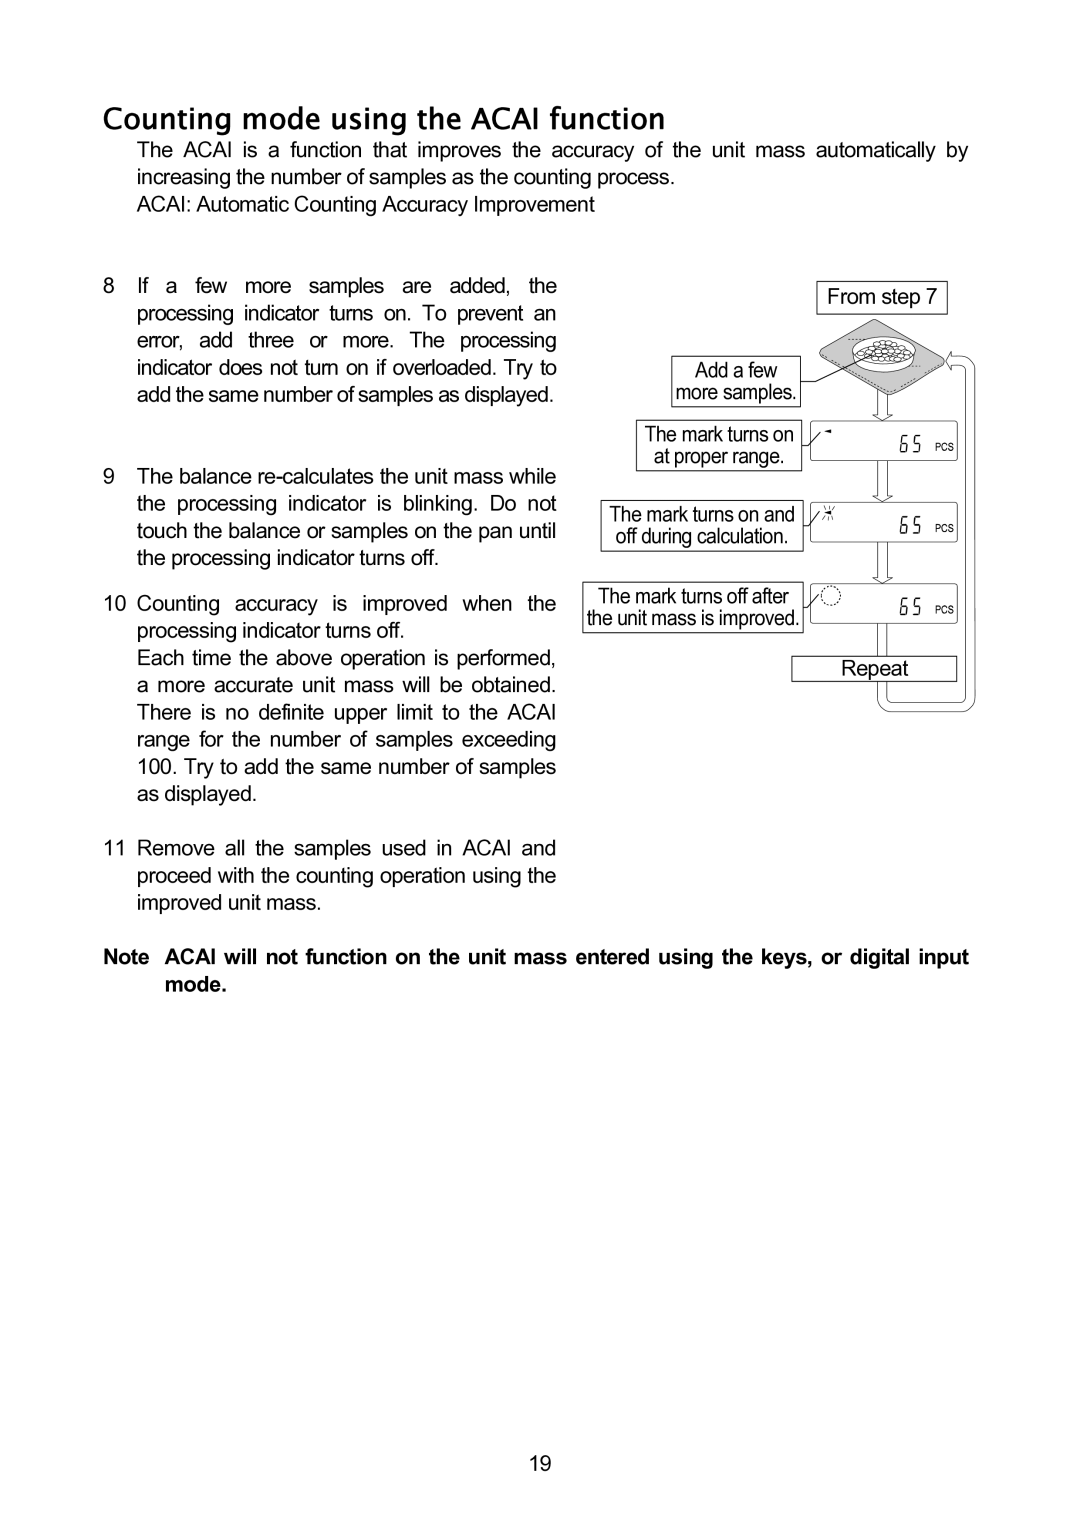
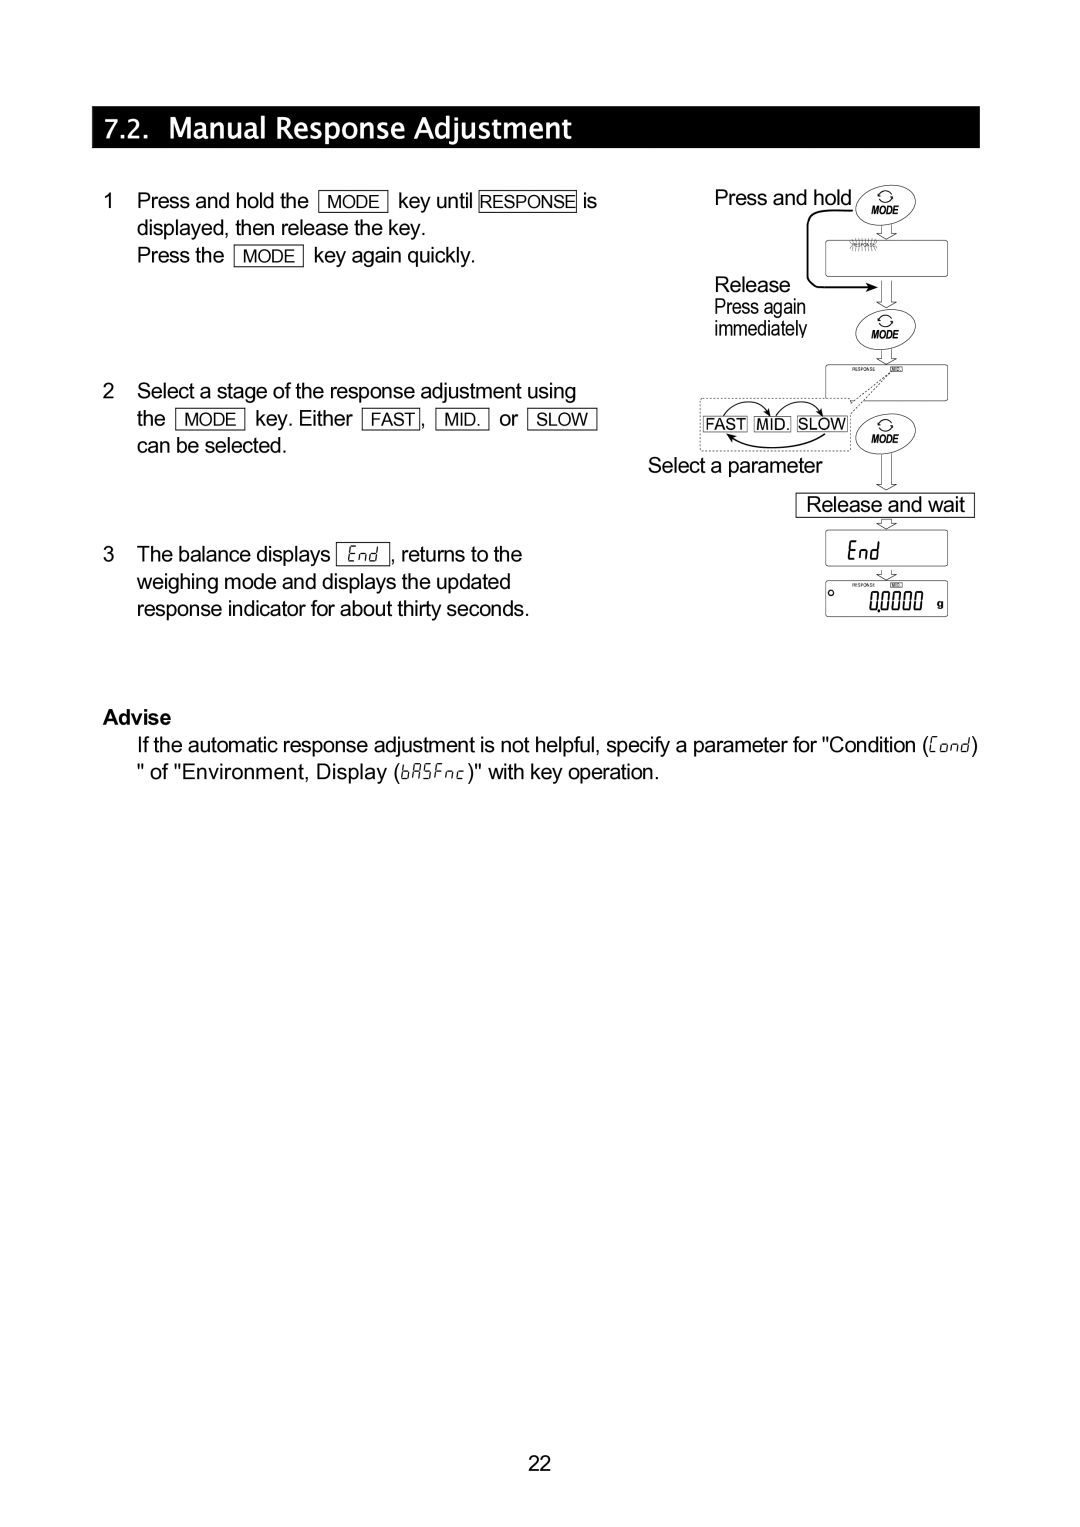
2Assemble the "Dust Plate", "Breeze Break Ring" (or "Fine range breeze break ring") "Pan support", and "Weighing Pan" on your balance. There is a reference illustration on the previous page.
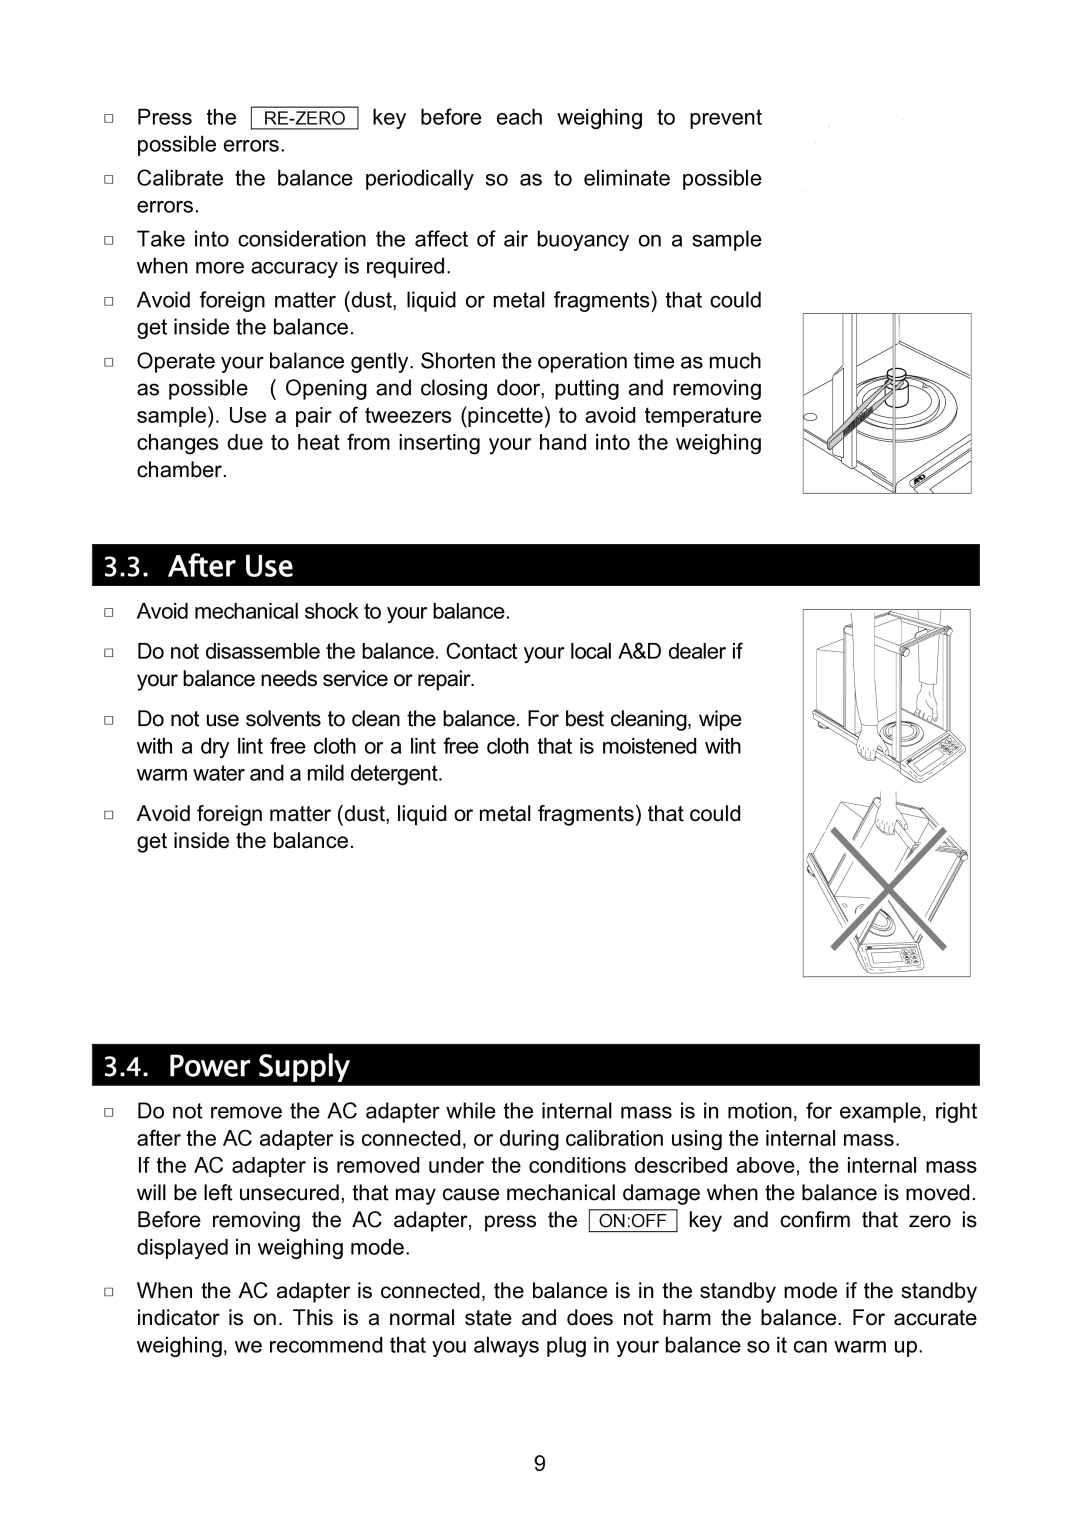
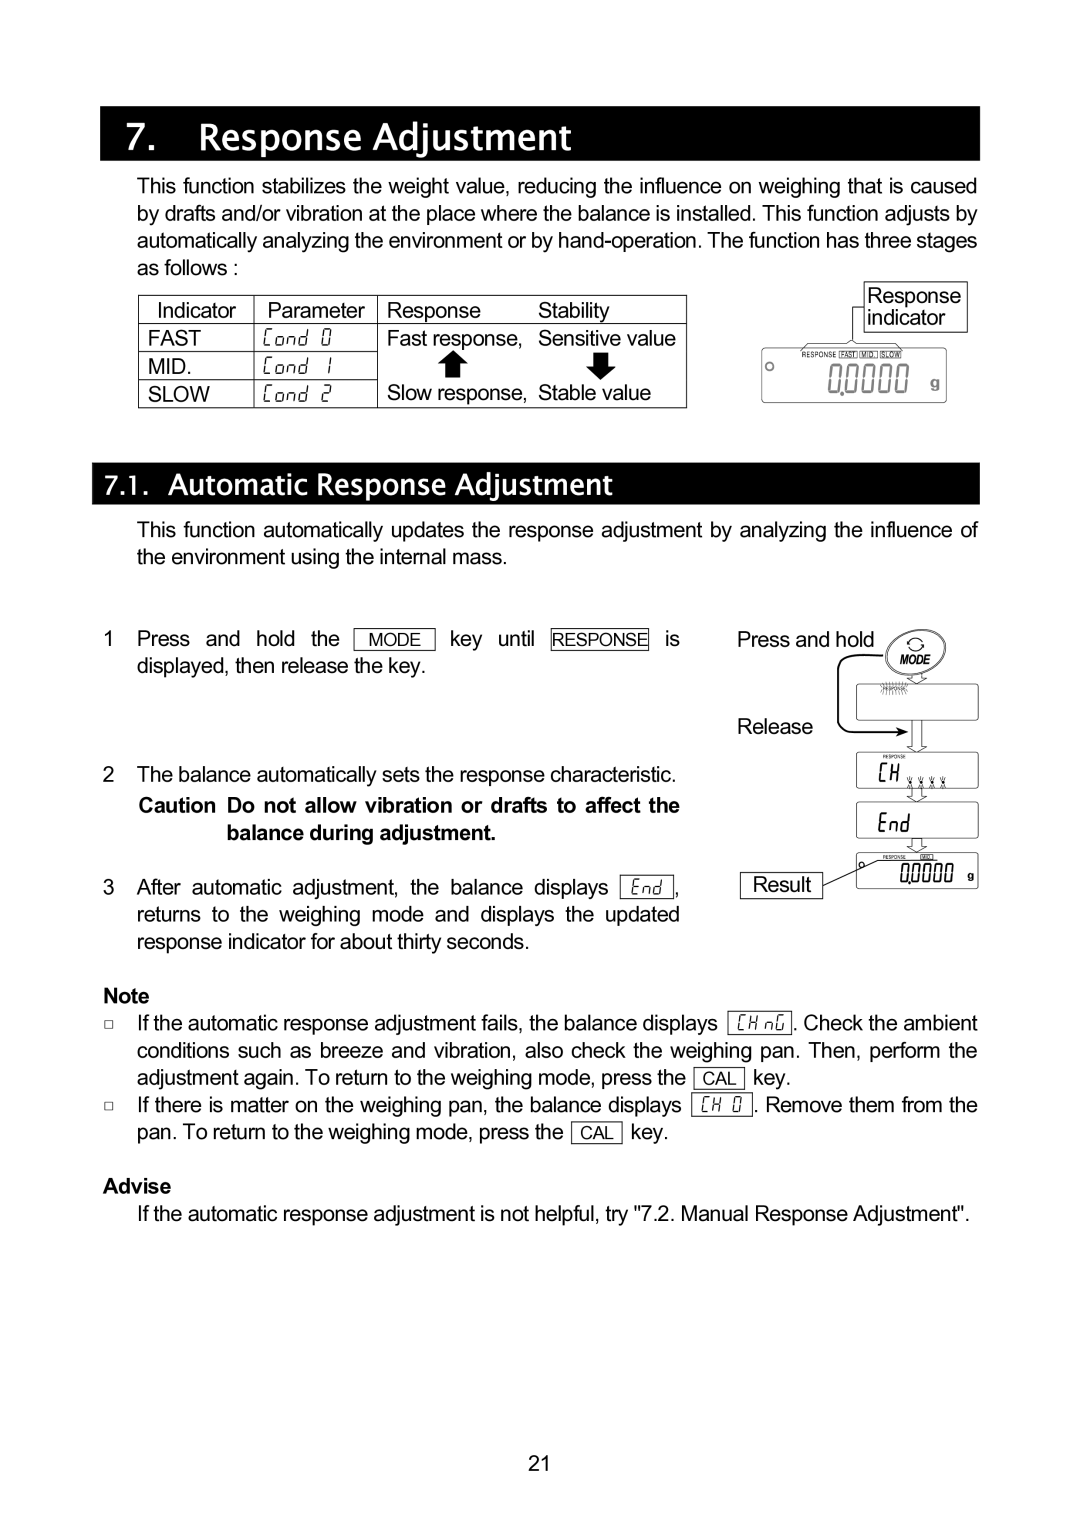
3Adjust the level of the balance using the leveling feet. Ground the balance chassis for discharging static electricity if you have a static problem.
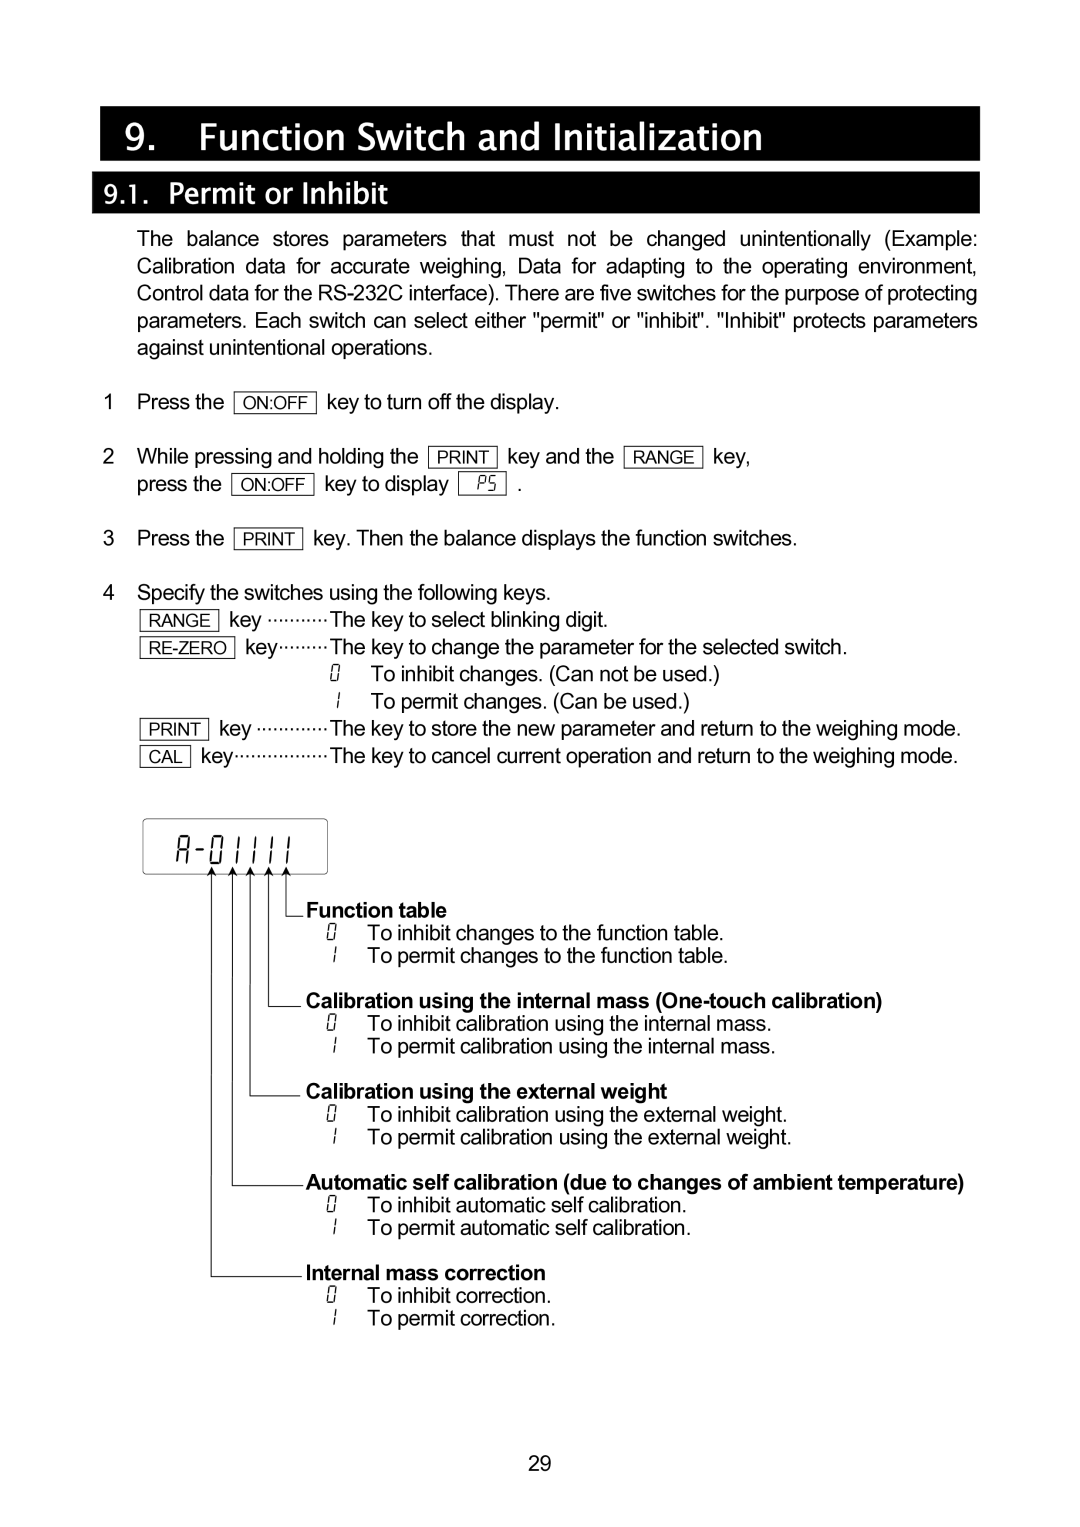
4Please confirm that the adapter type is correct for your local voltage and power receptacle type.
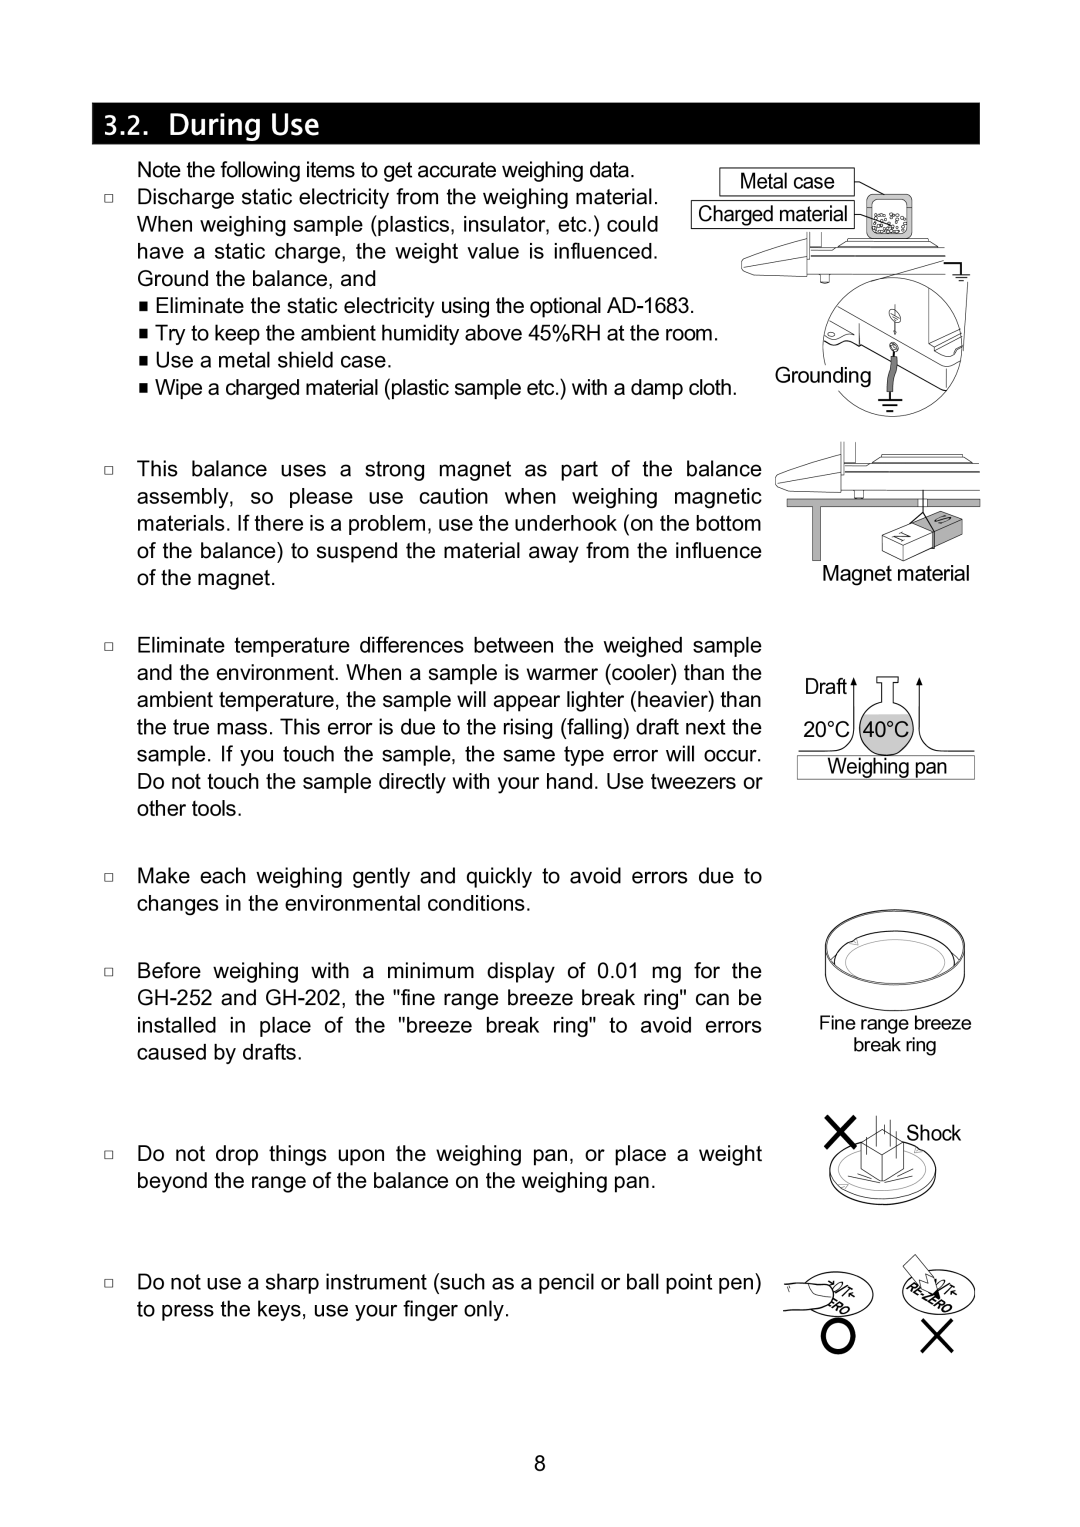
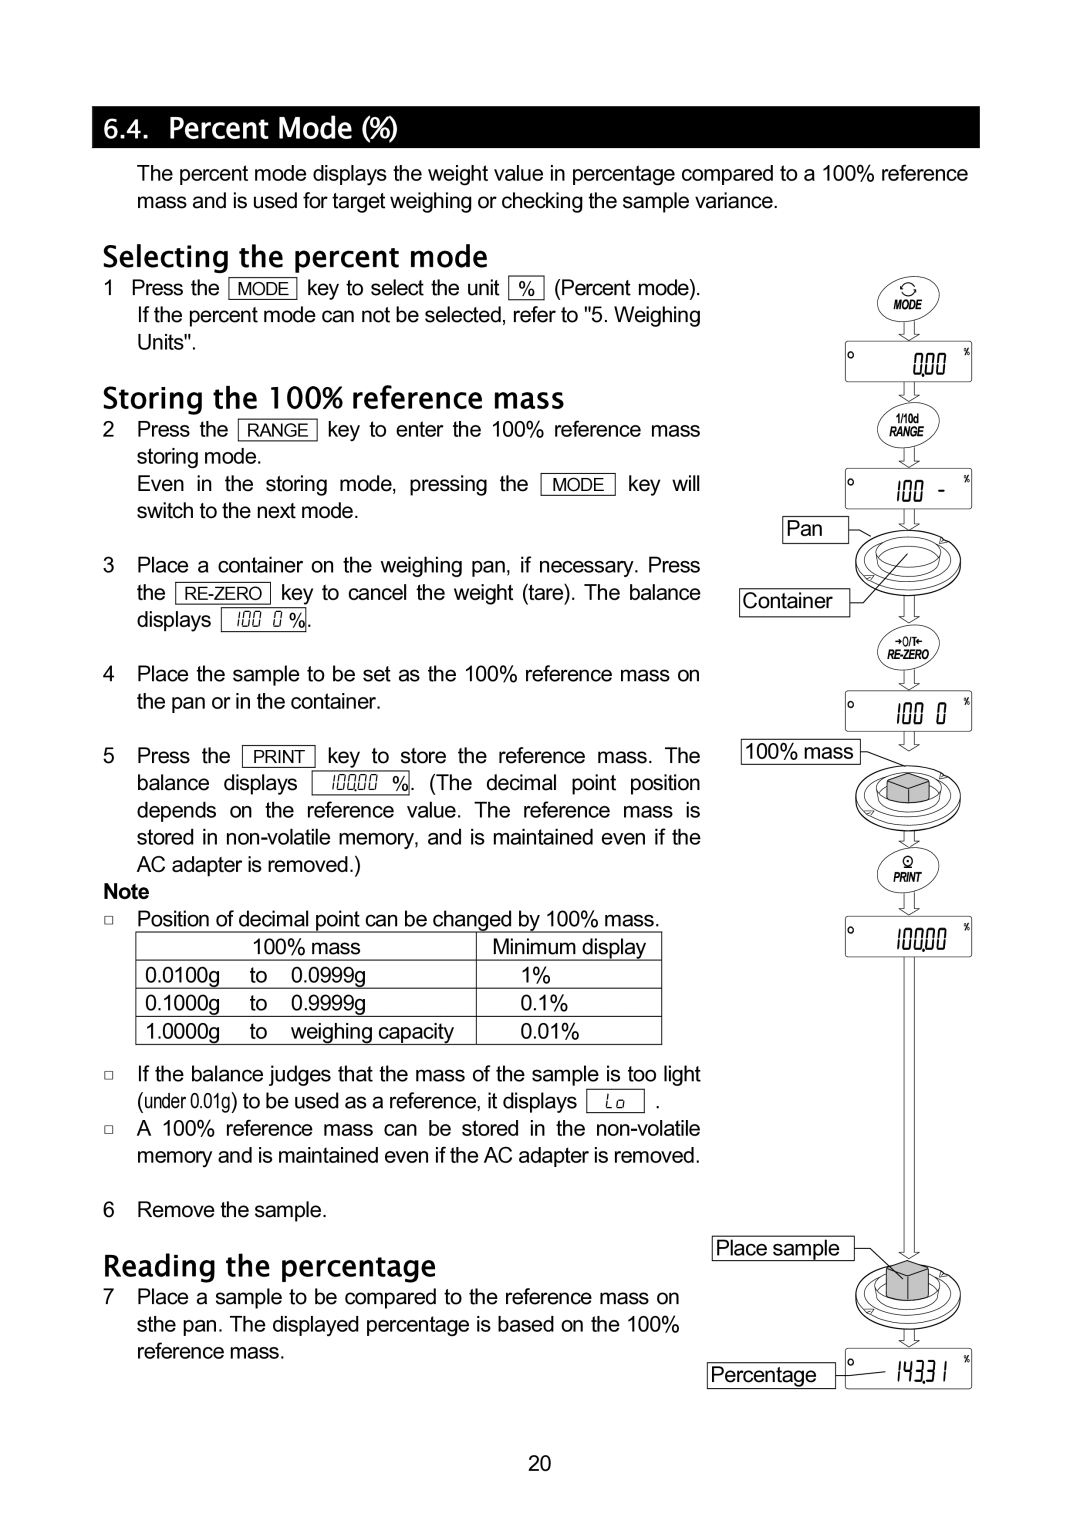
5Connect the AC adapter to the balance. Warm up the balance for at least one hour with nothing on the weighing pan.
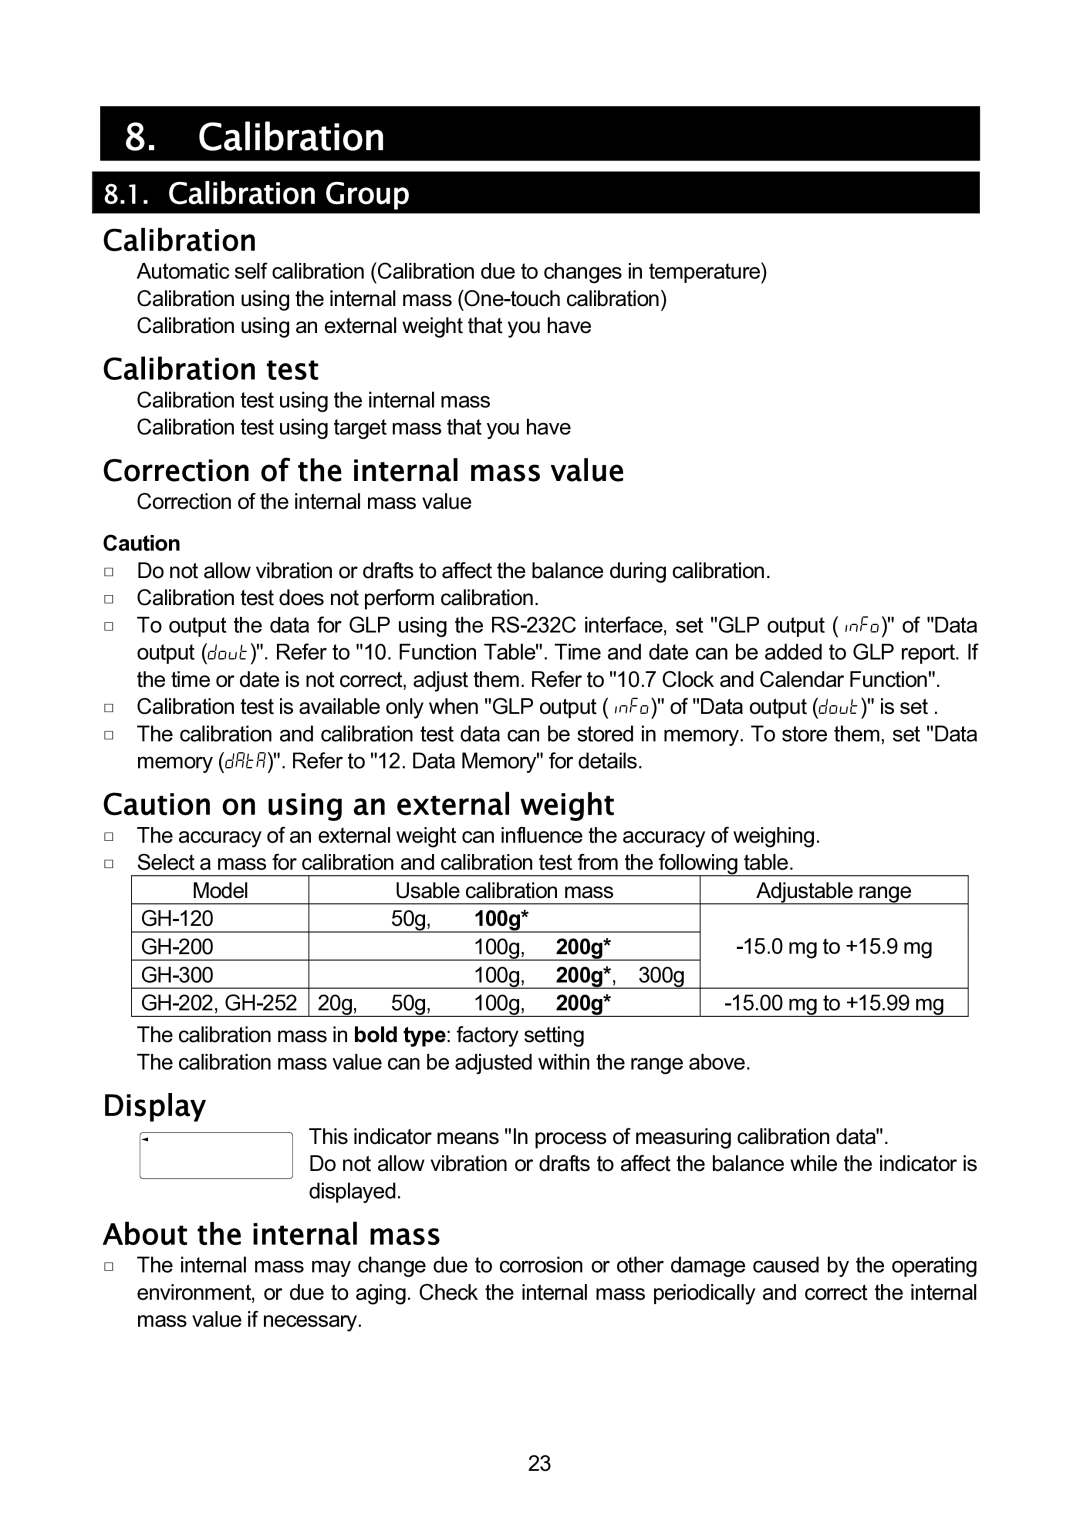
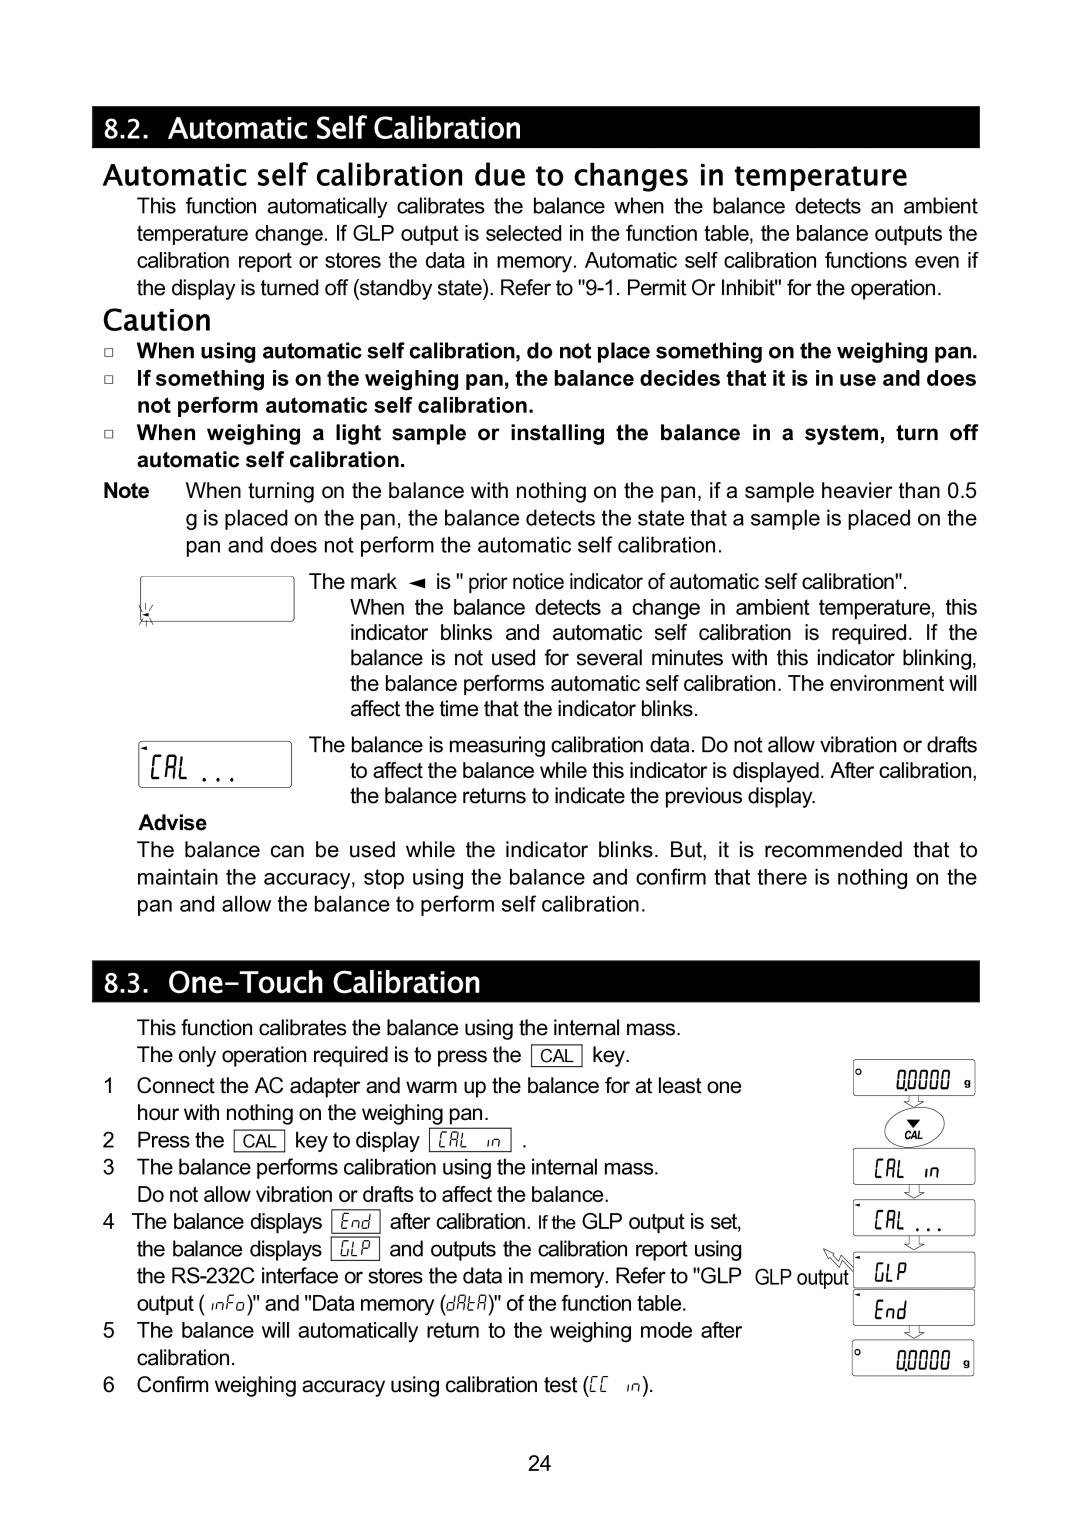
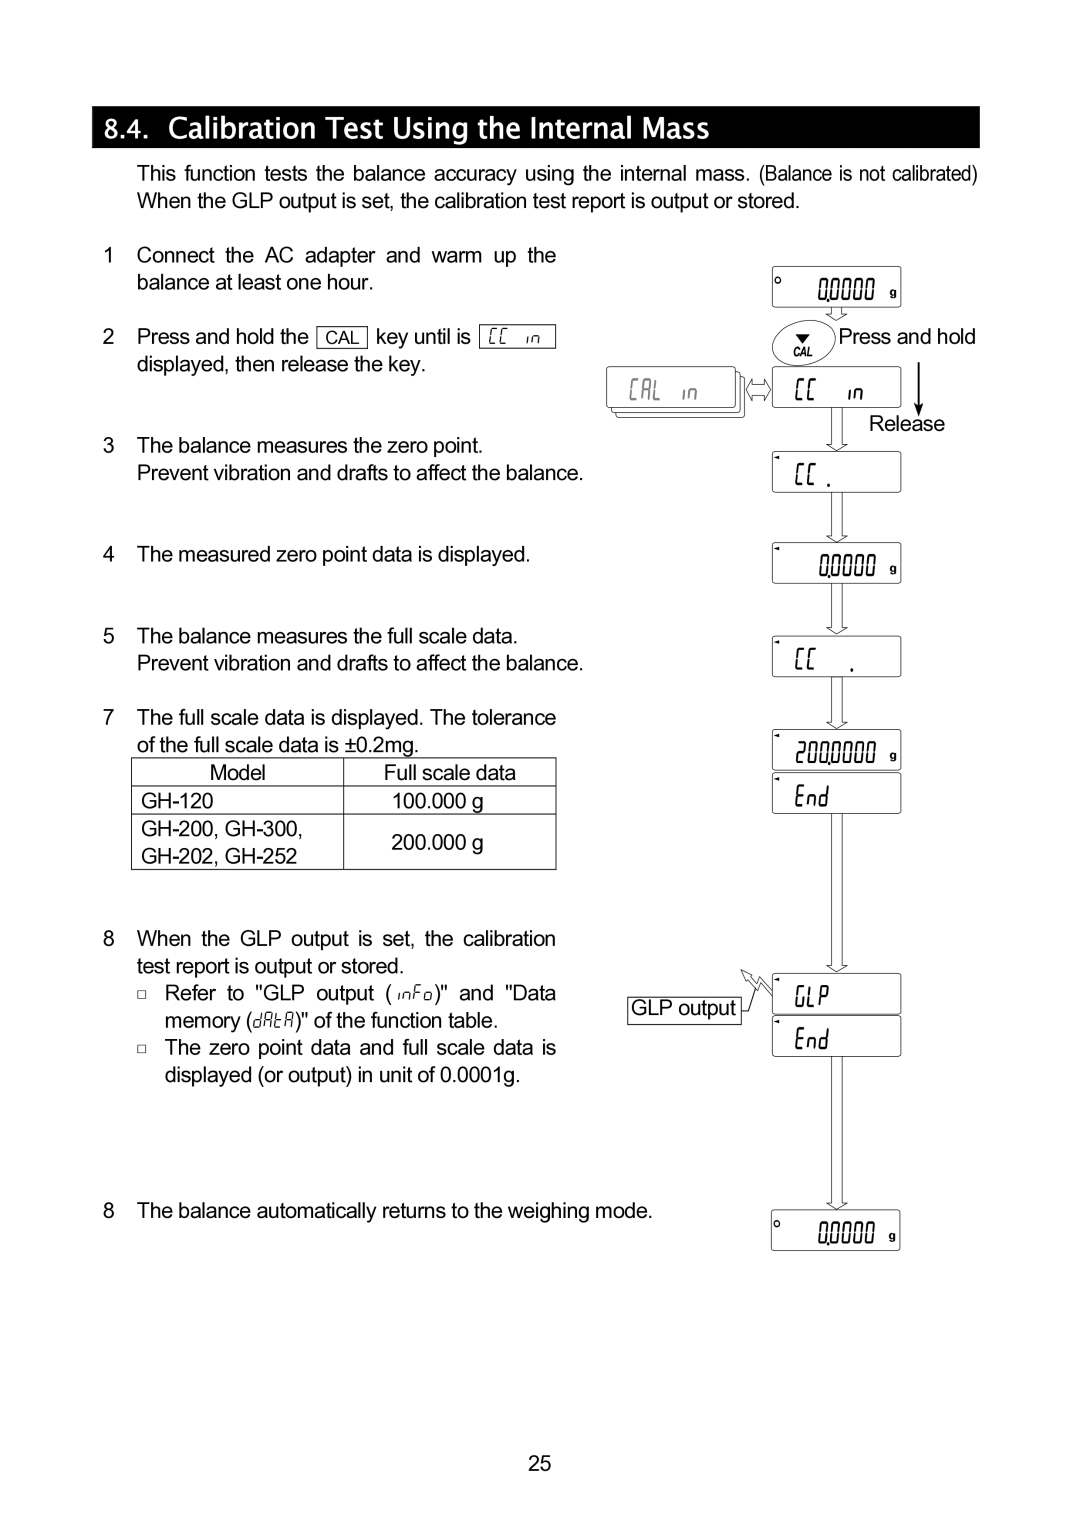
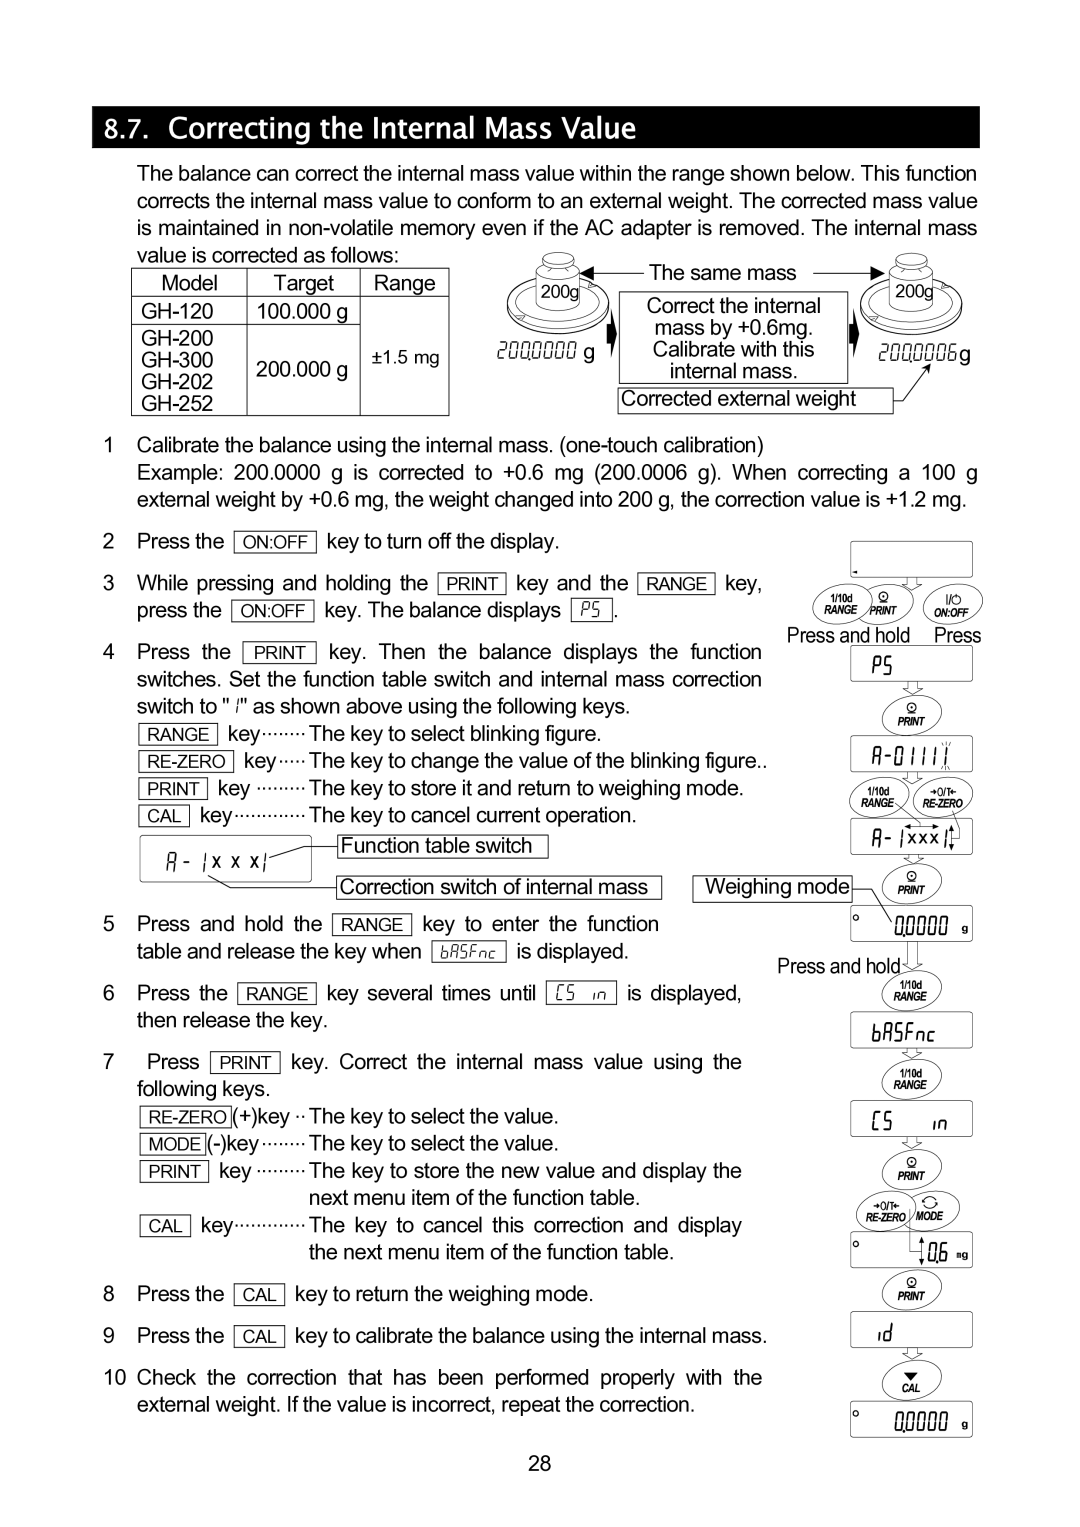
6Calibrate the balance before use. Refer to "8. Calibration".
Bubble spirit level
Connect the |
AC adapter |
3.Precautions
3.1.Before Use
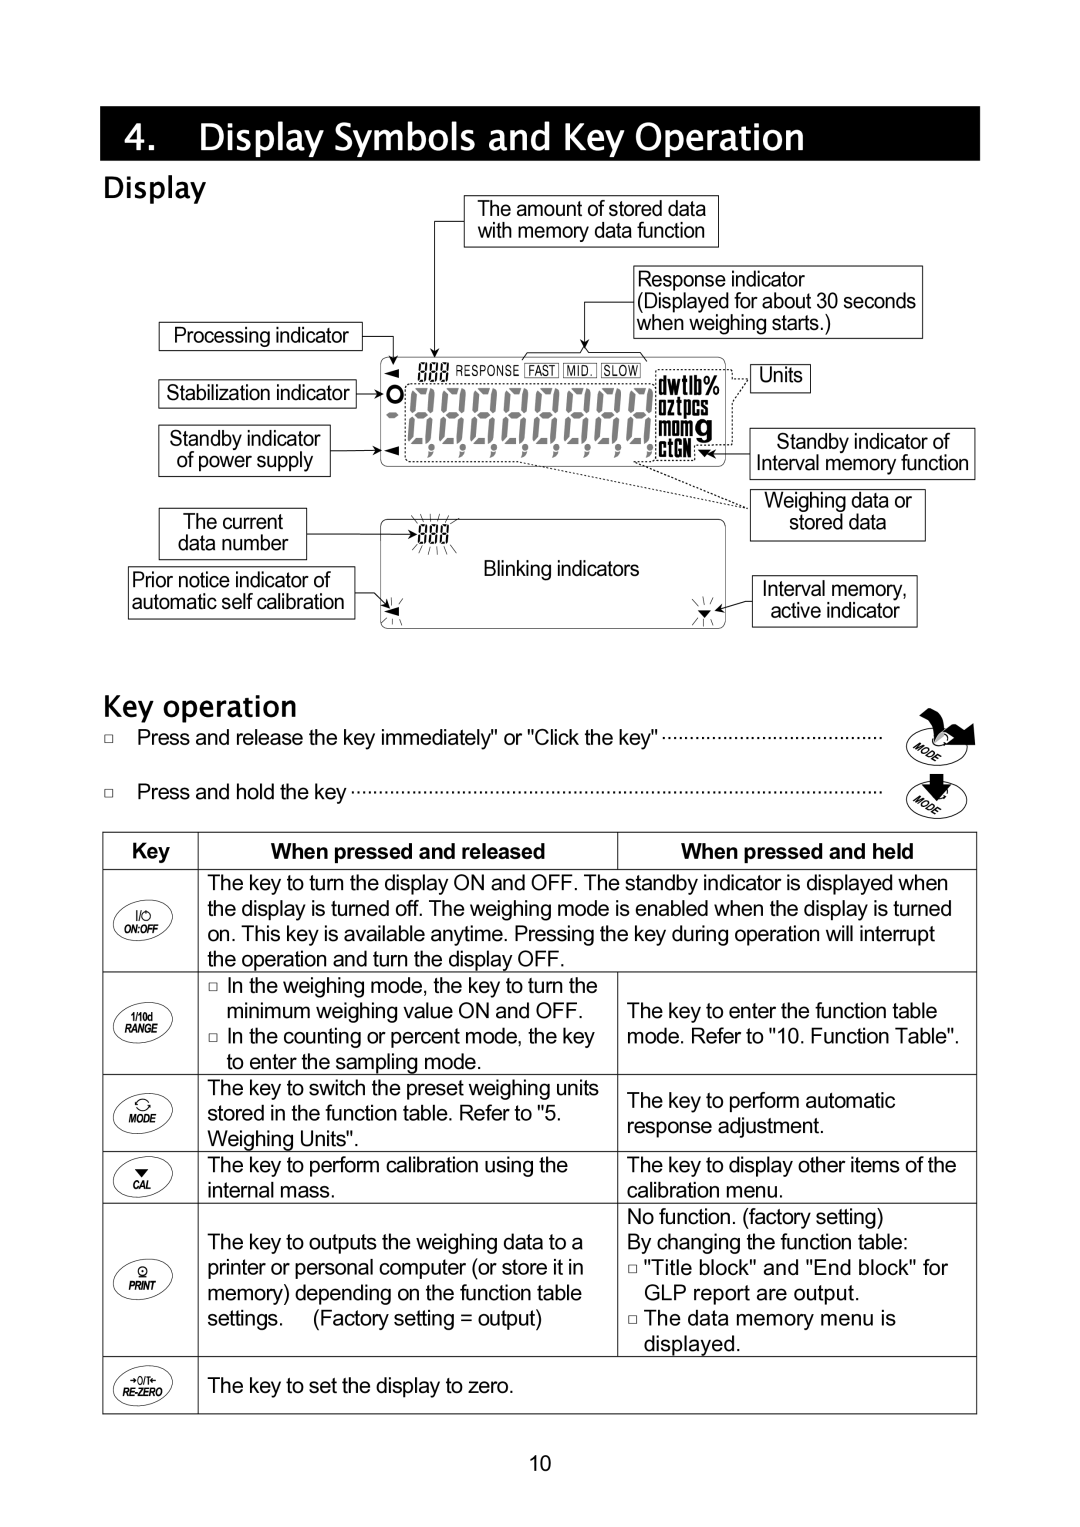
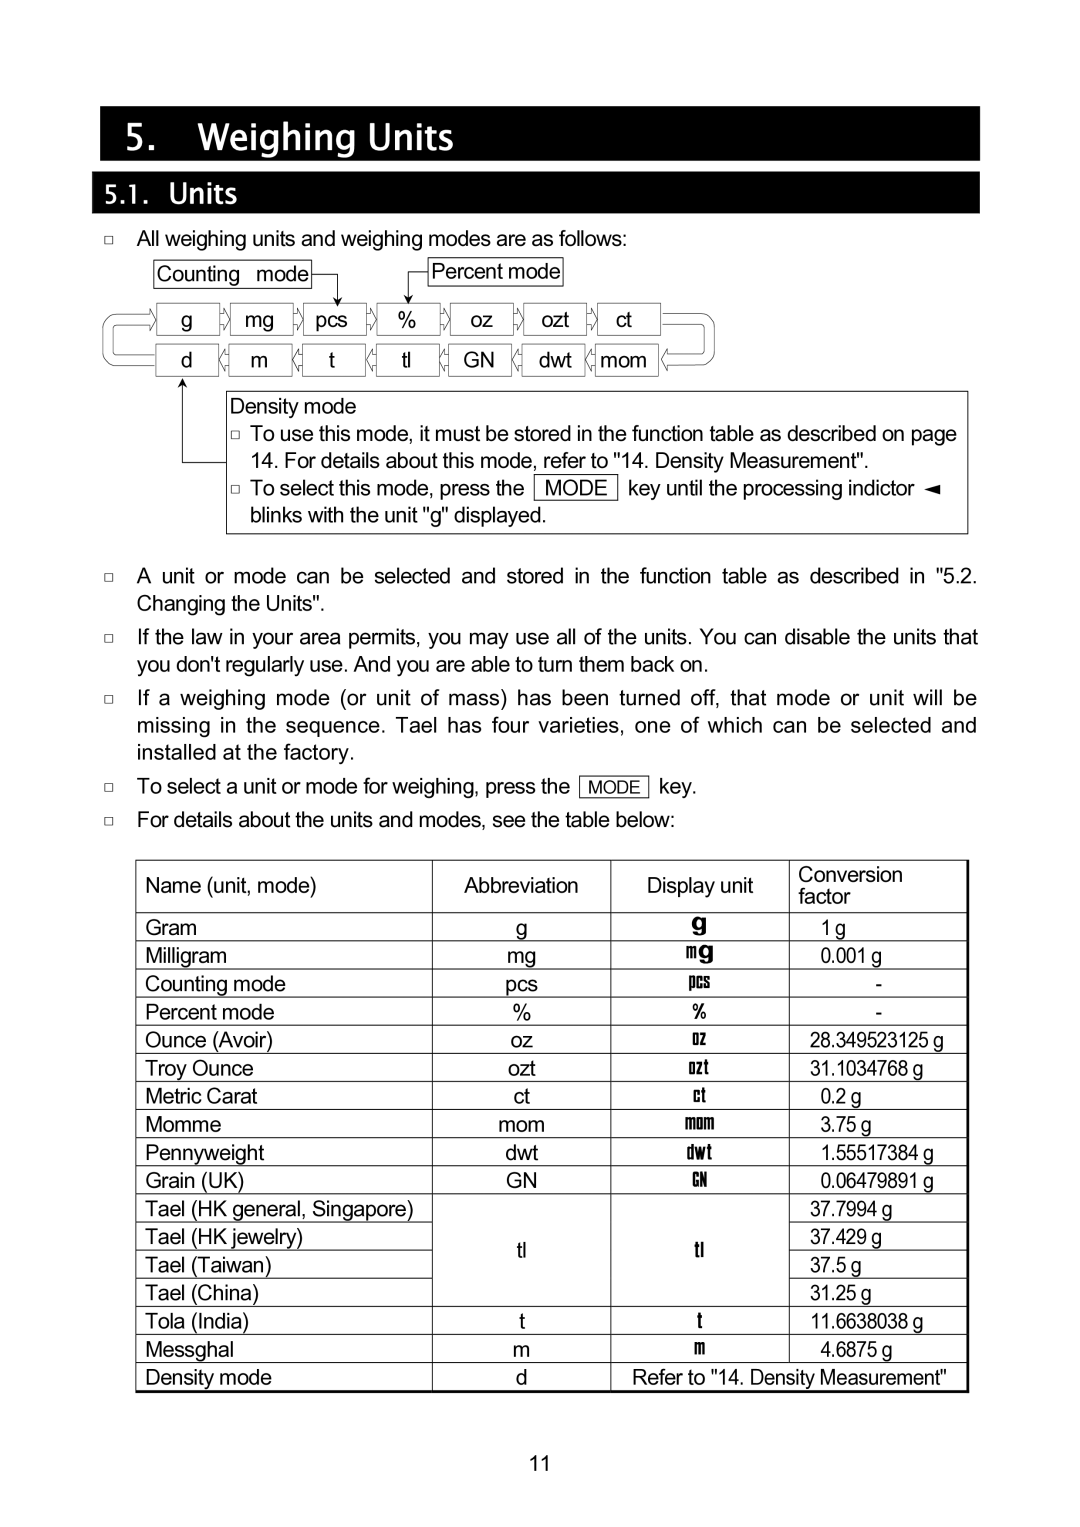
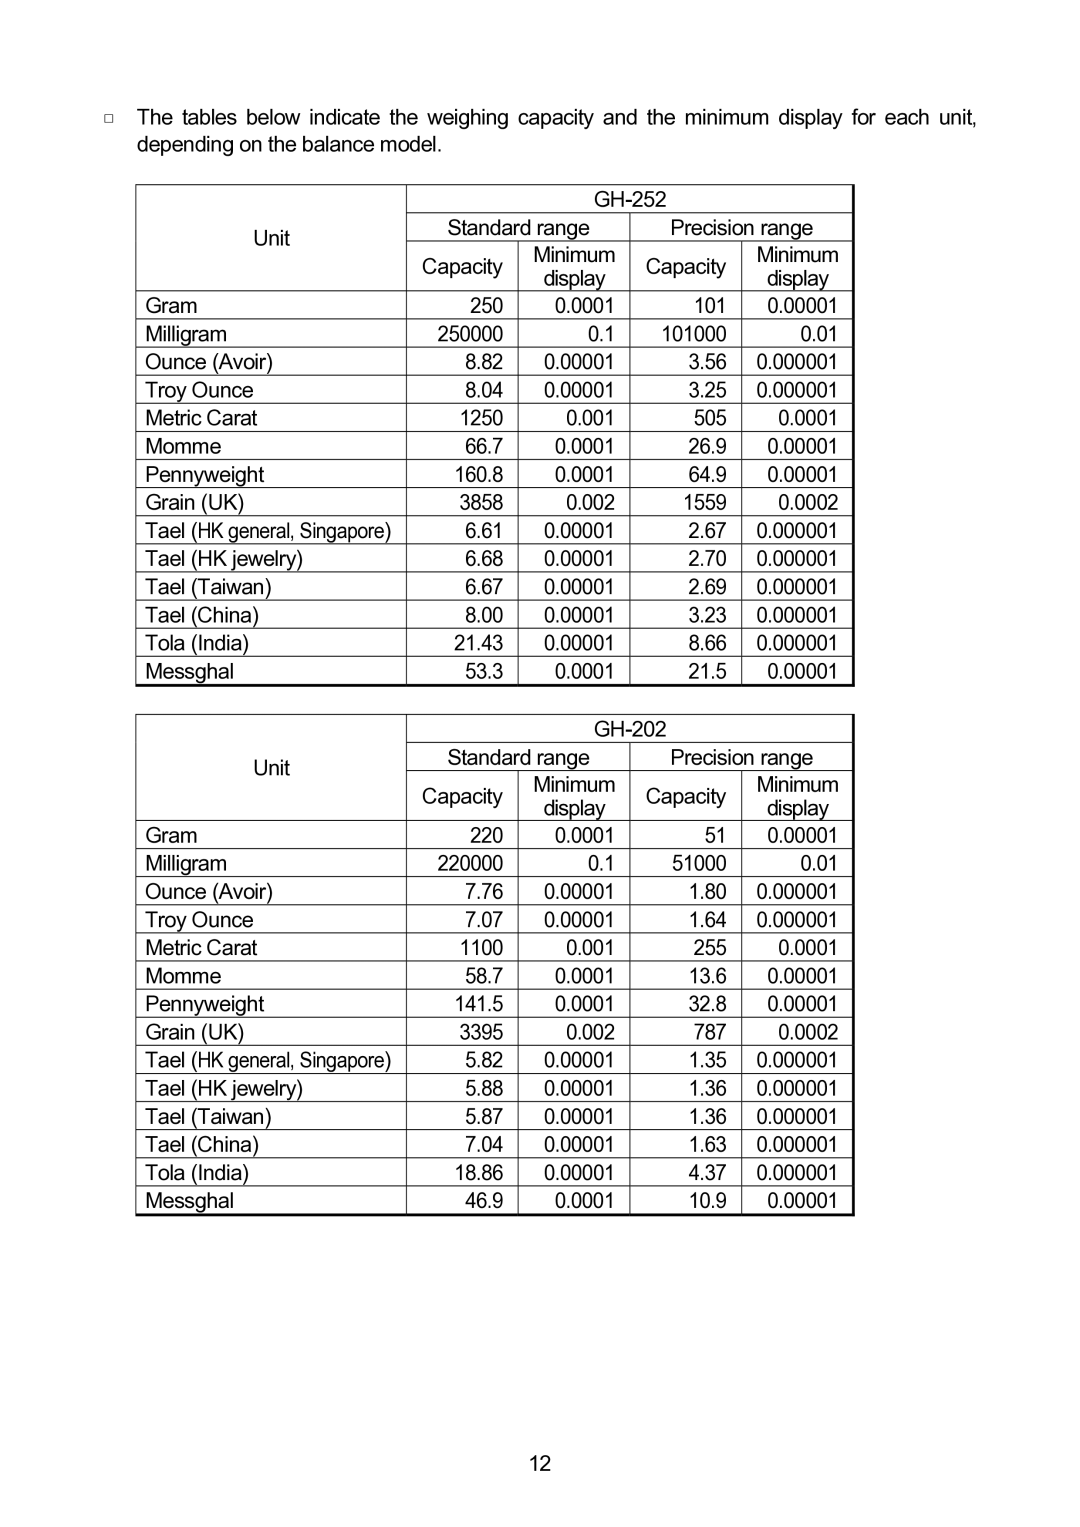
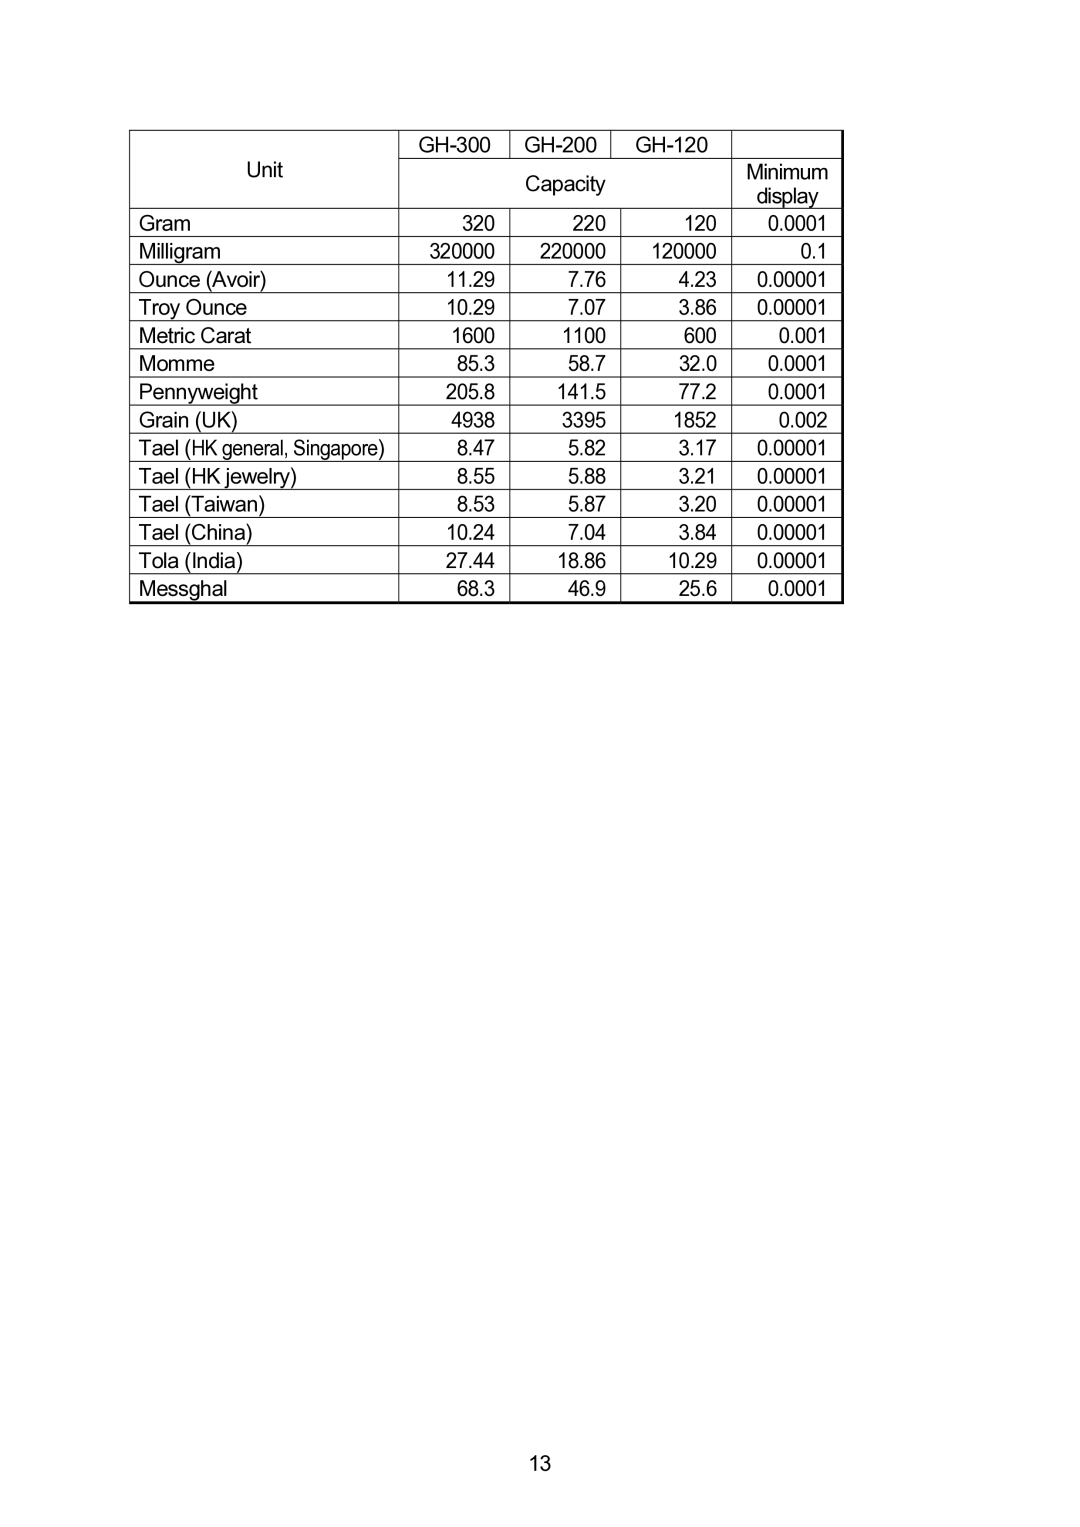
To ensure that you get the most from your balance, please try to follow these conditions as closely as possible.
Please confirm that the AC adapter type is correct for your local voltage and receptacle type.
Ensure a stable power source when using the AC adapter.
The best operating temperature is about 20°C / 68°F at about 50% Relative Humidity. The weighing room should be free of dust.
The weighing table should be solid and free from vibration, drafts (such as frequently opening doors or windows) and as level as possible.
Corners of rooms are best as they are less prone to vibration.
Do not install the balance near a heater or air conditioner.
Do not install the balance in direct sunlight.
Do not use the balance near other equipment which produces magnetic fields. Adjust the level of the balance using the leveling feet.
Please
![]() Do not place or use the balance where there is flammable or corrosive gas present.
Do not place or use the balance where there is flammable or corrosive gas present.
7
