Samsung MR7492W, MR5493G, MR7491G, MR5494W One-stage Cooking, Power Levels, = warm = simmer = low

Page 37
OPERATION
Defrosting Automatically
To thaw frozen food, set the weight of the food and the microwave automatically sets the defrosting time, power level and standing time.
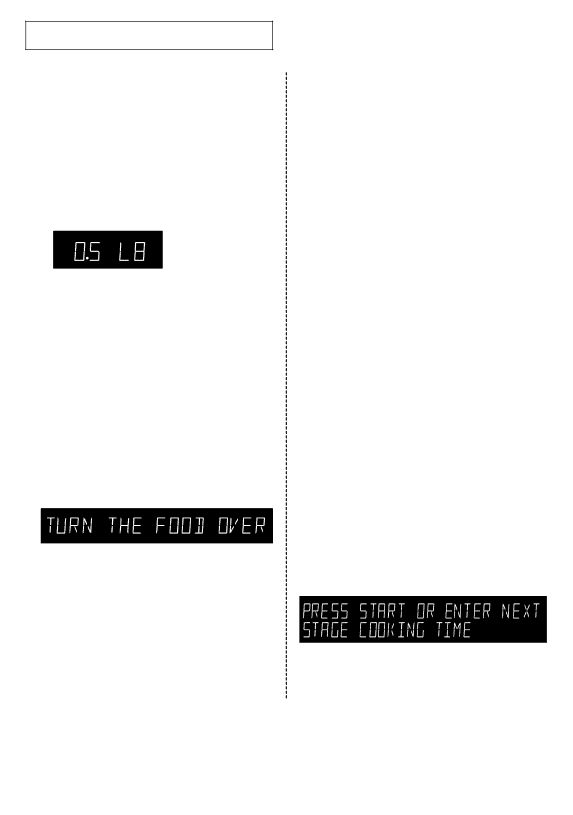
1 Press the Auto Defrost button. The dis- play shows “0.5 LB.” (0.2Kg if you have set your oven for metric measure)
2 To set the weight of your food, press the Auto Defrost button repeatedly. This increases the weight by 0.5 lb incre- ments, up to 6.0 lbs (The Auto Defrost button will increase the weight by 0.2Kg if you are using metric measurement).
You can also use the number buttons to enter the weight of the food directly.
The oven calculates the defrosting time and starts automatically. Twice during defrosting, the oven will beep and the display will read “TURN THE FOOD OVER.”
3 Press the Pause/Cancel button, open the oven door, and turn the food over.
4 Press the Start button to resume defrost- ing.
• See page 18 for the Auto Defrosting Guide

Setting Cooking Times & Power Levels

Your microwave allows you to set up to three differ- ent stages of cooking, each with its own time length and power level. The power level lets you control the heating intensity from Warm (1) to High (0).

One-stage Cooking

For simple one-stage cooking, you only need to set a cooking time. The power level is automatically set at High. If you want to set the power to any other level, you must set it using the Power Level button.

1 Use the number buttons to set a cooking time. You can set a time from one second to 99 minutes, 99 seconds. To set a time over one minute, enter the seconds too.

For example, to set 20 minutes, enter 2, 0, 0, 0 .

2 If you want to set the power level to something other than High, press the Power Level button, then use the number buttons to enter a power level.

Power Levels:

1

= warm

6

= simmer

2

= low

7

= medium high

3

= defrost

8

= reheat

4

= medium low

9

= sauté

5

= medium

0

= high

The display shows “PRESS START OR ENTER NEXT STAGE COOKING TIME”

3 Press the Start button to begin cooking. If you want to change the power level, press Pause/Cancel before you press Start, and re-enter all of the instructions.

OPERATION 11

Image 37
Contents Four à micro-ondes Instructions d’installation fournies Installez cet appareil conformément auxVeuillez lire toutes les instructions avant ’utiliser l’appareilGardez l’intérieur du four propre. Les particules IMPORTANTES, suiteGardez le cordon éloigné de toute surface chaude Utilisation d’une rallonge Directives DE Mise À LA TerreDirectives de cuisson Table des matièresAnnexe FonctionnementVérification des pièces Installation de votre four à micro-ondesMerci d’avoir choisi un produit Samsung Numéro de série Date d’achat ConcessionnaireTouches du panneau de commande Réglage de l’horloge Utilisation de la touche Pause/CancelAppuyez sur la touche CLOCK. L’afficheur montrera ClockTableau de cuisson instantanée Utilisation des touches de cuisson instantanéeAliment Poids Directive Réchauffage automatique Utilisation de la touche One Minute+Tableau de réchauffage automatique Poids DirectivesNiveaux de puissance Réglage de la durée de cuisson et du niveau de puissanceCuisson à un stade =chaud =mijotage =minimalRéglage de la durée de cuisson, suite Utilisation de la touche More/LessCuisson à plusieurs stades StartUtilisation de la minuterie Mode de démonstrationActivation du verrouillage de sécurité Par la suite, vous ne pouvez pas vous servir du fourUstensiles de cuisson Non recommandéTest de résistance aux micro-ondes Verre et vitrocéramiqueTechniques de cuisson Guide de cuisson de la volaille Guide de cuisson de la viandeRôti de boeuf, sans os BaconDarnes Guide de cuisson de fruits de merFilets CrevettesGuide de cuisson des légumes Guide de cuisson des oeufsNota Guide de décongélation automatiqueCocotte de brocoli et fromage 6 portions Ragoût de boeuf et d’orge 6 portionsSoupe aux haricots noirs Environ 2 litres Salade de pommes de terre chaude 6 portionsCuiller à thé de farine 2 cuillerées à soupe de vinaigre de cidre de pomme’afficheur fonctionne mais le four ne se met pas en marche DépannageLe four s’arrête avant que le temps réglé se soit écoulé Les aliments cuisent trop lentementTion Entretien et nettoyageExclusions de la garantie Obligation de l’acheteur initialAux États-Unis 1-800-SAMSUNG Au Canada 1-800-SAMSUNG Samsung ElectronicsCuisson à un stade Fonction Operation Réglage de l’horlogeTouches de cuisson InstantanéeMicrowave Oven Read all safety instructions before using the appliance Precautions to Avoid Possible Exposure to ExcessiveDishes and containers can become hot. Handle with care Important Safety InstructionsUse of Extension Cords Important Grounding InstructionsOperation Manual Block WarrantyYour New Microwave Oven Back CoverChecking Parts Setting Up Your Microwave OvenThank You for Choosing Samsung Model Number Serial Number Date Purchased DealerControl Panel Buttons Using the Pause/Cancel Button Setting the ClockPress the Clock button. The display will show Instant Cook Chart Using the Instant Cook ButtonsWeight Remarks Auto Reheat Chart Using the One Minute+ ButtonReheating Automatically One-stage Cooking Power Levels= warm = simmer = low Using the More/Less Button Setting Cooking TimesMulti-stage Cooking Use the number buttons to set a second cooking timeSetting the Child Protection Lock Using the Kitchen TimerDemonstration Mode Cooking Utensils Testing UtensilsWax paper Use as a cover to prevent spatter- ing Cooking Techniques Guide for Cooking Poultry in Your Microwave Guide for Cooking Meat in Your MicrowavePork Boneless or bone-in WholeGuide for Cooking Eggs in Your Microwave Guide for Cooking Seafood in Your MicrowaveGuide for Cooking Vegetables in Your Microwave Auto Defrosting Guide Broccoli and Cheese Casserole Beef and Barley StewTsp. pepper Pkg -10 oz. frozen peas, thawed Black Bean Soup Warm Potato Salad2 Tbs. apple cider vinegar Care and Cleaning Troubleshooting GuideLimited Warranty for Original Purchaser United States 1-800-SAMSUNG Canada 1-800-SAMSUNG North American Limited Warranty StatementPower Levels Feature Operation Set ClockOne Stage Cooking Instant Cook Buttons