Attaching Drive Cables
Attaching the IDE drive cable is simple. These cables are "keyed" to only allow them to be connected in the correct manner. The mainboard D1692 has two
Simply plug in the BLUE END of the IDE cable into the motherboard IDE connector, and the other end(s) into the drive(s). Each
Notes:
•Always remember to properly set the drive jumpers.
•If only using one device on a channel, it should be set as Master.
•If only using one device on a channel connect it to the last connector.
•The maximum supported length of an IDE cable is 18".
•There are no Master/Slave jumpers on SATA drives.
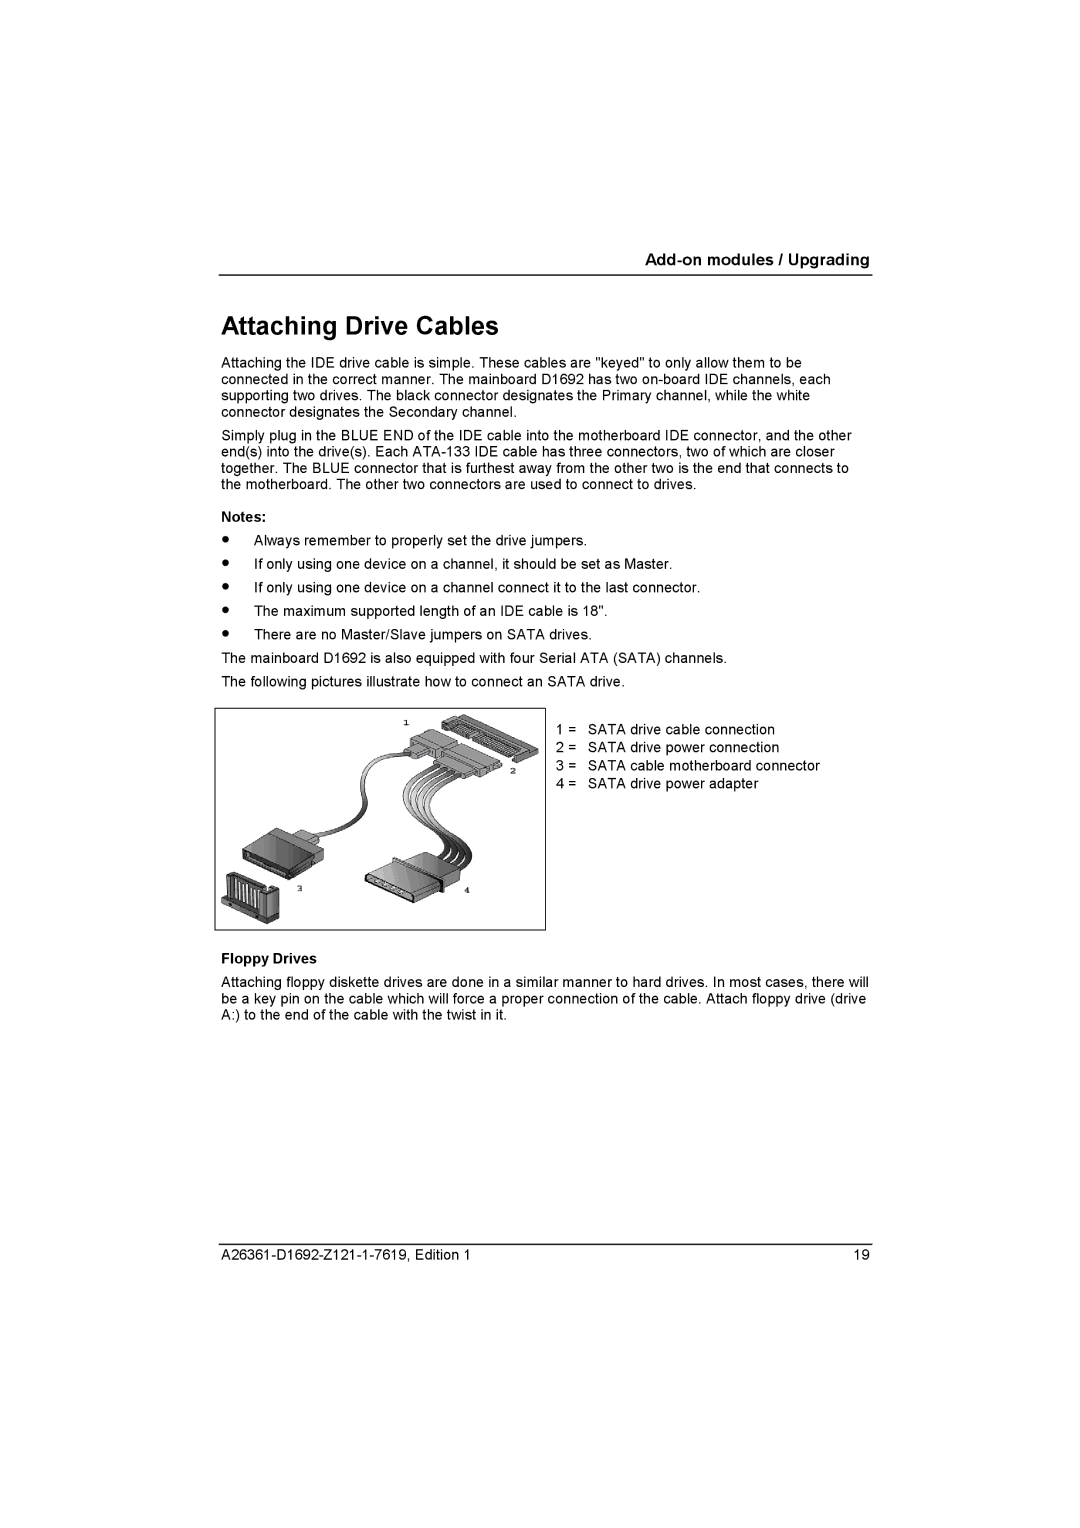
The mainboard D1692 is also equipped with four Serial ATA (SATA) channels. The following pictures illustrate how to connect an SATA drive.
1 = SATA drive cable connection
2 = SATA drive power connection
3 = SATA cable motherboard connector
4 = SATA drive power adapter
Floppy Drives
Attaching floppy diskette drives are done in a similar manner to hard drives. In most cases, there will be a key pin on the cable which will force a proper connection of the cable. Attach floppy drive (drive A:) to the end of the cable with the twist in it.
19 |