8810, 8814, 8807 specifications
The 3Com 8814, 8810, and 8807 are renowned products from the networking giant 3Com, which played a significant role in the evolution of networking technology in the early 1990s. These devices were instrumental during a time when organizations were transitioning from traditional communication systems to more sophisticated networking solutions.The 3Com 8814 is a multi-port networking hub designed for small to medium-sized businesses. One of its main features includes a 10Base-T Ethernet capability, allowing for fast and reliable connectivity among various devices within a local area network (LAN). The 8814 supports up to 14 connections, providing scalability for growing businesses. The hub’s ease of use is notable; it features a plug-and-play design, which aids in quick setup without requiring extensive configuration. This plug-and-play functionality, alongside its robust physical and electrical performance, made the 8814 an appealing choice for organizations looking to enhance their networking infrastructure without significant investment.
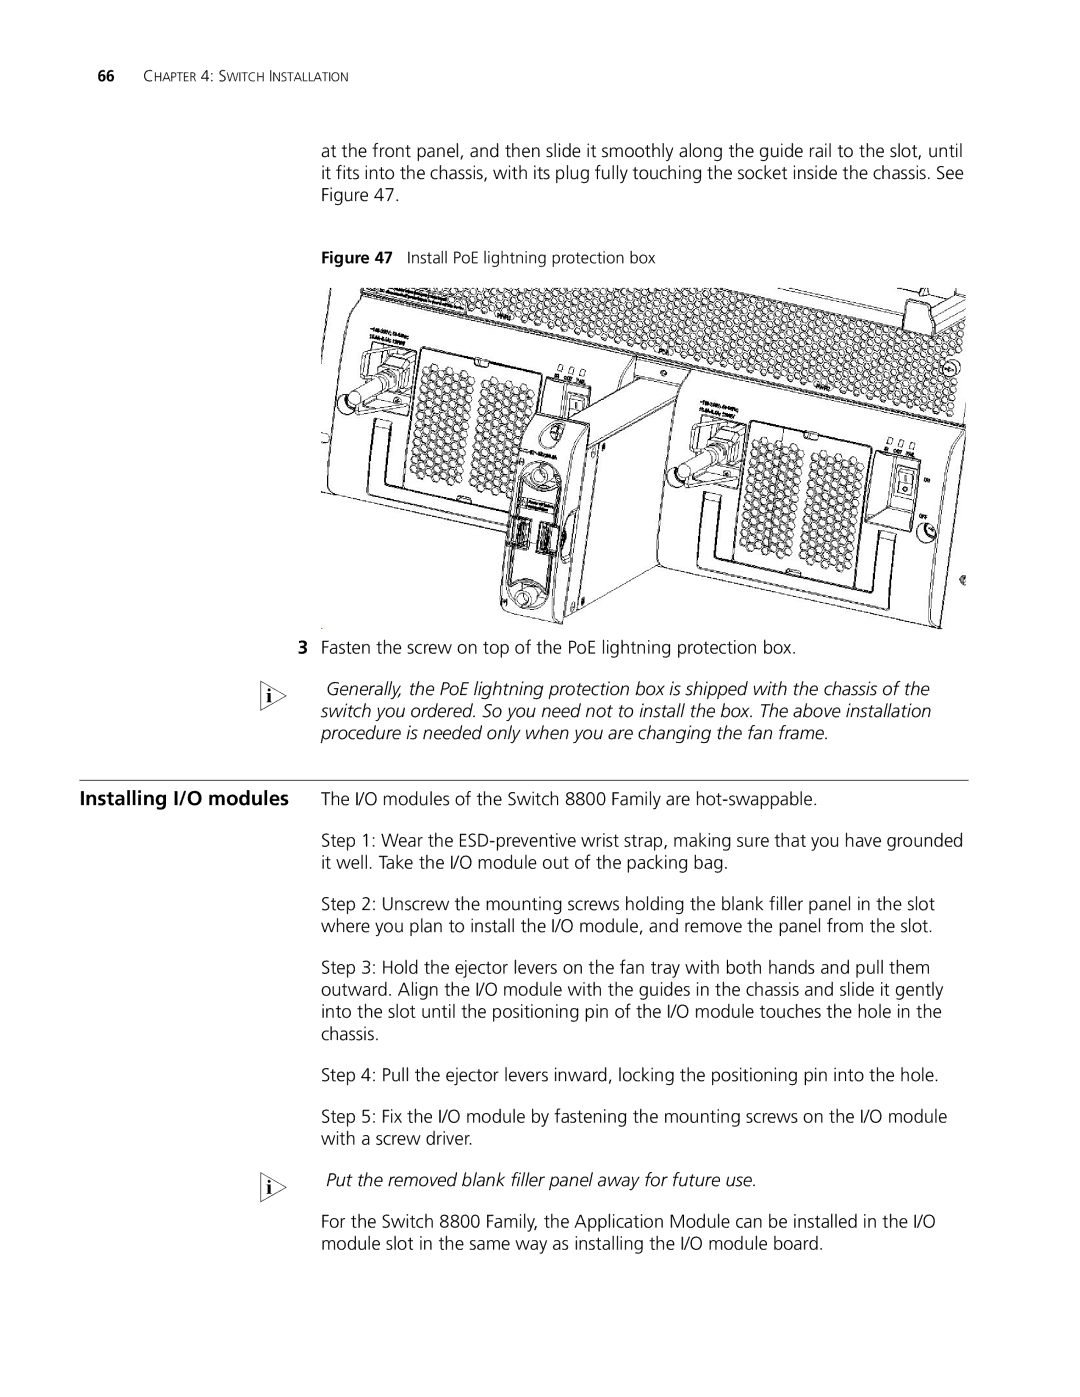
Moving on to the 3Com 8810, this device is labeled as an intelligent network switch and ushered in advancements in network management and performance. A critical element of the 8810 is its ability to support both 10/100Base-T Ethernet connections, effectively allowing mixed-speed environments. Its built-in management features, enabled by 3Com's networking technologies, offered users the ability to monitor traffic flow, manage bandwidth allocation, and configure network settings through a user-friendly interface. This switch also incorporated advanced features like VLAN support, increasing security and segmentation within networks, which proved invaluable for sophisticated networking environments.
Lastly, the 3Com 8807 represents a more versatile and high-performance switch option suited for larger networks. This model features a stackable design that allows for a broader range of scalability and redundancy. It supports both fast Ethernet and Gigabit Ethernet, ensuring that organizations can expand their network speeds as needed. The 8807 includes features for enhanced fault tolerance and link aggregation, which bolsters reliability and performance under heavy traffic loads. Its integration with 3Com's Network Management Software provided administrators with unprecedented control over their networks, empowering them to optimize performance and troubleshoot issues effectively.
Overall, the 3Com 8814, 8810, and 8807 exemplified the company's commitment to innovation in networking technology, providing businesses with the tools necessary to develop efficient, scalable, and reliable network infrastructures. Each of these devices played a crucial role in shaping the landscape of networking, emphasizing ease of use, management capabilities, and performance.