146 | Appendix C: Rack installation guide |
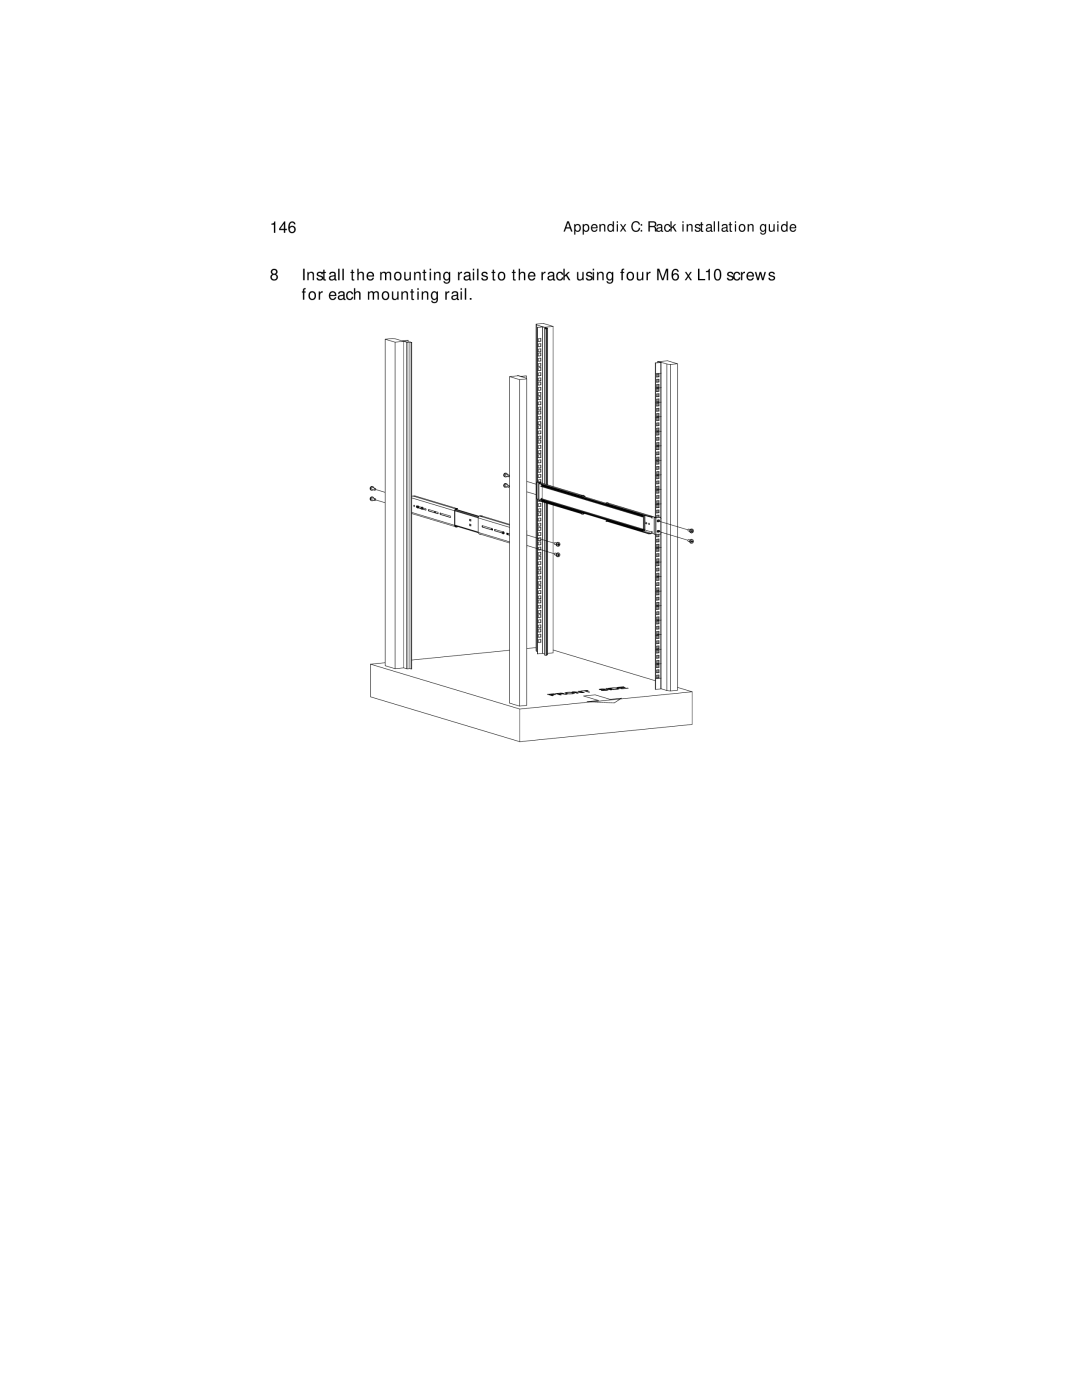
8Install the mounting rails to the rack using four M6 x L10 screws for each mounting rail.
146 | Appendix C: Rack installation guide |
8Install the mounting rails to the rack using four M6 x L10 screws for each mounting rail.