3. Preparation
3.1 Accessories
Remote Control 1 pc
Antenna 1 pc
Operating Instruction 1 pc
Power wire 1 pc
(Check contents after opening)
NOTE:
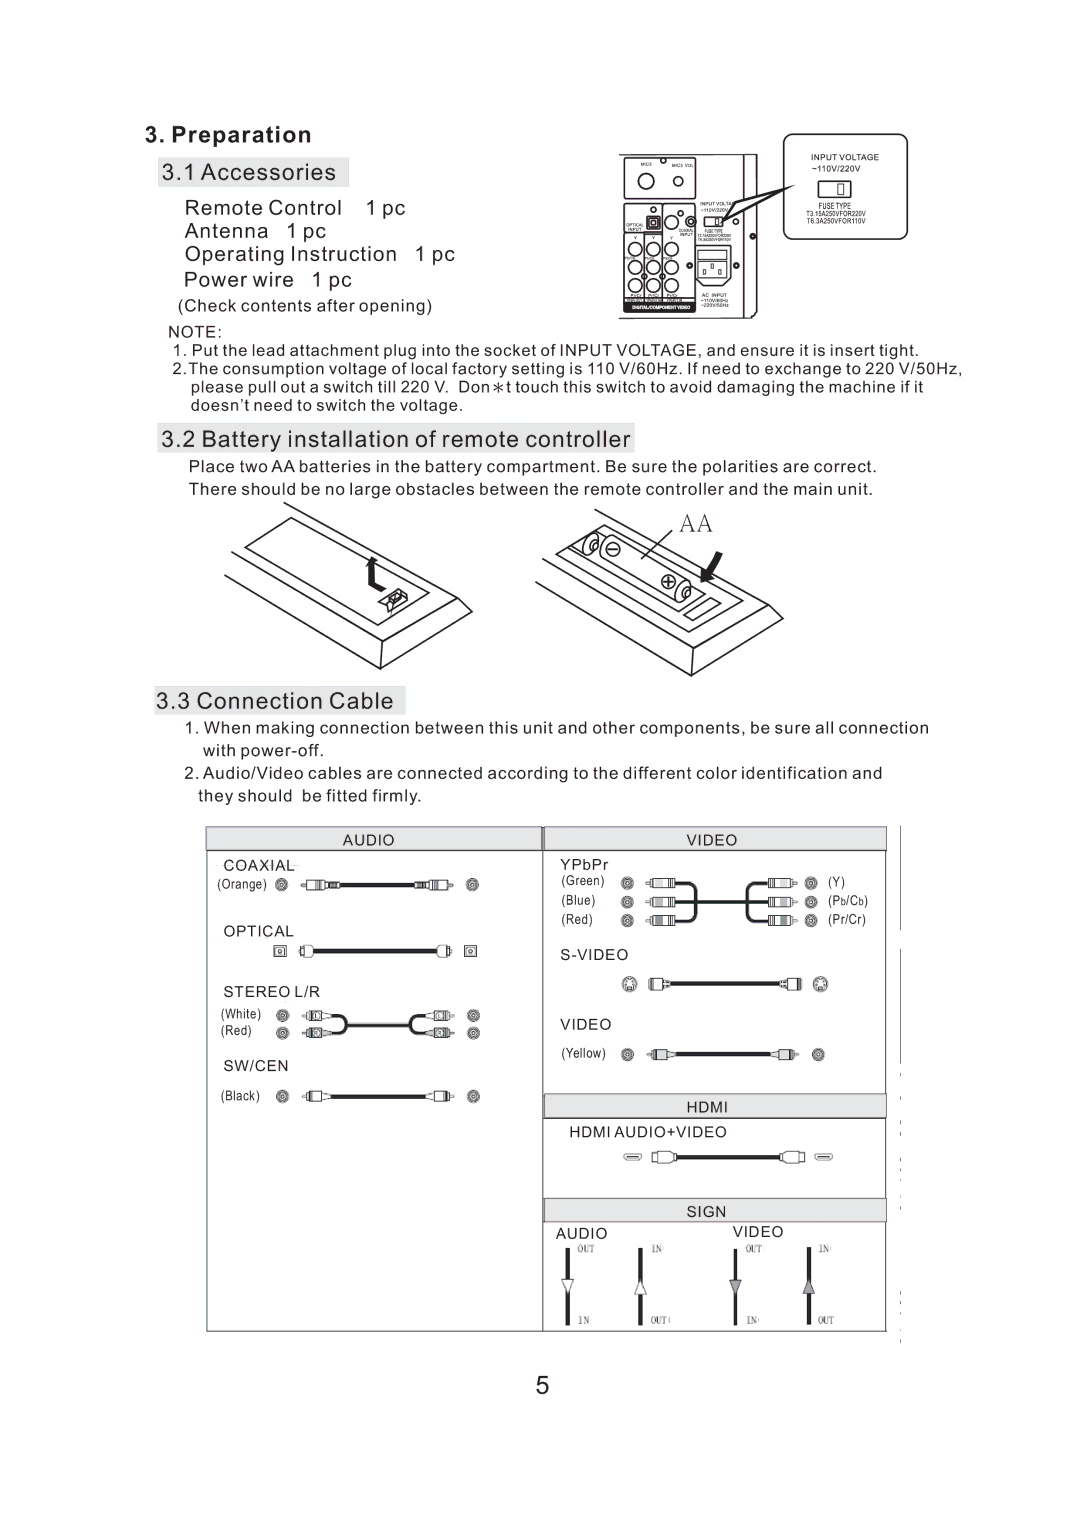
1.Put the lead attachment plug into the socket of INPUT VOLTAGE, and ensure it is insert tight. 2.The consumption voltage of local factory setting is 110 V/60Hz. If need to exchange to 220 V/50Hz,
please pull out a switch till 220 V. Don*t touch this switch to avoid damaging the machine if it doesn’t need to switch the voltage.
3.2 Battery installation of remote controller
Place two AA batteries in the battery compartment. Be sure the polarities are correct. There should be no large obstacles between the remote controller and the main unit.
AA
3.3Connection Cable
1.When making connection between this unit and other components, be sure all connection with
2.Audio/Video cables are connected according to the different color identification and
they should be fitted firmly.
AUDIO
COAXIAL
(Orange)
OPTICAL
STEREO L/R
(White)
(Red)
SW/CEN
(Black)
| VIDEO |
YPbPr |
|
(Green) | (Y) |
(Blue) | (Pb/Cb) |
(Red) | (Pr/Cr) |
VIDEO |
(Yellow) |
HDMI
HDMI AUDIO+VIDEO
| SIGN |
AUDIO | VIDEO |
5
