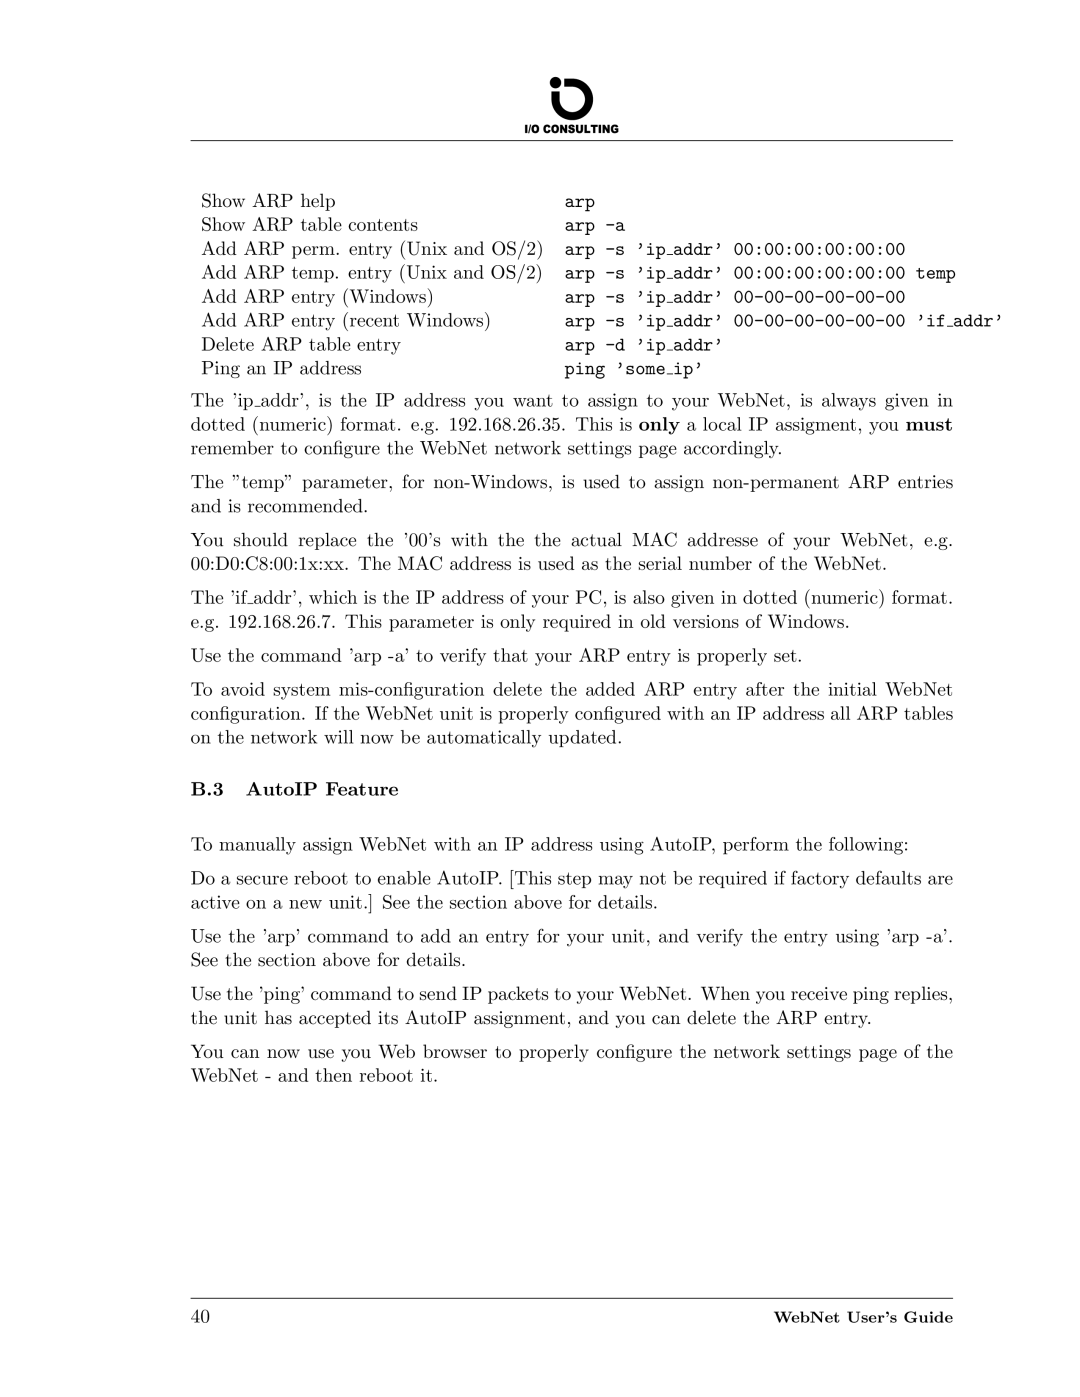
Show ARP help | arp | ||||
Show ARP table contents | arp | ||||
Add ARP perm. entry (Unix and OS/2) | arp |
| addr’ 00:00:00:00:00:00 | ||
Add ARP temp. entry (Unix and OS/2) | arp |
| addr’ 00:00:00:00:00:00 temp | ||
Add ARP entry (Windows) | arp |
| addr’ | ||
Add ARP entry (recent Windows) | arp |
| addr’ |
| addr’ |
Delete ARP table entry | arp |
| addr’ | ||
Ping an IP address | ping ’some |
| ip’ | ||
The ’ip addr’, is the IP address you want to assign to your WebNet, is always given in dotted (numeric) format. e.g. 192.168.26.35. This is only a local IP assigment, you must remember to configure the WebNet network settings page accordingly.
The ”temp” parameter, for
You should replace the ’00’s with the the actual MAC addresse of your WebNet, e.g. 00:D0:C8:00:1x:xx. The MAC address is used as the serial number of the WebNet.
The ’if addr’, which is the IP address of your PC, is also given in dotted (numeric) format. e.g. 192.168.26.7. This parameter is only required in old versions of Windows.
Use the command ’arp
To avoid system
B.3 AutoIP Feature
To manually assign WebNet with an IP address using AutoIP, perform the following:
Do a secure reboot to enable AutoIP. [This step may not be required if factory defaults are active on a new unit.] See the section above for details.
Use the ’arp’ command to add an entry for your unit, and verify the entry using ’arp
Use the ’ping’ command to send IP packets to your WebNet. When you receive ping replies, the unit has accepted its AutoIP assignment, and you can delete the ARP entry.
You can now use you Web browser to properly configure the network settings page of the WebNet - and then reboot it.
40 | WebNet User’s Guide |