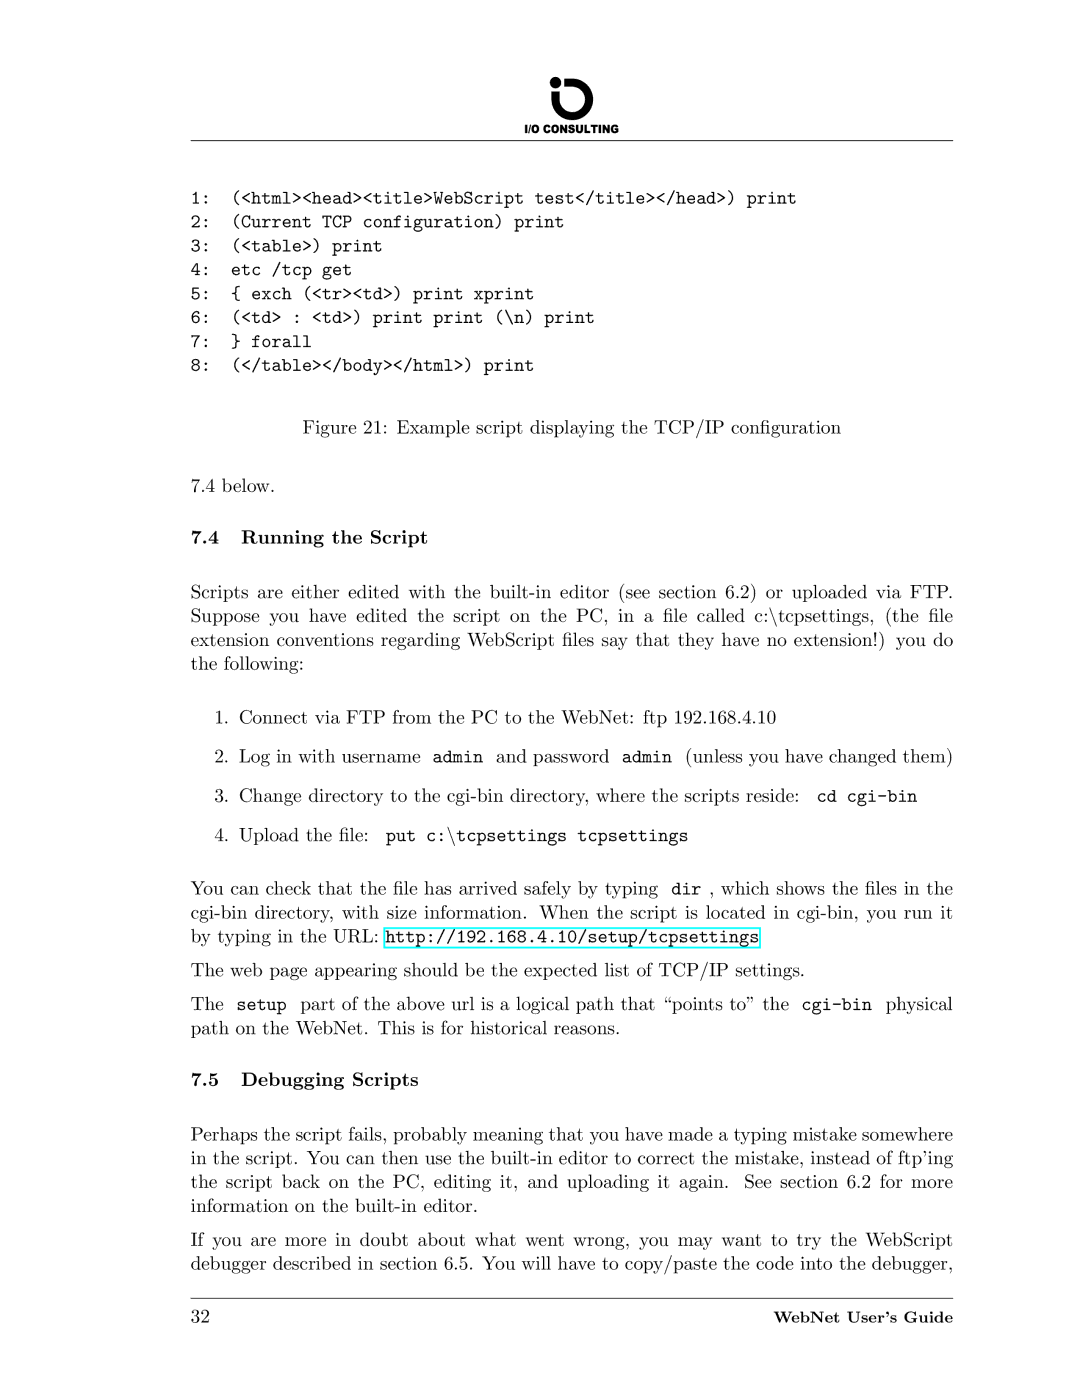
1:(<html><head><title>WebScript test</title></head>) print
2:(Current TCP configuration) print
3:(<table>) print
4:etc /tcp get
5:{ exch (<tr><td>) print xprint
6:(<td> : <td>) print print (\n) print
7:} forall
8:(</table></body></html>) print
Figure 21: Example script displaying the TCP/IP configuration
7.4 below.
7.4Running the Script
Scripts are either edited with the built-in editor (see section 6.2) or uploaded via FTP. Suppose you have edited the script on the PC, in a file called c:ntcpsettings, (the file extension conventions regarding WebScript files say that they have no extension!) you do the following:
1.Connect via FTP from the PC to the WebNet: ftp 192.168.4.10
2.Log in with username admin and password admin (unless you have changed them)
3.Change directory to the cgi-bin directory, where the scripts reside: cd cgi-bin
4.Upload the file: put c:ntcpsettings tcpsettings
You can check that the file has arrived safely by typing dir , which shows the files in the cgi-bin directory, with size information. When the script is located in cgi-bin, you run it by typing in the URL: http://192.168.4.10/setup/tcpsettings
The web page appearing should be the expected list of TCP/IP settings.
The setup part of the above url is a logical path that “points to” the cgi-bin physical path on the WebNet. This is for historical reasons.
7.5Debugging Scripts
Perhaps the script fails, probably meaning that you have made a typing mistake somewhere in the script. You can then use the built-in editor to correct the mistake, instead of ftp’ing the script back on the PC, editing it, and uploading it again. See section 6.2 for more information on the built-in editor.
If you are more in doubt about what went wrong, you may want to try the WebScript debugger described in section 6.5. You will have to copy/paste the code into the debugger,
32 | WebNet User’s Guide |