Setting chime schedule
[Chime setting – Chime schedule setting]
You can set a weekly chime schedule or individual daily schedule.
* The settings can be made to 1 year ahead.
1 Click Chime schedule setting in the table of contents.
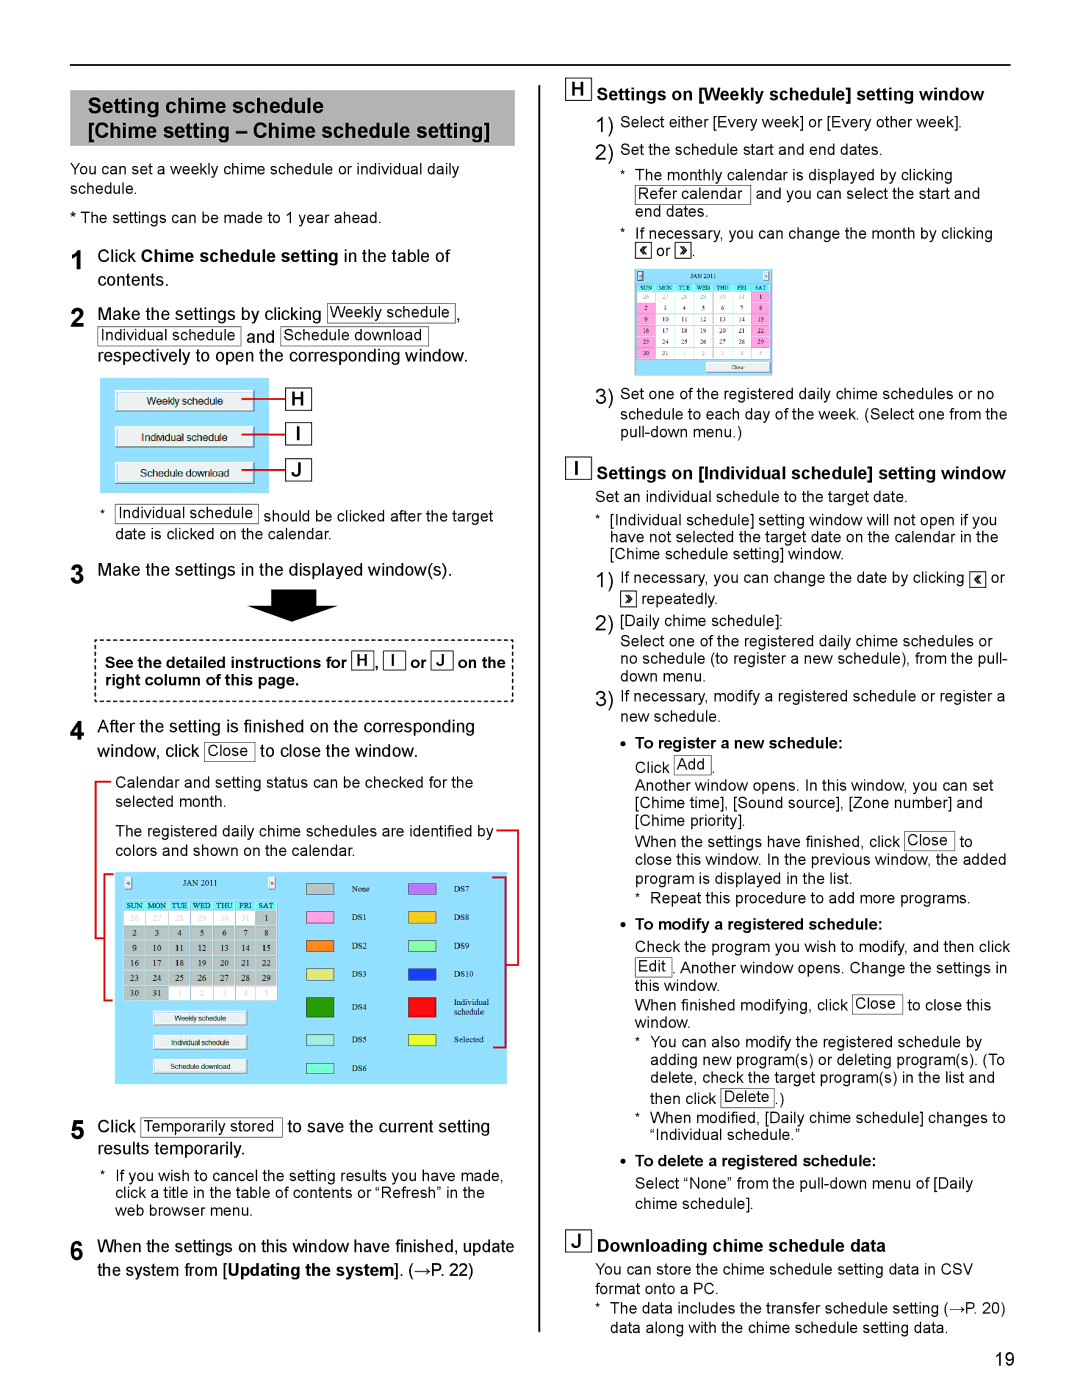
2 Make the settings by clicking Weekly schedule ,
and
respectively to open the corresponding window.
H
I
J
*Individual schedule should be clicked after the target date is clicked on the calendar.
3 Make the settings in the displayed window(s).
See the detailed instructions for H , I or J on the right column of this page.
4 After the setting is finished on the corresponding window, click Close to close the window.
Calendar and setting status can be checked for the selected month.
The registered daily chime schedules are identified by colors and shown on the calendar.
5 Click Temporarily stored to save the current setting results temporarily.
*If you wish to cancel the setting results you have made, click a title in the table of contents or “Refresh” in the web browser menu.
6 When the settings on this window have finished, update the system from [Updating the system]. (→P. 22)
HSettings on [Weekly schedule] setting window
1)Select either [Every week] or [Every other week].
2)Set the schedule start and end dates.
*The monthly calendar is displayed by clicking
Refer calendar and you can select the start and end dates.
*If necessary, you can change the month by clicking ![]() or
or ![]() .
.
3)Set one of the registered daily chime schedules or no schedule to each day of the week. (Select one from the
ISettings on [Individual schedule] setting window
Set an individual schedule to the target date.
*[Individual schedule] setting window will not open if you have not selected the target date on the calendar in the [Chime schedule setting] window.
1)If necessary, you can change the date by clicking ![]() or
or
![]() repeatedly.
repeatedly.
2)[Daily chime schedule]:
Select one of the registered daily chime schedules or no schedule (to register a new schedule), from the pull- down menu.
3)If necessary, modify a registered schedule or register a new schedule.
•To register a new schedule:
Click Add .
Another window opens. In this window, you can set [Chime time], [Sound source], [Zone number] and [Chime priority].
When the settings have finished, click Close to close this window. In the previous window, the added program is displayed in the list.
*Repeat this procedure to add more programs.
•To modify a registered schedule:
Check the program you wish to modify, and then click
Edit . Another window opens. Change the settings in this window.
When finished modifying, click Close to close this window.
*You can also modify the registered schedule by adding new program(s) or deleting program(s). (To delete, check the target program(s) in the list and then click Delete .)
*When modified, [Daily chime schedule] changes to “Individual schedule.”
•To delete a registered schedule:
Select “None” from the
JDownloading chime schedule data
You can store the chime schedule setting data in CSV format onto a PC.
*The data includes the transfer schedule setting (→P. 20) data along with the chime schedule setting data.
GETTING STARTED SETTING THE SYSTEM USING THE SYSTEM
APPENDIX
19