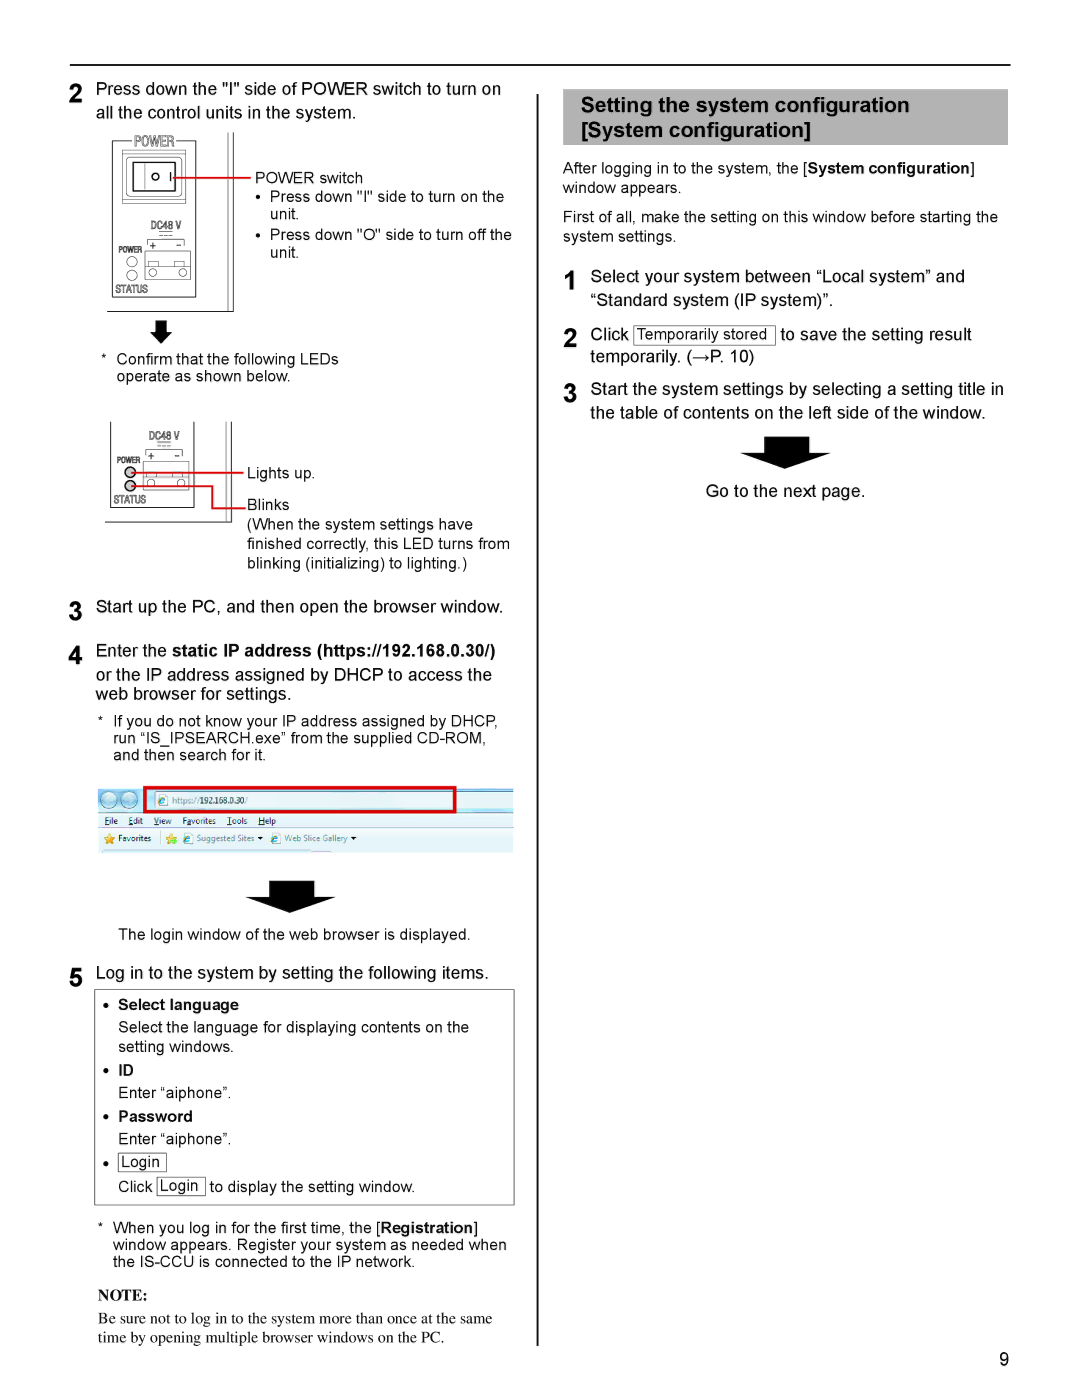
2 Press down the "I" side of POWER switch to turn on all the control units in the system.
![]()
![]() POWER switch
POWER switch
• Press down "I" side to turn on the unit.
• Press down "O" side to turn off the unit.
*Confirm that the following LEDs operate as shown below.
Lights up.
![]() Blinks
Blinks
(When the system settings have
finished correctly, this LED turns from blinking (initializing) to lighting.)
3 Start up the PC, and then open the browser window.
4 Enter the static IP address (https://192.168.0.30/) or the IP address assigned by DHCP to access the web browser for settings.
*If you do not know your IP address assigned by DHCP, run “IS_IPSEARCH.exe” from the supplied
The login window of the web browser is displayed.
5 Log in to the system by setting the following items.
•Select language
Select the language for displaying contents on the setting windows.
•ID
Enter “aiphone”.
•Password Enter “aiphone”.
•Login
Click Login to display the setting window.
*When you log in for the first time, the [Registration] window appears. Register your system as needed when the
NOTE:
Be sure not to log in to the system more than once at the same time by opening multiple browser windows on the PC.
Setting the system configuration [System configuration]
After logging in to the system, the [System configuration] window appears.
First of all, make the setting on this window before starting the system settings.
1 Select your system between “Local system” and “Standard system (IP system)”.
2 Click Temporarily stored to save the setting result temporarily. (→P. 10)
3 Start the system settings by selecting a setting title in the table of contents on the left side of the window.
Go to the next page.
GETTING STARTED SETTING THE SYSTEM USING THE SYSTEM
APPENDIX
9
