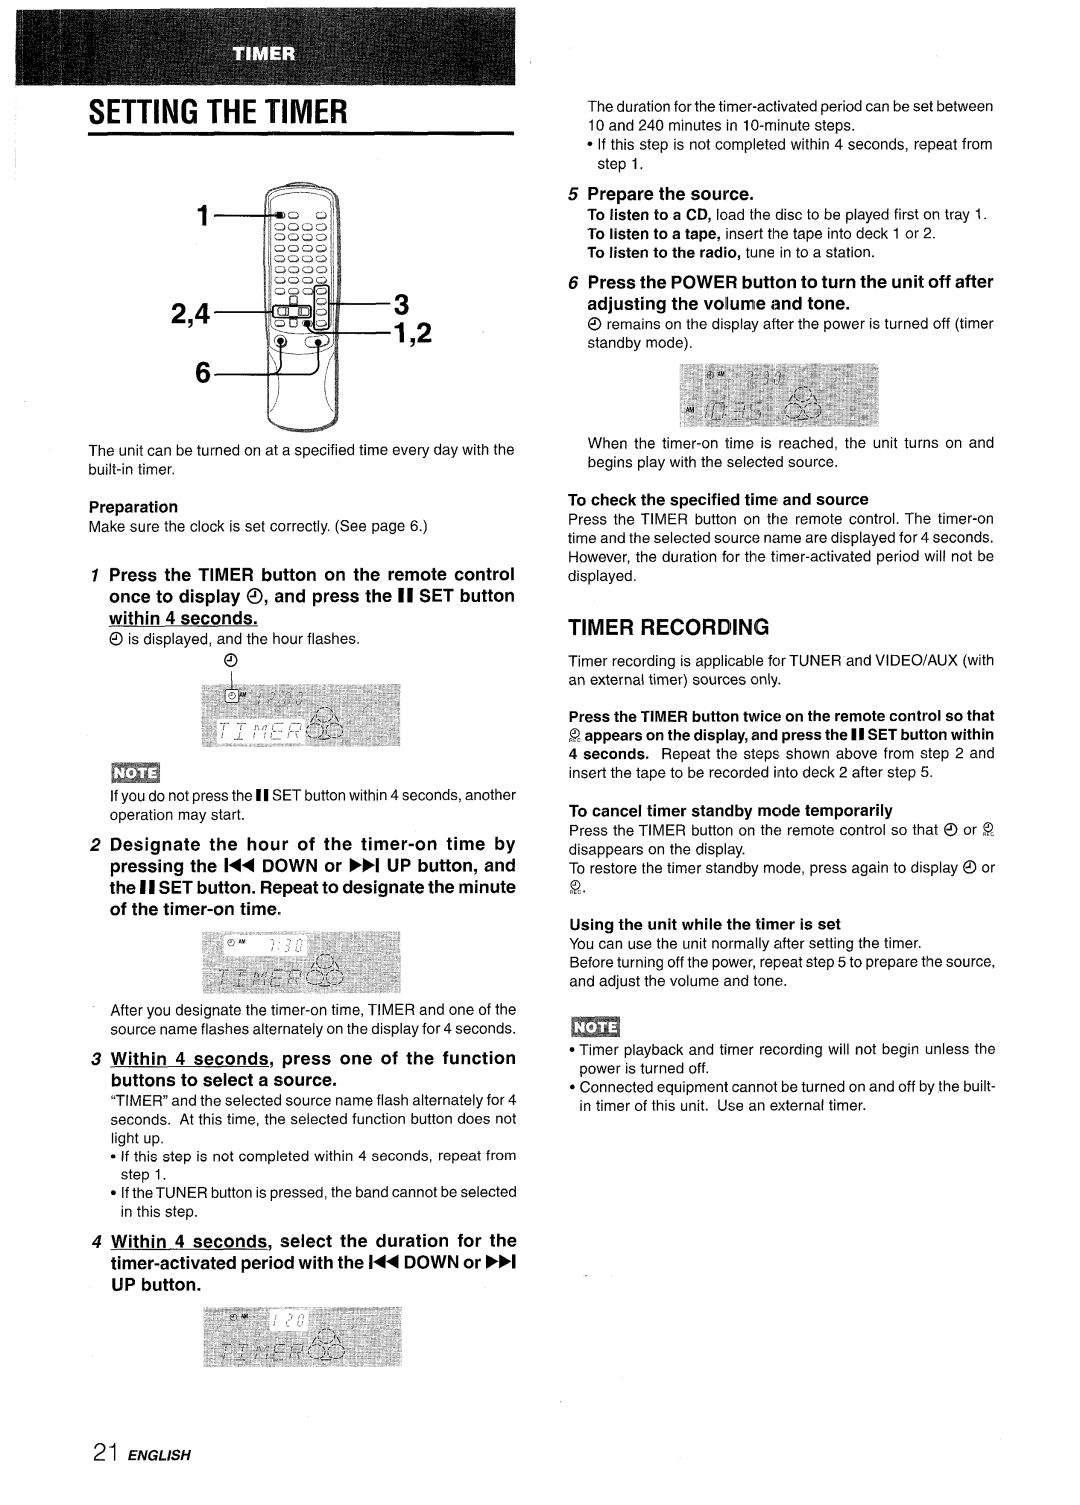
SETTING THE TIMER

1

2,43

1,2

6

The unit can be turned on at a specified time every day with the built-in timer.

Preparation

Make sure the clock is set correctly. (See page 6.)

1 Press the TIMER button on the remote control once to display 0, and press the II SET button within 4 seconds.

@is displayed, and the hour flashes.

@

m

If you do not press the 11SET button within 4 seconds, another operation may start.

2 Designate the hour of the timer-on time by pressing the l<< DOWN or WI UP button, and the II SET button. Repeat to designate the minute of the timer-on time.

After vou designate the timer-on time, TIMER and one of the source name flashes alternately on the display for 4 seconds.

3 Within 4 seconds, press one of the function buttons to select a source.

“TIMER and the selected source name flash alternately for 4 seconds. At this time, the selected function button does not light up,

If this step is not completed within 4 seconds, repeat from step 1.

. If the TUNER button is pressed, the band cannot be selected in this step.

4 Within 4 seconds, select the duration for the timer-activated period with the l<< DOWN or F>l UP button.

The duration for the timer-activated period can be set between 10 and 240 minutes in 10-minute steps.

If this step is not completed within 4 seconds, repeat from step 1,

5 Prepare the source.

To listen to a CD, load the disc to be played first on tray 1. To listen to a tape, insert the tape into deck 1 or 2.

To listen to the radio, tune in to a station.

6Press the POWER button to turn the unit off after adjusting the vollume i~rtd tone.

O remains on the display alter the power is turned off (timer standby mode).

When the timer-on time is reached, the unit turns on and begins play with the selected source.

To check the specified time and source

Press the TIMER button on the remote control. The timer-on time and the selected source name are displayed for 4 seconds. However, the duration for the timer-activated period will not be displayed.

TIMER RECORDING

Timer recording is applicable fc)rTUNER and VI DEO/AUX (with an external timer) sources cmly.

Press the TIMER button twice on the remote control so that

Q appears on the display, and press the 11SET button within 4 seconds. Repeat the steps shown above from step 2 and insert the tape to be recorded into deck 2 after step 5.

To cancel timer standby mc)de temporarily

Press the TIMER button on the remote control so that @ or Q disappears on the display.

To restore the timer standby mode, press again to display@ or g.

Using the unit while the timer is set

You can use the unit normally after setting the timer.

Before turning off the power, repeat step 5 to prepare the source, and adjust the volume and tone.

m

Timer playback and timer recording will not begin unless the power is turned off.

Connected equipment cannot be turned on and off by the built- in timer of this unit. Use an external timer.

21 ENGLISH

Page 22
Image 22
Aiwa NSX-AV800 manual Setting the Timer, Preparation, Prepare the source

NSX-AV800 specifications

The Aiwa NSX-AV800 stands out as a remarkable all-in-one audio system that combines versatility with high-quality performance. Launched in the late 1990s, it captures the essence of that era's audio innovation while offering features that appeal to a wide range of users, from casual listeners to serious audiophiles.

At the heart of the NSX-AV800 is its impressive sound system, which comprises powerful speakers and a robust amplifier. The dual cassette deck allows users to play and record their favorite tapes, a technology that was still popular during its release. This feature is complemented by an integrated CD player, enabling users to enjoy their CD collections with clarity and precision. The NSX-AV800 also supports FM/AM radio, ensuring that listeners can tune in to their favorite stations with ease.

One of the key features of the Aiwa NSX-AV800 is its distinctive Mega Bass technology. This feature enhances low-frequency sounds, providing a richer and deeper audio experience that adds depth to music genres like hip-hop and electronic. Additionally, the system includes a range of equalizer presets, allowing users to customize their audio experience according to personal preferences or the specific nature of the music being played.

In terms of design, the NSX-AV800 boasts a sleek and compact form factor, making it an attractive addition to any living space. Its user-friendly interface, with clearly labeled buttons and an intuitive layout, enhances the overall experience, allowing for easy navigation through various functions.

Connectivity is another strong suit of the Aiwa NSX-AV800. It offers multiple input options, including line-in, enhancing its compatibility with various external devices such as smartphones and portable music players. This adaptability ensures that users can enjoy a seamless listening experience, regardless of the source of their music.

In conclusion, the Aiwa NSX-AV800 is a well-rounded audio system that encapsulates the spirit of late 90s technology while delivering sound quality and functionality that many still appreciate today. Its combination of cassette, CD, and radio playback, alongside modern features like Mega Bass and customizable equalizer settings, makes it a standout choice for anyone looking for a versatile and powerful audio solution. Whether for casual listening or hosting gatherings, the Aiwa NSX-AV800 continues to be a beloved favorite among music enthusiasts.