Allied Telesis AT-GS950/8POE manual Installing the Switch on a Wall

Models: AT-GS950/8POE

1 68
Download 68 pages 9.71 Kb
Page 41
Image 41

AT-GS950/8POE Gigabit Ethernet WebSmart Switch Installation Guide

Installing the Switch on a Wall

To install the switch on a wall, perform the following procedure:

Note

Steps 1, 2, and 3 are optional. These steps provide instructions on how to remove the snap-on plastic feet from the bottom of a switch. You can leave the feet attached to the switch.

1.Place the switch upside down on a level, secure surface.

2.Using a flat-head screwdriver, remove the snap-on plastic feet from the bottom of the switch, as shown in Figure 7 on page 39.

3.Turn the switch over.
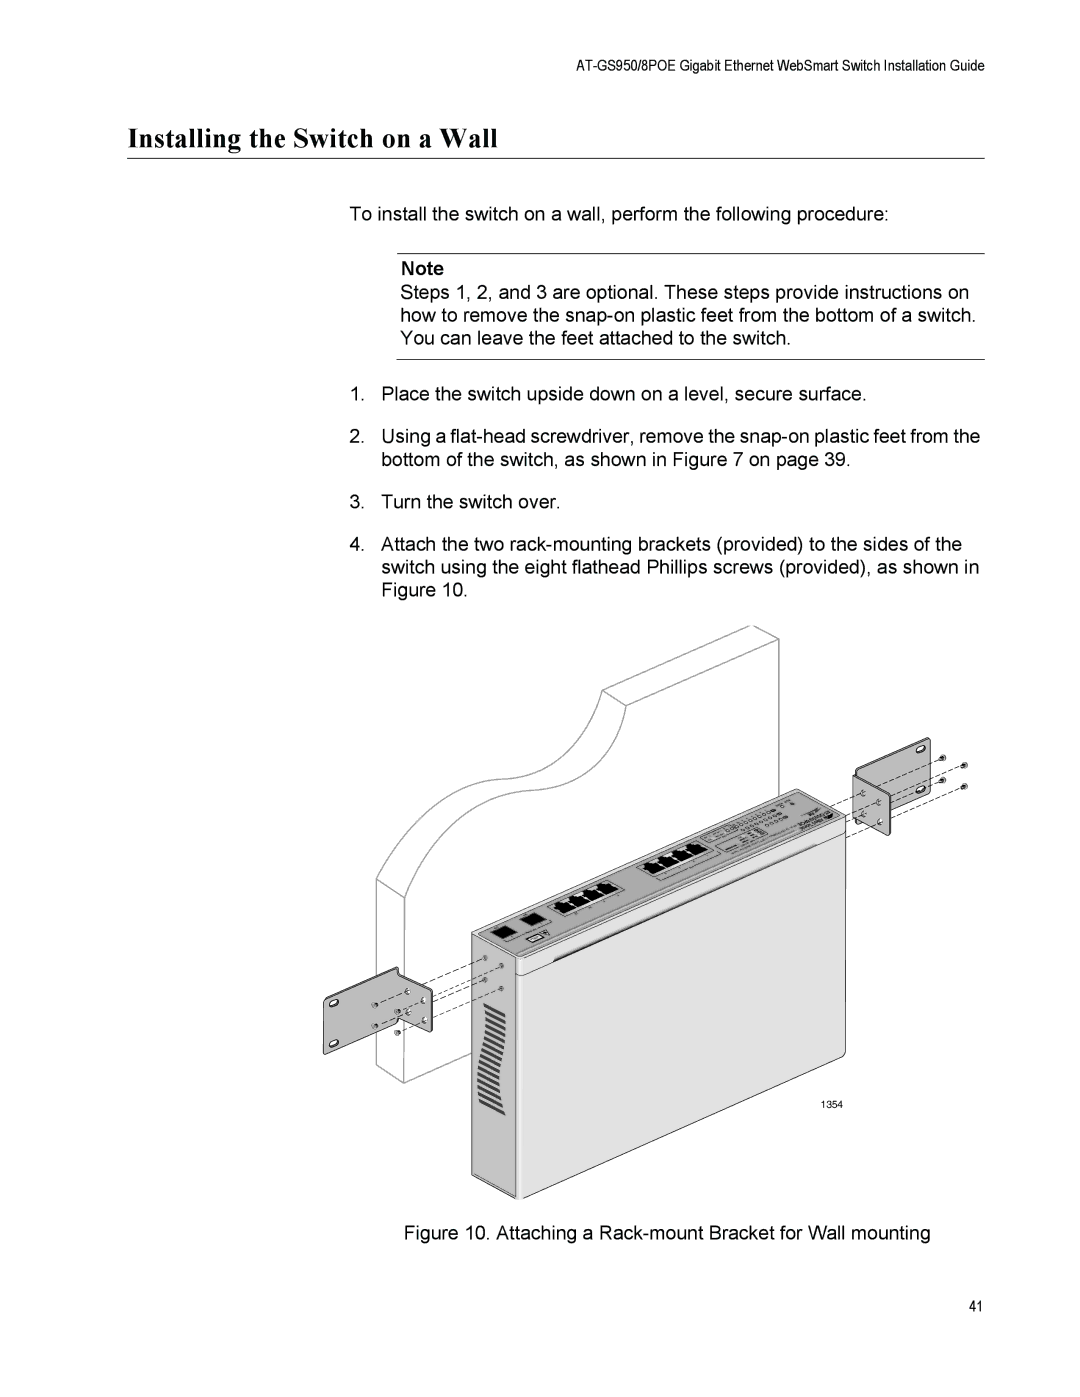
4.Attach the two rack-mounting brackets (provided) to the sides of the switch using the eight flathead Phillips screws (provided), as shown in Figure 10.

1354

Figure 10. Attaching a Rack-mount Bracket for Wall mounting

41

Page 41
Image 41
Allied Telesis AT-GS950/8POE manual Installing the Switch on a Wall, Attaching a Rack-mount Bracket for Wall mounting