Basic Operation
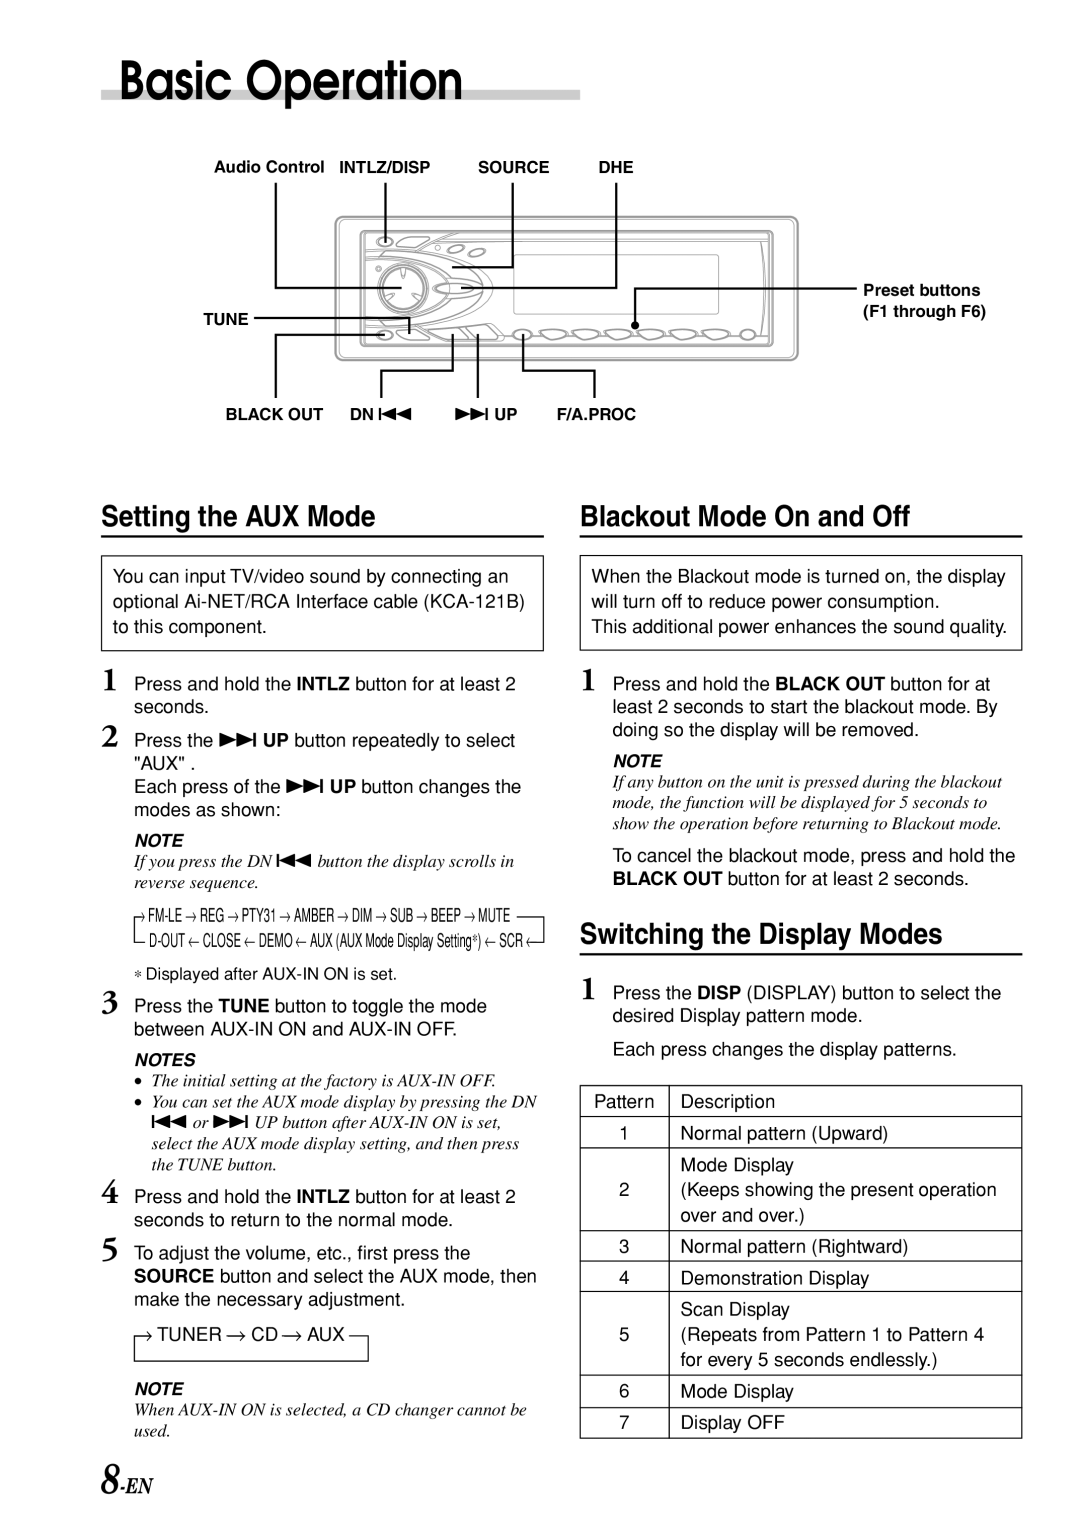
Audio Control INTLZ/DISP | SOURCE | DHE |
TUNE
Preset buttons (F1 through F6)
BLACK OUT DN g f UP | F/A.PROC |
Setting the AUX Mode |
| Blackout Mode On and Off |
You can input TV/video sound by connecting an optional
1
2
When the Blackout mode is turned on, the display will turn off to reduce power consumption.
This additional power enhances the sound quality.
1 Press and hold the BLACK OUT button for at least 2 seconds to start the blackout mode. By doing so the display will be removed.
NOTE
If any button on the unit is pressed during the blackout mode, the function will be displayed for 5 seconds to show the operation before returning to Blackout mode.
To cancel the blackout mode, press and hold the BLACK OUT button for at least 2 seconds.
Switching the Display Modes
1 Press the DISP (DISPLAY) button to select the desired Display pattern mode.
Each press changes the display patterns.
Pattern | Description |
|
|
1 | Normal pattern (Upward) |
|
|
| Mode Display |
2 | (Keeps showing the present operation |
| over and over.) |
|
|
3 | Normal pattern (Rightward) |
|
|
4 | Demonstration Display |
| Scan Display |
5 | (Repeats from Pattern 1 to Pattern 4 |
| for every 5 seconds endlessly.) |
|
|
6 | Mode Display |
|
|
7 | Display OFF |
|
|