
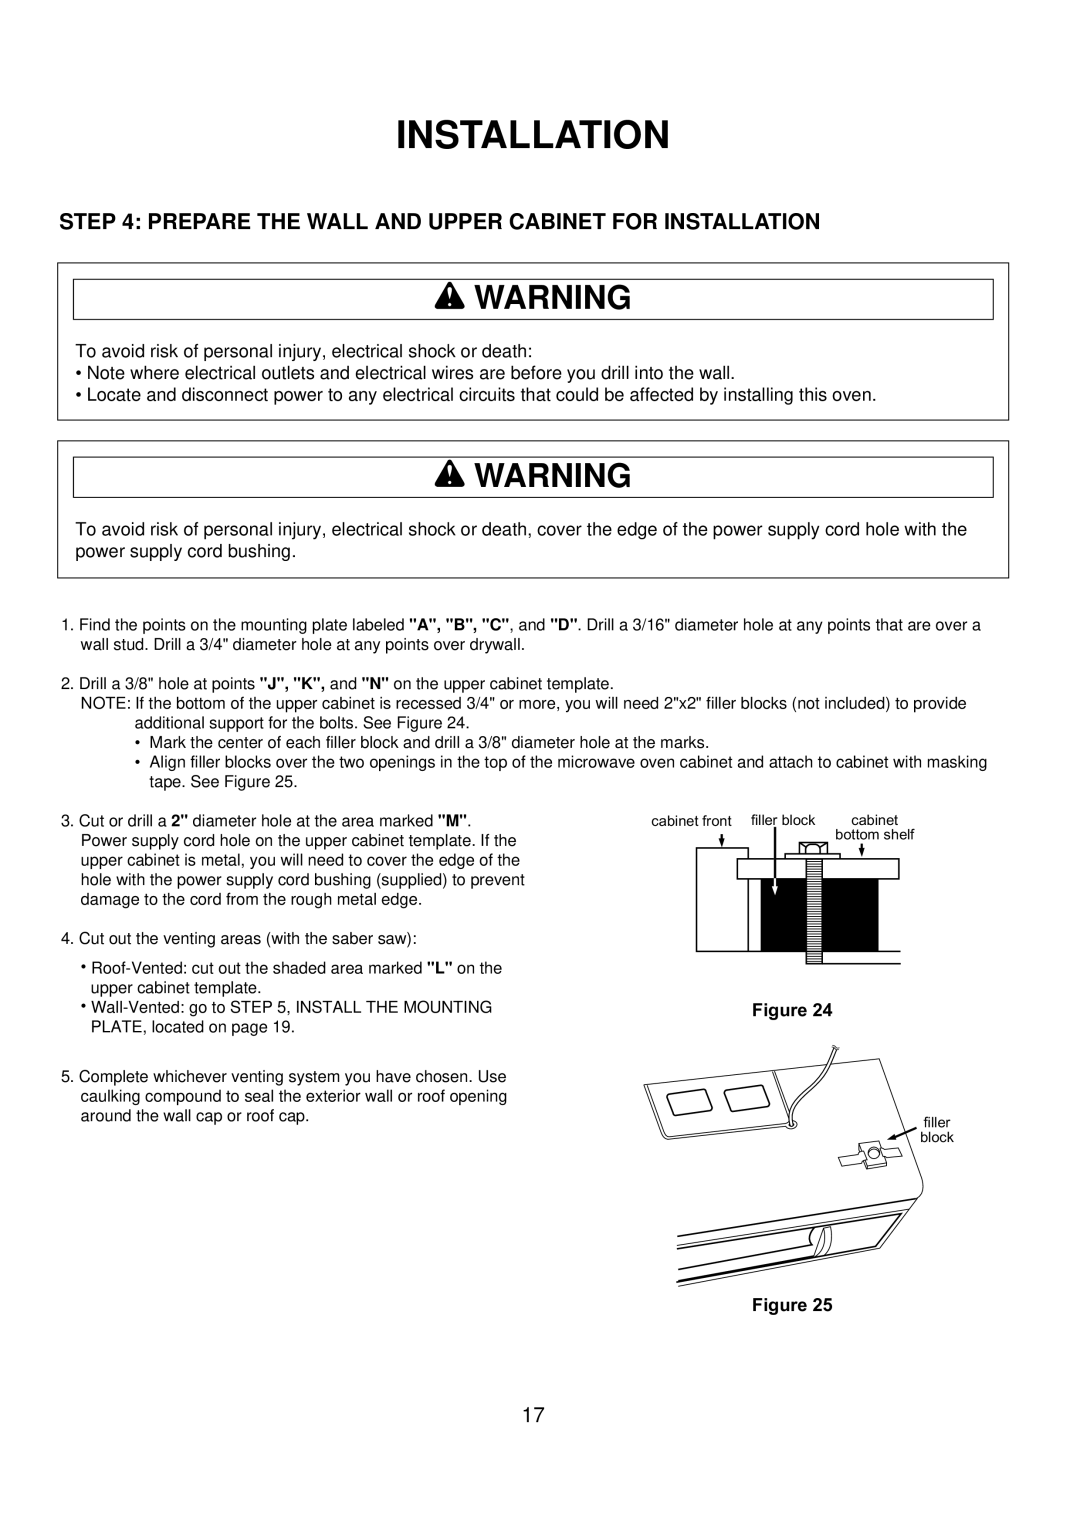
ACO1520A specifications
The Amana ACO1520A is a versatile, countertop combination oven that epitomizes convenience and efficiency in modern cooking. Designed for both residential and commercial settings, this appliance integrates various cooking techniques to simplify food preparation and enhance culinary experiences.One of the standout features of the Amana ACO1520A is its combination cooking capability. This unit utilizes a combination of microwave and convection cooking methods. This unique technology allows users to achieve the speed of a microwave while enjoying the even cooking and browning of conventional ovens. This is especially beneficial for busy kitchens where time is of the essence but quality cannot be compromised.
The Amana ACO1520A has a spacious interior that can accommodate various dish sizes, making it perfect for cooking everything from a simple meal to elaborate dishes. The generous cooking space is complemented by a turntable mechanism that ensures even heating of food. Additionally, multiple rack positions provide flexibility when cooking different dishes simultaneously.
The appliance features various pre-programmed cooking settings that cater to a multitude of meal types. These automatic cooking options allow users to easily select the right cooking mode for their needs, eliminating guesswork and enhancing cooking efficiency. Moreover, the digital control panel is user-friendly, providing clear and intuitive navigation for selecting functions and adjusting cooking times and temperatures.
Safety is a key consideration in the design of the Amana ACO1520A. The unit is equipped with a child safety lock to prevent unintended use, making it a reliable option for families. Additionally, the oven features a robust build quality that can withstand the rigors of frequent use, ensuring long-lasting performance.
In terms of energy efficiency, the Amana ACO1520A is designed to use less energy compared to traditional ovens. The combination of microwave and convection technology reduces cooking times significantly, leading to lower energy consumption.
Overall, the Amana ACO1520A combines versatility, efficiency, and safety, making it an excellent addition to kitchens seeking to harmonize quick cooking with high-quality results. Whether preparing everyday meals or experimenting with new recipes, this countertop oven meets a range of culinary needs while delivering outstanding performance.