Rev. A.3, 5/00 | Page- 4 |
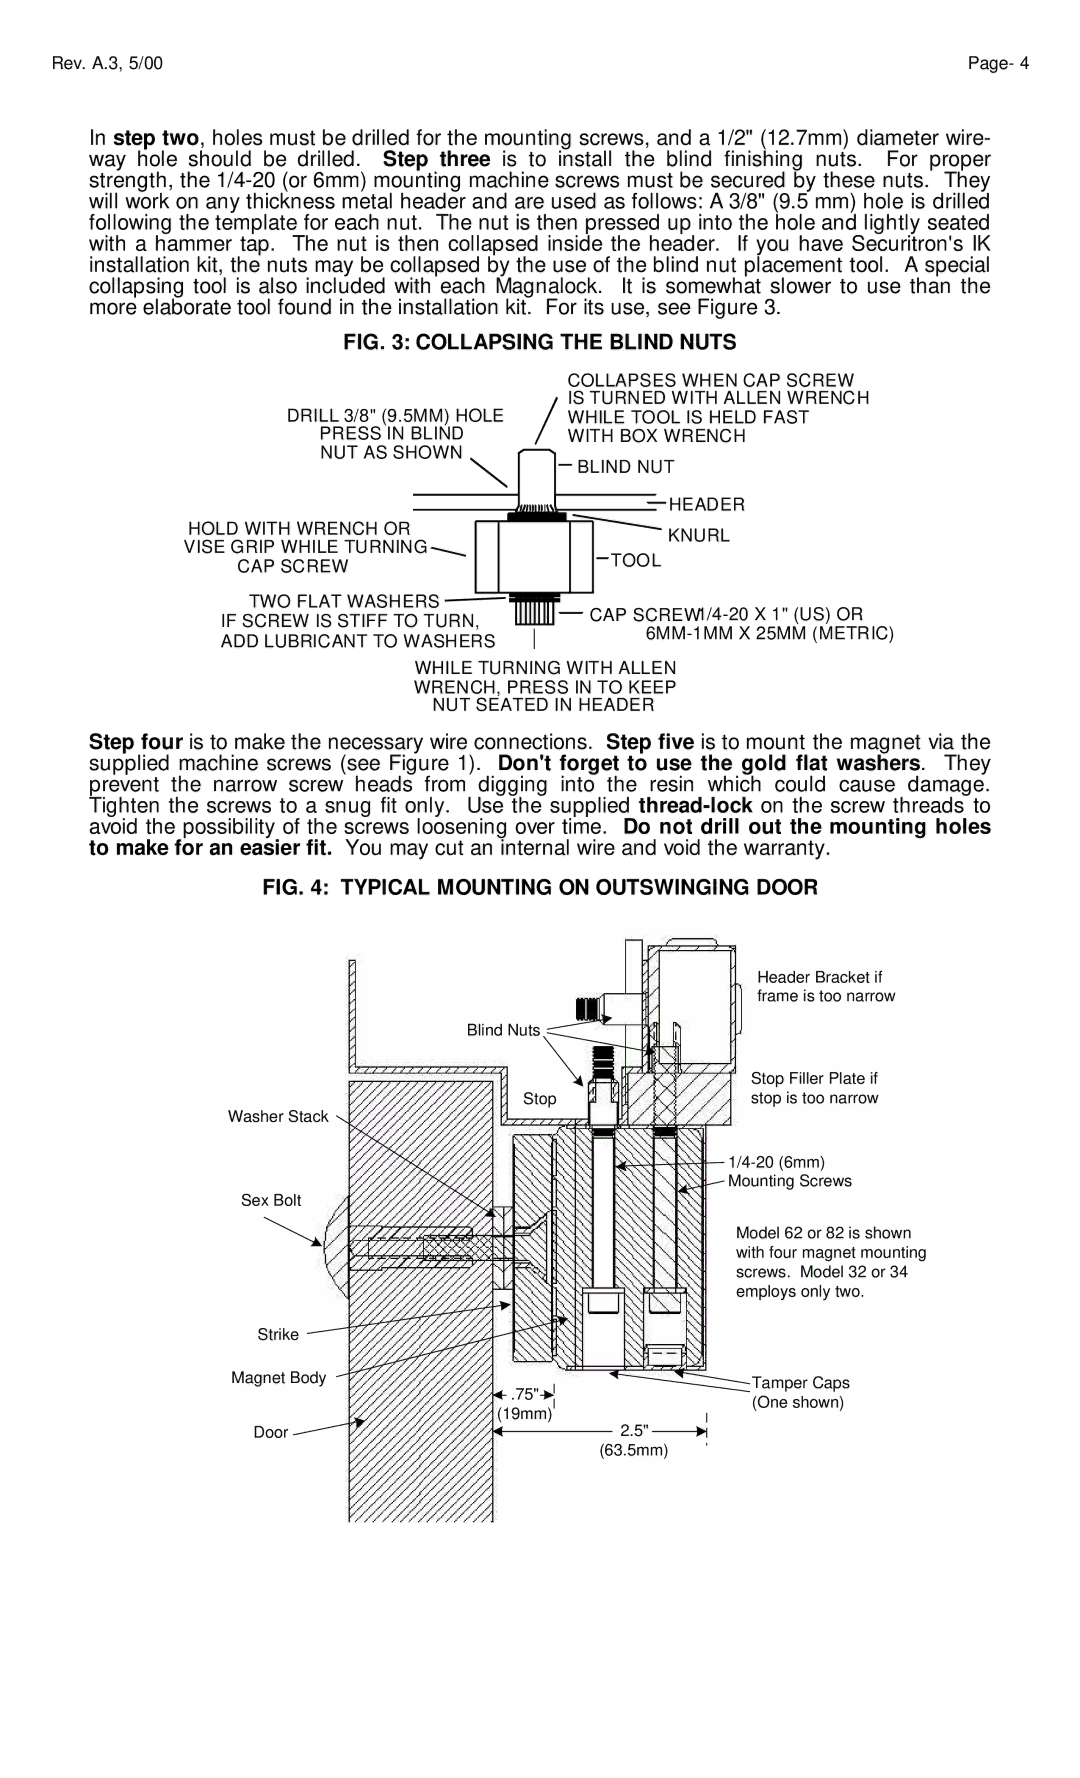
In step two, holes must be drilled for the mounting screws, and a 1/2" (12.7mm) diameter wire- way hole should be drilled. Step three is to install the blind finishing nuts. For proper strength, the
FIG. 3: COLLAPSING THE BLIND NUTS
|
|
|
|
| COLLAPSES WHEN CAP SCREW | |
DRILL 3/8" (9.5MM) HOLE |
|
| IS TURNED WITH ALLEN WRENCH | |||
|
| WHILE TOOL IS HELD FAST | ||||
PRESS IN BLIND |
|
| WITH BOX WRENCH | |||
NUT AS SHOWN |
|
| BLIND NUT | |||
|
|
|
|
| ||
|
|
|
|
|
| HEADER |
|
|
|
|
| ||
HOLD WITH WRENCH OR |
|
|
|
| KNURL | |
|
|
|
| |||
VISE GRIP WHILE TURNING |
|
|
| |||
|
| TOOL | ||||
CAP SCREW |
|
| ||||
|
|
|
| |||
TWO FLAT WASHERS |
|
|
| CAP | ||
|
|
| ||||
|
|
| ||||
IF SCREW IS STIFF TO TURN, |
|
| ||||
|
| |||||
ADD LUBRICANT TO WASHERS |
|
| ||||
|
|
|
| |||
WHILE TURNING WITH ALLEN
WRENCH, PRESS IN TO KEEP
NUT SEATED IN HEADER
Step four is to make the necessary wire connections. Step five is to mount the magnet via the supplied machine screws (see Figure 1). Don't forget to use the gold flat washers. They prevent the narrow screw heads from digging into the resin which could cause damage. Tighten the screws to a snug fit only. Use the supplied
FIG. 4: TYPICAL MOUNTING ON OUTSWINGING DOOR
| Header Bracket if |
| frame is too narrow |
Blind Nuts |
|
| Stop Filler Plate if |
Stop | stop is too narrow |
Washer Stack |
|
| |
Sex Bolt | Mounting Screws |
|
Strike
Magnet Body
![]() .75"
.75"![]()
![]()
(19mm)
Door |
| 2.5" |
|
(63.5mm)
Model 62 or 82 is shown with four magnet mounting screws. Model 32 or 34 employs only two.
Tamper Caps (One shown)
