Transmitter Controls and Functions
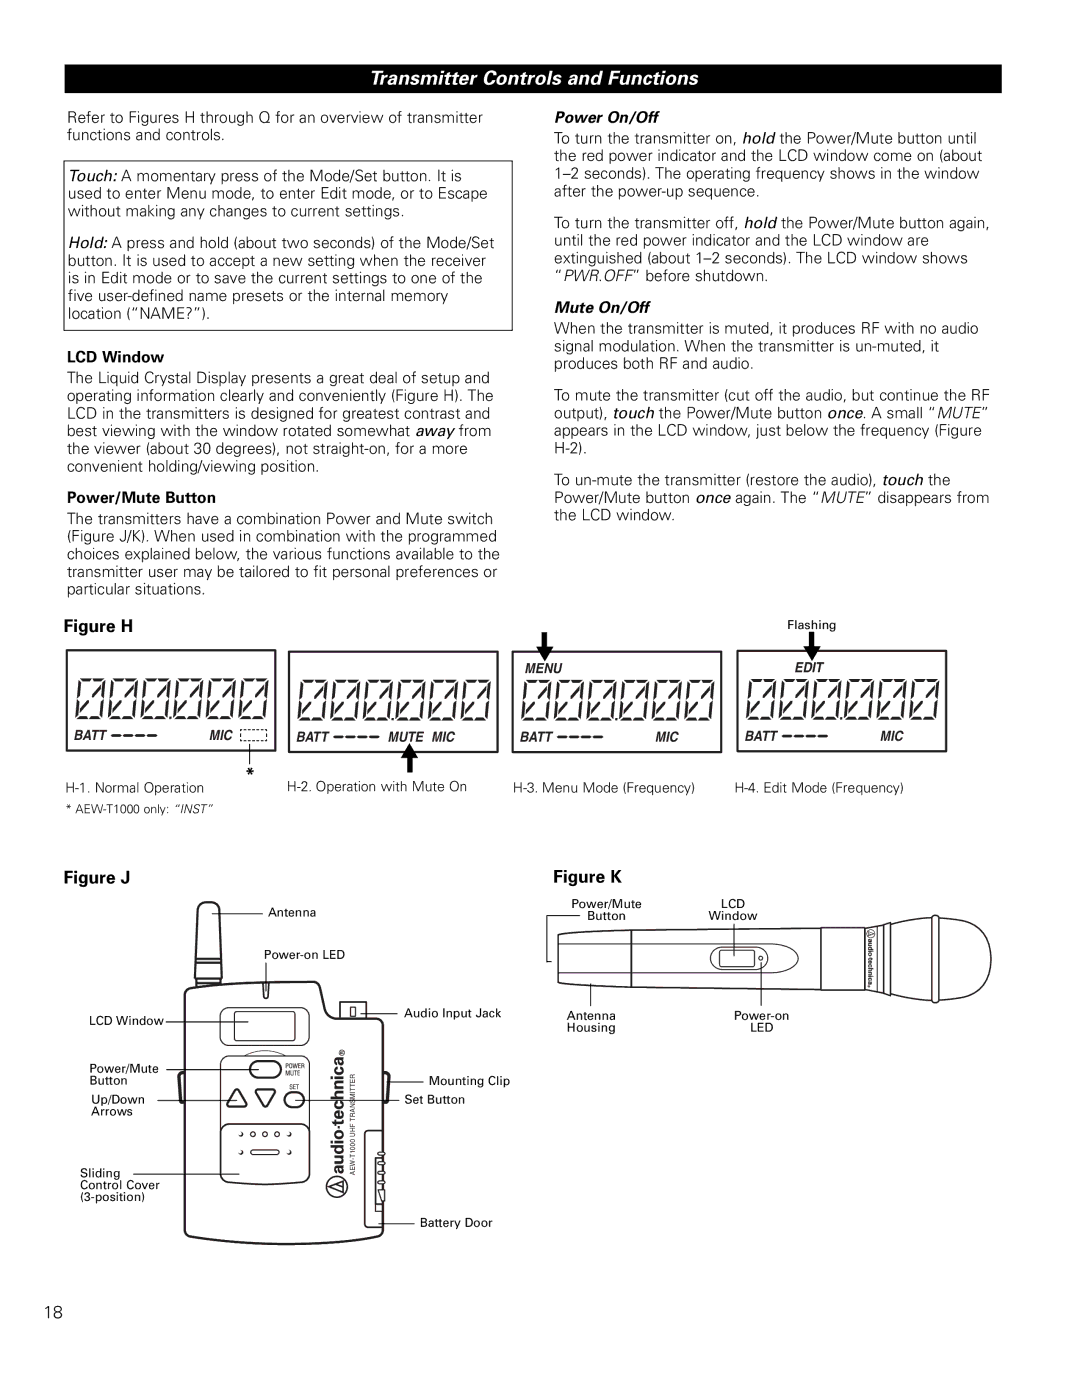
Refer to Figures H through Q for an overview of transmitter functions and controls.
Touch: A momentary press of the Mode/Set button. It is used to enter Menu mode, to enter Edit mode, or to Escape without making any changes to current settings.
Hold: A press and hold (about two seconds) of the Mode/Set button. It is used to accept a new setting when the receiver is in Edit mode or to save the current settings to one of the five
LCD Window
The Liquid Crystal Display presents a great deal of setup and operating information clearly and conveniently (Figure H). The LCD in the transmitters is designed for greatest contrast and best viewing with the window rotated somewhat away from the viewer (about 30 degrees), not
Power/Mute Button
The transmitters have a combination Power and Mute switch (Figure J/K). When used in combination with the programmed choices explained below, the various functions available to the transmitter user may be tailored to fit personal preferences or particular situations.
Power On/Off
To turn the transmitter on, hold the Power/Mute button until the red power indicator and the LCD window come on (about
To turn the transmitter off, hold the Power/Mute button again, until the red power indicator and the LCD window are extinguished (about
Mute On/Off
When the transmitter is muted, it produces RF with no audio signal modulation. When the transmitter is
To mute the transmitter (cut off the audio, but continue the RF output), touch the Power/Mute button once. A small “MUTE” appears in the LCD window, just below the frequency (Figure
To
Figure H
BATT | MIC |
| * |
BATT | MUTE MIC |
| ▼ |
▼ |
|
MENU |
|
BATT | MIC |
| Flashing |
| ▼ |
| EDIT |
BATT | MIC |
*
H-2. Operation with Mute On
|
|
Figure J
LCD Window
Power/Mute
Button
Up/Down
Arrows
Sliding Control Cover
Antenna
![]()
![]()
![]() Audio Input Jack
Audio Input Jack
Mounting Clip | |
| |
| Set Button |
Battery Door
Figure K
Power/MuteLCD
ButtonWindow
Antenna | |
Housing | LED |
18
