Transmitter Setup
Battery Selection and Installation
Each transmitter uses two 1.5V AA batteries, not included. Alkaline type is recommended. Always replace both batteries. Make certain the transmitter power is Off before replacing batteries.
UniPak™ Transmitter Battery Installation
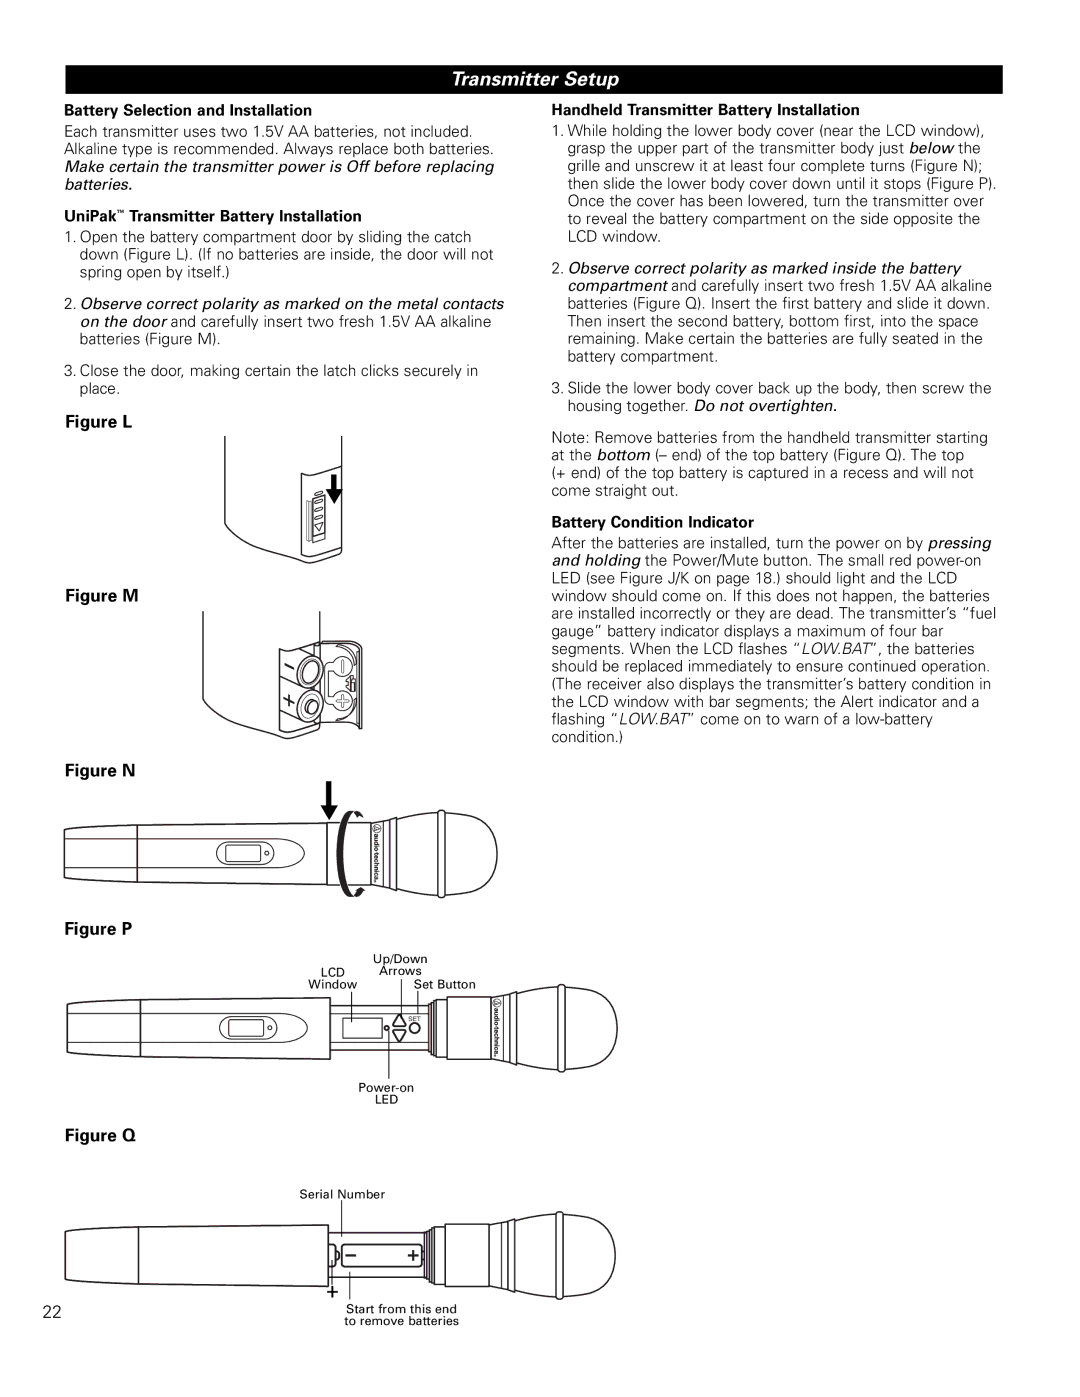
1.Open the battery compartment door by sliding the catch down (Figure L). (If no batteries are inside, the door will not spring open by itself.)
2.Observe correct polarity as marked on the metal contacts on the door and carefully insert two fresh 1.5V AA alkaline batteries (Figure M).
3.Close the door, making certain the latch clicks securely in place.
Figure L
![]() ▼
▼
Figure M
Handheld Transmitter Battery Installation
1.While holding the lower body cover (near the LCD window), grasp the upper part of the transmitter body just below the grille and unscrew it at least four complete turns (Figure N); then slide the lower body cover down until it stops (Figure P). Once the cover has been lowered, turn the transmitter over to reveal the battery compartment on the side opposite the LCD window.
2.Observe correct polarity as marked inside the battery compartment and carefully insert two fresh 1.5V AA alkaline batteries (Figure Q). Insert the first battery and slide it down. Then insert the second battery, bottom first, into the space remaining. Make certain the batteries are fully seated in the battery compartment.
3.Slide the lower body cover back up the body, then screw the housing together. Do not overtighten.
Note: Remove batteries from the handheld transmitter starting at the bottom (– end) of the top battery (Figure Q). The top (+ end) of the top battery is captured in a recess and will not come straight out.
Battery Condition Indicator
After the batteries are installed, turn the power on by pressing and holding the Power/Mute button. The small red
Figure N
▼ ![]()
Figure P
| Up/Down |
LCD | Arrows |
Window | Set Button |
| SET |
| |
| LED |
Figure Q
Serial Number
22 | Start from this end |
| to remove batteries |