GX2411ci English I/B ver.
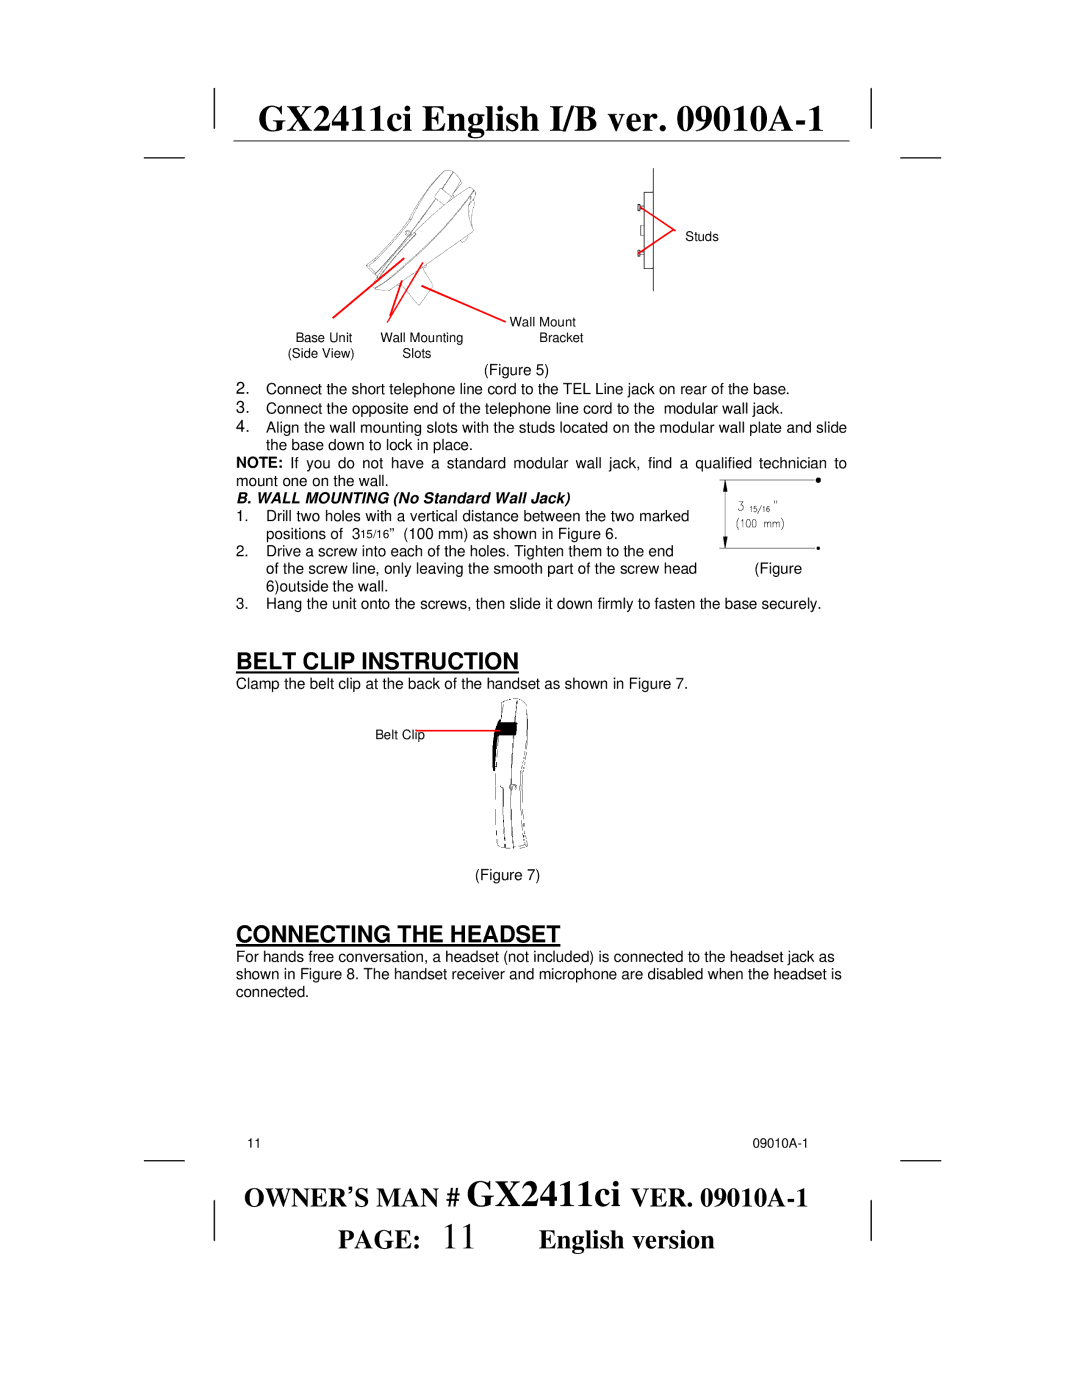
Studs
|
| Wall Mount |
Base Unit | Wall Mounting | Bracket |
(Side View) | Slots |
|
(Figure 5)
2.Connect the short telephone line cord to the TEL Line jack on rear of the base.
3.Connect the opposite end of the telephone line cord to the modular wall jack.
4.Align the wall mounting slots with the studs located on the modular wall plate and slide the base down to lock in place.
NOTE: If you do not have a standard modular wall jack, find a qualified technician to mount one on the wall.![]()
![]()
B. WALL MOUNTING (No Standard Wall Jack)
1. | Drill two holes with a vertical distance between the two marked |
|
| positions of 315/16” (100 mm) as shown in Figure 6. |
|
2. | Drive a screw into each of the holes. Tighten them to the end |
|
| of the screw line, only leaving the smooth part of the screw head | (Figure |
| 6)outside the wall. |
|
3.Hang the unit onto the screws, then slide it down firmly to fasten the base securely.
BELT CLIP INSTRUCTION
Clamp the belt clip at the back of the handset as shown in Figure 7.
Belt Clip
(Figure 7)
CONNECTING THE HEADSET
For hands free conversation, a headset (not included) is connected to the headset jack as shown in Figure 8. The handset receiver and microphone are disabled when the headset is connected.
11 |
OWNER’S MAN # GX2411ci VER.
PAGE: 11 | English version |