GEBRUIK MAKEN VAN UW SWITCH

Het inschalen van de systemen

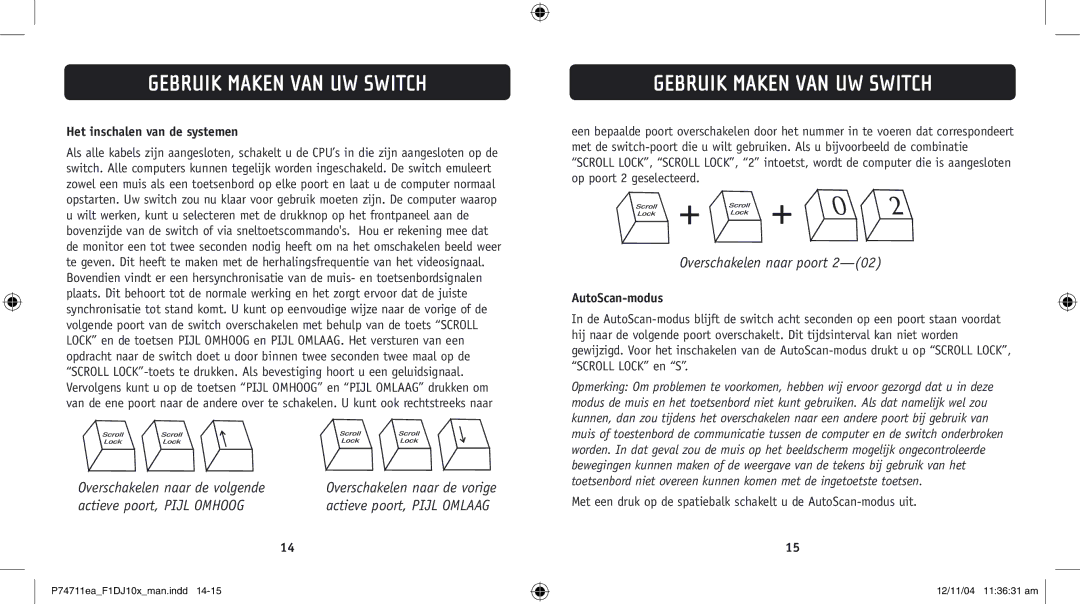
Als alle kabels zijn aangesloten, schakelt u de CPU’s in die zijn aangesloten op de switch. Alle computers kunnen tegelijk worden ingeschakeld. De switch emuleert zowel een muis als een toetsenbord op elke poort en laat u de computer normaal opstarten. Uw switch zou nu klaar voor gebruik moeten zijn. De computer waarop u wilt werken, kunt u selecteren met de drukknop op het frontpaneel aan de bovenzijde van de switch of via sneltoetscommando's. Hou er rekening mee dat de monitor een tot twee seconden nodig heeft om na het omschakelen beeld weer te geven. Dit heeft te maken met de herhalingsfrequentie van het videosignaal. Bovendien vindt er een hersynchronisatie van de muis- en toetsenbordsignalen plaats. Dit behoort tot de normale werking en het zorgt ervoor dat de juiste synchronisatie tot stand komt. U kunt op eenvoudige wijze naar de vorige of de volgende poort van de switch overschakelen met behulp van de toets “SCROLL LOCK” en de toetsen PIJL OMHOOG en PIJL OMLAAG. Het versturen van een opdracht naar de switch doet u door binnen twee seconden twee maal op de “SCROLL LOCK”-toets te drukken. Als bevestiging hoort u een geluidsignaal. Vervolgens kunt u op de toetsen “PIJL OMHOOG” en “PIJL OMLAAG” drukken om van de ene poort naar de andere over te schakelen. U kunt ook rechtstreeks naar

Overschakelen naar de volgende

Overschakelen naar de vorige

actieve poort, PIJL OMHOOG

actieve poort, PIJL OMLAAG


14

P74711ea_F1DJ10x_man.indd 14-15


GEBRUIK MAKEN VAN UW SWITCH

een bepaalde poort overschakelen door het nummer in te voeren dat correspondeert met de switch-poort die u wilt gebruiken. Als u bijvoorbeeld de combinatie “SCROLL LOCK”, “SCROLL LOCK”, “2” intoetst, wordt de computer die is aangesloten op poort 2 geselecteerd.

+ +

Overschakelen naar poort 2—(02)

AutoScan-modus

In de AutoScan-modus blijft de switch acht seconden op een poort staan voordat hij naar de volgende poort overschakelt. Dit tijdsinterval kan niet worden gewijzigd. Voor het inschakelen van de AutoScan-modus drukt u op “SCROLL LOCK”, “SCROLL LOCK” en “S”.

Opmerking: Om problemen te voorkomen, hebben wij ervoor gezorgd dat u in deze modus de muis en het toetsenbord niet kunt gebruiken. Als dat namelijk wel zou kunnen, dan zou tijdens het overschakelen naar een andere poort bij gebruik van muis of toestenbord de communicatie tussen de computer en de switch onderbroken worden. In dat geval zou de muis op het beeldscherm mogelijk ongecontroleerde bewegingen kunnen maken of de weergave van de tekens bij gebruik van het toetsenbord niet overeen kunnen komen met de ingetoetste toetsen.

Met een druk op de spatiebalk schakelt u de AutoScan-modus uit.

15

12/11/04 11:36:31 am

Page 52
Image 52
Belkin F1DJ104P-B, F1DJ102P-B user manual Gebruik Maken VAN UW Switch, Het inschalen van de systemen

F1DJ102P-B, F1DJ104P-B specifications

Belkin, a renowned name in the world of connectivity and networking solutions, has made significant strides in the realm of KVM switches with its F1DJ104P-B and F1DJ102P-B models. These devices are engineered to seamlessly manage multiple computers from a single set of peripherals, enhancing user efficiency and workspace organization.

The Belkin F1DJ104P-B model stands out with its ability to control up to four computers simultaneously. This 4-port KVM switch offers an intuitive interface and gives users the freedom to switch between systems effortlessly. It supports USB connectivity, allowing users to connect their keyboard, mouse, and monitor quickly, while its compact design ensures minimal space usage on the desk. One notable feature of this model is its support for high-resolution display output, with the capability to handle up to 1920 x 1200 pixels. This ensures that users can benefit from clear and sharp visuals, whether for work or entertainment.

On the other hand, the Belkin F1DJ102P-B caters to those who require a more streamlined solution, managing two computers efficiently with its 2-port configuration. Similar to its 4-port counterpart, the F1DJ102P-B incorporates USB connectivity, making it user-friendly and straightforward to set up. Like the F1DJ104P-B, it also supports high-definition video output, providing crisp imagery that enhances productivity and clarity.

Both models support a hotkey function that allows users to switch between connected computers conveniently without needing to reach for a button on the device itself, thus making operation more efficient and ergonomic. Furthermore, the inclusion of LED indicators makes it easy to identify which computer is currently active, aiding in quick transitions.

Durability is another hallmark of Belkin's offerings. Both models are constructed with high-quality materials, ensuring longevity and reliability in diverse working environments. With their compatibility across various operating systems, such as Windows and macOS, end users can enjoy an adaptable and hassle-free experience.

In summary, the Belkin F1DJ104P-B and F1DJ102P-B KVM switches are powerful tools designed to enhance productivity and streamline workspace management. Their combination of high-resolution support, user-friendly features, and robust design makes them ideal for professionals and multitaskers looking to optimize their computing experience. Whether you choose the 2-port or the 4-port version, both models deliver excellent performance tailored to meet your specific needs.