
F5D7632uk4A specifications
The Belkin F5D7632uk4A is a versatile wireless router recognized for its reliability and robust performance. Designed to cater to both home and small office environments, it ensures seamless connectivity for multiple devices simultaneously.One of the standout features of the F5D7632uk4A is its 802.11g wireless technology, which delivers impressive transfer speeds of up to 54 Mbps. This allows users to enjoy smooth streaming, online gaming, and rapid file downloads, enhancing their overall internet experience. The router also supports backward compatibility with older 802.11b devices, ensuring that even legacy hardware can connect without issue.
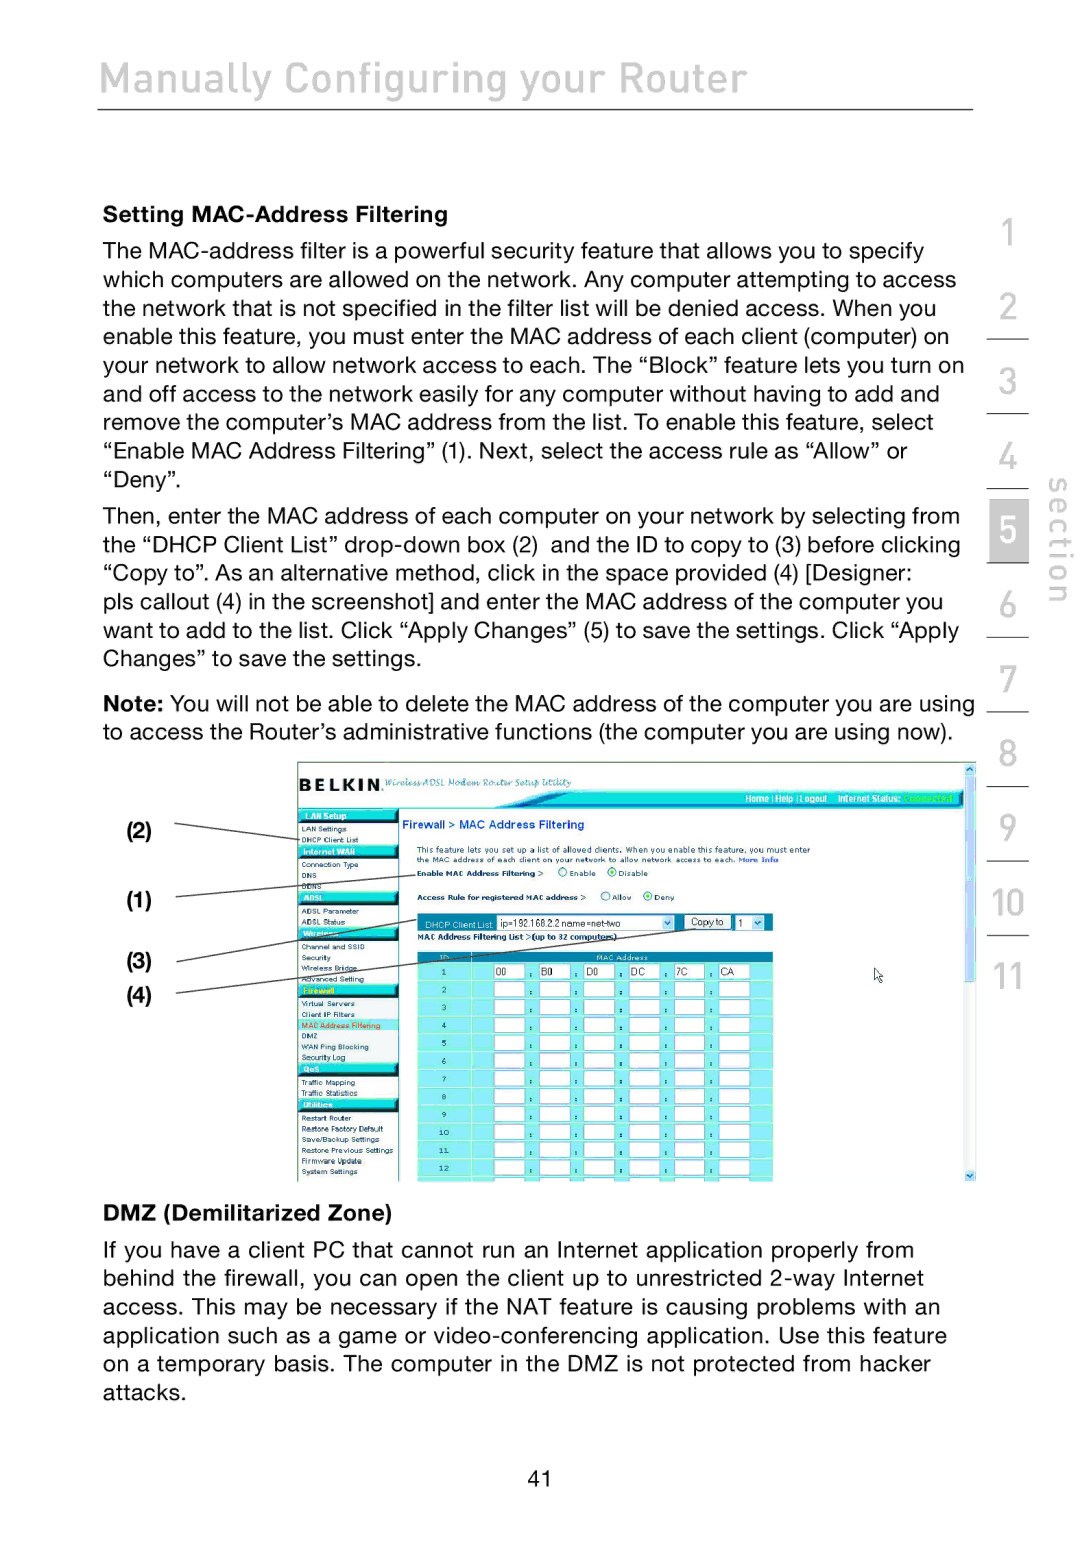
Security is a top priority for the F5D7632uk4A. It employs advanced encryption standards such as WEP, WPA, and WPA2, safeguarding your network from unauthorized access and keeping your data safe while browsing. Features like MAC address filtering add an additional layer of protection, allowing users to specify which devices can connect to the network.
The router comes equipped with four Ethernet ports, enabling wired connections for devices that may require a stable and dedicated connection, such as gaming consoles or desktop computers. This flexibility ensures that users can efficiently manage their network based on their specific needs.
Another notable characteristic of the F5D7632uk4A is its user-friendly setup process. With a simple installation wizard, even those who are not tech-savvy can have their network up and running in no time. The web-based management interface is intuitive, offering a range of customization options to optimize network performance.
The compact design of the Belkin F5D7632uk4A makes it easy to integrate into any home or office setting. Additionally, the router has been designed to ensure reliable performance over long distances, which is essential for larger spaces that require extensive Wi-Fi coverage.
In summary, the Belkin F5D7632uk4A is an excellent choice for users seeking a robust wireless router that balances speed, security, and ease of use. Its combination of modern wireless standards, security features, and connectivity options make it a valuable addition to any networking setup, providing reliable and efficient internet access for all connected devices.