the button whose keystone icon is similar to the shape of the projected image. Continue pressing the same button or press the other buttons until you are satisfied with the shape.
• | Press MENU/BACK on the projector or remote | KEYSTONE | ||||||||
| control. Go to the DISPLAY > Keystone menu and | |||||||||
|
| |||||||||
| press ENTER to display the Keystone correction |
| ||||||||
| page. Press one of the Keystone/Arrow buttons |
| ||||||||
| ( |
| / , |
| / , |
| / , |
| / ) on the projector |
|
|
|
|
|
|
| |||||
|
|
|
|
| ||||||
|
|
|
|
|
|
|
|
|
|
|
|
|
|
|
|
|
|
|
|
|
|
| or remote control whose Keystone icon is similar to |
| ||||||||
the shape of the projected image. Continue pressing the same button or press the other buttons until
you are satisfied with the shape. | Back |
|
The values on the lower portion of the page change while pressing. When the values reach their maximum or minimum with repeated button presses, the image's shape will stop changing. You will not be able to change the image further in that direction.
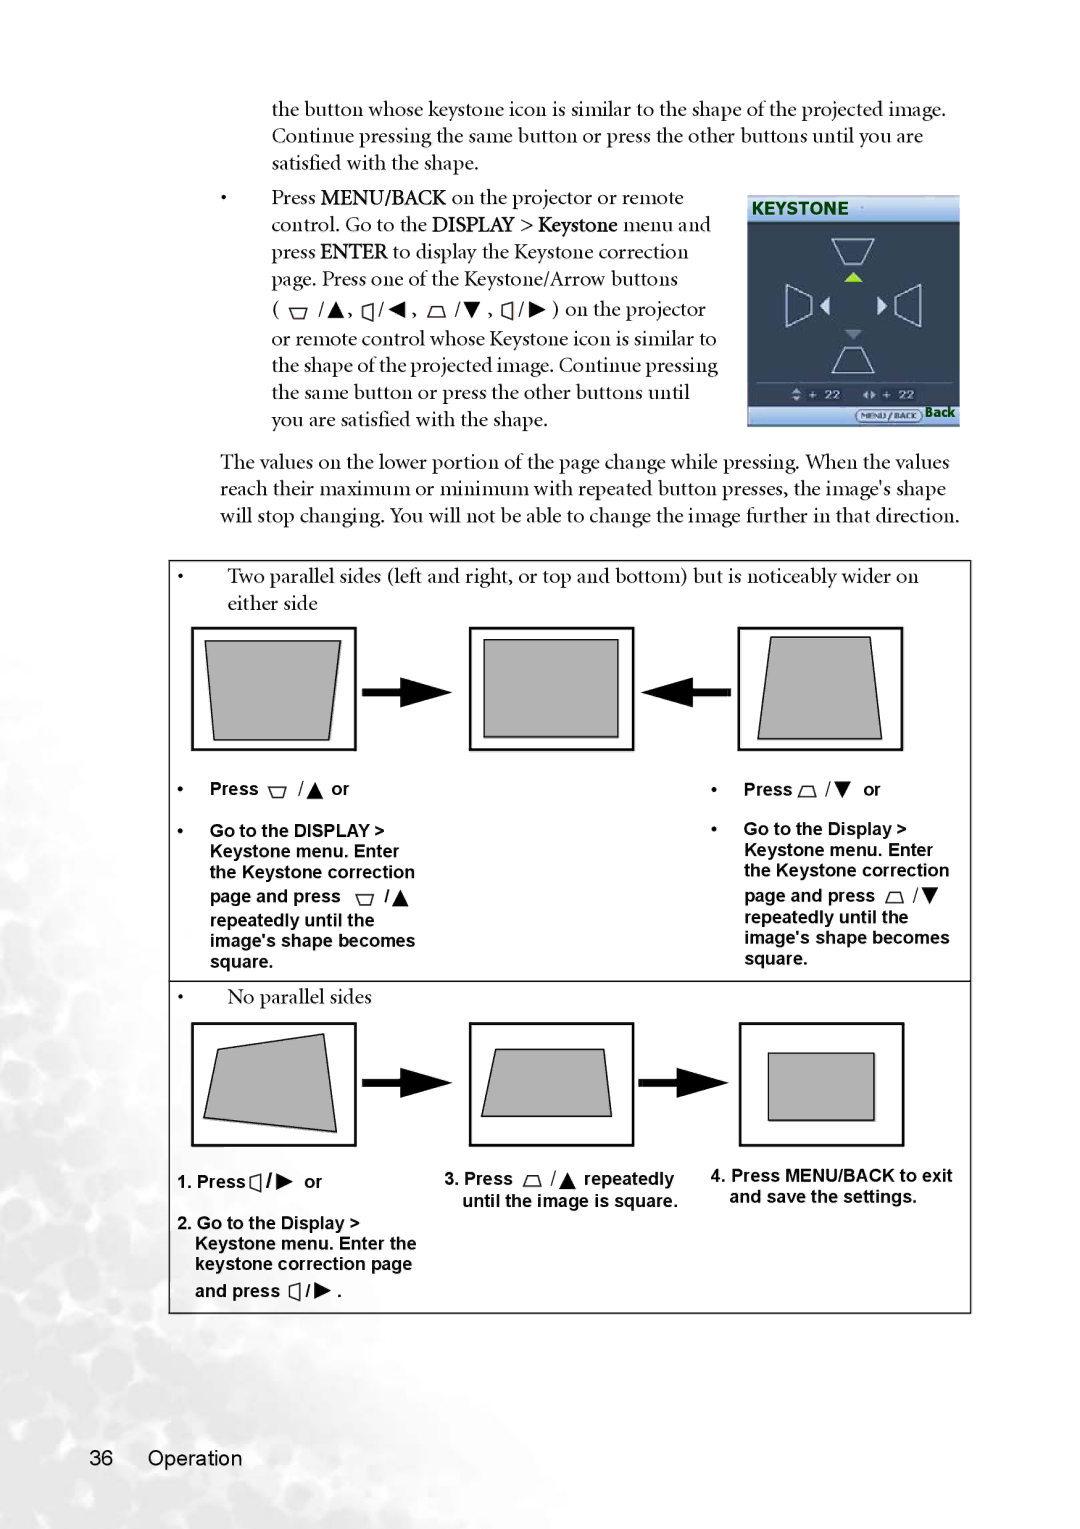
•Two parallel sides (left and right, or top and bottom) but is noticeably wider on either side
•Press ![]() /
/![]() or
or
•Go to the DISPLAY > Keystone menu. Enter the Keystone correction
page and press ![]() /
/ ![]() repeatedly until the image's shape becomes square.
repeatedly until the image's shape becomes square.
•Press ![]() /
/ ![]() or
or
•Go to the Display > Keystone menu. Enter the Keystone correction
page and press ![]() /
/![]() repeatedly until the image's shape becomes square.
repeatedly until the image's shape becomes square.
•No parallel sides
1. Press | / | or |
2.Go to the Display > Keystone menu. Enter the keystone correction page and press ![]() /
/ ![]() .
.
3. Press |
| / repeatedly | 4. Press MENU/BACK to exit |
| |||
until the image is square. | and save the settings. | ||
