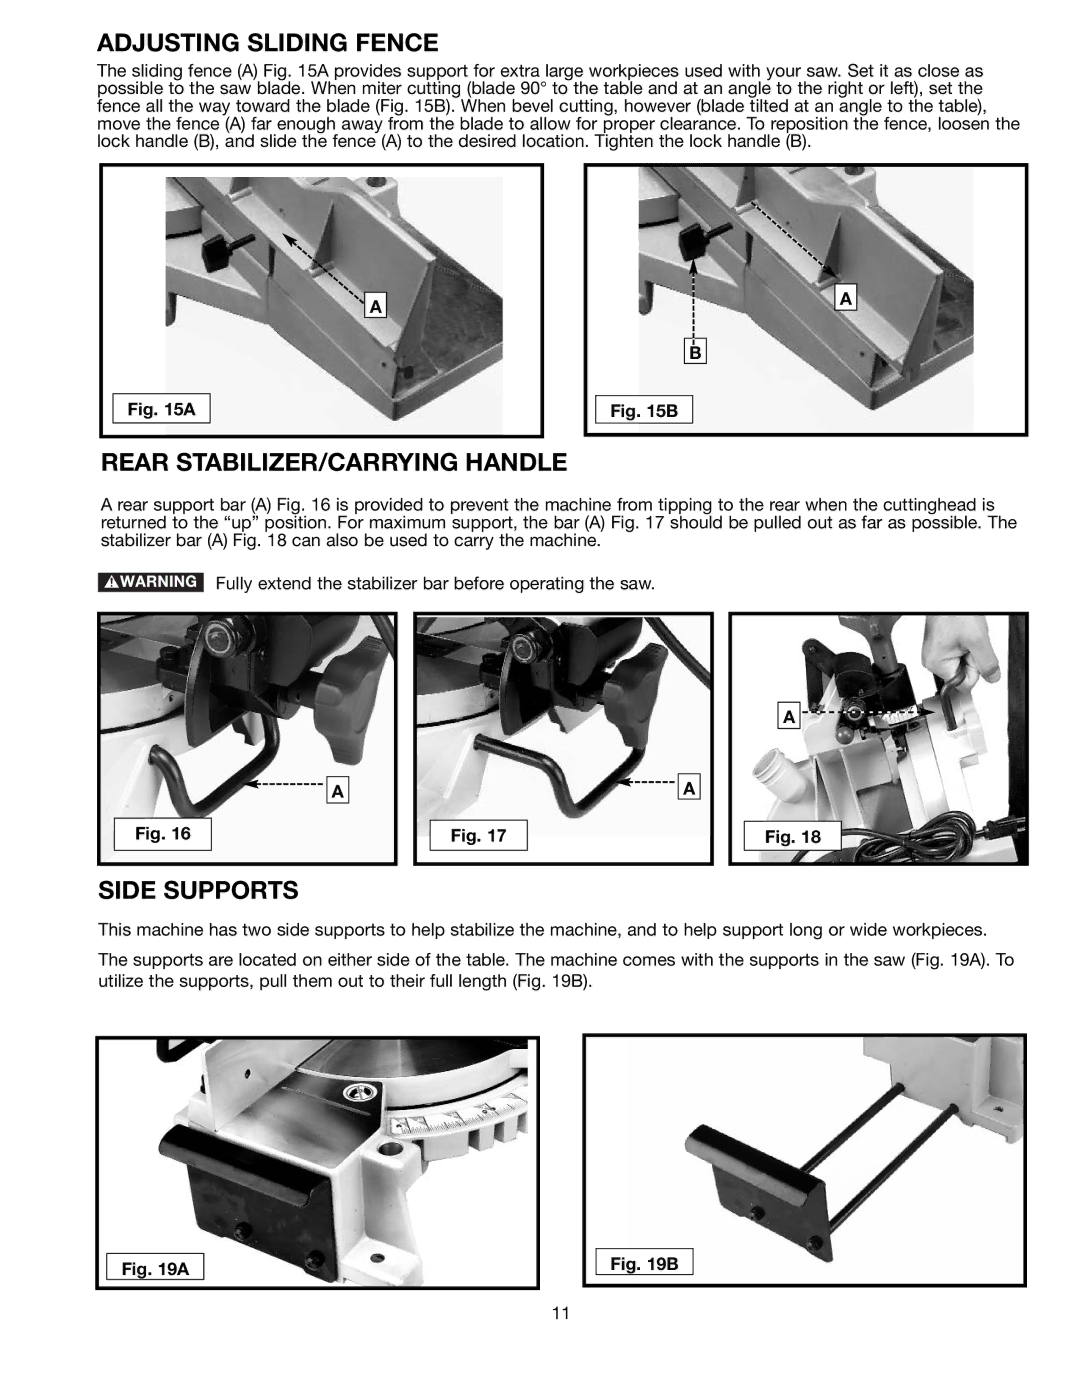
ADJUSTING SLIDING FENCE
The sliding fence (A) Fig. 15A provides support for extra large workpieces used with your saw. Set it as close as possible to the saw blade. When miter cutting (blade 90° to the table and at an angle to the right or left), set the fence all the way toward the blade (Fig. 15B). When bevel cutting, however (blade tilted at an angle to the table), move the fence (A) far enough away from the blade to allow for proper clearance. To reposition the fence, loosen the lock handle (B), and slide the fence (A) to the desired location. Tighten the lock handle (B).
A
Fig. 15A
A
B
Fig. 15B
REAR STABILIZER/CARRYING HANDLE
A rear support bar (A) Fig. 16 is provided to prevent the machine from tipping to the rear when the cuttinghead is returned to the “up” position. For maximum support, the bar (A) Fig. 17 should be pulled out as far as possible. The stabilizer bar (A) Fig. 18 can also be used to carry the machine.
Fully extend the stabilizer bar before operating the saw.
|
|
|
|
|
|
|
|
|
|
|
|
|
|
|
|
|
|
|
| A |
|
|
|
| A |
|
|
|
|
|
| |
|
|
|
|
|
|
|
|
|
|
|
|
|
|
|
|
|
|
|
|
|
|
| Fig. 16 |
|
|
|
|
| Fig. 17 |
|
|
|
|
|
|
|
|
|
|
|
|
|
|
|
|
|
|
|
|
|
|
|
|
|
A![]()
![]()
Fig. 18
SIDE SUPPORTS
This machine has two side supports to help stabilize the machine, and to help support long or wide workpieces.
The supports are located on either side of the table. The machine comes with the supports in the saw (Fig. 19A). To utilize the supports, pull them out to their full length (Fig. 19B).
Fig. 19A
Fig. 19B
11