
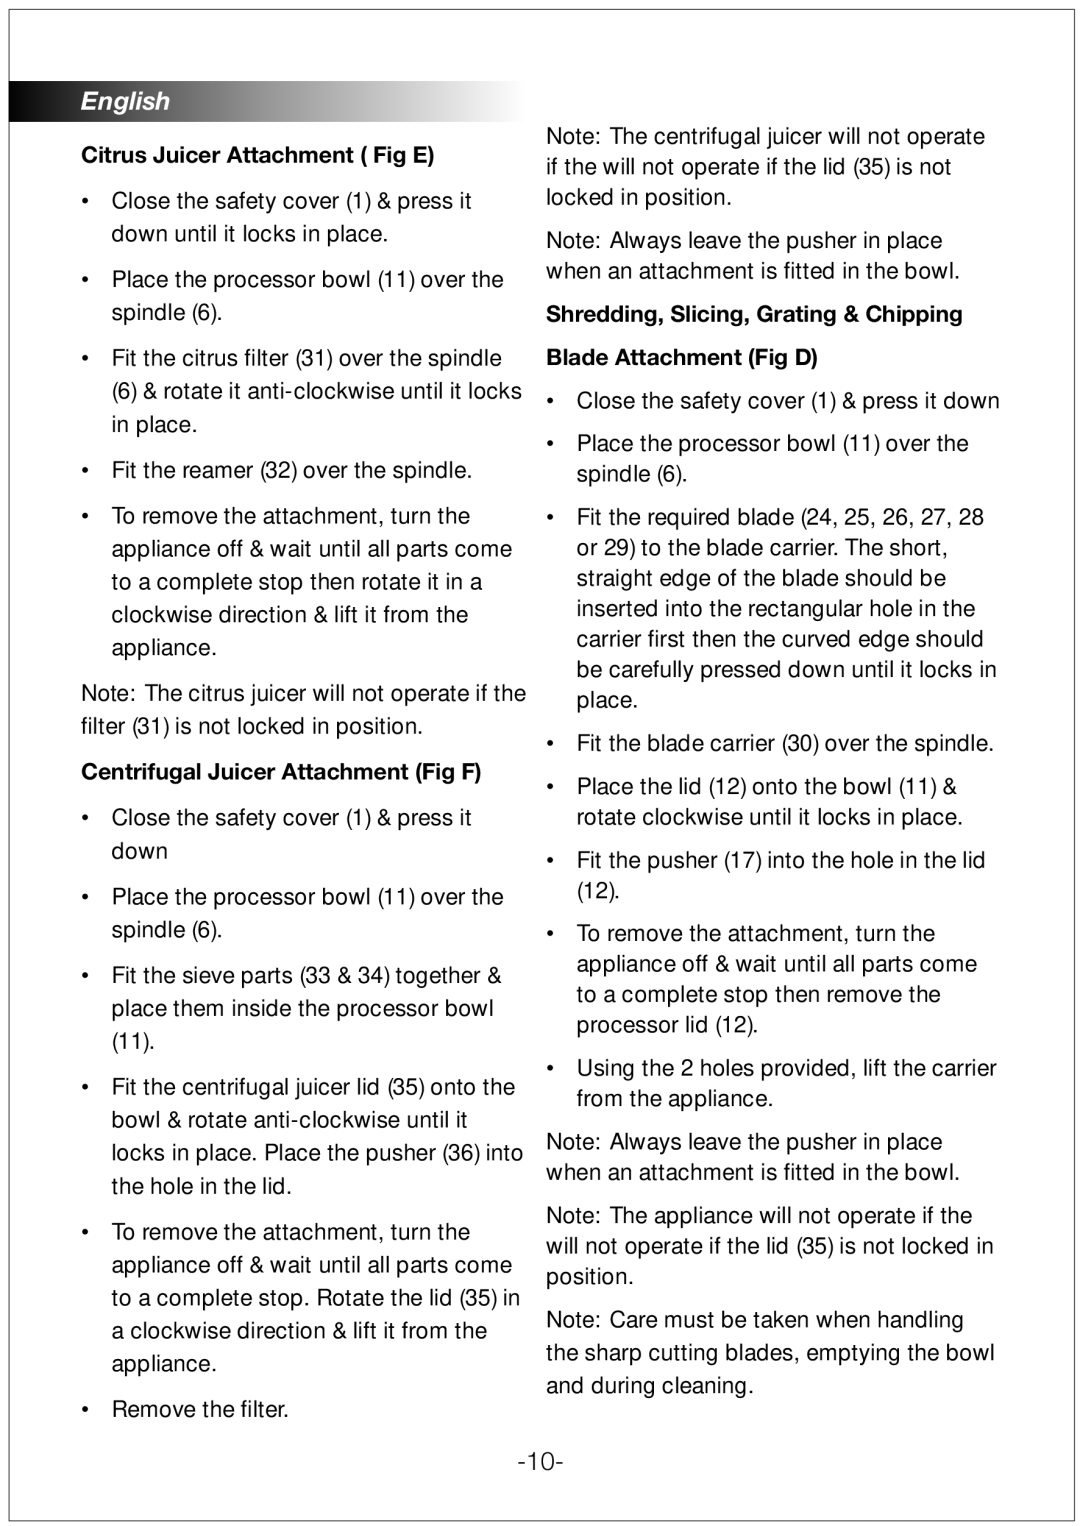
FX1000 specifications
The Black & Decker FX1000 is a modern powerhouse designed to simplify a variety of household tasks, from cooking to food preparation. This versatile appliance integrates advanced technology and user-friendly features, making it an essential addition to any kitchen.One of the standout features of the FX1000 is its powerful 1,000-watt motor, which enables efficient and rapid processing of diverse food types. This robust motor ensures that the FX1000 can handle everything from chopping vegetables to blending smoothies and pureeing soups, all with ease and consistency. The high-performance motor is complemented by a variety of speed settings, allowing users to choose the perfect speed for their specific task, whether it’s gentle mixing or vigorous blending.
The FX1000 boasts a large-capacity mixing bowl, providing ample space for significant food quantities. This feature is particularly beneficial for families or those who enjoy entertaining guests, as it reduces the need to process food in smaller batches. Additionally, the bowl is designed to be easy to clean, facilitating the quick transition between different recipes.
One of the key technologies integrated into the FX1000 is its SmartBlend System. This innovative technology adjusts the blending speed and power automatically based on the consistency of the ingredients being processed. This ensures optimal results, whether users are making smoothies, sauces, or dips. The appliance also features a One-Touch Pulse function, allowing for precise control during the blending process.
Safety is a top priority with the FX1000. The appliance comes with a safety lock mechanism that prevents operation unless the lid is securely in place. This feature gives users peace of mind, especially when working with hot foods or mixtures that require more significant processing.
The FX1000 is designed with ergonomics in mind, featuring a comfortable handle for easy pouring and a lightweight build that allows for easy maneuvering around the kitchen. Furthermore, the modern design and sleek aesthetics make it an appealing fixture on any countertop.
In summary, the Black & Decker FX1000 is a multifunctional kitchen appliance that combines power, convenience, and safety. With its advanced technologies, generous capacity, and intuitive features, it is an ideal solution for anyone looking to elevate their culinary skills while saving time and effort in the kitchen.