Chapter 3: Installation and Initial Setup
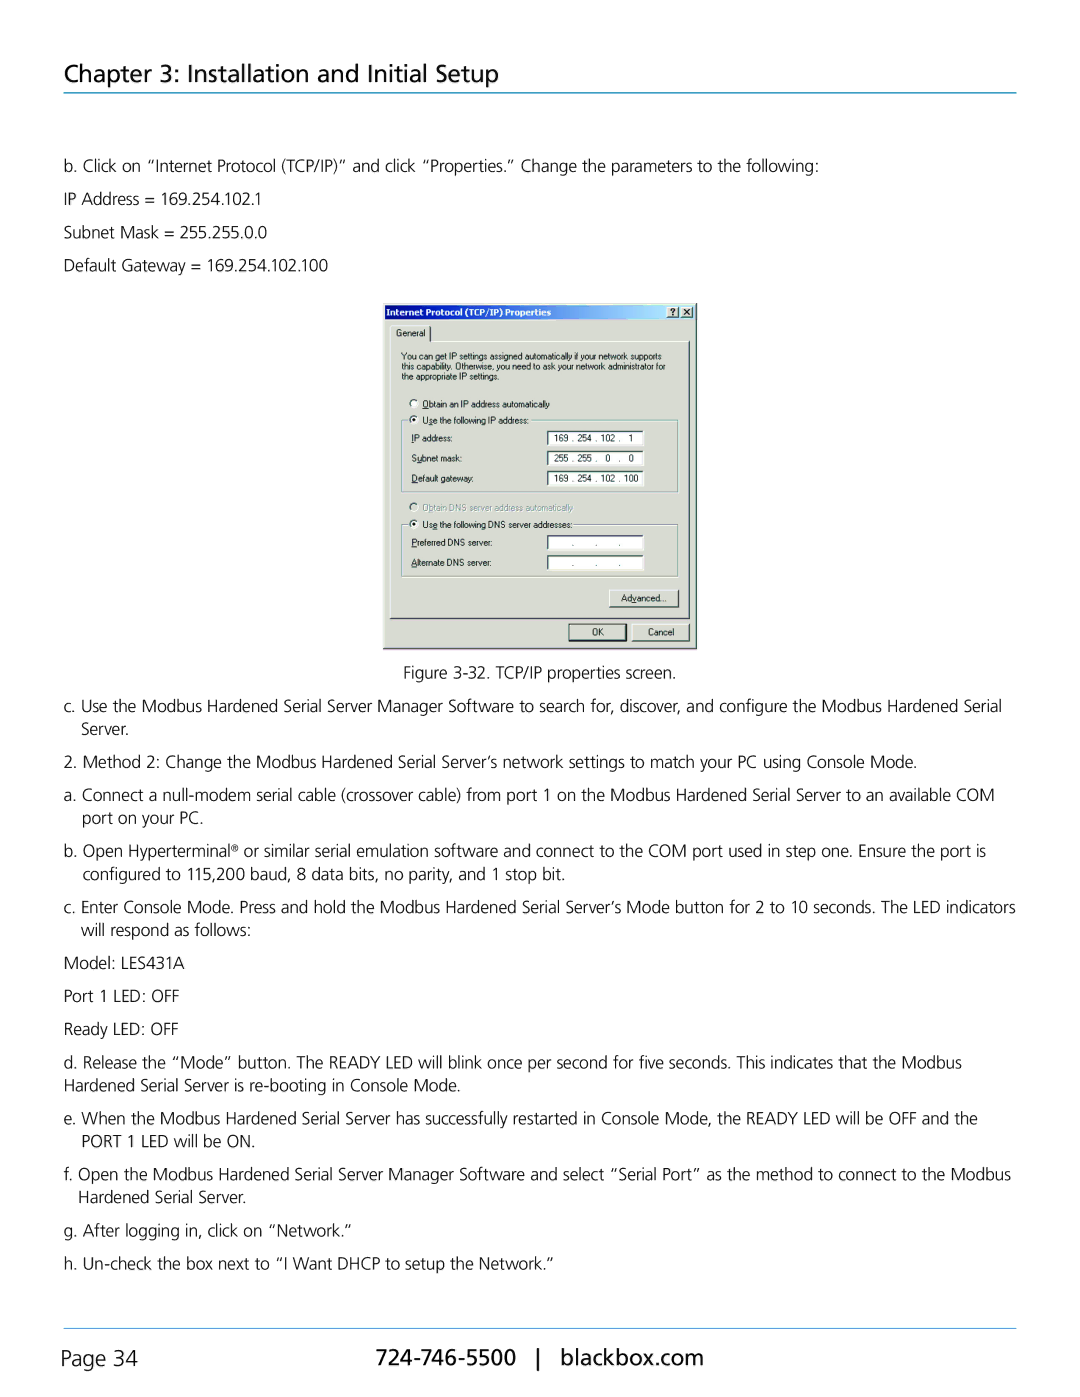
b. Click on “Internet Protocol (TCP/IP)” and click “Properties.” Change the parameters to the following:
IP Address = 169.254.102.1
Subnet Mask = 255.255.0.0
Default Gateway = 169.254.102.100
Figure 3-32. TCP/IP properties screen.
c. Use the Modbus Hardened Serial Server Manager Software to search for, discover, and configure the Modbus Hardened Serial Server.
2. Method 2: Change the Modbus Hardened Serial Server’s network settings to match your PC using Console Mode.
a. Connect a null-modem serial cable (crossover cable) from port 1 on the Modbus Hardened Serial Server to an available COM port on your PC.
b. Open Hyperterminal® or similar serial emulation software and connect to the COM port used in step one. Ensure the port is configured to 115,200 baud, 8 data bits, no parity, and 1 stop bit.
c. Enter Console Mode. Press and hold the Modbus Hardened Serial Server’s Mode button for 2 to 10 seconds. The LED indicators will respond as follows:
Model: LES431A
Port 1 LED: OFF
Ready LED: OFF
d. Release the “Mode” button. The READY LED will blink once per second for five seconds. This indicates that the Modbus Hardened Serial Server is re-booting in Console Mode.
e. When the Modbus Hardened Serial Server has successfully restarted in Console Mode, the READY LED will be OFF and the PORT 1 LED will be ON.
f. Open the Modbus Hardened Serial Server Manager Software and select “Serial Port” as the method to connect to the Modbus Hardened Serial Server.
g. After logging in, click on “Network.”
h. Un-check the box next to “I Want DHCP to setup the Network.”
Page 34 |