Chapter 3: Installation and Initial Setup
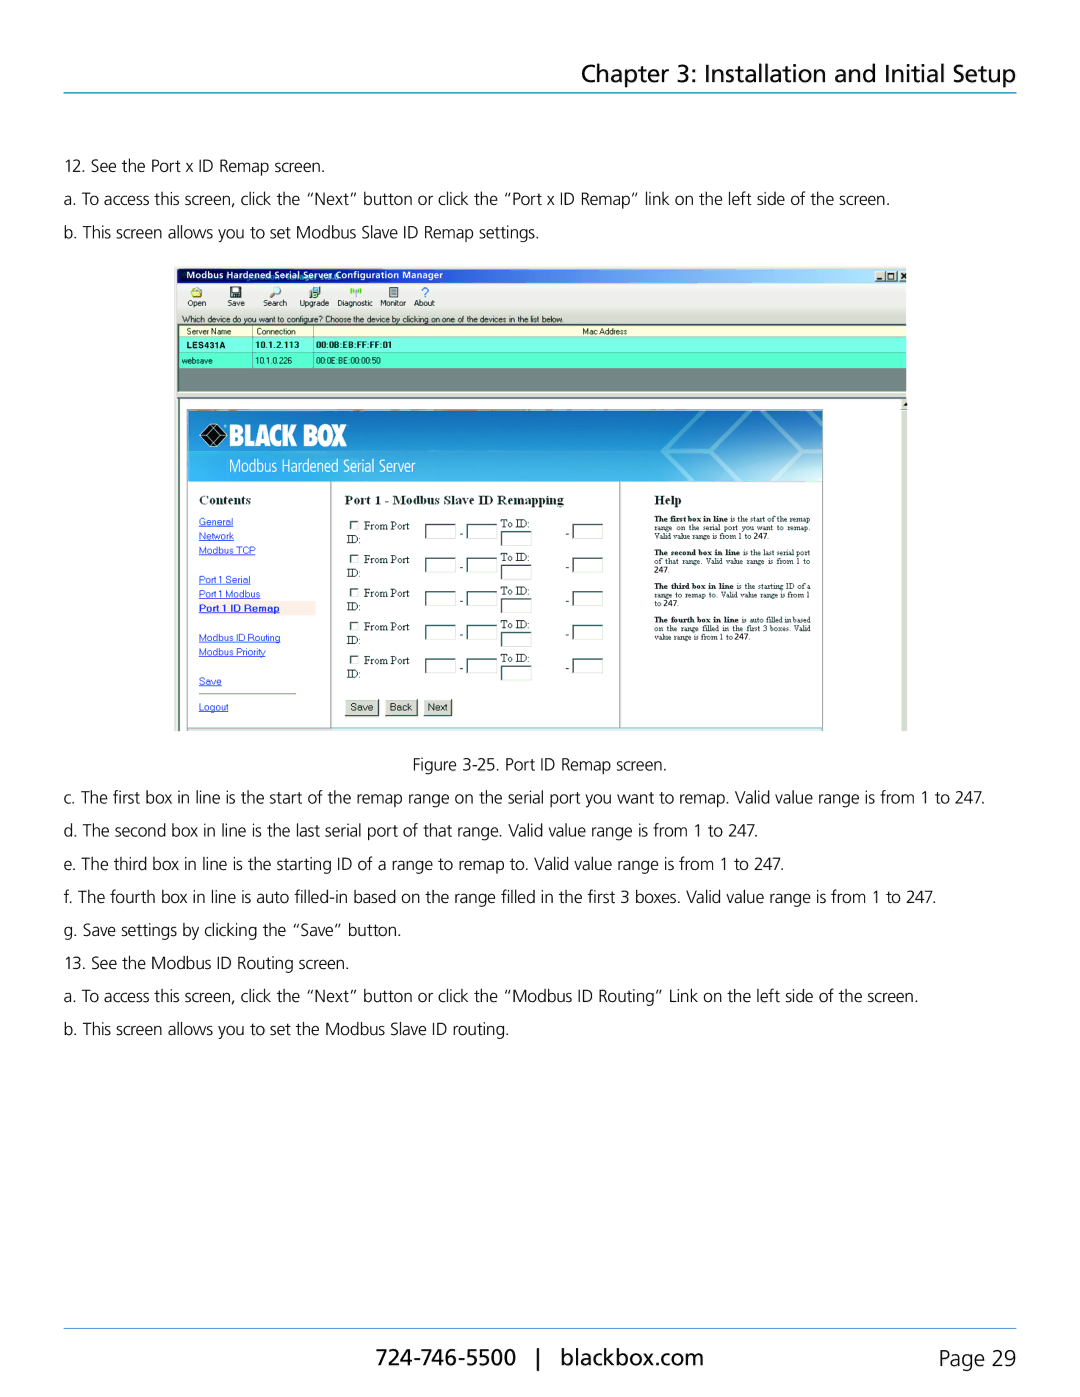
12. See the Port x ID Remap screen.
a. To access this screen, click the “Next” button or click the “Port x ID Remap” link on the left side of the screen. b. This screen allows you to set Modbus Slave ID Remap settings.
Figure 3-25. Port ID Remap screen.
c. The first box in line is the start of the remap range on the serial port you want to remap. Valid value range is from 1 to 247. d. The second box in line is the last serial port of that range. Valid value range is from 1 to 247.
e. The third box in line is the starting ID of a range to remap to. Valid value range is from 1 to 247.
f. The fourth box in line is auto filled-in based on the range filled in the first 3 boxes. Valid value range is from 1 to 247. g. Save settings by clicking the “Save” button.
13. See the Modbus ID Routing screen.
a. To access this screen, click the “Next” button or click the “Modbus ID Routing” Link on the left side of the screen. b. This screen allows you to set the Modbus Slave ID routing.
Page 29 |
