Getting To Know Your Miter Saw
24
30
2
1
27
26
25
23
50 | 45 |
19 |
|
|
|
20 | 17 |
| 16 |
10 | 18 | ||
|
|
|
4
|
|
| 25 | 20 | 15 |
40 | 35 | 30 |
| ||
|
|
15
3
5
6
7
| 37 |
8 |
|
18 |
|
9 | 17 |
| 10 |
| 11 |
15 | 12 |
10 | |
5 |
|
0 |
|
10 |
|
| 13 |
14 |
|
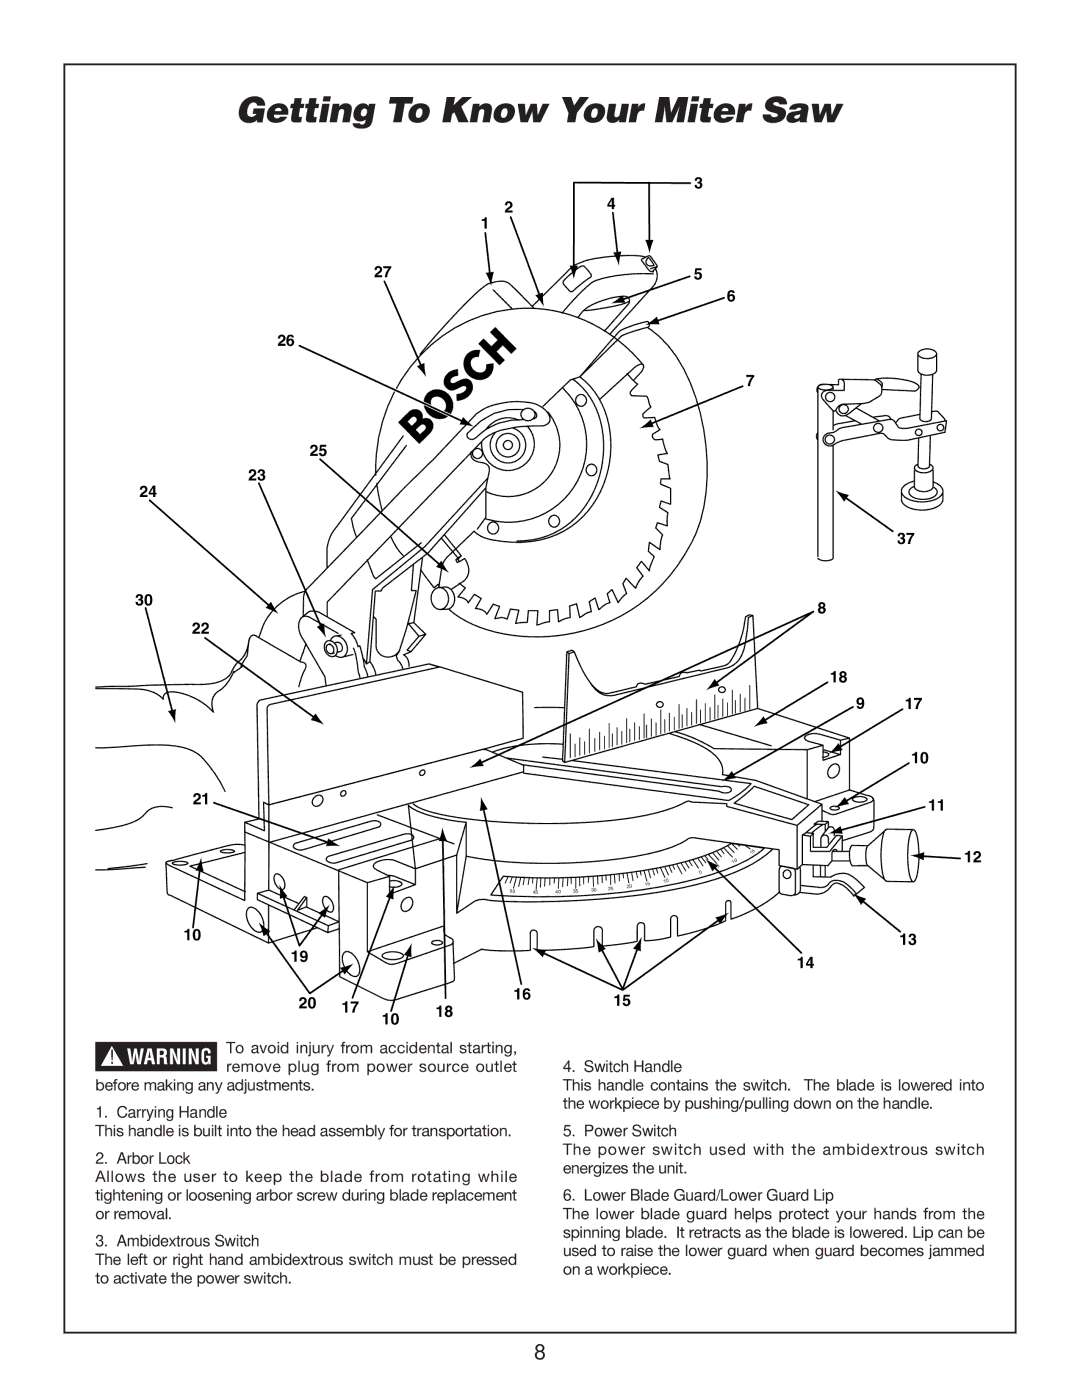
!WARNING To avoid injury from accidental starting, remove plug from power source outlet
before making any adjustments.
1. Carrying Handle
This handle is built into the head assembly for transportation.
2. Arbor Lock
Allows the user to keep the blade from rotating while tightening or loosening arbor screw during blade replacement or removal.
3. Ambidextrous Switch
The left or right hand ambidextrous switch must be pressed to activate the power switch.
4. Switch Handle
This handle contains the switch. The blade is lowered into the workpiece by pushing/pulling down on the handle.
5. Power Switch
The power switch used with the ambidextrous switch energizes the unit.
6. Lower Blade Guard/Lower Guard Lip
The lower blade guard helps protect your hands from the spinning blade. It retracts as the blade is lowered. Lip can be used to raise the lower guard when guard becomes jammed on a workpiece.
8