Step 1 —Provide Unit Support

Roof Curb

Assemble and install accessory roof curb in accordance with instructions shipped with curb. (See Fig. 2.) Install insulation, cant strips, roofing felt, and counter flashing as shown. Ductwork must be attached to curb, not to the unit. If electric control power or gas service is to be routed through the basepan, attach the accessory thru-the-bottom service connections to the basepan in accordance with the accessory installation instructions. Connections must be installed before unit is set on roof curb.

551B,C

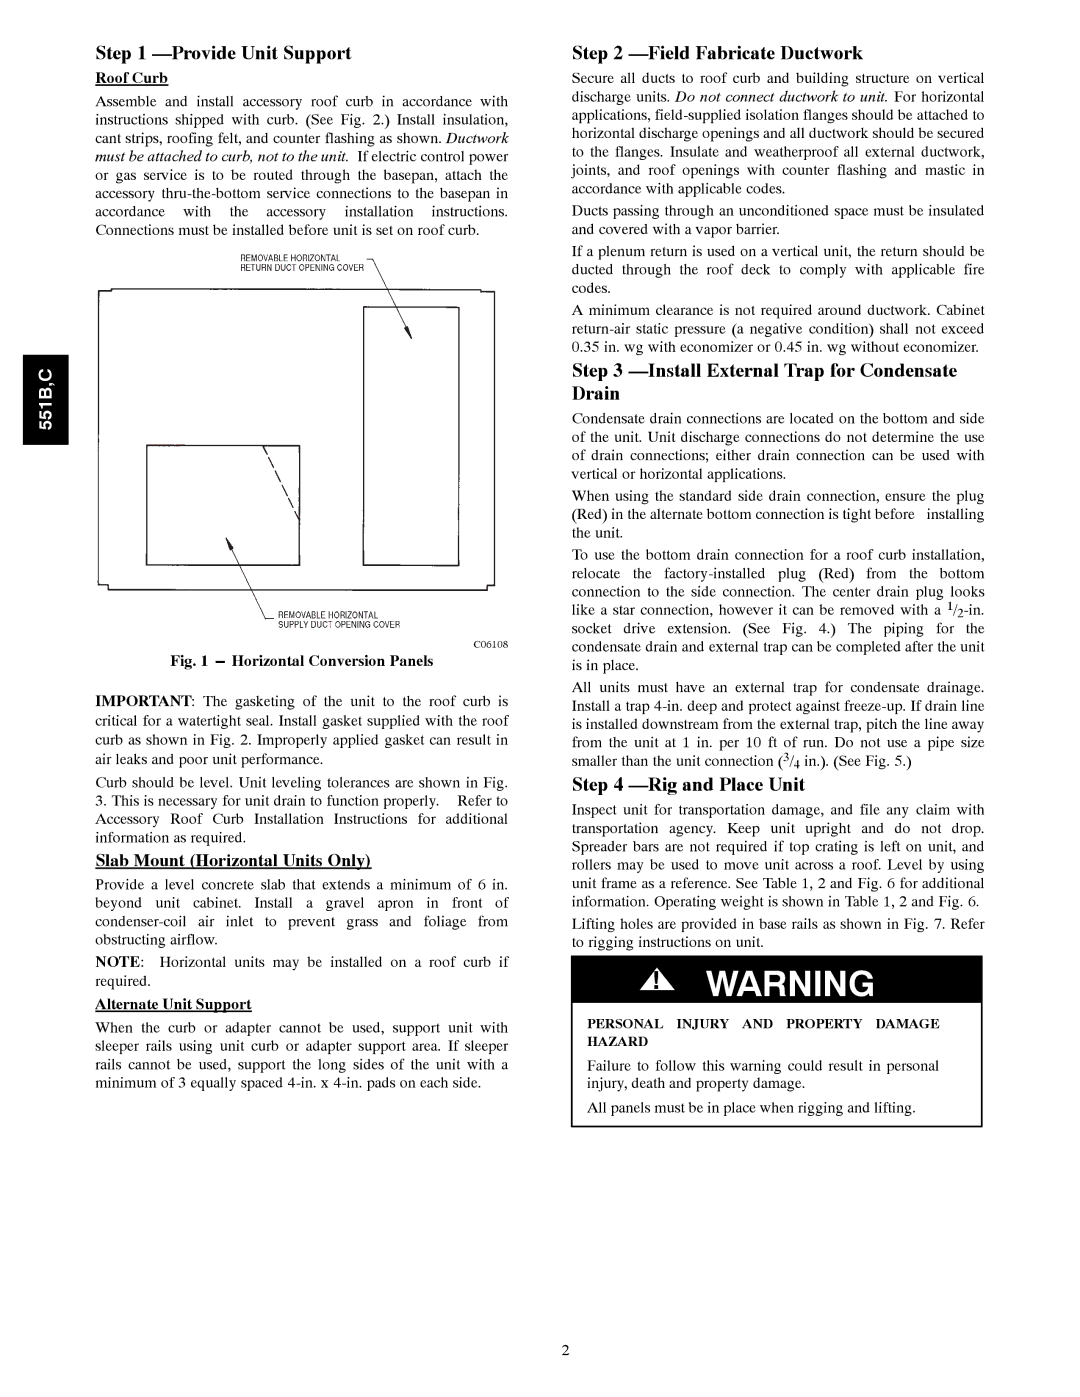
C06108

Fig. 1 ---Horizontal Conversion Panels

IMPORTANT: The gasketing of the unit to the roof curb is critical for a watertight seal. Install gasket supplied with the roof curb as shown in Fig. 2. Improperly applied gasket can result in air leaks and poor unit performance.

Curb should be level. Unit leveling tolerances are shown in Fig.

3.This is necessary for unit drain to function properly. Refer to Accessory Roof Curb Installation Instructions for additional information as required.

Slab Mount (Horizontal Units Only)

Provide a level concrete slab that extends a minimum of 6 in. beyond unit cabinet. Install a gravel apron in front of condenser-coil air inlet to prevent grass and foliage from obstructing airflow.

NOTE: Horizontal units may be installed on a roof curb if required.

Alternate Unit Support

When the curb or adapter cannot be used, support unit with sleeper rails using unit curb or adapter support area. If sleeper rails cannot be used, support the long sides of the unit with a minimum of 3 equally spaced 4-in. x 4-in. pads on each side.

Step 2 —Field Fabricate Ductwork

Secure all ducts to roof curb and building structure on vertical discharge units. Do not connect ductwork to unit. For horizontal applications, field-supplied isolation flanges should be attached to horizontal discharge openings and all ductwork should be secured to the flanges. Insulate and weatherproof all external ductwork, joints, and roof openings with counter flashing and mastic in accordance with applicable codes.

Ducts passing through an unconditioned space must be insulated and covered with a vapor barrier.

If a plenum return is used on a vertical unit, the return should be ducted through the roof deck to comply with applicable fire codes.

A minimum clearance is not required around ductwork. Cabinet return-air static pressure (a negative condition) shall not exceed 0.35 in. wg with economizer or 0.45 in. wg without economizer.

Step 3 —Install External Trap for Condensate Drain

Condensate drain connections are located on the bottom and side of the unit. Unit discharge connections do not determine the use of drain connections; either drain connection can be used with vertical or horizontal applications.

When using the standard side drain connection, ensure the plug (Red) in the alternate bottom connection is tight before installing the unit.

To use the bottom drain connection for a roof curb installation, relocate the factory-installed plug (Red) from the bottom connection to the side connection. The center drain plug looks like a star connection, however it can be removed with a 1/2-in. socket drive extension. (See Fig. 4.) The piping for the condensate drain and external trap can be completed after the unit is in place.

All units must have an external trap for condensate drainage. Install a trap 4-in. deep and protect against freeze-up. If drain line is installed downstream from the external trap, pitch the line away from the unit at 1 in. per 10 ft of run. Do not use a pipe size smaller than the unit connection (3/4 in.). (See Fig. 5.)

Step 4 —Rig and Place Unit

Inspect unit for transportation damage, and file any claim with transportation agency. Keep unit upright and do not drop. Spreader bars are not required if top crating is left on unit, and rollers may be used to move unit across a roof. Level by using unit frame as a reference. See Table 1, 2 and Fig. 6 for additional information. Operating weight is shown in Table 1, 2 and Fig. 6.

Lifting holes are provided in base rails as shown in Fig. 7. Refer to rigging instructions on unit.

!WARNING

PERSONAL INJURY AND PROPERTY DAMAGE HAZARD

Failure to follow this warning could result in personal injury, death and property damage.

All panels must be in place when rigging and lifting.

2

Page 2
Image 2
Bryant 551B Provide Unit Support, Field Fabricate Ductwork, Install External Trap for Condensate Drain, Rig and Place Unit

551C, 551B specifications

The Bryant 551B and 551C are two highly efficient air conditioning units designed to provide optimal comfort in residential settings. Known for their reliability and performance, these models are part of Bryant's esteemed line of heating and cooling solutions.

One of the standout features of the Bryant 551B is its two-stage cooling system, which allows for better humidity control and increased comfort. This ensures that homeowners can enjoy consistent temperatures while reducing energy consumption. The unit operates quietly, thanks to its noise-reducing technology, making it an ideal choice for bedrooms and living spaces.

On the other hand, the Bryant 551C builds upon this foundation with its variable-speed compressor. This technology allows the unit to adjust its cooling output according to the specific needs of the home. This results in seamless operation and even greater energy efficiency. Both models also incorporate Bryant's advanced control capabilities, which allow users to monitor and adjust settings remotely via smart devices, adding a layer of convenience and modernity to home climate control.

With an emphasis on durability, both the 551B and 551C feature a galvanized steel cabinet that protects against weather-related damage. The powder coat finish further enhances their resistance to rust and corrosion, ensuring a long lifespan and minimal maintenance.

Another significant characteristic of these units is their excellent Seasonal Energy Efficiency Ratio (SEER) ratings. The 551B boasts a SEER rating of up to 16, while the 551C takes it even further with ratings exceeding 20. This efficiency not only translates to lower energy bills for homeowners but also contributes to a reduced carbon footprint, making these units environmentally friendly options.

Both models are also designed to operate with eco-friendly refrigerants, aligning with modern energy standards and regulations aimed at reducing greenhouse gas emissions.

In summary, the Bryant 551B and 551C are exemplary choices for homeowners looking for reliable, efficient, and high-performing air conditioning solutions. With features such as two-stage and variable-speed compressors, advanced smart technology, and robust construction, these models stand out in the competitive HVAC market. They promise a comfortable indoor environment along with significant energy savings, making them a wise investment for the future.