Manuals
/
Bunn
/
Kitchen Appliance
/
Coffeemaker
Bunn
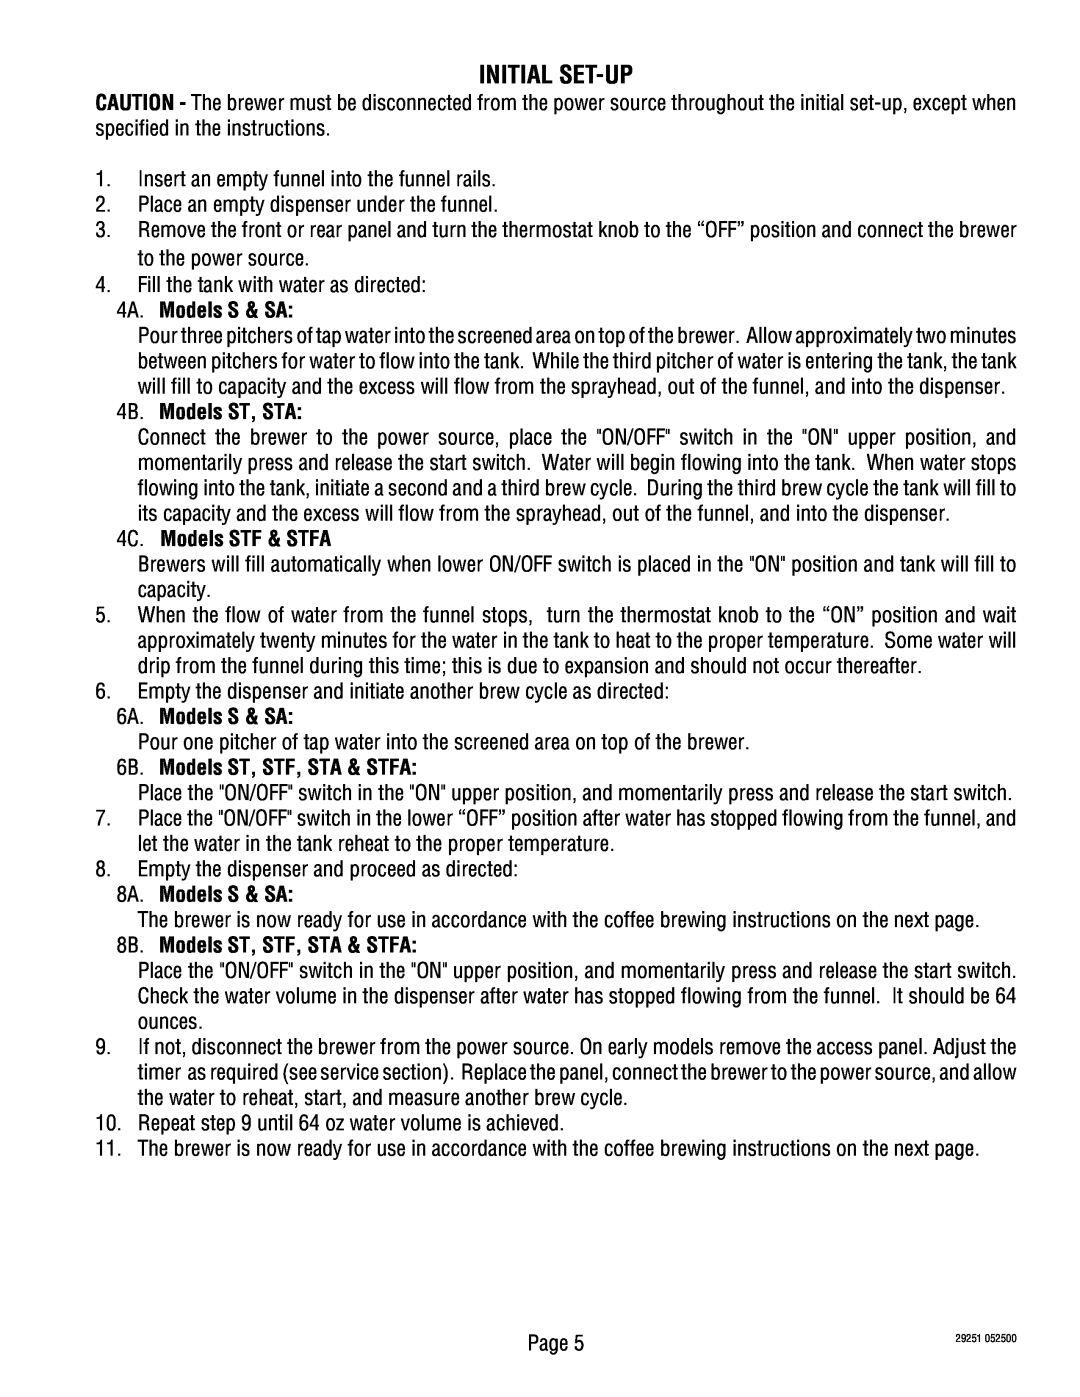
Initial Set-Up, 4A. Models S & SA, 4B. Models ST, STA, 4C. Models STF & STFA
Models:
SA
STFA
ST
STA
STF
1
5
44
44
Download
44 pages
36.16 Kb
1
2
3
4
5
6
7
8
Troubleshooting
Brew Timer
Warranty
Problem
Cleaning
SERVICE cont
Page 5
Image 5
Page 4
Page 6
Page 5
Image 5
Page 4
Page 6
Contents
FAX
POST OFFICE BOX SPRINGFIELD, ILLINOIS
BUNN S,SA
ST,STA STF,STFA
USER NOTICES
WARRANTY
#00656.0000
USER NOTICES Continued
#00882.0000
#02763.0000 #02765.0000 #02769.0000
PLUMBING REQUIREMENTS
ELECTRICAL REQUIREMENTS
Electrical Hook-Up
Models S & SA
4A. Models S & SA
INITIAL SET-UP
4B. Models ST, STA
4C. Models STF & STFA
Models ST, STF, STA & STFA ON/OFF SWITCH
CLEANING
START SWITCH
OPERATING CONTROLS
TROUBLESHOOTING
PROBLEM
TROUBLESHOOTING cont
PROBABLE CAUSE
REMEDY
TROUBLESHOOTING cont PROBLEM
Dripping from sprayhead
Beverage overflows dispenser cont Weak beverage
Brewer is making unusal noises
Contents
SERVICE
COMPONENT ACCESS
CONTROL THERMOSTAT
SERVICE cont
SERVICE cont CONTROL THERMOSTAT cont
SERVICE cont LIMIT THERMOSTAT
ON/OFF SWITCH Models ST, STA, STF & STFA
FIG. 8 SOLENOID
START SWITCH Models ST, STA, STF & STFA
SERVICE cont TANK HEATER
SERVICE cont TANK HEATER Cont
FIG. 14 BREW TIMER
SERVICE cont BREW TIMER Early Modelscont
FIG. 16 DIGITAL BREW TIMER
DIGITAL BREW TIMER Late Models
SERVICE cont DIGITAL BREW TIMER Late Modelscont
LIQUID LEVEL CONTROL BOARD Models STF & STFA
STFACont
SERVICE cont TIMER RELAY Models STF & STFA
SERVICE cont WARMER ELEMENTS
SERVICE cont THERMAL CUT-OFFModels SA, STA & STFA
29251
Page
29251
Page
29251
Page
29251
Page
29251
Page
29251
Page
29251
Page
29251
Page
29251
Page
29251
Page
29251
Page
29251
Page
29251
Page
Top
Page
Image
Contents