How to use the scanner
4Press the Scan Slides or Negatives button (![]() ) on the front of the scanner.
) on the front of the scanner.
The scan is displayed in the HP Image Zone software. If multiple selection areas were detected, the selections are displayed as separate scanned images.
Note The Preview setting for the Scan Slides or Negatives button (![]() ) must be set to off to scan multiple pictures with one scan. Normally the Preview setting is set to off already. To change the Preview
) must be set to off to scan multiple pictures with one scan. Normally the Preview setting is set to off already. To change the Preview
setting for the Scan Slides or Negatives button (![]() ), see Change settings.
), see Change settings.
5When finished, remove the negative strip. Place the negative strip holder back into the slide holder for storage.
Scan documents
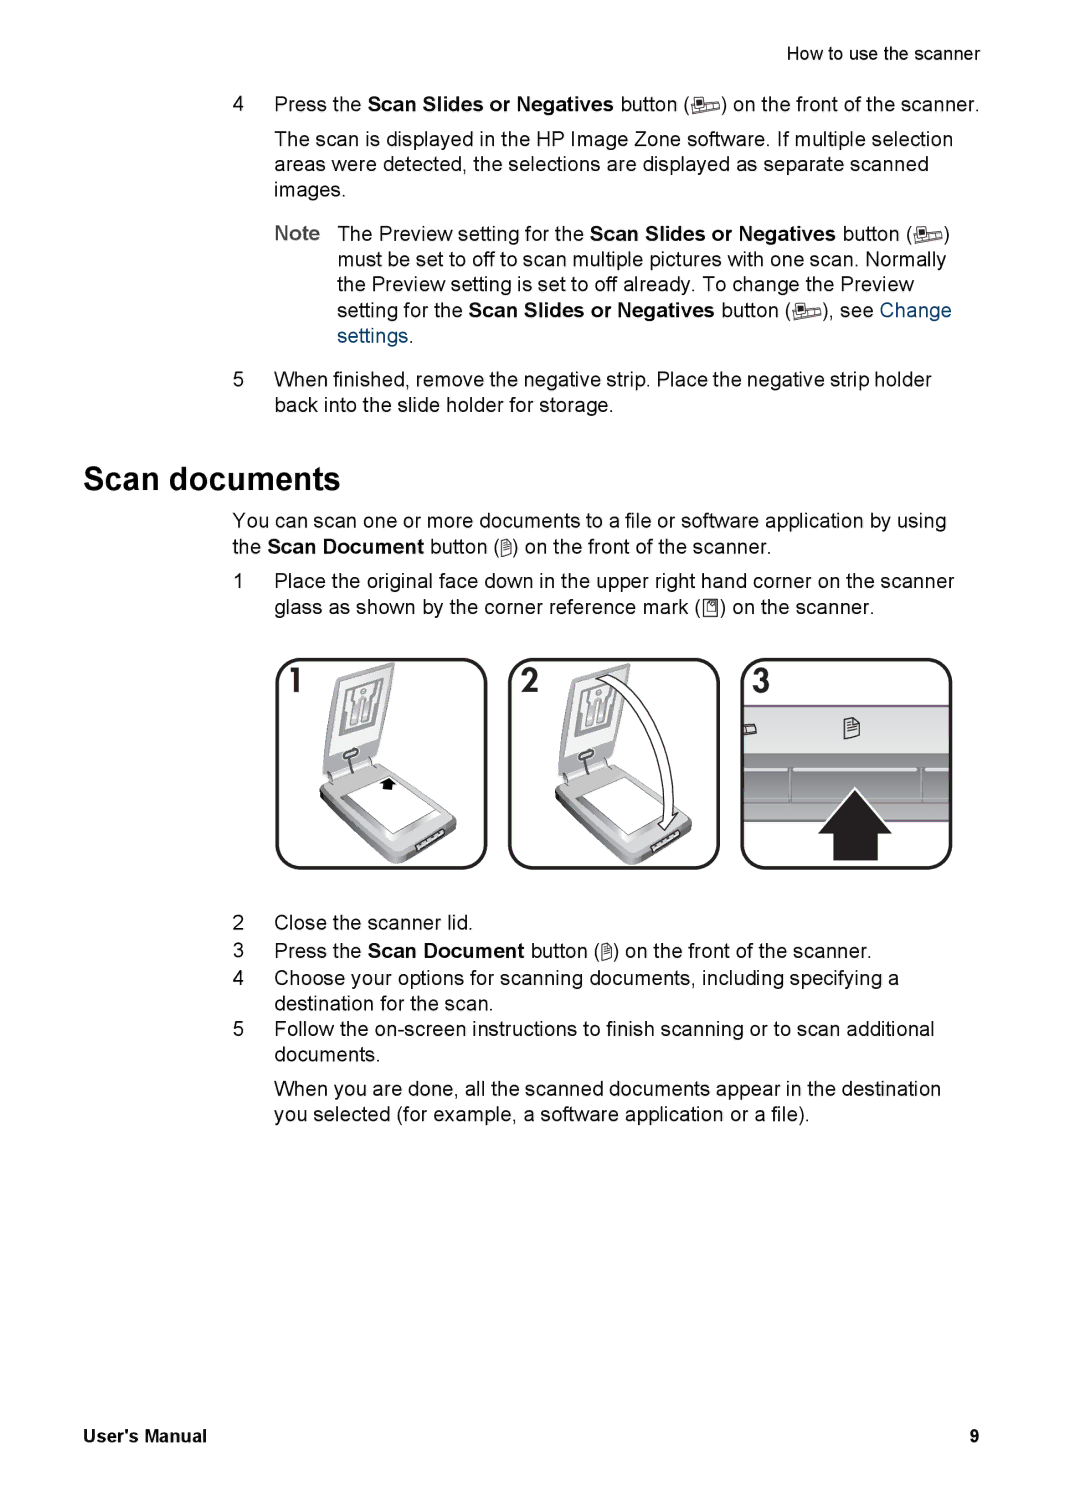
You can scan one or more documents to a file or software application by using the Scan Document button (![]() ) on the front of the scanner.
) on the front of the scanner.
1Place the original face down in the upper right hand corner on the scanner glass as shown by the corner reference mark (![]() ) on the scanner.
) on the scanner.
2Close the scanner lid.
3Press the Scan Document button (![]() ) on the front of the scanner.
) on the front of the scanner.
4Choose your options for scanning documents, including specifying a destination for the scan.
5Follow the
When you are done, all the scanned documents appear in the destination you selected (for example, a software application or a file).
User's Manual | 9 |