Assembly and Installation
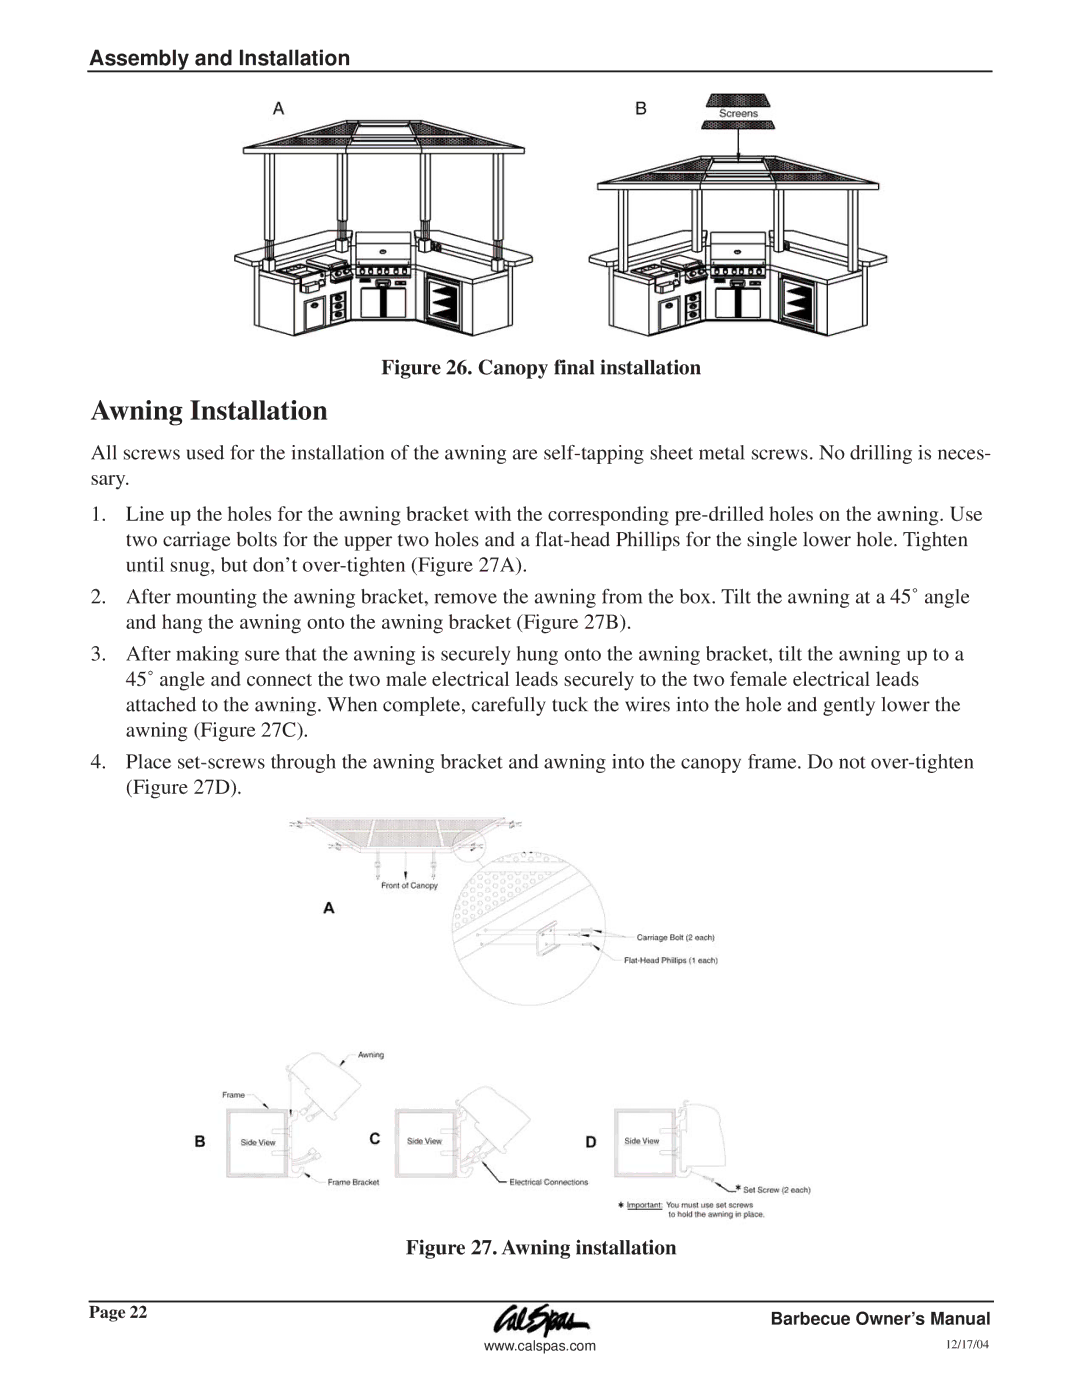
Figure 26. Canopy final installation
Awning Installation
All screws used for the installation of the awning are
1.Line up the holes for the awning bracket with the corresponding
2.After mounting the awning bracket, remove the awning from the box. Tilt the awning at a 45˚ angle and hang the awning onto the awning bracket (Figure 27B).
3.After making sure that the awning is securely hung onto the awning bracket, tilt the awning up to a 45˚ angle and connect the two male electrical leads securely to the two female electrical leads attached to the awning. When complete, carefully tuck the wires into the hole and gently lower the awning (Figure 27C).
4.Place
Figure 27. Awning installation
Page 22 | Barbecue Owner’s Manual |
|
www.calspas.com | 12/17/04 |
