■ BEFORE YOU BEGIN ... ■
Operation panel
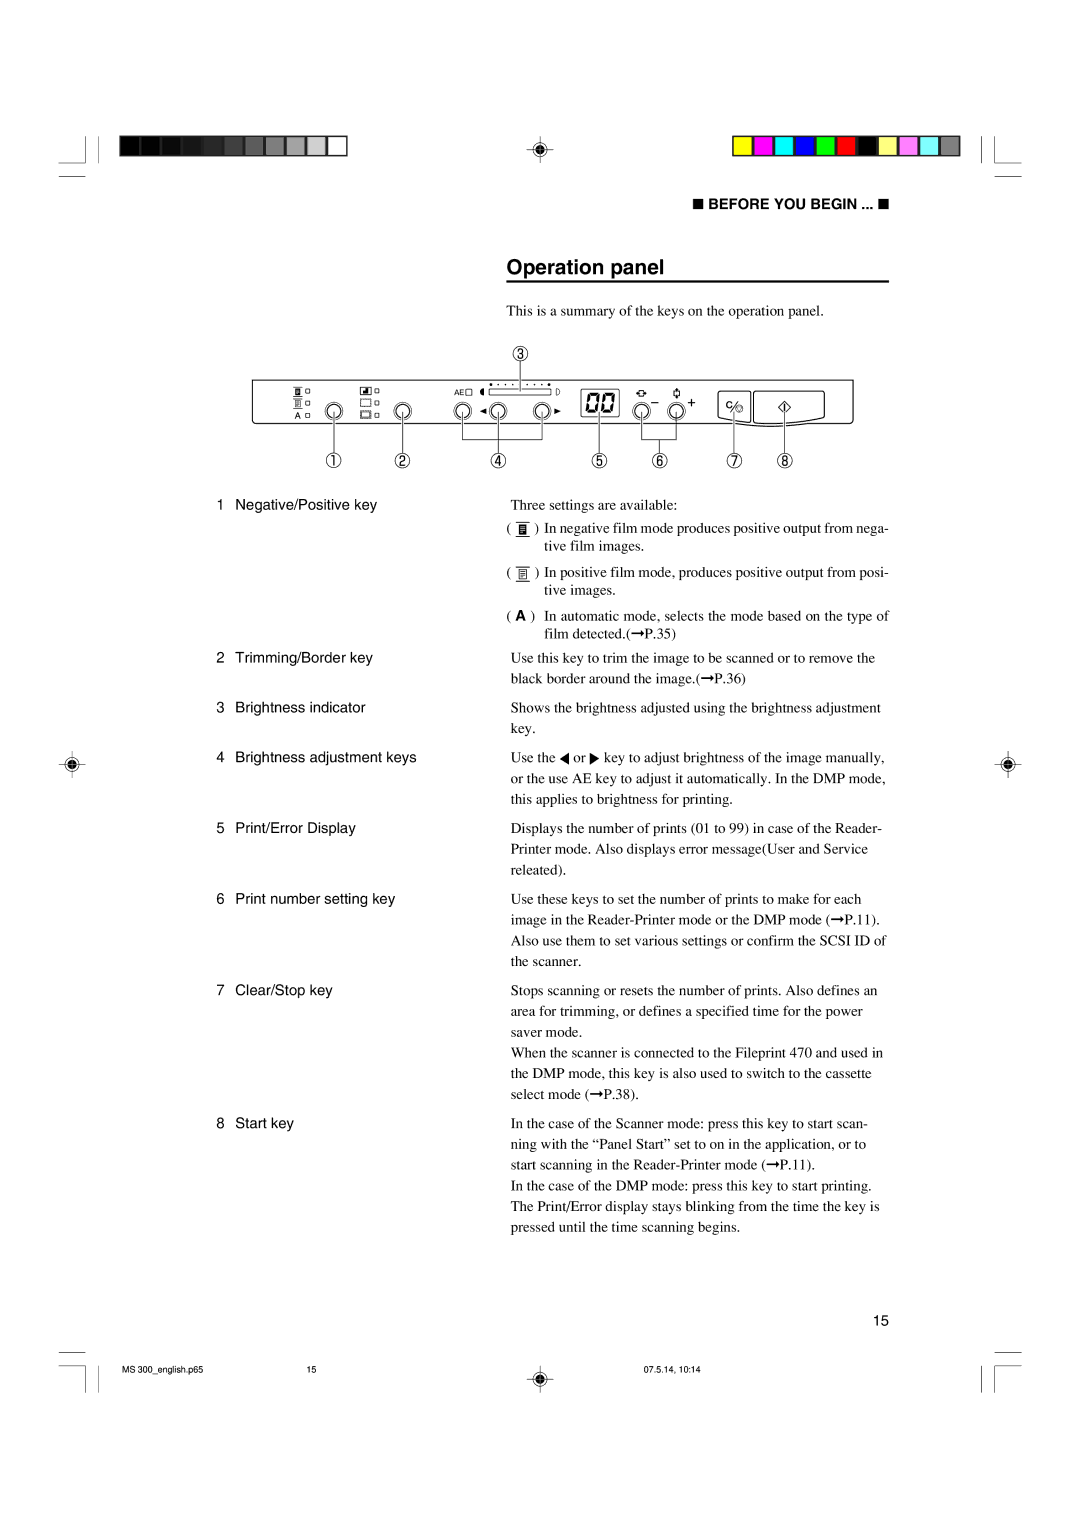
This is a summary of the keys on the operation panel.
1 Negative/Positive key | Three settings are available: | ||||||
| ( |
|
|
|
|
| ) In negative film mode produces positive output from nega- |
|
|
|
| ||||
|
|
|
|
|
|
| tive film images. |
|
|
|
|
|
|
| |
| ( |
|
|
|
|
| ) In positive film mode, produces positive output from posi- |
|
|
|
|
| |||
|
|
|
|
|
| ||
|
|
|
|
|
| ||
|
|
|
|
|
| ||
|
|
|
|
|
|
| tive images. |
| ( A ) In automatic mode, selects the mode based on the type of | ||||||
|
|
|
|
|
|
| film detected.(➞P.35) |
2 Trimming/Border key | Use this key to trim the image to be scanned or to remove the | ||||||
| black border around the image.(➞P.36) | ||||||
3 Brightness indicator | Shows the brightness adjusted using the brightness adjustment | ||||||
| key. | ||||||
4 Brightness adjustment keys | Use the or key to adjust brightness of the image manually, | ||||||
| or the use AE key to adjust it automatically. In the DMP mode, | ||||||
| this applies to brightness for printing. | ||||||
5 Print/Error Display | Displays the number of prints (01 to 99) in case of the Reader- | ||||||
| Printer mode. Also displays error message(User and Service | ||||||
| releated). | ||||||
6 Print number setting key | Use these keys to set the number of prints to make for each | ||||||
| image in the | ||||||
| Also use them to set various settings or confirm the SCSI ID of | ||||||
| the scanner. | ||||||
7 Clear/Stop key | Stops scanning or resets the number of prints. Also defines an | ||||||
| area for trimming, or defines a specified time for the power | ||||||
| saver mode. | ||||||
| When the scanner is connected to the Fileprint 470 and used in | ||||||
| the DMP mode, this key is also used to switch to the cassette | ||||||
| select mode (➞P.38). | ||||||
8 Start key | In the case of the Scanner mode: press this key to start scan- | ||||||
| ning with the “Panel Start” set to on in the application, or to | ||||||
| start scanning in the | ||||||
| In the case of the DMP mode: press this key to start printing. | ||||||
| The Print/Error display stays blinking from the time the key is | ||||||
| pressed until the time scanning begins. | ||||||
15
MS 300_english.p65 | 15 | 07.5.14, 10:14 |