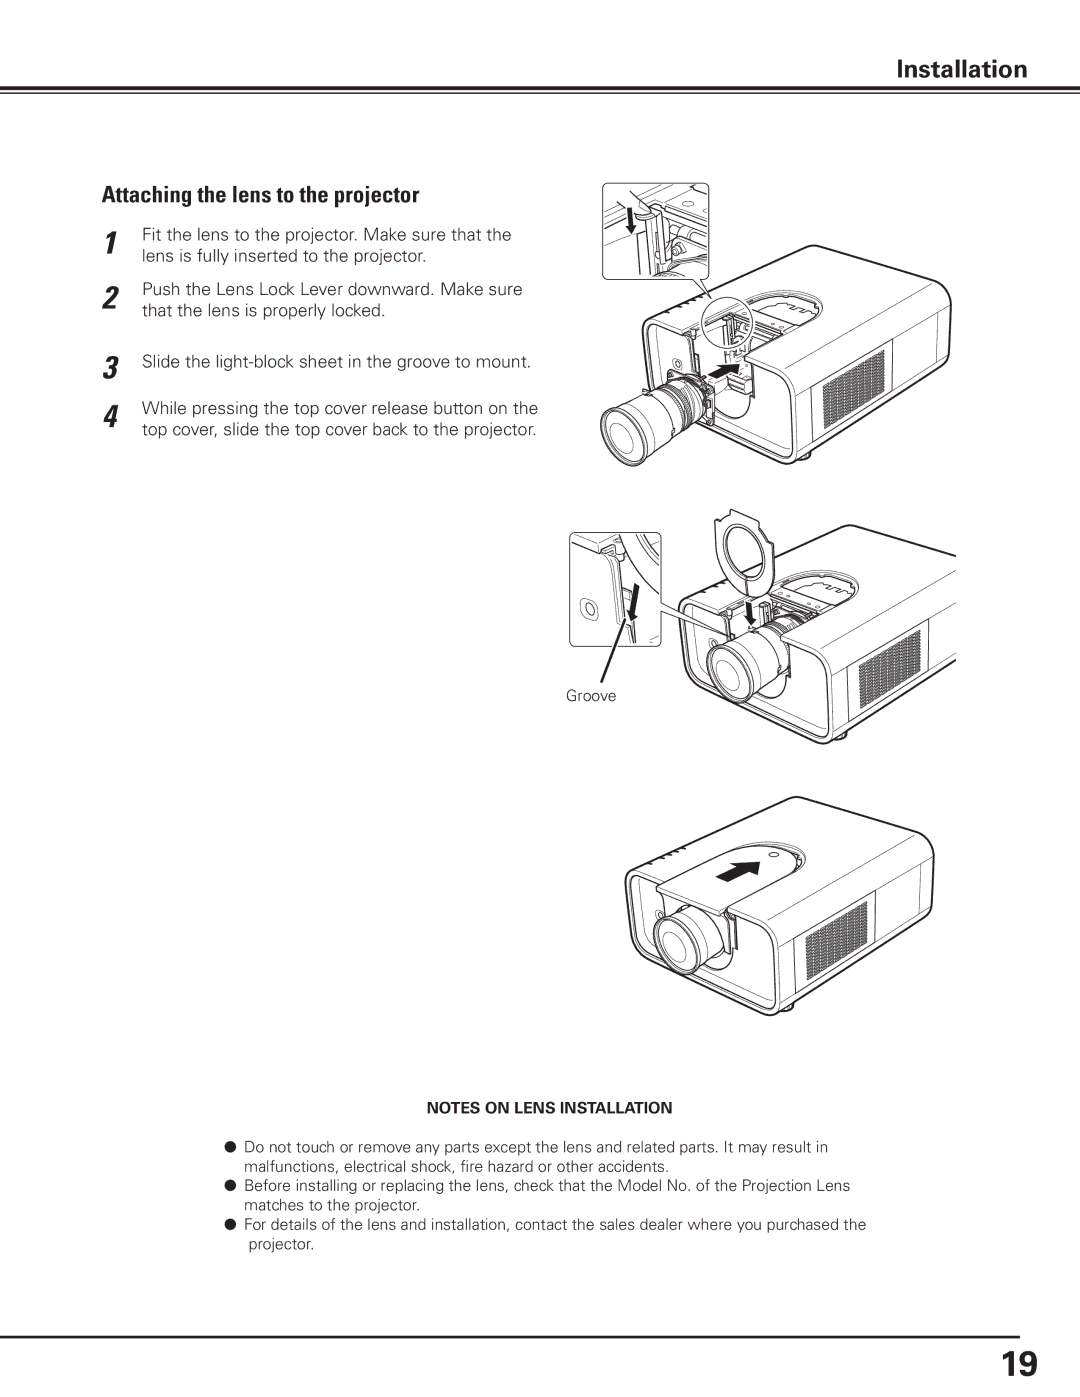
Slide the light-block sheet in the groove to mount.
Installation
Attaching the lens to the projector
1 | Fit the lens to the projector. Make sure that the |
lens is fully inserted to the projector. |
2Push the Lens Lock Lever downward. Make sure that the lens is properly locked.
3
4 While pressing the top cover release button on the top cover, slide the top cover back to the projector.
Groove
NOTES ON LENS INSTALLATION
LDo not touch or remove any parts except the lens and related parts. It may result in malfunctions, electrical shock, fire hazard or other accidents.
LBefore installing or replacing the lens, check that the Model No. of the Projection Lens matches to the projector.
LFor details of the lens and installation, contact the sales dealer where you purchased the projector.
19