Placing the Paper into the Paper Cassette
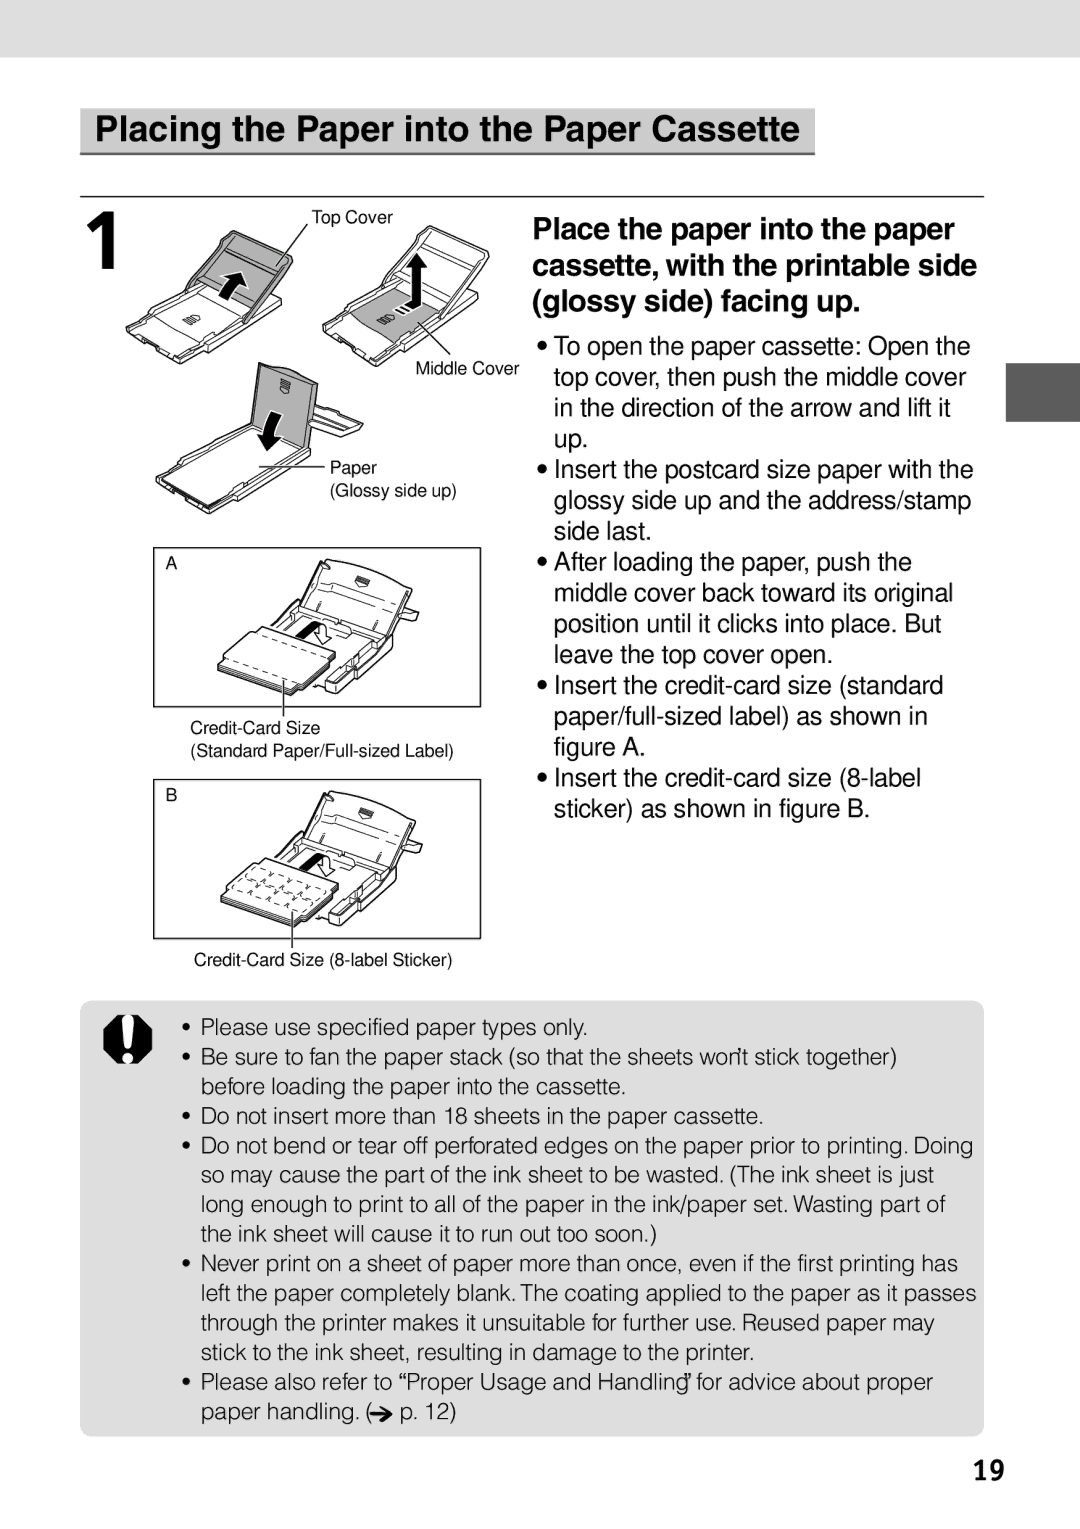
1 | Top Cover |
| |
| Middle Cover |
| Paper |
| (Glossy side up) |
| A |
(Standard
B
Place the paper into the paper cassette, with the printable side (glossy side) facing up.
•To open the paper cassette: Open the top cover, then push the middle cover in the direction of the arrow and lift it up.
•Insert the postcard size paper with the glossy side up and the address/stamp side last.
•After loading the paper, push the middle cover back toward its original position until it clicks into place. But leave the top cover open.
•Insert the
•Insert the
•Please use specified paper types only.
•Be sure to fan the paper stack (so that the sheets won’t stick together) before loading the paper into the cassette.
•Do not insert more than 18 sheets in the paper cassette.
•Do not bend or tear off perforated edges on the paper prior to printing. Doing so may cause the part of the ink sheet to be wasted. (The ink sheet is just long enough to print to all of the paper in the ink/paper set. Wasting part of the ink sheet will cause it to run out too soon.)
•Never print on a sheet of paper more than once, even if the first printing has left the paper completely blank. The coating applied to the paper as it passes through the printer makes it unsuitable for further use. Reused paper may stick to the ink sheet, resulting in damage to the printer.
•Please also refer to “Proper Usage and Handling” for advice about proper paper handling. (![]() p. 12)
p. 12)
19