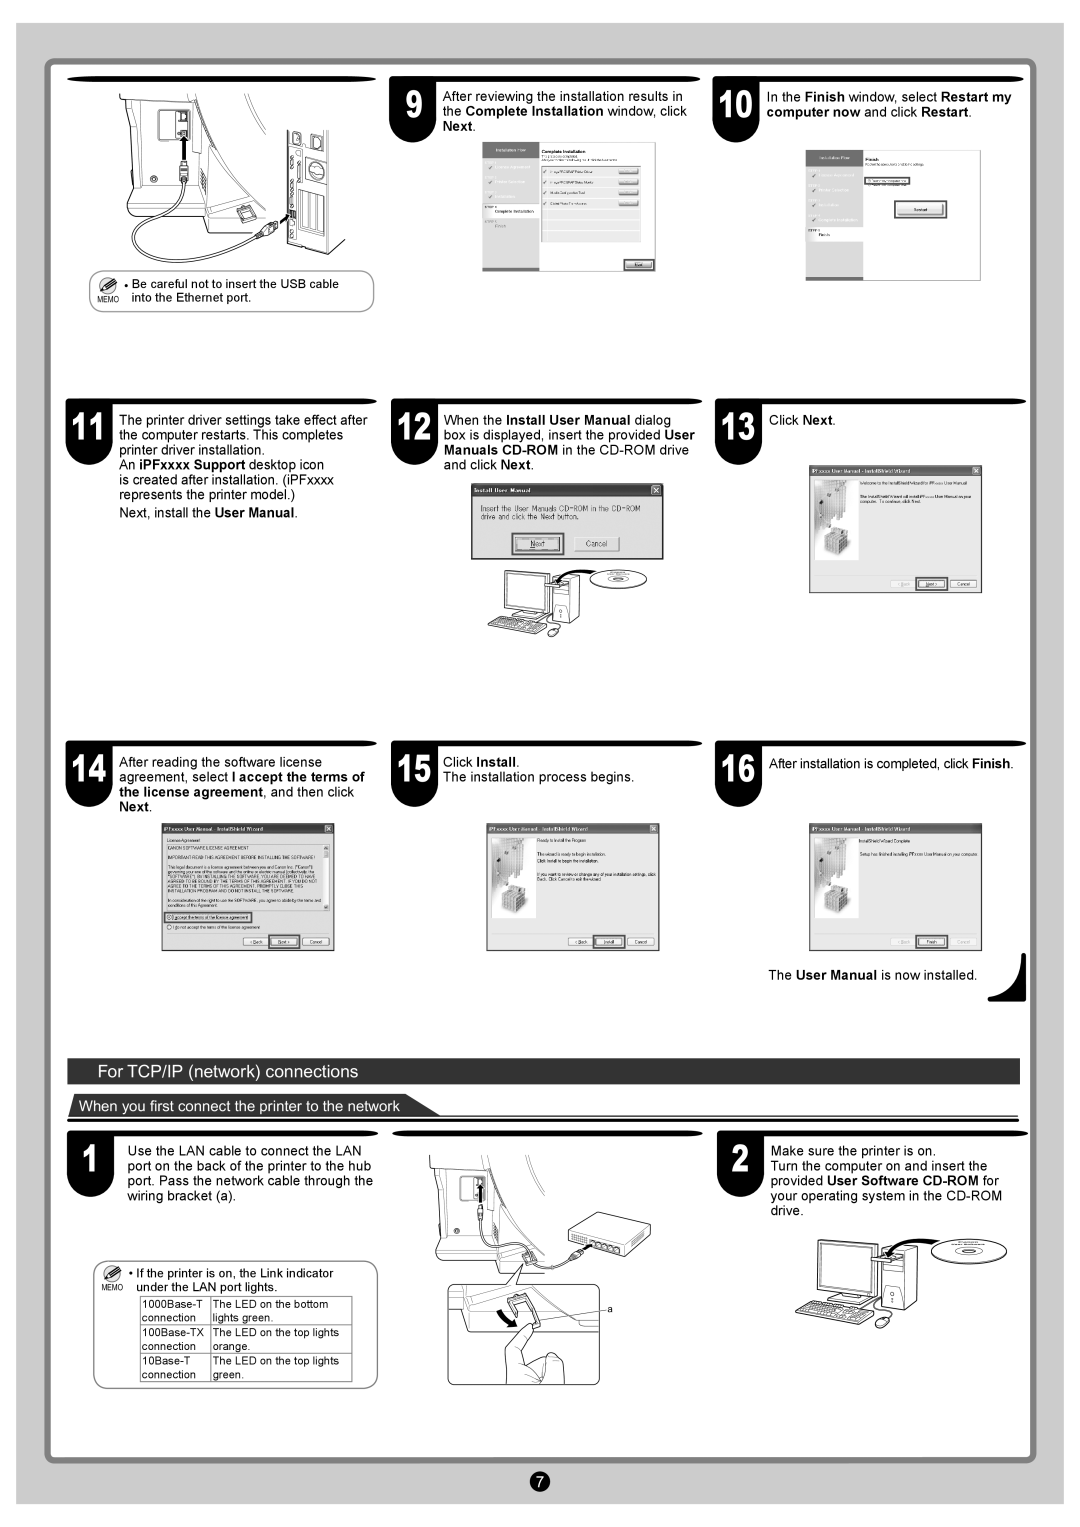
9 | After reviewing the installation results in | 10 | In the Finish window, select Restart my |
the Complete Installation window, click | computer now and click Restart. |
Next.
• Be careful not to insert the USB cable
MEMO into the Ethernet port.
11 | The printer driver settings take effect after |
the computer restarts. This completes |
printer driver installation.
An iPFxxxx Support desktop icon is created after installation. (iPFxxxx represents the printer model.)
Next, install the User Manual.
When the Install User Manual dialog | 13 | Click Next. |
12 box is displayed, insert the provided User |
|
Manuals CD-ROM in the CD-ROM drive and click Next.
14 | After reading the software license | 15 | Click Install. | 16 After installation is completed, click Finish. |
agreement, select I accept the terms of | The installation process begins. |
the license agreement, and then click Next.
The User Manual is now installed.
For TCP/IP (network) connections
When you first connect the printer to the network
1 | Use the LAN cable to connect the LAN |
port on the back of the printer to the hub |
port. Pass the network cable through the wiring bracket (a).
![]() • If the printer is on, the Link indicator MEMO under the LAN port lights.
• If the printer is on, the Link indicator MEMO under the LAN port lights.
2 | Make sure the printer is on. |
Turn the computer on and insert the |
provided User Software
a
7